Lack of spark is one of the most common reasons why your engine won't start. Obsessing over certain details is a good way to avoid finding the real problem.
It is much more likely that the problem is with a wire, connector, ground, or switch than with the ignition system component itself.
So don't focus on one part until testing shows it may be faulty. Knowing what to look for when ignition problems occur allows you to make the right decisions. Firstly, we know that the engine turns over, but does not start.
Always fully charge the battery before starting any tests. Use a charger.
Make sure there is no spark
- Disconnect the fuel system by removing the fuel pump fuse or relay.
- Insert the spark plug tester into the plug and ground it to the engine.
- Have someone crank the engine and watch for spark.
If you have a coil-on-plug ignition system without wires
- Remove one of the coils from the spark plug.
- Use an old spark plug.
- Spark plug tester.
- Or even a screwdriver in the coil plug.
- Ground to a metal part of the engine.
- Have someone spin the engine and watch for a spark.
No spark indicates an ignition problem.
In extreme cases, the control unit (ECU) may malfunction. In some cases, a problem with the ECU can cause the car to not run at all. The functions of the control unit include crankshaft positioning, spark control and ignition timing. If there are problems with the way the controller performs these functions, the vehicle may not operate.
Reasons for lack of spark
The cause may be any of the following.
Faulty crankshaft position sensor (CPS)
First of all, pay attention to the presence of broken, loose or oxidized wires from the sensor to the ECU. The crankshaft position sensor monitors the position and speed of the crankshaft. If the DPKV is completely out of order and does not send a signal to the control unit at all, then the controller will not send fuel to the injectors. This will prevent you from starting the car.
Ignition module
Ignition modules are solid-state switching devices that typically use a part such as a transistor to turn current through the primary winding of the ignition coil on and off. Thus, the ignition module is very similar to mechanical contacts. However, ignition modules cannot work alone. The module needs an external control signal.
If your car suddenly stalls while running and won't start again, it may be due to loose connections or corroded electrical connections in the ignition module. In this case, check the ignition key, clean oxidized terminals and replace broken wires if necessary. Another problem is heat damage. If you are unable to start your car, you need to check the ignition control module.
Faulty breaker, broken distributor gear, broken or corroded wires from the sensor to the ignition module or ECU
Electronic ignition interrupters are a component of traditional electronic distributor ignition systems. They are located inside the distributor and function as a trigger for the ignition system to produce a spark.
The chopper coil controls the rotation of the distributor and starts the ignition system. In addition, the spark must be produced at the optimal time for best engine performance.
Since the ignition breaker essentially functions as the activation switch for the entire ignition system, if it fails, it can significantly affect the performance of the vehicle.
One of the first signs of a bad ignition breaker is an engine that stalls and won't restart.
Consequently, an old or faulty breaker may periodically cut the signal, which may cause the engine to stall.
The engine may simply suddenly stall, as if the ignition key was turned off. Depending on the nature of the problem, sometimes the car can be restarted and continue driving. Consequently, this problem will only get worse.
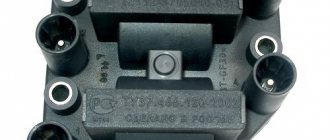
Faulty ignition coil
An ignition coil is a device that takes low voltage and turns it into a powerful spark. One of the most common symptoms of a faulty ignition coil is that the car runs for a while and then the car engine suddenly dies for no apparent reason.
This occurs after the ignition coil or module becomes too hot. In addition, the situation may improve after the ignition module cools down. In some cases, a faulty ignition coil can cause the car to not start at all.
How to check for spark?
To verify that the engine is not starting due to lack of spark, you can do one of the following.
Ignition voltage is dangerous! Do not hold or touch the spark plug wire while starting the engine.
If the spark plugs come with wires, disconnect one of them from the spark plug and place the end of the wire near a metal surface on the engine. Insert a small Phillips screwdriver, small bolt, or nail into the end of the wire (lug) to provide a conductive path. Then spin the engine and check for spark between the screwdriver, bolt or nail in the spark plug wire tip and the engine housing. If there is no spark, then there is an ignition problem.
Another option. Disconnect the spark plug wire and insert an old spark plug or ignition tester into it. Place the spark plug on a metal surface of the engine or ground the spark plug tester. Then spin the engine. No spark indicates an ignition problem.
If you have a separate ignition coil for each plug, disconnect one of the coils from the spark plug and insert an old spark plug, spark plug tester, or screwdriver into the end of the coil. Ground the spark plug or spark plug tester to the engine, then crank the engine and check for spark. The absence of a spark indicates an ignition problem.
Video on how to check the spark on an injection engine:
Spray some Quick Start aerosol into the throttle body (WARNING: Quick Start fluid is extremely flammable!). Then crank the engine.
If the engine starts, you have no ignition problems. The engine failure is fuel related.
Malfunction of the contactless distributor.
When operating contactless distributors, the main malfunction is a malfunction of the hall sensor or inductive sensor. Minor wear and play in the bushings and bearing of the movable contact plate do not affect the operation of the distributor until the sensor rotor touches the stator.
Such malfunctions as breakdown of the slider, burning of its resistance. It can also break through the distributor cap between the cylinders. This malfunction is typical for non-contact distributors, since the secondary voltage in these systems is twice as high as in a contact one.
admin23/04/2011
Subscribe to comments
- Vlad — November 12th, 2012 at 12:54 pm
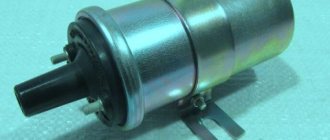
Good afternoon, I have a Toyota Kaldina that stopped starting, at first it failed, then I changed the explosive wires, the ignition coil, and the slider in the distributor. and it stopped starting altogether. I unscrewed the spark plug and saw a red spark and a velvety black carbon deposit on it, i.e. what a dead thing. Question There is a capacitor in the distributor and it looks worn out, sad, now I’m waiting for a new one, I ordered it. Could this be the reason, is this capacitor a noise suppressor or a spark amplifier? The on-board computer has not flashed a check more than once since the date of purchase of the car.
admin — November 12th, 2012 at 05:33 pm
It's hard to say without knowing the type of engine and year of manufacture, or at least the type of ignition. These models were equipped with four types of distributors. The capacitor plays basically the same role in all. In addition to the capacitor, the reason may be in the switch, which is also installed in the distributor. The capacitor can most likely be checked by charging it by connecting it in series to a 220V network with a lamp of no more than 100W. After disconnecting, use a screwdriver with an insulated handle to close the wire to its body. If the capacitor is working properly, a spark will jump. Answer
- Huilo Waffle - April 2nd, 2012 at 10:15 pm
Cool! It helped me! Now it doesn't bother me!!!
- Mikhail - August 26th, 2011 at 15:24
...The capacitance of the capacitor should be in the range of 15-25 mF... Should be 0.15-0.25 μF
admin — August 27th, 2011 at 0:20
Thank you for your comment. I fixed everything. Answer
A comment
Name *
Website
This site uses Akismet to reduce spam. Find out how your comment data is processed.
« Distributor device
Ignition system VAZ - 2105 »
Tags
VAZ, VAZ malfunctions Sensors Ignition Injector Devices Starter Circuits Electric cars Power supply VAZ 2110 gazelle gazelle business recorders car repair
Recent Entries
- Laser headlights.
- Advantages and disadvantages of halogen lamps
- Design and principle of operation of parking sensors
- Multifunctional device Roadgid X7 Hybrid GT
- Malfunction of the GAS ignition system
Archives
Archives Select month September 2022 August 2022 July 2019 December 2022 August 2022 July 2022 June 2022 May 2022 April 2017 March 2022 December 2016 November 2016 October 2016 September 2016 August 2016 July 201 6 June 2016 May 2016 April 2016 March 2016 February 2016 November 2015 October 2015 August 2015 July 2015 June 2015 May 2015 April 2015 March 2015 February 2015 January 2015 December 2014 November 2014 October 2014 September 2014 August 2014 July 2014 June 2014 May 2014 April 201 4 February 2014 January 2014 December 2013 November 2013 October 2013 August 2013 June 2013 May 2013 March 2013 February 2013 January 2013 November 2012 October 2012 September 2012 August 2012 July 2012 June 2012 May 2012 April 2012 March 2012 February 2012 January 2012 December 2011 November 2011 October November 2011 September 2011 August 2011 July 2011 June 2011 May 2011 April 2011
Categories
- Accumulator battery
- Video
- Generator
- Sensors
- Diagnostics
- Ignition
- News
- Equipment
- Devices
- Repair
- Spark plug
- Starter
- Scheme
- Devices
- Electric cars
- Electricity supply
What to do if there is no spark?
If there is no spark, check for the presence of a “plus” terminal of the coil when the ignition key is turned on. This can be done using a multimeter, setting it to measure direct voltage (DC).
If there is voltage, the problem is related to the coil trigger circuit (crankshaft position sensor, ignition module, wires, etc.).
If there is no voltage on the coil, there is a problem in the power circuit (ignition key, wires, connections).
If voltage is being applied to the coil, the problem could be a bad high voltage output wire from the coil to the distributor, hairline cracks in the coil cap, or cracks or carbon tracks inside the distributor cap or on the runner.
Using the Scanner
If you have a scan tool, connect it to the vehicle's diagnostic connector and watch the RPM signal when you start the engine. No signal? The problem is poor operation of the ignition distributor signal sensor (on engines with a distributor), a malfunction of the distributor drive mechanism (usually for plastic gears), a malfunction of the ignition distributor (on engines without a distributor), a wiring malfunction (break, short circuit, oxidation of contacts).
If the Check Engine Light comes on, use a scan tool to read ignition-related trouble codes. Any codes related to the coil (P0351 − P0358) will require a coil test. Misfire codes indicate that the spark plugs and/or spark plug wires need to be checked.
Checking the ignition coil
The ignition coils in DIS (Distributorless Ignition System) ignition systems function in the same way as in conventional ignition systems, so the tests are essentially the same.
But symptoms caused by a weak or faulty coil will be limited to one or two cylinders in a DIS ignition system, rather than all cylinders in an engine with a distributor and one coil.
Most DIS starting problems are caused by a bad crankshaft position sensor. Many DIS systems use "idle spark", where one coil ignites two spark plugs that are placed opposite each other in firing order. Others, including newer coil-on-wire systems, have a separate coil for each spark plug.
Individual DIS coils are tested essentially the same as epoxy filled (square type). First disconnect all wires. Set the multimeter to resistance measurement mode in the lowest range. Connect the device to the primary terminals of the ignition coil and compare the resistance of the primary winding with the data in the specification (usually less than 2 ohms).
Then connect the multimeter to the secondary winding and compare the readings with the rating data (usually 6000–30,000 Ohms). If the readings are outside the specified range, the coil is faulty and needs to be replaced.
If measuring the DIS coil secondary resistance is difficult due to location, try disconnecting the spark plug wires and measuring the secondary resistance through the wire plugs rather than the coil terminals. Just remember to add a maximum of 8000 ohms of wire resistance to your readings.
Diagnostic procedure
When diagnosing ignition coils, workshops should proceed in the following order:
Preliminary check: You should first check whether the battery voltage is at least 11.5 volts. You should also check whether the engine speed sensor is working properly. You should also check the operation of the engine control unit fuse.
Checking the power supply: You need to remove the primary connector from the coil. When the ignition is turned on, the voltage between terminal 1 (negative terminal) and 15 (positive terminal) should be at least 11.5 volts.
Measure the resistance of the secondary winding: The resistance of the secondary winding at the output of the coil should be measured with an ohmmeter. The specified values must be within the range specified in the vehicle repair manual (at a temperature of 20 degrees Celsius).
Checking the crankshaft sensor
On most vehicles, a faulty PDAC will usually cause a trouble code, so use a diagnostic scanner. Or check the crankshaft sensor itself.
Magnetic DPKV
Crankshaft magnetic sensors can be tested by disconnecting the electrical connector and measuring the resistance between the corresponding terminals. If the resistance is not within specifications, the sensor is faulty and must be replaced.
Magnetic crankshaft position sensors produce alternating current when the engine is started, so checking the output voltage is another test that can be performed.
With the sensor connected, measure the output voltage at the sensor terminals when the engine starts. If you see at least 20 mV on AC, the sensor is good and there is probably a problem with the module.
If the output voltage is low, remove the sensor and inspect the end for rust or debris (magnetic sensors will attract metal particles). Clean the sensor, reinstall it and test again.
Make sure it has the proper air gap (if adjustable) as the distance between the end of the sensor and the ring gear or notches in the crankshaft will affect the sensor's voltage output. If the air gap is correct and the output voltage is still low, replace the sensor.
DPKV on the Hall effect
Hall effect crankshaft position sensors typically have three terminals. One is for current supply, one is for grounding and one is for output signal. The sensor must have voltage and ground to produce a signal, so check these terminals first with a multimeter.
Source: autorepairhelp.us
The sensor output can be checked by disconnecting the DIS module and cranking the engine to ensure that the sensor is producing a voltage signal. The voltmeter voltage should change each time a prong passes in front of the sensor. When observed on an oscilloscope, you should see a square wave shape. The absence of a signal indicates that the sensor is faulty.
Previous post Error P0016 - what it means, symptoms, causes, diagnosis, elimination
Next entry Error P0113 - what it means, symptoms, causes, diagnosis, solution
Procedure for adjusting the gap
How to test a resistor for functionality with a multimeter
Remove the distributor cap and the slider and, slowly turning the engine crankshaft with the starting handle, set cam 4 to the position where the gap between the breaker contacts is greatest, i.e., when the breaker lever pad is installed on the top of the cam face. After this, use a flat feeler gauge to check the gap between the contacts. If the gap does not correspond to the value indicated above, it is necessary to loosen the locking screw and, by turning the eccentric 23, set the required gap; then tighten the screw and check the gap again. Then you need to put the cover in place and secure it with latches 10. After adjusting the gap between the breaker contacts, the correct setting of the ignition timing is disrupted. Therefore, the ignition installation must be checked and, if necessary, clarified.