Many car enthusiasts have encountered the fact that one of the low beam lamps on a VAZ-2114 went out. Why does this happen? The answer is quite simple - the light bulb has burned out and needs to be replaced. Many motorists will ask the question - how to do this? Quite simple, and this article will walk you through this simple process.
A video on how to replace a low beam lamp on a VAZ-2115 (by analogy, replacement on a VAZ-2114 occurs) below:
The video will tell you how to replace the low beam lamp in a VAZ-2114.
Bulb replacement process
- Open the hood, ignition is turned off.
- We find the headlight block and unscrew the headlight protective box on both sides with our hands.
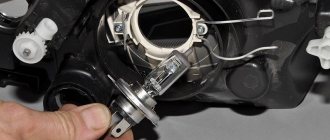
- Having unscrewed the box, we see the picture shown in the figure.
- We take out the contact group from the light bulb (Fig. 1).
- Disconnect the spring holders (Figure 3).
- We take out the light bulb.
Before installation, wipe the lamp bulb with alcohol, otherwise it will burn out.
Install strictly in the reverse order and make sure that the lamp sits in its place (one single position). When carrying out work, it is worth remembering basic safety. If your car's lamp stops functioning on the road, then there is no need to work while standing on the side of the road; it is better to reach the nearest gas station or site. In addition, you should beware of the “treachery” of a burnt-out light bulb, because even the slightest shake can cause the bulb to burst and fly apart, accidentally hitting, for example, the eye, so it is better to work with safety glasses.
We can draw the following conclusions: although replacing lamps in headlights is not a very complicated process, there is no need to approach it “sleeveless”; it is better to study the materials relevant to this topic, and also follow basic safety rules. By following these simple rules, you will replace the lamps yourself and be healthy!
Lada 2115 Worn saddle Logbook Choosing lamps for headlights
Good day everyone! I’ll tell you a little about how I chose lamps for my “saddle”, based on my experience in the field of car lighting. Maybe it will be useful to someone! When choosing lamps for your pet, you need to clearly define what we want from the light of our headlights. Bright light, long life, xenon effect or all-weather option? Have you decided? No? Then look at all the pros and cons of each option!
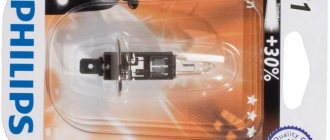
From the factory, most cars, domestic and foreign, are equipped with Philips + 30% lamps: The lamps meet all the requirements, give a clear light boundary, and if your light is quite satisfactory to you, then there is no point in chasing brightness, install such lamps. In the tests of the magazine “Behind the Wheel” all tests are carried out OUTSIDE THE COMPETITION.
Philips PremiumFor those for whom the standard is not enough, read on!
Lamps with increased luminous flux: For example, Philips +50%, +80%, +100% brightness, or OSRAM +50, +90% brightness. The peculiarity of such lamps is that their spiral is thinner than that of a factory lamp, plus the special composition of the gas in the flask, this gives greater brightness, compared to the standard, at the same power. The disadvantages of such lamps are their service life, which is 30 percent less than factory ones, as well as the high price, for example, Philips H4 55\60W +100% costs 950 rubles per pair. Conclusion: It’s not worth installing such lamps for round-the-clock use!
Lamps with increased brightnessBrightness can also be increased due to greater power. Lamps such as OSRAM 85\80W, or 100\90W. The more power, the brighter the light and this does not affect the service life so much, although they heat up more and burn out, respectively, more often than factory ones. One of the significant disadvantages is that they consume more energy compared to the standard, and there is also a risk of contacts and wires melting. It is better to install such lamps with a special ceramic adapter; it will protect the wiring from melting. And again, it is not recommended to install it for daytime use.
High power lamps
WHAT IS YOUR COLOR? BLUE, WHITE, BLUE? With bright light everything is clear, but what lamps should I put in to make the car stand out from the crowd? Xenon in the dipped beam is now prohibited, but there are lamps with a color reminiscent of xenon. For example Philips Blue Vision, Cristal Vision or Osram cool Blue or Narva 4500K. Such lamps shine beautifully, some claim that they are even brighter than the factory ones, in fact this is a syndrome of wheel caps that give the car an extra 10 hp. the first 300 meters. These lamps shine with white light only because the bulb is covered with a blue coating, sometimes even with dull varnish, and such lamps cannot physically shine brighter - the light transmittance is less! Plus, the white spectrum is only good in dry weather; in fog, rain and snow they are of no use. Conclusion: we install it solely for beauty, we focus on brightness, safety and good visibility in all weather conditions.
Lamps
All-weather lamps. Let's talk about these lamps separately. Such as Osram ALLSEASON. Such lamps shine with a more yellow light and, due to this yellow spectrum, provide good visibility in any weather. The only downside is that during a long trip, the yellow light begins to strain the eyes. I would recommend installing such lamps in PTF.
Osram all-weather lamps
Color difference: left standard Philips right Narva 4500K
Left standard Philips right Osram allseason
For me, of all the listed parameters, brightness and good visibility at night are important. I chose OSRAM H4 85\80W lamps, according to my subjective feelings, they still shine brighter than Philips +100% and have a longer service life. I don’t use low beams during the day, only at night, everything is adjusted, I don’t blind anyone!) ) Good luck to everyone on the roads and bright lights at night!
>Test of H4 halogen lamps
Types of headlights
If the xenon headlight bulbs of the VAZ 2114 only lead to an installation problem, then when buying halogen ones, the car enthusiast also faces the problem of choice, because there are several types:
- Standard - in the modern configuration of the VAZ 2114 it is BOSCH with a power range of 60/55W. On previous versions of the car, the power was also in this range, but the car was equipped with domestic manufacturers, which noticeably affected the quality of the headlights.
Standard
- Amplified ones are more expensive than classic lamps and are marked +30 (50, etc.)%. Such headlights operate approximately the same percentage less, cost the same percentage more, and consume energy in the appropriate mode.
Amplified lamp
- Improved visibility – the bulb of these illuminators has a slight blue tint. While consumption and heating remain normal, the light is brighter, and visibility on dry or snowy roads is better and further. Such headlights do not blind oncoming car owners, but without high-quality fog lights they are unable to illuminate the road in rainy weather.
- All-weather - differ from standard ones by the presence of a yellow coating on the light source. In terms of technical characteristics, they are no different from them, but they help create a visual contrast in the contours of objects, especially when the weather is bad outside.
All weather lamp
Increased power - these headlights are a product of the market, which generated demand, and not an objective need
More powerful lamps are the prerogative of young people who do not take into account possible road problems associated with the consequences of such “tuning”.
Main conclusions
The VAZ 2114 headlights have halogen lamps with an H4 socket by default. These are two-strand designs in which one thread is responsible for the high beam and the other for the low beam. In addition to halogen, the following can be used:
- incandescent lamps;
- xenon;
- LED bulbs.
Most users prefer LEDs, but according to the rules it is necessary to use standard halogen designs. Express your thoughts about lamps for the VAZ 2114 in the comments.
Sources used:
- https://remontvazov.com/kak-pomenyat-lampochku-blizhnego-sveta-na-vaz-2114
- https://carfrance.ru/zamena-lampy-blizhnego-sveta-vaz-2114/
- https://krutilvertel.com/zamena-lampy-blizhnego-i-dalnego-sveta-vaz-2113
- https://svetilnik.info/avtomobilnyj-svet/lampy-vaz-2114.html
Replacing the low beam lamp on a VAZ-2114
Low beam lamp.
One of the simplest car repair processes is replacing headlight bulbs.
The lamp replacement process itself takes 3–7 minutes, depending on the skill of the motorist. So, let's consider the sequence of actions:
- Unscrew the screws securing the lamp protective casing and remove it.
Remove the lamp protective cover.
- Disconnect the wire block.
Disconnect the wire block from the lamp.
- Compress the fixing spring of the lamp mount and remove the holder.
Unclip the lamp clamp.
- Next, take out the lamp and insert a new one.
We remove the low beam lamp from its seat.
- We carry out the assembly in the reverse order.
Lamp selection
The choice of low beam lamps for modern cars is quite large, since the further into the forest, the more advanced the technology becomes. So, let's look at what types of lamps are installed on the VAZ-2114.
Standard lamps
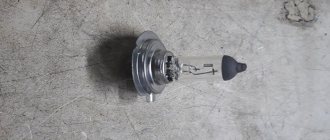
Lamp type H4.
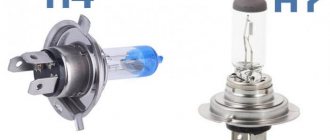
The manufacturer recommends installing lamps with the H4 rating in the headlights of cars of the 2113-2115 series. But, as practice shows, the applicability of other headlights has increased and it is already possible to install H1 as the main light.
Halogen
This is how halogen lamps shine!
They are ideal because they are visible from afar. The main representatives can rightfully be considered: Osram and Philips.
Xenon
This is how xenon shines on a VAZ-2114!
10 years ago, xenon technology began to be introduced en masse. Today, no one will be surprised by the presence of xenon lamps in a car. The automotive market for additional equipment provides a wide selection of such equipment that even the cheapest cars began to install such lamps.
Ice lamps
Led lamp on the left, halogen on the right!
A newer and more advanced technology that has burst into the automotive world and has captivated many car enthusiasts. The main advantages are that the lamps have bright and fairly good light even in the daytime, while the electricity consumption is significantly lower than even that of xenon, which is why they have become quite popular. The only drawback remains the price, which is too high.
This is interesting: How to replace the rear brake light bulbs on a Renault Logan with your own hands: let’s cover it in general terms
conclusions
Replacing a low beam lamp on a VAZ-2114 is quite simple and even a novice car enthusiast can handle this procedure. So, you should be more careful when selecting lamps.
Home / Catalog / Lada / Lada / VAZ 2113 / VAZ 2114 / VAZ 2115 with 1.5i liter and 1.6i liter engines, repair book in color photos in electronic form / ...Show book contents
Content
Introduction
Emergency procedures
- Wheel replacement
- Actions in case of engine overheating
- Starting the engine from an additional power source
- Circuit breakers
- Emergency pressure drop in the engine lubrication system
- Turning on the low battery indicator
- Turning on the engine system malfunction indicator
- Turn on the brake warning light/parking brake warning light
Daily checks and troubleshooting
Operating a car in winter
A trip to the service station
Operation and Maintenance Instructions
- Technical information
- Controls, instrument panel and interior equipment
- Car care
- Vehicle maintenance
- Fuels and lubricants
Warnings and safety rules when working on a vehicle
Basic tools, measuring instruments and methods of working with them
- Basic set of necessary tools
- Methods of working with measuring instruments
Engine and its systems
- General information
- Servicing the engine without removing it from the car
- Engine disassembly and assembly
- Ignition and engine control system
- Supply system
- Lubrication system
- Cooling system
- Intake and exhaust system
- Chapter Appendix
Transmission
- General information
- Clutch
- Transmission
- Drive shafts
- Chapter Appendix
Chassis
- General information
- Front suspension
- Rear suspension
Steering
- General information
- Steering wheel
- Steering gear
- Steering rods
Brake system
- General information
- Car service
- Front wheel brakes
- Rear wheel brakes
- Parking brake
Body
- General information
- Front bumper
- Rear bumper
- Hood
- Front door
- Rear door (VAZ 2114/2115)
- Body dimensions
Gas equipment
Car electrical equipment
- General information
- Generator
- Starter
- Egnition lock
- Replacing steering column switches
- Replacing the power window switch
- Outdoor lighting devices
Fault codes
- Controller JANUARY-4
- GM Controller (IFSI-2S, ITMS-6F)
- OBDII protocol controllers
Electrical circuits
Dictionary
Useful tips for car owners
How to pay and download
Which manufacturer's lamps are best to buy?
As we have already found out, to replace low and high beam lamps on a VAZ 2114 and similar models, you need to buy an H4 type lamp. I have compiled a list of popular models in descending order of price. It is impossible to clearly say that some lamp is good and some is bad. They are all fully worth their cost. So, our rating of lamps:
Philips H4 X-treme VisionBuy
Philips H4 3700K X-treme Vision +130% is a lamp from a well-known manufacturer with increased luminous flux. It has a standard power of 55/60W, so you don’t have to worry about the safety of the on-board network and the load on the generator. But at the same time, the luminous flux is increased compared to standard H4. The manufacturer claims that they are 130% brighter than conventional halogens. Their cost as of February 2019 is 1055 rubles, which is equal to approximately 16 dollars.
Osram H4 Night BreakerBuy
Osram H4 Night Breaker Unlimited +110% Another lamp with increased luminous flux from an equally well-known manufacturer. This brand has found popularity among car enthusiasts. It is also noted that defective light bulbs are rarely encountered. Osram claims they will shine 110% brighter than standard at the standard 55/60W output. They cost less than their competitor's counterparts from Philips: 795 rubles, which is equivalent to 12 dollars.
OSRAM H4 Ultra LifeBuy
OSRAM H4 Ultra Life - this lamp is best installed in headlights for those who want it to shine for a long time and not have to change it again. The manufacturer claims 4 times longer service life than conventional halogen lamps. Let us remind you that the average service life of halogen lamps is 600 hours. Users note that Ultra life series products really last a long time. The cost of these lamps is 380 rubles, which is almost $6.
But if you want to save money, then pay attention to two more brands - GE and Mayak. General Electric H4Buy
General Electric H4Buy
General Electric H4 12V 60/55W P43t GE are inexpensive lamps. Car owners note that they operate normally throughout the entire declared service life without any complaints. The shape of the light beam is correct, and they cost only 270 rubles. or $4.
Lighthouse H4BuyLighthouse H4 12V60/55W - lamps that are even cheaper. The best thing for taxi drivers and young owners of domestic cars. They give relatively good light for their 215 rubles. or 3.3$.
Types of lighting fixtures
For installation in the headlights of the VAZ 2114, double-filament lamps with an H4 socket are used, the power of which is 60/55 W. They perform simultaneously the functions of high and low beam. This allows you to reduce the size of the headlights and reduce heat. However, such versatility also has negative sides. If one thread burns out, the other can still work. But, since it is impossible to drive without low or high beams, you have to change a partially working lamp. At the same time, headlight bulbs are always installed in pairs to obtain the same glow mode on the left and right sides. It turns out that because of one burnt-out filament, you will have to change two lamps, which is uneconomical.
Halogen lamps are installed at the manufacturer's factory. This is a modification of conventional incandescent lamps, the bulbs of which contain pairs of halogens - iodine and bromine. This makes it possible to increase the heating of the coil and increase the brightness of the glow. However, the temperature of the flask, which has to be made of quartz glass, also increases.
In addition to halogen lamps, the following are installed in the headlights of a VAZ 2114 car:
- incandescent lamps. They are cheap, but dull and short-lived. Currently practically not used;
- xenon lamps. They have increased brightness because the plasma arc glows. They do not have filaments, therefore they are more resistant to stress. The disadvantage of xenon is the need to use an ignition unit, which takes up extra space;
- LEDs. These are relatively new lamps that have managed to win the preference of most car enthusiasts. They are safe, the supply voltage is only 12 V. The service life is up to 50,000 hours (halogen - up to 2000). Practically do not heat up. The disadvantage is the directional emission of the light flux. While halogen or xenon samples shine evenly in all directions, LED lamps emit in one direction, so several crystals mounted on a cylindrical base are used at once. In addition, the LEDs are equipped with diffusion lenses that evenly distribute the flow in all directions.
How to replace headlight bulbs?
Replacing lamps in headlights in almost all cars is similar, since all headlights consist of a housing, a light diffuser and a light source, a reflector. But despite the wide variety, headlights can be divided into two types: with a fixed or moving lens. In addition, high and low beam can be provided either by one double-filament lamp, or by two separate ones.
After replacing the lamps is completed, it is imperative to check the tightness of the headlights, because if it is broken, then dirt or water can get inside, and at temperature all this can harden and form carbon deposits! In addition, there is no need to install more powerful lamps on your car, because they do not provide a very significant increase in illumination, which can be obtained if the standard headlights are adjusted correctly. Also, there is no need to add additional headlights with powerful lamps to your vehicle, because they only add significant load to the generator.
It's time to move on to the replacement process itself. To do this, you may need a thin screwdriver or an awl. It is also advisable to have a magnet on a long flexible handle when replacing, but such a device is not always necessary. In this case, instructions for replacing lamps may also be needed if you are not an expert in this field.
Light bulb replacement diagram
When is it possible?
And yet there is one possibility when LEDs and xenon can be installed in headlights. But, unfortunately, this opportunity will not make it any easier for us.
Does this mean that VAZ can be equipped with other headlights, including those with xenon or LED? No, that doesn't mean it. According to the Technical Regulations, in any case, such a light source must be certified and tested as part of the vehicle on which it is installed. This means that if the old VAZ provided only halogen lamps, then the headlights will have to be installed only with a halogen light source.
In addition, with such an installation, you will have to go through the procedure of making changes to the design of the machine, which is quite labor-intensive and expensive.
How to replace all lamps on a VAZ 2113-VAZ 2115?
Note! Before you start, be sure to keep one thing in mind: under no circumstances should you touch the glass bulb with your fingers, otherwise this could cause your light bulb to fail much faster, so we recommend that you replace the light bulbs with clean gloves, but if If you have already touched the glass flask with your fingers, then before installing the lamp, wipe the entire flask from grease and dirt with a clean rag soaked in alcohol! (This information applies only to the halogen lamp, the small side light lamp and the turn signal lamp do not need to follow this procedure, but we still recommend that you use clean gloves when working with the lamps)
Replacing the low and high beam lamp:
1) As was said earlier, there is only one lamp for the low and high beam, but it is two-filament, so to replace it you will need to first open the hood of the car and then find two bolts on the back of the headlight unit (Bolts are indicated by arrows ) that secure the headlight cover, after these bolts come out, unscrew them completely by hand and then, as shown in the small picture below, remove the plastic cover from the headlight block.
Note! After removing the cover from the headlight unit, you will have to work with electronics, so it is recommended to de-energize the battery when working with it, so that no short circuits occur during operation, and for information on how to de-energize the battery, see the article entitled: “Replacing the battery on a VAZ ", paragraph 1!
2) Now that the car is de-energized, disconnect the wire block from the terminal of the halogen lamp and then take it aside.
3) Then take a closer look at the terminals of the halogen lamp, there will be a spring clamp that holds the light bulb while driving so that it does not fall out of the headlight, so using your hand, fold this spring clamp down, as shown in the small photo below and then pull it lamp leads (For clarity, the leads are indicated by red arrows), remove it from the hole in which it is located.
Note! The new halogen lamp is installed in the headlight unit in the reverse order of removal, but when installing, always remember that you cannot touch the glass bulb with your fingers, otherwise your lamp will quickly burn out and will not work!
Replacing the side light bulb:
This lamp is replaced very simply, in order for you to be able to remove the old lamp, you will first need to open the hood and remove the same plastic cover that was discussed just above, in the section “Replacing the low and high beam lamp”, so first remove this completely roof and simply pulling the wires that fit the side light lamp, pull it out of the hole in which it is located and then, holding the lamp itself with your hand, simply remove it from the hole, thereby you will remove it from the chamber, as shown in the small photo slightly below:
Note! In some cars of the Samara family, the optics are slightly changed, so on some cars there are side light headlights that are held simply by tension, and there are those that are specifically fixed in the chamber, those that are held by tension do not need to be turned anywhere, you just need to pull it by force it will come out (This lamp is shown in the small photo above), but those that are specifically attached to the chamber must be turned counterclockwise and only then removed, so before pulling it, try turning it counterclockwise!
Replacing the turn signal lamp:
1) Replacing this lamp will also not be difficult, so as always, first you will need to open the hood of the car and then find the socket that goes with the lamp and is built into the turn signal itself, so after finding the socket, take it with your hand and turn counterclockwise as shown in the figure below, and after turning the socket, pull it and thereby remove it from the turn signal along with the lamp.
2) And finally, when the socket and the lamp are in your hand, press the light bulb itself and turn it in the same way as the socket counterclockwise and then completely remove the lamp from the socket.
Note! This lamp is installed in the reverse order of removal, but only when installing will you pay attention to the two side slides (One of them is indicated by an arrow in the photo below) that are located on the lamp, so install it in such a way that these slides fit into the grooves on the chamber and then Turning the lamp, make sure that it is fixed with these two side slides!
Sources
Repair work
To begin with, we advise you to make room for yourself near the car so that you can open the doors without any problems, nothing prevents them from always being in the open position, and you have the opportunity to approach and move away from the car without overcoming multiple obstacles.
If in summer you can simply drive your car outside, then in winter you will have to limit yourself to the available space of a closed garage.
You are ready? Then you can start repairing.
Dedicated place where the cigarette lighter fuse is located on the VAZ 2114
The first situation is that the fuse for the VAZ 2114 cigarette lighter has failed. A popular problem that is not so difficult to solve. The primary task is to determine where the cigarette lighter fuse is located on the VAZ 2114. It's simple. Open the hatch where the entire fuse box is located. The element you are looking for is located to the left of the steering column. This is a 20-amp fuse, which has a special marking - F4. It is difficult to confuse it with others, so finding the fuse is not a problem at all. Take a tester and check its functionality. If it works, we continue to look for the problem. If the fuse fails, you can simply purchase a new one. It’s cheap, so there shouldn’t be any problems finding and purchasing it. Since the old fuse has burned out, you won’t be able to simply take a new one, put it in place and supposedly complete the repair.
It is extremely important to understand exactly why the old fuse blew. Figuring out how to remove the cigarette lighter on a VAZ 2114 is quite simple.
Be sure to check the quality of the contacts in the blocks when leaving the mounting block. It is designated X1. This block has connections from the cigarette lighter located in the passenger compartment. If the reason is in the contacts, tighten them. The most popular problem with a cigarette lighter malfunction is the car owner’s own mistakes during operation. When connecting external devices to the device, there is no need to unscrew the plugs in different directions. Because of this, the plates short out and the cigarette lighter simply stops working. Another fairly common problem is a burnt-out backlight bulb. It is quite simple to replace, but to do this, our device must first be removed from its socket. Pay attention to the moving core of your cigarette lighter. Examine it externally, check the quality and integrity of the spring coils. If there is damage, you will have to replace this element. The problem is that the core is not sold separately; auto parts stores offer only a prefabricated design. The only search option is all kinds of car flea markets, where grandfathers sell spare parts from their old cars. Despite the apparent absurdity, in such places you can often find excellent parts for cars such as the VAZ 2114.
Headlight device
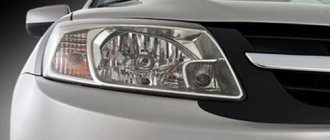
Let's start with the fact that the entire updated Lada Samara 2 family, namely VAZ 2113, 2114, 2115, has the same front optics installed. It comes in two types and different production:
- "Kirzhach";
- "Bosch".
These headlights have differences. This is an insignificant difference in the optical pattern on the glass and the presence of a reflector-partition in front of the lamp on Kirzhach. The Kirzhach reflector itself is wider and occupies almost the entire area of the headlight. Because of the partition, drivers complain that Kirzhach’s headlights are blind and remove it. But to do this you need to remove the glass, and it is glued in - be careful if you are going to do this.
Differences between BOSCH and Kirzhach headlights on the VAZ 2114The direction indicators are not a single unit with the headlight, but it is also impossible to install an orange block from Kirzhach into a Bosch without modifications, or vice versa - they are not interchangeable. They attach differently to the headlight
Please note that the pattern on the turn signal glass is different. The back side of the headlight is also different, we will talk about this below.
What lamps are needed
The design of the headlights on the VAZ 2114 provides for the use of halogen bulbs. Therefore, do not install xenon if you do not want problems at the nearest traffic police post. The use of H4 LED lamps in headlights is also a very dubious idea.
On the one hand, the manufacturer positions them as a direct replacement for halogen lamps, on the other hand, you need to keep in mind clause 3.1 of the List of faults and conditions under which the operation of vehicles is prohibited. It states that it is prohibited to operate vehicles if the number, type, color, location and mode of operation of external lighting devices do not comply with the design requirements of the vehicle. The punishment for violating clause 3.1. provided for in Part 3 of Article 12.5 of the Code of Administrative Offenses of the Russian Federation: deprivation of rights from 6 to 12 months, and in the case of replacing not lamps, but headlights with non-standard LED ones, the same article provides for a fine of 500 rubles.
The headlights of the VAZ 2114 have H4 type halogen lamps. This is a combined lamp for high and low beam headlights; it contains two filaments, one for each mode. Therefore, on its base there are three contacts: common, spirals for the near one and spirals for the far one.
H4 lamp design
The use of H4 lamps is determined by the design of the headlight. Such lamps are installed almost always when there is only one headlight, and not 4, as is the case with BMW and other cars with similar optics, and also when the headlight is not divided into two halves by a reflector and glass, as in the Priora.
Alternative optics
Why do the headlights fog up from the inside and thereby spoil the appearance of the car? The fact is that glass allows moisture to pass through, as a result of which the contacts oxidize, and the lamp may simply burn out. Even if this does not happen, the glass will fog up, resulting in poor visibility on the road. Replacing the glass won't do anything. The result, if there is one, will only last for a short time.
Based on this, we can say that tuning the rear lights on a VAZ 2114 or 2109 and 21099, or the front lights, is more of a necessity than just an external change.
Alternative optics for VAZ 2109
