Injector advantages
- more accurate fuel dosing;
- fuel burns better, engine efficiency is higher;
- gasoline costs are reduced;
- environmental pollution is reduced;
- The VAZ 2107 with an injector responds to the gas pedal much better;
- you can quickly find faults in the power system even by yourself by connecting your laptop to a “smart” injector (if the program is installed);
- For novice drivers, electronic injection is good because it does not allow the engine to stall, it decides what speed to gain, makes it easier to start without revving up, etc.;
- maintains stable idle speed, during a cold start, no “choke” is needed;
- the engine runs more quietly, as a hydraulic chain tensioner is installed;
- no valve adjustment is required, since hydraulic compensators are installed and the absence of gaps is maintained automatically;
- as a result, the injector is 15-18 horsepower more powerful;
Why change a carburetor engine to an injection engine, and is it necessary?
Do-it-yourself HBO installation
Basically, everyone does this to install 4th generation gas equipment, and 2-3rd generation gas installations will work much better than on a carburetor.
Another positive point is that in the design of the intake manifold, in any throttle position, both intake valves operate. There is also a difference in fuel consumption. But the consumption itself mainly depends on the car, gearbox, axle, etc. And the mandatory use of high-grade fuel in an injection engine will not save you money. The car starts up much better after the changes, in any frost.
Important! For normal operation of the injector, it is necessary to flush the system every 25 thousand kilometers.
Injector disadvantages
- the injector is capricious, requires regular maintenance and cleaning (otherwise the quantity and quality of injection decreases), and there is a loss of power, the engine runs unstable, and exhaust toxicity increases;
- since a new type of engine was not developed for the injector of the classics and the VAZ 2107, in particular, but “they took what they had,” then access to many parts of the traction unit is difficult, and it can be difficult to repair anything with your own hands;
- installation of the catalyst is low, below the rear axle gearbox, at a height of 10-11 cm, immediately forget about driving through a mown field to pick mushrooms;
- refuel wherever you want, but get your VAZ 2107 accustomed to excellent gasoline. Otherwise, you'll stall.
- If you stall on the injector, you will be “like on a foreign car”, you will stall for a long time. The tow truck and car service station are shining.
- When starting the engine, leave the key in the ignition position for a few seconds. This will allow the fuel pump to build up fuel pressure, otherwise it will fail.
- How much does it cost to tune a carburetor VAZ 2107 with conversion to injection injection?
- If you turn to service experts, you will spend about 30 thousand rubles on tuning. at prices in the summer of 2014, when the ruble was more or less stable for parts and labor, for everything on a turnkey basis. Maybe you'll even get a guarantee.
- If you are confident in your knowledge and experience, then, by going to auto repair shops, you can buy everything used, but working, for 12-15 thousand rubles, and disappear in the garage for a long time, doing tuning not only with your own means, but also “ with your own hands,” for this you need to be “handy” and understand hardware, but even more “big-headed” and understand electrics.
- The cost of a new six engine with an injector is 55,000 rubles. Will fit on VAZ 2107. Option with warranty. If you choose tuning at a car service center, you will receive a guarantee for both the kit and installation.
Required spare parts
If you still decide to tune the engine yourself, then here is an approximate list of parts that you need to purchase on your own:
- cylinder head with 21214;
- her gas pedal;
- MZ bracket;
- also a pulley with distributed injection;
- firmware for ECU January 5.1.1.;
- Volga fuel pump (Bosch) with bracket;
- assembled throttle with gasket, idle speed reducer;
- high-voltage ignition wires for an eight-valve engine;
- throttle cable (possible with classics);
- fuel filter for injection engine;
- highway;
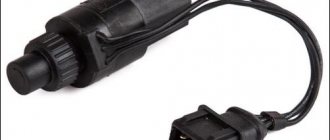
- knock and speed sensors;
- receiver with ramp from 21214;
- engine cover with crankshaft position sensor;
- injection wiring harnesses;
- fuel pump and breaker plugs;
- antifreeze temperature sensor;
- air flow sensor;
- Nivovsky ignition module;
- tee with cylinder head;
..... and also all the standard gaskets and seals, which we will replace during installation.
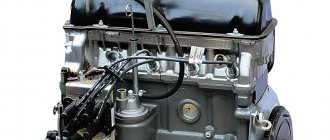
Replacing a carburetor with an injector for a VAZ-2107 car
DIY seat heating installation
The production of VAZ passenger cars was mastered by the Togliatti plant back in the early seventies, and rear-wheel drive models were produced for a long time with carburetor internal combustion engines (ICE). The standard injection engine appeared on the “Classic” only at the beginning of the 2000s, so the bulk of the cars were equipped with KS.
Since the manufacturer produces spare parts for distributed injection systems, there is no need to spend a lot of time with adjustments when replacing a carburetor with an injector, but still, such tuning for the 2107 requires a significant investment of time and money. In order to install the SRV instead of the KS, you will need the following parts:
- crankshaft pulley with ebb for the crankshaft position sensor;
- cylinder head (cylinder head) 21214 assembled with a camshaft and hydraulic compensators;
- front engine cover;
- underhood electrical wiring;
- ECU;
- ignition module;
- electric fuel pump (here you can use a submersible or remote pump);
- fuel injectors with ramp;
- receiver;
- knock sensors, temperature sensors, TPS;
- gas tank (when installing a remote used pump, it is not required);
- absorber;
- air filter housing with filter element;
- air pipes;
- throttle assembly;
- RXX.
If buying all new spare parts turns out to be expensive, you can try looking for used parts through advertisements or at a car dismantling station. Also, if they want to save money or due to a lack of funds, some car owners modify the “native” cylinder head, modernize the old gasoline tank and intake manifold. When replacing a carburetor with an injector, adjusting and reworking it with a VAZ classic, you end up with a lot, a lot of work with the wiring. Installing an injection system on a carburetor front-wheel drive Lada is somewhat simpler, and costs less time and money.
Sequence of work
- We drain the antifreeze below the height of the cylinder head.
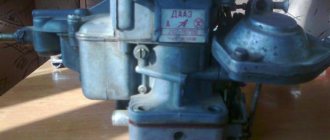
- We remove the carburetor.
- Remove the intake and exhaust manifolds.
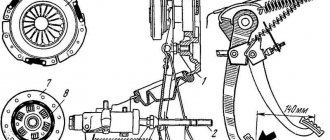
- We remove the breaker - distributor with coil.
- We remove the pulley from the crankshaft, replace the front engine cover with a new one, with space for the crankshaft sensor.
- We install a new pulley, with teeth for the sensor, not forgetting the marks.
- We install a new block head 2124. You can use a new prefabricated one, or you can use an empty one, but then you’ll have to rearrange everything with yours, or you can leave your classic one, but bore it for the new profile of the intake windows and for additional studs with your own hands;
- We install the coolant sensor on the tee of the VAZ 2107 block head, drilling a hole and cutting a thread for the sensor. Then we install it.
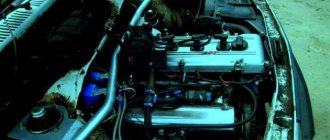
- After installation, we attach the intake pipes and exhaust manifold to the block head, install a ramp with injectors on the intake, and screw it on. Then you need to put on the receiver, with the throttle assembly and screw it on.
- We attach a plug to the seats of the fuel pump and breaker.
- We place the knock sensor closer to the cylinders, preferably on the breaker plug screw.
- Install the ignition module; To do this, use a grinder to level the area with your own hands ( be careful, sparks and gasoline vapors can cause a fire and explosion! ) next to the brake fluid reservoir and attach the “Nivov device.” It's away from the heat, which is better for electronics.
- We install a fine filter between the supply tube and the main line; it is easier to install it from the Volga on clamps;
- We install the return line in the same way, in the form of a second line along the bottom of the car to the tank;
- There, under the bottom, near the fastening of the speedometer and gearbox cables, we install a speed sensor;
- We put the return line into the gas tank, the main thing is to make it hermetically sealed, by drilling a hole in the intake cover and inserting the tube;
- We install a fuel pump. It is better to place it further away, as it makes noise. For example, on the wheel arch in the trunk:
- We connect the fuel pump hoses according to the diagram: intake - pump - supply line - return - pipe to the gas tank. The clamps need to be strong, otherwise there will be a stink of gasoline from the trunk into the cabin.
- Place the gas pedal, attach the gas cable to it, attach the cable to the throttle and to the receiver bracket. The cable does not need to be pulled too tight. We check the tension with our hands.
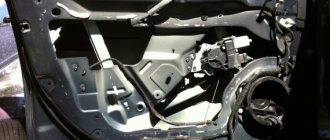
- Electrical: all new wiring, on-board computer, all fuel injection system sensors need to be installed. To discourage beginners, let’s just say that you need to not only cut out the lengths of all the circuits to the sensors, but also professionally solder them, making do with a minimum of connections to prevent “terminal souring.”
- In this case, you will have to conduct separate electrical circuits by hand: black - white, black - red, red, gray, white with a stripe, blue with a stripe, brown with a stripe of wire. They need to be carried out on the battery, fuel pump, ignition, choke light, tachometer, fan, fan relay and all sensors.
Advice: before you start purchasing all the parts and spending major financial resources, figure out which wires are connected where if you decide to install the injector yourself.
- Finally, the ignition system is installed - coil, high voltage wires.
Now the pleasant sound of an injection engine can please the owner. You have done a great job!
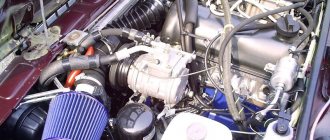
Installing an injector on a carburetor classic
So, today we will tell you how to convert a classic carburetor engine into an injection one . We described this procedure using the example of converting a carbator VAZ-2107 into an injection one ; in principle, the instructions are suitable for any similar classic engines. In general, I decided to evolve and switch from mechanical mixture formation to electronic, simply from a carburetor to an injector . I'm tired of constantly pulling the choke handle when warming up, looking at the smoked spark plugs and the drooping tachometer needle when under load, especially in winter. No, it’s clear that building a turbo engine is much cooler than simply switching from a carburetor to an injector. But just think about how much it will cost you to repair a turbine if it fails https://turbos.com.ua/about - I think it won’t seem a little