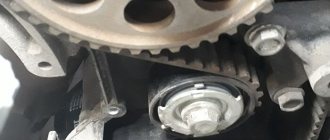
Our neighbor came to us to undergo scheduled maintenance on his brand new VAZ 2170, or Lada Priora in common parlance, to replace the timing belt, pump, oil and other little things.
Different sources indicate different frequency of replacing the timing belt from 80 thousand km to 105 thousand, but we change it at 60 thousand or every four years. We check the belt tension and its condition every 20 thousand kilometers or once a year and this is not our whim, because we all know about the quality of our spare parts. When checking, we pay special attention to the absence of cracks and tears on the belt, as well as oil or antifreeze. And remember that saving on a timing belt can result in many times higher costs for engine repairs.
Important! When the timing belt on the 21126 engine breaks, all 16 valves bend.
And yet, not everyone knows, but on the sixteen-valve Priora engine, lightweight connecting rods are installed, and when the timing belt breaks, not only all 16 valves bend, but in most cases the connecting rods as well. And if they are not replaced, the car will have a decent oily appetite. Therefore, it is better to play it safe.
Together with the timing belt, we also change the pump, since in my experience most of the cases of toothed belt breakage occur due to a jammed pump.
Replacing the timing belt, tension and support roller
The intervals for replacing the timing belt on Lada Priora cars are always changed by the manufacturer from year to year.
Previously, there was evidence that replacement was required at 120 thousand km. Now, even on the new Lada Vesta, the service book indicates an interval of 180,000 km, after which the belt must be replaced. Of course, you need to look not only at the mileage, but also at the actual condition of all timing parts, such as:
- Drive belt
- Water pump (pump)
- Support roller
- Tension roller
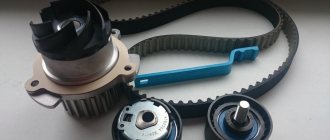
If upon inspection it turns out that one of the parts requires replacement, and the rest are in working order, you should not change everything at once. Timing kits for Priora now cost a lot of money, so it is not advisable to replace parts that are known to be good.
Types of timing drive checks
In the absolute majority, the Priora is equipped with a VAZ 2170 engine. It has 16 valves. But there is a small part of these cars equipped with an 8-valve engine. For the most part, these are “Priors” for official use. Therefore, the 16-valve engine will be considered in the article. There are 3 ways to check belt tension:
- Organoleptic (manual).
- Using mechanical devices.
- Electronic sensor.
They will now be described in order of priority.
Manual way to check the tension and condition of the drive
This is the simplest method suitable for every owner. Although many repairmen often use it too. It's done like this. Using a #5 hex socket, remove the bolts securing the upper timing belt cover. There will be access to the camshaft gears and the belt section between them. Take the belt by the sides and try to turn it out with your fingers. The edge of the belt should move no more than 2-3 millimeters. If more, you need to tighten it. Carefully inspect the drive for cracking of the rubber. Make sure there is no fraying of the cord. No fraying at edges. If there is no damage, tighten the belt to normal.
It is recommended to inspect and check the condition of the timing drive at least every 3,000 km.
Mechanical testing method
For this you will need a special device. Dynamometric. This is a device with a scale that allows you to determine the deflection of the belt. It has its own instructions for various car models. There is no particular point in buying it for a private owner; it is suitable for small service stations.
Electronic verification method
This is the most accurate of all types of checking the Priora timing belt tension. But it requires a special ultrasonic indicator. The device is quite expensive, but convenient and easy to use. It is made in the form of an oblong rectangular case. Two wires come out of it at one end and are attached to the car battery terminals. They are designated “+” and “-”. In the middle, on one side, there is a digital window - a display. When connected, two “0”s are displayed there.
Instructions for replacing the timing belt and rollers on a Priora 16-cl.
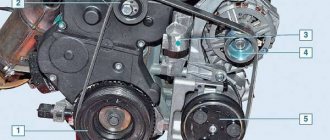
The first step is to remove the accessory drive belt, which is described in detail in this article. Next, you need to unscrew all the bolts securing the timing belt protective cover, using a special TORX t30 wrench for this.
Then remove the cover, both the upper and lower parts:
Now the entire gas distribution mechanism becomes accessible and further actions can be carried out.
But then it is advisable to find an assistant in order to unscrew the bolt securing the crankshaft damper pulley. This is done as follows. First, jack up the front right side of the car and remove the wheel. The assistant gets behind the wheel, engages fifth gear and simultaneously presses the brake pedal. At this time, it is necessary to unscrew the pulley mounting bolt, since the crankshaft is locked and will not turn.
Finally unscrew the bolt and remove the pulley and washer. After which it is necessary to set the Priora timing mechanism according to the marks. To do this, turn the crankshaft clockwise until all marks coincide. You can do this as follows:
- the right side of the car is hanging out
- engage fifth gear
- use the brake disc of the suspended wheel to turn the crankshaft by hand
The mark on the crankshaft tooth gear should coincide with the cast on the oil pump housing:
The marks on the camshaft gears must match those on the housing of the inner timing cover. Everything is clearly demonstrated in the photo below:
Now, having locked the gears, unscrew the bolts securing the tension and support rollers and remove them:
After this, you can remove the old Priora timing belt, since nothing else holds it.
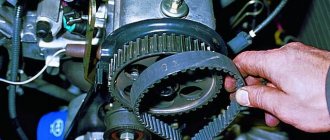
Installing a new timing belt occurs in the reverse order. To do this, first we put it on the crankshaft gear, then strictly counterclockwise through the support roller, onto the right, then the left camshaft gear, onto the pump and install the tension roller. The timing marks on the camshafts may move slightly, so if necessary, correct them using a 17 mm wrench:
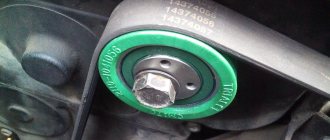
The roller has a mechanism that automatically regulates the belt tension in such a way that, in principle, it cannot be overtightened. And the roller itself is tensioned as follows. Using a special key, turn the outer part of the roller until the protrusion coincides with the slot, which is clearly shown in the photo below:
After the marks are aligned, we finally tighten the roller mounting bolt using a torque wrench with a torque of 34 to 41 N*m. After this, we turn the crankshaft two turns to make sure that the timing marks are set correctly. If everything matches, we take further actions. We install the crankshaft pulley in place and tighten the bolt securing it with a torque of 110 N*m.
We start the engine and check that there are no extraneous noises when the timing belt is operating. We put back the casing and all those parts that were removed before starting the repair. For those who want to look at this procedure visually, I recorded a video review of this topic.
Video report on replacing the timing belt and rollers on a Priora 1.6 16-valve
This review is embedded from my YouTube channel.
If you have any questions after reading the material, you can ask them below in the comments.
Replacing the timing belt. VAZ, Priora
It is recommended to install a new timing belt if even small defects are detected, since a broken belt greatly increases the time and financial costs of repairing an internal combustion engine. In order to replace the belt, you must have the following tool:
- key for rotating the roller (tensioner)
- a small pry bar or a large, durable screwdriver
Before you begin installing a new belt, you need to degrease all surfaces that come into contact with the belt. It is recommended to always replace the tension bearing together with the belt (as a rule, they can be purchased as a set).
Follow these steps:
Remove the negative cable from the battery by loosening the nut on the terminal. Remove the canister sensor and engine cover.
Unscrew the timing belt cover.
The two upper bolts are unscrewed with a TORX T30 wrench.
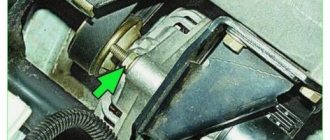
Using a 17 mm wrench, unscrew the tension roller bolt that tensions the drive belt.
Move the drive belt to the side.
Unscrew the 2 bolts of the lower part of the timing belt cover and remove it.
Using a 17 mm wrench, rotate the crankshaft and set the marks on the camshafts.
Checking the condition of the belt
The inspection regulations for this unit require an inspection in a cold engine state. Remove the outer protective casing to allow visual contact with the surface of the gas distribution unit parts. Having gained access directly to the timing belt, rotating its drive, inspect both sides of the consumable in detail for the presence of any kind of defects (wear, broken teeth, protruding cord, rubber delamination, etc.). Tensioner rollers are subject to careful inspection; in the presence of mechanical damage and large play, they contribute to increased wear of the consumables. The presence of oil stains on the surface of a rubber technical part, which contribute to the destruction of its structure, is not allowed. If found, immediately remove from surface.
Any auto mechanic will explain to the motorist that the timing belt must be changed regularly, otherwise its rupture during operation will damage the vehicle. All motorists will be able to replace the part if they carry out the preparatory stage correctly, remove interfering components for a while, and set the timing marks on the Priora.
Experts advise checking the condition of this component of the mechanism every 105 thousand kilometers traveled. It will be useful for motorists to learn how to disassemble the mechanism and check for damage to the belt.
Checking and adjusting the tension of the timing belt.
If you want your belt to last long and trouble-free, it is important to maintain its tension in the correct position. To do this, periodically test the tension. Pay special attention to the first tension of the new belt. If the belt is loose, the lateral load on the teeth increases, which greatly accelerates their wear. In some cases, if the belt is very loose, there is a high probability of the belt teeth moving relative to the pulleys. This can lead, at best, to engine instability and loss of power. In the worst case, it will lead to expensive repairs. To check the tension, perform the following steps:
1. Unscrew the 5 bolts securing the protective timing cover and move the cover to the side.
2. Press the timing belt exactly in the center between the camshaft pulleys with a force of 100 Newtons (10 kgf). The belt deflection from the horizontal position should be no more than 7 millimeters. Modern tension rollers are also provided with a tension control mechanism. To check the quality of the tension, make sure that mark A on the outer part of the roller coincides with protrusion B.
3. To adjust the tension, slightly unscrew the roller mounting bolt and, rotating the roller, achieve complete alignment of the marks described above (see figure)
4. Secure the tension by tightening the roller mounting bolt.
5. Reassemble all remaining parts in the opposite order of removal.
Source
We change the timing belt and rollers on a Lada Priora with a 1.6 liter 16 valve engine
Our neighbor came to us to undergo scheduled maintenance on his brand new VAZ 2170, or Lada Priora in common parlance, to replace the timing belt, pump, oil and other little things.
Different sources indicate different frequency of replacing the timing belt from 80 thousand km to 105 thousand, but we change it at 60 thousand or every four years. We check the belt tension and its condition every 20 thousand kilometers or once a year and this is not our whim, because we all know about the quality of our spare parts. When checking, we pay special attention to the absence of cracks and tears on the belt, as well as oil or antifreeze. And remember that saving on a timing belt can result in many times higher costs for engine repairs.
Important! When the timing belt on the 21126 engine breaks, all 16 valves bend.
And yet, not everyone knows, but on the sixteen-valve Priora engine, lightweight connecting rods are installed, and when the timing belt breaks, not only all 16 valves bend, but in most cases the connecting rods as well. And if they are not replaced, the car will have a decent oily appetite. Therefore, it is better to play it safe.
Together with the timing belt, we also change the pump, since in my experience most of the cases of toothed belt breakage occur due to a jammed pump.
Possible breakdowns and their causes
According to the manufacturers of the Lada Priora, the rollers and belt can withstand up to 200 thousand kilometers. However, in practice, many car owners encounter problems after 40 - 60 thousand kilometers. Failure to correct the malfunction in a timely manner may result in the timing belt breaking. The Internet is full of horror stories about the catastrophic consequences of a break and the subsequent replacement of dead pistons and bent valves. However, few people mention that such breakdowns do not occur suddenly. To avoid serious damage, it is recommended to inspect and diagnose the system once every 50 thousand kilometers. Unfortunately, diagnosing faults in the gas distribution system is a very non-trivial task. The fact is that many signs may simultaneously correspond to several malfunctions, sometimes not related to the timing belt. A malfunction may be indicated by:
- Metallic knocking in the engine;
- “Sag” in power on a cold engine;
- “Shots” into the silencer;
- Blue exhaust fumes;
- Engine overheating.
One way or another, if these signs occur, it is worth conducting a visual diagnosis. Among the main causes of malfunctions with parasitic timing belt rollers are: contamination of the part, inappropriate belt tension or its displacement due to improper assembly. The reason may also lie in mechanical damage that occurs due to incorrect installation or a foreign object getting under the belt.
Don’t tempt fate; keep an eye on the condition of the timing system and the timing of replacement. Buy spare parts for timing belt maintenance in trusted stores.
Preparatory operations
First, disconnect the negative battery terminal, remove the engine protection and drain the antifreeze.
Engine 16 valves Priora.
Remove the protective cover, not forgetting to disconnect the absorber purge valve.
Step-by-step instruction
It will not be possible to completely remove the belt since the engine mount passes through it and if you want to change it you will have to unscrew it. It will not interfere with replacing the drive belt.
On newer models we will need an asterisk.
- We tint the marks on the camshaft toothed pulleys with a marker for ease of control.
- Unscrew the bolts securing the lower timing belt protective cover. Hexagon 5.
Lower timing cover.
The front right wheel does not need to be removed, but turned all the way to the right.
- We lock the crankshaft. We place stops under the front wheels, turn on fifth speed and unscrew the crankshaft pulley bolt. 17mm head and extension with a pipe as a lever. Turn off the speed.
Crankshaft pulley.
- We dismantle the pulley and the lower protective cover. behind the pulley, do not forget it when installing.
Set the top dead center
- It is necessary to screw the crankshaft bolt into place and use this bolt to turn the crankshaft clockwise until the marks on the crankshaft pulley and the ebb on the oil pump coincide. The head is 17. We put a mark with a marker for convenience. Many manuals suggest putting a mark on the flywheel, but climbing under the thermostat is not very convenient, so we’ll take the simple route.
Crankshaft mark.
- The marks on the camshaft pulleys should also match the marks on the timing case. The camshaft marks were photographed after installing the new belt, they simply forgot to take a photo during the replacement process, may the inexperienced reader forgive us for this.
Camshaft marks.
- We unscrew the bolts securing the tension and idler rollers and remove them together with the timing belt.
Replacing the pump
Attention! There is a plate for the timing sensor installed on the intake camshaft pulley, do not damage it.
We pull the bolts evenly in several passes.
Camshaft marks
The VAZ 21126 engine uses two switchgears. One of them is needed for optimal operation of the intake valves, and the second is installed in order to regulate the movement of the exhaust valves.
Each camshaft has its own pulley, which is not recommended to be replaced with another. This pulley allows the camshaft mechanism to operate correctly. A phase sensor is installed on the right side of the pulley.
The marks are located on the pulleys. They are located on the crown of the ledge at the bottom. Experienced mechanics call them movable because they move with the rotation of the camshaft.
Attention! Beginning car owners should remember that the marks have different sizes. It all depends on the manufacturer who made the pulley
To see the marks, experienced mechanics advise wiping the pulley with a clean rag to get rid of dirt and dust. Then you will notice a small notch in the metal.
But the crankshaft marks will help all parts of the 126 engine from the Lada vehicle work equally. At the output of the crankshaft there is a gear. And this gear is connected to the device by means of a key. This is where the mark for correct installation of parts is located. Because if the position is incorrect, the key simply will not fit as expected.
The notch is made in the form of a slot or a conical hole. It is found on the outside of the engine pulley.
Additional guidelines are also applied to the outer engine housing so as not to make mistakes when setting marks. To do this, install another mark on the rear side of the timing belt housing. It is needed for the correct alignment of the camshaft pulleys.
Similar article Engine for Niva from a foreign car without modifications
Another notch is located on the engine oil pump. It is needed for the correct orientation of the crankshaft. And it will be difficult to find the last mark. It is located on the flywheel.
There is a small cutout in the flywheel housing. According to the standard, it is covered with a rubber plug. It is pulled out and inserted with pliers.
Installing a new timing belt
Attention! On the tension roller there is a direction of tension (shown by an arrow) and an indicator of the correct tension, indicator type.
The timing marks on the camshafts tend to run a bit, so if you're doing it alone, you'll have to be very tricky to hold the camshafts and fit the timing belt. You can fix the pulleys for convenience by installing a homemade clamp between the pulleys from a bolt with a nut and two washers. The Internet is full of pictures and examples, we won’t dwell on that.
- We put the timing belt first on the crankshaft pulley and pump, then on the idler pulley, the intake and exhaust camshaft pulleys and the tension roller. The branch between the crankshaft and intake camshaft pulleys must be tensioned.
- We tighten the timing belt with a roller in the direction of the arrows using a special wrench until the correct tension marks match. That is, when the pointer on the bottom of the roller is opposite the groove on the top. Tighten the bolt. Please note that an under-tightened belt will lead to rapid wear of the teeth, and an over-tightened belt will lead to increased wear on the pump bearing and reduced service life.
Correct tension.
- We check that everything should be on the mark. If the marks do not match, remove and reinstall the belt. If they match, then turn the crankshaft two turns and check the marks and tension again.
The new belt is in place.
- If everything is in place, install all the parts in place in the reverse order of removal. We start the car.
This is how easy it is to replace the timing belt on your Priora in a simple garage or even on the street.
