How to adjust the generator roller on a Priora with your own hands
The generator belt tensioner roller is a small but very important part of the machine. If it fails, the operation of attachments and electrics is at risk. But you can diagnose, lubricate and even change a spare part yourself; it does not require much effort or serious knowledge in the automotive industry.
On Lada Prioras with air conditioning and power steering, as well as those equipped with power steering (electric or hydraulic power steering), the alternator belt is additionally maintained in an optimally tensioned state by a special roller. The Priora generator belt tension roller is an important part that ensures the operation of the attachment.
Tension using adjusting bolt
Adjustment with a bolt on a VAZ-2110
This method is more progressive and is used in most modern machines. It is based on the use of a special adjusting bolt , by turning which you can adjust the position of the generator relative to the engine. The algorithm of actions in this case will be as follows:
- loosen the generator, its upper and lower fastenings;
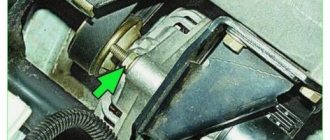
- Using the adjusting bolt, we change the position of the generator;
- fix and tighten the generator mount.
The belt tension level in this case can be determined during the adjustment process.
Where is the Priora generator roller located?
The tension roller of the Lada Priora generator belt is used to hold the auxiliary drive belt on the pulleys of the drive device; it is responsible for a tight fit and preventing slipping.
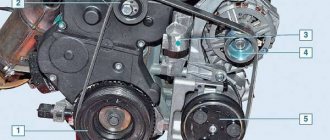
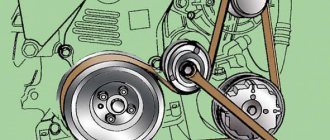
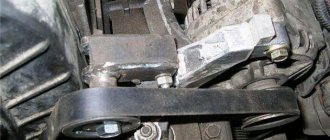
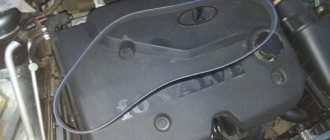
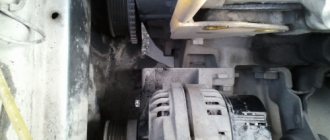
The drive belt in a Priora with 8 or 16 valves is located under the hood on the right side of the engine (along the direction of the car). If you look directly at the assembly, the bypass roller will be located on the top left, it is clearly visible. This is noticeable in numerous photos of the Priora’s engine compartment available on the Internet, and in videos with instructions for repair and replacement.
The part is of an eccentric type and is visually distinguishable due to the off-center bolt.
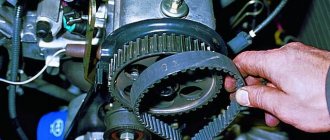
Installing a new timing belt
- We get a new timing belt kit.
Timing kit.
Attention! On the tension roller there is a direction of tension (shown by an arrow) and an indicator of the correct tension, indicator type.
Direction of tension on the roller.
- We install the tension and support rollers in their places and check that all marks match. We tighten the bolt securing the support roller, and simply tighten the tension roller.
The timing marks on the camshafts tend to run a bit, so if you're doing it alone, you'll have to be very tricky to hold the camshafts and fit the timing belt. You can fix the pulleys for convenience by installing a homemade clamp between the pulleys from a bolt with a nut and two washers. The Internet is full of pictures and examples, we won’t dwell on that.
- We put the timing belt first on the crankshaft pulley and pump, then on the idler pulley, the intake and exhaust camshaft pulleys and the tension roller. The branch between the crankshaft and intake camshaft pulleys must be tensioned.
- We tighten the timing belt with a roller in the direction of the arrows using a special wrench until the correct tension marks match. That is, when the pointer on the bottom of the roller is opposite the groove on the top. Tighten the bolt. Please note that an under-tightened belt will lead to rapid wear of the teeth, and an over-tightened belt will lead to increased wear on the pump bearing and reduced service life.
Correct tension.
- We check that everything should be on the mark. If the marks do not match, remove and reinstall the belt. If they match, then turn the crankshaft two turns and check the marks and tension again.
The new belt is in place.
- If everything is in place, install all the parts in place in the reverse order of removal. We start the car.
This is how easy it is to replace the timing belt on your Priora in a simple garage or even on the street.
Which generator roller is better to install on the Priora?
Of the good non-original “prior guides” note:
- Hofer (HF code 608230);
- Gates (T39176);
- Lynx (PB-5039);
- Trialli (CM170);
- Marel (2110).
Alternator belt roller. Photo source: https://www.drive2.ru/l/513749832809054967
Less common are accessories from INA and Andycar. Among the inexpensive and fairly popular options for replacing the tension roller of a Lada Priora generator belt with air conditioning or power steering, we can highlight the products of the Vologda Bearing Plant - the VBF roller (catalog number 830900AKE). But reviews from car owners indicate the “floating” quality of VBF parts, and their purchase should be approached with caution. Many people advise installing Gates spare parts.
There are also drive belt repair kits supplied with this part, for example, Trialli GD613.
Signs of tensioner failure
The following symptoms indicate poor adjustment or failure of the unit:
- whistling, increased noise, rustling from the generator unit (extraneous sounds are not necessarily associated with the tensioner, but may indicate its misadjustment or malfunction);
- hum and buzzing that occurs when the belt roller bearing of the Priora generator wears out;
- vibration of the roller and belt, indicating a worn bushing;
- too much belt deflection (more than 8 cm) or excessive tension (less than 0.6 cm) - if detected, adjustment must be made;
- the fastening bolt begins to heat up;
- backlash in the tension roller (this, like the hum, indicates a worn bearing);
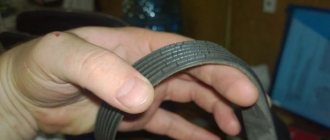
- uneven wear and stretching of the belt on one side (as a rule, this sign indicates a bend in the tensioner bracket).
Why does the generator roller whistle and make noise?
The whistling noise may not be related to a malfunction. For example, sometimes the unit begins to make noise and hum in humid weather when moisture gets on it and the pulleys. After warming up and drying, the symptoms stop.
But if the car starts to whistle, squeak and rustle “when cold” and constantly, this may indicate:
- thickened tension roller lubricant or its deficiency;
- sagging or excessive belt tension, as well as its wear;
- slipping of the drive belt due to oil getting on the surface;
- Tension roller malfunction;
- misalignment of pulleys.
Replacing the alternator belt roller on a Priora. Photo source: https://www.drive2.ru/l/513749832809054967
The first thing to check is the tensioner eccentric roller and belt tension.
The importance of tension level and checking it
Let's consider what unpleasant consequences an incorrect level of tension will lead to. If it is weakened, then there is a high probability of slippage . That is, the generator drive will not operate at rated speed, which in turn will lead to the level of voltage generated by it being below normal. The result is an insufficient level of battery charging, insufficient electricity to power the vehicle systems, and operation of the electrical system under increased load. In addition, when slipping, the temperature of the belt itself increases significantly, that is, it overheats, which is why it loses its service life and may fail prematurely .
If the belt is too tight, this can also lead to excessive wear on the belt itself . And in the worst case, even to its breakage. Also, excessive tension has a detrimental effect on the bearings of the crankshaft and generator shaft, because they have to work under conditions of increased mechanical load. This leads to excessive wear and speeds up their failure.
How and with what to lubricate
If the check reveals a lack of lubricant, it can be changed. You can use Litol-24.
To lubricate the tension roller of the Priora 16 class generator, you should:
- Dismantle it.
- Remove the anthers.
- Wash the tensioner to remove any remaining old grease (this will also help to visually check the condition of the bearings).
- Apply a layer of Litol.
- Reinstall the anthers, mount the eccentric roller and check the tension.
In addition to Litol, the CRC lithium-based consistency demonstrates good qualities. It is resistant to high temperatures and rotation speeds. Chevron Delo Grease EP NLGI 2 has similar properties; the authors of repair video guides often recommend lubricating the mechanism with it.
It is important not to apply too much lubricant, otherwise it will begin to squeeze out onto the belt.
How to tension a roller
After replacement or dismantling and subsequent return to place, the roller must be adjusted for proper operation of the drive mechanism. To work you will need tools:
- Size key
- Special key for tightening. It is a structure welded to the base in the form of a pair of rods with a gap of 18 mm between them (similar to a key for an angle grinder). The rods are designed for insertion into technological holes on the roller.
How should the belt be tensioned?
- The eccentric roller retaining bolt must be loosened.
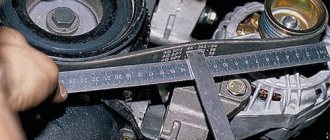
- Clamp the roller cage and turn the part counterclockwise or clockwise with the adjuster key, increasing/decreasing the belt tension. At the longest section between the pulleys and the shaft, it should bend by about 6 mm.
When the desired result is achieved, the fastening is finally tightened.
Tension adjustment using a roller
Adjusting roller and key for it
Some modern machines use special adjustment rollers . They allow you to quickly and easily tension the belt. As an example of using this method, consider adjusting the belt on a Lada Priora car with air conditioning and power steering, as one of the most popular cars in our country.
How to tighten the alternator belt on a Priora
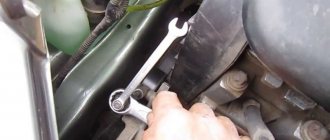
Work on tensioning the alternator belt on a Lada Priora car is carried out using a special tension roller, which is part of the structure. To work, you will need a 17 mm wrench to unscrew and lock the mentioned roller again, as well as a special key to turn the adjusting roller (it is a structure of two rods with a diameter of 4 mm, welded to the base, the distance between the rods is 18 mm). Such a key can be purchased at any auto store for a nominal price. Some car owners use curved pliers or “duckbills” in their work. However, we advise you to still buy an adjustment wrench, given its low price and ease of further work.
How to change the generator roller on a Priora
The part cannot be repaired, only lubricated if its technical condition allows. If there is a malfunction, the spare part is replaced. Let's look at how to change the roller of a Priora generator with air conditioning.
To replace the Priora generator roller, you need a 17 mm wrench and a tension wrench.
Progress
There is almost nothing to disassemble:
- Unscrew the fixing bolt.
- Remove the old part (you should remove it carefully, making sure that the belt does not slip off, and holding it with your other hand).
- Install new one.
- Make sure that the belt fits into the grooves of all rollers and pulleys.
- Tighten the bolt, but do not tighten it completely.
- Adjust the tensioner.
- Tighten the bolt.
- Check tension.
How to check the generator roller
After diagnostics with removal, lubrication, replacement or adjustment, the roller must be checked. After completing the adjustment, check the tension according to the diagram:
- manual control by pressure - a correctly tensioned belt should not bend by more than 0.8 cm;
- start the engine;
- turn on all possible energy consumers - air conditioning, heating, high beams.
If all components are working properly and there is no extraneous noise coming from the generator, the setup is correct. If there is a whistling sound, the belt is most likely under-tensioned, and if the bearings are humming, it is likely to be too tight. The procedure should be repeated more carefully, controlling the tension. Normally, the belt should bend by 0.6-0.8 cm when pressed.
Tension roller for generator and air conditioner Marel Magnum on VAZ 2110-2112, Priora
- Manufacturer Marel (Italy)
- Availability: In stock
- Length: 7 cm x Width: 7 cm x Height: 4 cm
- Weight: 0.35 kg
- Product code: 16491
- Catalog number: mr006
- OEM: 2110-1041056/2
- Upon receipt (cash on delivery)
- By bank cards online
- Electronic wallets
- According to the organization's account (excluding VAT)
- Apple Pay | Samsung Pay
Correct tension of the Priora generator belt
The alternator belt whistles on a Priora! This problem or malfunction, so to speak, is felt by every tenth owner of this brand of AvtoVAZ’s brainchild! In today’s article I will tell you why the alternator belt whistles and how to get rid of the annoying noise.
The alternator belt is a structural element of the engine that transfers mechanical energy from the crankshaft to the generator, which, in turn, converts it into electricity. The interaction between the generator and the crankshaft is ensured by a belt connection mounted on pulleys.
Description and location
The generator's job is to provide power to the vehicle's electrical equipment. Like other components in a car, the generator is powered by the engine; to ensure constant rotation of the rotor, pulleys are installed on the generator shaft and the crankshaft of the power plant. A belt is pulled between them. After starting the engine, the crankshaft begins to rotate, and the movement is transmitted through the belt to the rotor.
On the latest Priora models, this element operates the air conditioning and power steering. This material discusses the replacement and tensioning of the belt in a new model car, where additional equipment is installed.
Why does the alternator belt whistle on a Priora when it’s cold?
On the Lada Priora, the alternator belt is closed. It is located in the enclosed space of the engine. And if there is no crankcase protection, it turns out that water gets on the belt, or wet weather. And it turns out that even a new, working one can whistle for a while, then the whistle stops. The new alternator belt whistles even in new cars; if it is open, it is enough to drive through a puddle. After 20-30 seconds the water dries and the problem is resolved.
Alternator belt and air conditioner Lada Priora
Many people do not know what an overrunning clutch is and what it is needed for. And modern Lada Priora generators are equipped with this particular coupling. The anchor of the generator itself is attached to it. In order for the belt to run smoothly, without jerking, the overrunning clutch is responsible for this.
Bearings, unfortunately, do not last forever and after 100-120 thousand km they begin to jam. And because of this, it can begin to “walk” to the right and left, that is, warp. Also, due to the tensioner wedge, it begins to “walk” not parallel on the pulleys. To prevent the generator belt from whistling, it is necessary to constantly check the pulley to see whether it is spinning or not spinning, and whether there are any distortions.
Working unit of the Lada Priora generator
The largest pulley is at the crankshaft, the smallest is at the generator. Over time, the pulley can become dirty. Dirt and stones get clogged into the grooves, causing wear and whistling of the alternator belt. Clean the grooves from dirt.
During operation it may become covered with various deposits. The store currently sells enough cleaning products. Just spray on your belt and it will stop whistling.
Replacing the alternator belt
In a Priora car, the alternator belt should be replaced after 60,000 km. In the case of rare use of a car as a vehicle, such a replacement of the alternator belt is carried out at least once every 2 years, regardless of the mileage traveled.
The procedure involves the following actions:
- We drive the vehicle into the pit for inspection, prepare the necessary mechanic tools and a fender liner remover.
- We loosen the generator mounting nut, remove the adjusting bolt, holding it by the body, and move the generator device towards the “engine”.
- We dismantle the wheel and wheel arch liner of the vehicle.
- We remove the alternator belt from the car and replace it by performing the installation steps in reverse order.
- We check the tension of the alternator belt for normal functioning of battery recharging.
Because Since the power steering drive pulley in this version of the Lada Priora is located at a low height, the alternator belt on a Priora with power steering and air conditioning is structurally located near the engine support. It follows from this that replacing the alternator belt with such a modification is carried out subject to certain requirements.
We carry out the following procedures:
- We prepare the necessary plumbing tools and WD40 fluid to put the threaded connections of the engine support and fasteners in order for the subsequent replacement of the generator belt and jack up the wheel on the right in the direction of travel of the vehicle.
- Place a block under the engine and remove the wheel. We lower the car a little, unscrew the alternator belt tensioner roller, move the product to the side and unscrew the engine mount fasteners.
- We lower the vehicle until the power plant is suspended. In this case, we shift the motor cushion towards the location of the unit. This distance will be enough to remove the old belt and replace the alternator belt with a new product.
- At the finishing stage, you need to place the vehicle on a jack and lower the engine.
On the Internet you can easily find a video “replacing the Priora alternator belt”, which clearly shows the procedure for performing the work.
Hello, dear motorists! Well, let's move on to specific cars and their lovers?
“PRIOROVODY” - this is what the owners of cars from one of the latest VAZ series called “Lada” - “Priora” call themselves.
Many people liked the stylish and modern car. The deep-rooted belief that domestic cars are worthless is gradually dispelling. The cars have indeed become more comfortable and attractive, and their technical equipment has improved significantly.
The differences between the Priora and previous modifications are noticeable immediately as soon as the hood is opened. The new owner of a brand new Lada will have to learn a lot all over again. Such a simple, at first glance, manipulation as replacing the alternator belt on a Priora will require considerable effort.
Replacing the Priora generator 16 valves with your own hands video
VAZ car models usually do not present any difficulty with simple repairs or disassembly, they are inexpensive to service in almost any service center, and the basic configurations, if necessary, are suitable even for beginners. But if you need to replace a Priora 16 valve generator with air conditioning or power steering, dismantling it will be quite difficult due to the narrower space under the hood, and preparation is required.
Why, in fact, is it difficult to replace a generator on a Priora 16 valves?
The sixteen-valve version has a much narrower distance between the head and the radiator than the eight-valve version. If you remove the mounting bolts on a 16-valve generator, it will still not be possible to remove it - it will rest against the radiator. Because the free space under the hood will be occupied by a compressor or pump. Do not pull on the generator under any circumstances, this will damage the radiator. If something doesn't come off on its own, don't force it.
How to remove the generator
It is preferable to have a crane beam indoors; in extreme cases, you can use a jack on wheels, special for hanging the engine. You should proceed in the following way.
- Disconnect the battery terminals.
- Hang up the motor.
- Remove the drive belt.
- Loosen the hoses on the power steering or air conditioning.
- Remove the mountings from the generator.
- The generator can now be disconnected and powered up. First to the side, then up.
- When all wiring is disconnected, the generator can be removed.
Replacing the alternator belt on a Priora 16 valve is carried out in the reverse order, just install the new part following the instructions.
How to remove a generator on a Lada without air conditioning
If you do not have additional equipment installed, replacing the Priora 16 valve generator will be a little easier, since there will be more space under the hood.
- Remove the negative terminal from the battery.
- Remove the protection from the engine.
- Unscrew the nut on the belt tensioner (not completely, a maximum of four turns). Now you can turn it around by turning the screw a little. When it is loose enough, you can remove it.
- Remove the protective cap to later remove the terminal from the wiring harness. Now you can remove the wiring block.
- Remove the nut to remove the top mounting bolt, then do the same with the bottom mounting bolt.
- Remove the belt and then the entire generator.
Why does the alternator belt whistle on a warm Priora engine?
There may be several reasons why the VAZ-2110 alternator belt whistles. However, the first place in terms of frequency of occurrence is the wear and tear of the material from which it is made. The rubber stretches, loses its shape, and begins to slip.
Diagnostics is carried out visually, based on the degree of belt tension. If it sags and can be easily turned by hand (while the pulleys remain motionless), then the cause of the malfunction can be considered found.
Lada Priora generator installed on a car
The drive may not whistle constantly, but periodically whistle for some time after a cold start in winter. In general, if the situation returns to normal after warming up, no intervention is required. The fact is that the rubber from which the element is made becomes hard in the cold and does not adhere tightly to the surfaces of the pulleys. As it warms up, it takes on a working form and the whistling stops.
Tension with adjuster bar
Securing the generator using a strip
This method is used for older cars (for example, “classic” VAZs). It is based on the fact that the generator is attached to the engine using a special arc-shaped strip , as well as a bolt and nut. By loosening the fastening, you can move the bar with the generator relative to the engine to the required distance, thereby adjusting the tension level.
Actions are performed according to the following algorithm:
- unscrew the fastening nut on the arc-shaped bar;
- Using a pry bar, we adjust the position (move) of the generator relative to the engine;
- tighten the nut, fixing the new position of the generator.
The procedure is simple, it can be repeated if you were unable to achieve the required level of tension the first time.
Alternator belt tension
For the standard alternator belt on a Priora, the size may vary depending on the configuration of various drive systems. The generator drive with hydraulic steering uses a generator belt with power steering with a poly-V-ribbed pattern, which has the nomenclature 6РК1115 and a length of 1115 mm. The Priora engine without hydraulics is equipped with a belt with the nomenclature number 6РК742, the circumference of which is 742 mm. When a vehicle is equipped with climate control equipment, a generator belt with an air conditioner with the nomenclature number 6РК1125 with a working surface length of 1125 mm is used as a drive mechanism.
Unscheduled tensioning of the generator belt on a Priora is required when this rubber product stretches due to wear during operation or when the adhesion of the belt surface to the plane of the generator belt tensioner roller, other rollers and pulleys decreases. In this case, it is necessary to tighten the generator belt to restore the normal functionality of the power plant.
Direct tensioning of the generator belt is carried out using a standard set of wrenches and a special wrench for the roller. If the alternator belt whistles in your car, you need to tighten it to avoid breaking. To do this, we carry out the following set of repair work:
- Slightly unscrew the fasteners of the generator belt tensioner roller, making sure to hold the clip with a wrench.
- Rotate the cage part of the eccentric roller to tighten the alternator belt, which improves its tension. Next, tighten the tension roller fasteners.
- When operating correctly, the belt deflection in a basic version car should not exceed 10 mm.
- In a modification equipped with an air conditioner or hydraulic steering mechanism, significant effort must be made to tighten the alternator belt.
Generator malfunctions on Lada Priora
The problem with the whistling generator of the Lada Priora and the entire front-wheel drive line of cars usually lies in a collapsed front cover bearing. In this case, both the bearing itself and the belt slipping along the jammed pulley can make noise. The malfunction is determined “by eye”.
In some cases, alternator drive slippage may be caused by a misaligned alternator pulley or crankshaft pulley. The belt begins to move at an angle, touching the side surfaces. At the same time, even a new alternator belt will whistle. A breakdown can be determined by severe wear on the belt drive. The drive “eats” on the sides.
What to do in this situation? The solution depends on the identified malfunction. A loose drive should be tightened. Kalina cars and other front-wheel drive VAZA models have a tension bolt that allows you to adjust the degree of belt tension.
We change the alternator belt on a Lada Priora car ourselves
The new version of Lada-Priora really attracted domestic car enthusiasts. But, like any other car, it needs timely service. For example, the Priora alternator belt must be changed after a certain mileage, and its condition must be checked regularly.
Lada Priora differs from previous models in comfort and improved handling. But the main differences are under the hood. Everything here is located differently than in previous models. As a result, not all specialists even know how to replace the belt and tension it. New models are equipped with additional systems. Air conditioning and power steering (EUR) added comfort, but such changes complicated the approach to the generator.
In versions with power steering or air conditioning, the belt is longer when compared with the regular version of the car. As a result, we will look at how the change occurs in the first and second cases on models 16 and 8 valves.
In what cases does a car need to be replaced?
Typically, the need to replace the alternator belt appears due to wear during its use and deterioration of adhesion to the roller surfaces. Also, tightening or changing is necessary if, as drivers say, it starts to whistle.
This video shows the generator drive whistling.
The instructions that come with the car indicate that the alternator belt should be replaced every 60 thousand km. If the car is used infrequently, then replacement should be carried out every two years.
Step-by-step instructions for replacing without power steering
Do-it-yourself replacement work on a Priora without power steering (EUR) and air conditioning is more convenient to carry out in the inspection pit.
Tools
Stages
- First, loosen the nut with a wrench of the appropriate size.
- Unscrew the adjusting bolt.
- We move the generator towards the power plant.
- Remove the right front wheel.
- We remove the fender liner and get access to the old belt.
- We replace it with a new one and do not forget to tighten it.
- Checking the tension. It should not be weak, but tightening it on a model with power steering (EUR) is also dangerous. The generator bearings may be the first to suffer.
The nut that needs to be loosened. Unscrew the bolt. Install a new one.
Replacement instructions with power steering
Since the power steering pulley in this modification is at a low height, the creators ran the generator belt around the engine mount. This makes it a little more difficult to do the DIY change.
Tools
Stages
- Use WD40 to moisten the bolts that secure the motor mount and bracket. These bolts need to be moistened with liquid
- After about a quarter of an hour, you can begin to unscrew the bracket nut.
- Let's jack up the wheel.
- Next, we place some object under the motor and remove the wheel.
- We lower the car a little.
- Unscrew the tension roller.
- Bend the belt.
- Now you can unscrew the bolts that secure the pillow. These bolts need to be unscrewed
- Next, we lower the car so that the engine begins to hang out.
- The cushion moves towards the motor. Moving the pillow
- Now you can change.
- Next, we lift the car with a jack so that the power unit lowers. We do this carefully so that the belt and pillow do not move.
- Tighten the bolts and nuts.
- We put on the wheel and lower the car.
At this point, work on the model with power steering can be considered completed.
Tensioning and checking the belt
The belt in Lada Priora is tensioned as follows:
- The first step is to loosen the roller nut; to do this, the cage is held with a wrench.
- We rotate the roller cage by rotating the key.
- We tighten the roller nut.
- The tension is checked on the longest section between the pulleys.
- When pressed, the alternator belt should bend approximately 10 millimeters.
- On a model with power steering, the tension should be a little tighter. You can also test it by ear. If the tension is insufficient, a whistle will be heard and you need to tighten it. If it is too much, you will hear the hum of the bearings and the tightening will need to be loosened. Roller key
The work is not difficult, but a little troublesome due to the need to dismantle some components in models with power steering and air conditioning with your own hands, but it is doable even for a novice car enthusiast. But calculate how much such work costs at a service station and whether it would be better to use this money for other purposes.
Video “How to quickly and correctly replace”
This video shows how a shift is carried out on a Priora with 16kL power steering.
Replacement
Required Tools
We will prepare everything necessary for the repair:
- Lubricant WD-40.
- Keys to 19, 17.
- Two copies of the key for 13.
- Head for 10 and 17.
- Jack.
- Special key for tensioning.
- Lever arm.
The alternator belt on a modified Priora with air conditioning and power steering runs around the engine mount. The designers decided to carry out such a modification for the Priora 16 due to the fact that the power steering pulley is installed low. Hence there are additional steps that you need to be aware of.
Step-by-step instruction
- First of all, we need to wet the bolts that hold the bracket and motor mounts. Wait 10-15 minutes for the lubricant to spread over the surface;
The replacement is complete, all that remains is to adjust the alternator belt with power steering and air conditioning. The new consumables on the Priora will have to be tightened several times until you get the required tension. If the component whistles or there is a hum coming from under the hood, then it is necessary to carry out repeated adjustments until these defects are eliminated.
How to get rid of a whistling alternator belt on a Lada Priora - step-by-step instructions
To carry out the manipulation, loosen the fastening bolts, then tighten the adjustment bolt a few turns, achieving optimal tension. A correctly tensioned drive should bend no more than 1 cm under hand pressure. If this cannot be achieved even with the bolt tightened to maximum, the belt should be replaced.
If the pulleys become oily, the drive should be removed and the inside should be wiped with alcohol or gasoline. Pulleys are cleaned in the same way. If the belt has been in an oily state for a long time, it is recommended to replace it, since fuels and lubricants destroy rubber. Also, current seals and gaskets must be changed.
If, as a result of diagnostics, it was revealed that the front bearing of the generator is whistling, it is replaced. To do this, remove the unit from the car, dismantle the front cover and, after removing the faulty bearing, press in a new one. This is also done when the pulley is skewed and the generator shaft is jammed.
Source
Tension check
Tension checking process
Now let's look at the issue of checking tension. It’s worth mentioning right away that the force values are unique and depend not only on the make and model of the machine, but also on the generators and belts used. Therefore, look for the relevant information in the manuals for your car or in the operating instructions for the alternator or belt. This will also be influenced by the presence of additional equipment installed in the car - power steering and air conditioning. In general terms, we can say that if you press the belt on the longest section between the pulleys with a force of about 10 kg, then it should deflect by approximately 1 cm (for example, for a VAZ 2115 car, when applying a force of 10 kg, the belt deflection limits are 10 .15 mm for generators 37.3701 and 6.10 mm for generators type 9402.3701).
