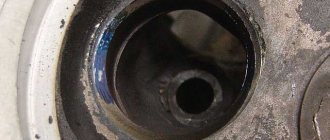
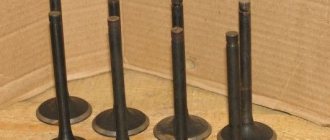
Valve seat - a small ring with a bevel on the inner surface.
It is installed in the holes of the cylinder head intended for installing valves and distilling the air-fuel mixture and exhaust gases through them. The part is pressed into the cylinder head at the factory.
Performs the following functions:
- hole tightness;
- transfers excess heat to the cylinder head;
- provides the necessary air flow when the mechanism is open.
Replacing the valve seat is required when it is not possible to restore its tightness using mechanical processing (numerous treatments in the past, burnout, severe wear). You can do this yourself.
Part repairs are performed when:
- plate burnout;
- after replacing the guide bushings;
- with a moderate degree of natural wear;
- if the tightness of the connection between the ring and the plate is broken.
Correcting worn and damaged saddles at home is done using cutters. In addition, you may need a welding machine or a powerful gas torch, a standard set of wrenches necessary for dismantling and disassembling the cylinder head, lapping paste, and a drill.
Signs and causes of clutch failure
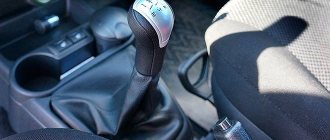
The VAZ 2108, 2109, 21099 clutch consists of a basket, a pressure bearing, a drive and driven disk. The main signs of a clutch malfunction are clutch slipping and incomplete disengagement:
- When switching off is incomplete (the pedal is pressed), there is difficulty shifting gears with the engine running, noise and crackling noises when changing gears, and large free play of the clutch pedal.
- When the clutch “slips” (the pedal is released), a burning smell may be felt in the cabin from the burning of the clutch disc linings, the car’s dynamics will deteriorate, the engine may overheat, and fuel consumption will increase.
Most often, the cause of a breakdown of the VAZ 2109 clutch is improper operation of the car. For example, if the car “sits down” in the snow and you continue to accelerate hard, or really like to start with slipping, all this shortens the life of the clutch.
In addition to the clutch disc itself, the release bearing can also fail - it serves to smoothly engage and disengage the clutch. When the release bearing wears out to the limit, you can hear a characteristic squealing sound - this is a sure sign that the bearing needs to be replaced. The cause of clutch failure may also be a breakdown in its drive mechanism, for example, a break or jamming of the clutch drive cable, a breakdown of the lever system, a fluid leak from the hydraulic drive if the clutch is hydraulic, or other similar breakdowns in the drive.
By the way, when replacing the release bearing at a service station, they may advise you to also replace the clutch disc. Usually, if problems begin with the clutch, it is better to replace all these parts, because replacing the clutch is very difficult: you need to remove the gearbox. But if someone wants to save on this, then all clutch parts can be purchased separately.
To work you will need the following:
- wrenches 8, 10, 13, 17 mm;
- torque wrench, 8 mm socket;
- jack;
- container for draining oil;
- inspection hole or lift.
- flat screwdriver, hammer.
When removing or installing the gearbox, do not rest the input shaft of the gearbox on the clutch pressure spring petals, so as not to damage them.
Oil leak due to bad piston group
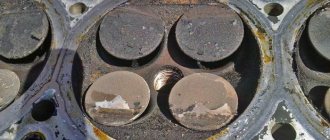
When the engine is completely covered in oil stains, and cleaning the ventilation does not produce results, most likely the piston rings are broken or “seized.” In this situation, only repair will help, but first you need to determine whether the piston group is really to blame.
Signs of a faulty cylinder-piston group are as follows:
- the engine idles unstably and does not develop the required power;
- There is bluish smoke coming from the muffler pipe, it becomes more noticeable during throttle changes;
- smoke is also clearly visible if you remove the oil filler cap;
- Oil smudges appear not only in the valve cover area, but throughout the entire engine at the junctions of its parts.
In this case, repairs should begin by removing the cylinder head. If there is no wear or scoring in the cylinders, you can try changing the piston rings. If the cylinders are damaged, the engine must be removed and overhauled.
Replacing the clutch on a VAZ 2109/21099 without removing the gearbox
Replacing the VAZ 2109/21099 clutch without removing the gearbox is quite difficult. You will not find instructions or recommendations on this topic in the car's owner's manual. These recommendations are based on the experience of car enthusiasts who share their experience of replacing the clutch.
The main problem when replacing a clutch is that not every motorist has an overpass, a pit, and especially a lift, and it is necessary to make sure that the massive gearbox does not fall to the ground. But lifting it is problematic, since it is impossible to crawl under the car with it.
All steps for removing the gearbox are almost the same as the instructions above, with the exception of some nuances:
- Purchase two bolts from the upper arm of the classic front suspension from the store. Their threads are exactly the same as those on the bolts that secure the box and the engine block together.
- Screw them in from above, only after that, with a small crowbar or screwdriver, we begin to disconnect the nodes. After moving away, the rear part of the box will rest on the transverse rod, and a gap of about 15 centimeters will form between the clutch housing and the flywheel.
- The release bearing is removed through the resulting gap and the bolts on the basket are unscrewed.
But the installation is slightly different from the process shown in the instructions:
- Place the new release valve in its place. Then a disk is installed on the flywheel and a basket on top of it.
- Just tighten the bolts a couple of turns, but do not overtighten!
- Carefully begin to slide the input shaft onto the splines in the disc.
- Then we move the box back and tighten the bolts on the basket. The basket fastening bolts are tightened only after the box is installed in its place.
- After this, you can install the gearbox and tighten the bolts on it.
When replacing the clutch without removing the gearbox on a VAZ 2109/21099 car, there is no need to center the disc!
Axle shaft seal VAZ 2107 number
Dear visitors of the “Cars” website! We will be very grateful for your comments on the video clip “Axle seal VAZ 2107 number”; registration is not required for this. We also ask you to let us know if you have any problems playing the video.
tormoza nado bylo pomyt benzinom i kistockoi :
There are a lot of similar videos, they are not interesting. I watched the video from Oleg, it was very interesting and I became interested in repairing the car myself:
Is there one seal or on both sides?
It’s obvious that this is not the first time you’ve changed the oil seal... but damn, was it really difficult to tap the mudguards and knock the snow off the arch? It’s not pleasant to sit in this melted puddle of shit and dig in the dirt... It’s better to hammer the oil seal into the seat with a pipe of the same diameter as it, otherwise it may not press evenly. I don’t know how, but I wipe the seat seat dry and lubricate it with sealant.
With this amount of oil, this wheel will not slow down all winter and all spring. During emergency braking on a winter surface without the clutch depressed, due to the non-braking of one wheel, it can spin through the differential so much that before you have time to react, it will turn 180 degrees, and depending on your luck.
very useful video, everything is accessible and clearly explained and shown
I unscrewed these 4 bolts, but the axle shaft cannot be removed
The brake drums are stuck, can you tell me how to remove them?
Doesn't look like butter. It looks like a brake. By the way, my oil seal cracked and everything was covered in oil. It slows down with oil, and how. The pads stick. The wheel blocked at the slightest braking, although I thoroughly wiped off all the oil with a rag from both the pads and the drum. I had to take it apart and wash it again. I came across some acetone soap.
Hello, can you show me how to replace the front oil seal on the third engine?
But it was impossible to remove the mess from the fender liner... everything flows straight onto your hands and onto the pads... I never do that... to pick around in the dirt...
but a rubber band is still needed, like a seal before putting the axle shaft back
They say that before you remove the axle shaft, you need to set the marks so that you can put it back exactly as it was, otherwise there will be vibration. Any opinions???
Thank you
Excellent video, but at the end, when tightening the wheel bolts... we pull all the way, I’ve already changed two axle shafts, it seems like I’m not strong, but the thread breaks right away. And I can’t even count how many bolts I’ve torn off in 10 years... I wish I had a Dino key a long time ago bought it So pull it carefully
after replacement, oil still continues to flow, everything was pressed in exactly, the assumption is that there is a gap in the cavity where the oil seal was pressed in. How to solve this problem? maybe someone knows
bit nado rovnomerno, inache budet tech , kak na video
Why didn’t I wash everything from oil there and put a drum in?
Handsome man. I'll go try it myself. In the service they want 1000 for work:
try hammering it in with a mallet, it’s better and easier, you can hit the top of a pointed mallet with a hammer. verified
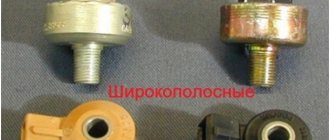
Which clutch bearing should I install?
The original clutch bearing number is 2108 1601182.
Analogues:
- Pilenga PC-P 2108 — 360 rub.
- Luk 500 0439 20 — 1156 rub.
- Fenox TP2116C3 — 345 rub.
1. Remove the “negative” terminal from the battery “4”, remove the connector from the mass air flow sensor (MAF) “2”, loosen the clamp securing the corrugation to the MAF “3”, remove the air filter housing “1” from the car.
2. Remove the clutch cable from the clutch fork. Loosen the two nuts securing the cable to the bracket on the gearbox.
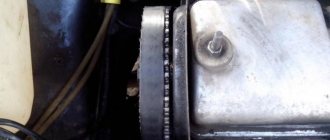
3. Remove the clutch protective cover. Disconnect the ground wire and the top dead center sensor from the clutch housing. Disconnect the wires from the reverse light switch. Drain the oil.
4. Unscrew the 3 bolts securing the bracket to the body. Unscrew the nut securing the arm extension.
5. Jack up the car. We remove two bolts “1” and disconnect the ball joint of the suspension arm from the steering knuckle. Unscrew the nut “2” securing the brace to the suspension arm, and remove the longitudinal brace together with the lever.
6. Remove the wheel, unscrew the hub nut and unscrew the fastening of the ball joint to the steering knuckle, then remove the CV joint from the bearing hole.
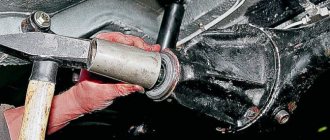
7. Having rested the pry bar against the gearbox housing, we press the internal drive joint from the side gear, to do this we sharply hit the body of the internal joint with a hammer. We knock out the hinge from the side gear.
8. Fastening the ball joint without driving the front wheel.
9. Loosen the clamp and disconnect the gear shift rod from the gear selection hinge. It is also necessary to support the engine, otherwise it may drop too low and tear off the interior heater hoses.
10. Having unscrewed the bolts securing the rear suspension support of the power unit, remove the suspension bracket from the eyes of the body spar.
11. Using a 17mm wrench, unscrew the nut and remove the bolt of the left engine mount. Unscrew the three starter mounting nuts and remove the starter.
12. Using a 19mm wrench, unscrew the three bolts and one nut securing the clutch housing to the cylinder block, remove the gearbox from the engine and remove it.
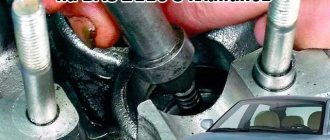
14. Using an “8” spanner, unscrew the six bolts securing the clutch housing to the flywheel. To loosen the bolts easily, tap their heads with a copper hammer. You can also use a 8mm socket to loosen the bolts.
15. Remove the driven and driven clutch discs. We check the degree of wear of the friction linings. If the rivet heads are recessed less than 0.2 mm, the surface of the friction linings is oily or the rivet joints are loose, the disc must be replaced. Cracks or mechanical damage to parts of the driven disk are not allowed.
16. If a visual inspection reveals loosening of the rivet joints of the clutch basket parts and the drive disc, then the clutch drive disc assembly should be replaced.
17. Lubricate the release bearing seat on the shaft, as well as the clutch guide forks, then install the bearing.
18. When installing the clutch, we orient the driven disk with its protruding part towards the drive disk and insert the centering mandrel.
19. We insert the mandrel into the hole in the crankshaft and secure the clutch drive disc in this position, tightening the bolts evenly (one turn per pass). We tighten the bolts no more than one turn each so as not to deform the flange of the clutch drive disc. We assemble everything in reverse order.
Valve cover repair kit CS20 PU, VAZ 2108, kit
- Engine Crankshaft
- Flywheel
- VAZ cylinder head
- Sports camshafts
- Sport timing valves
- Cylinder head components
- Belts | Timing gears
- Gaskets | Oil seals
- Intake system
- Throttle valve
- Clubturbo pistons
- TDMK pistons
- Federal Mogul pistons
- Piston rings
- Connecting rods
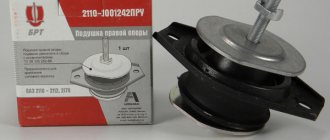
- Engine mounts
- Inserts for VAZ engines
- ACL earbuds
- Oil catchers
- Oil crankcase
- Oil pump
- Miscellaneous
- Turbo Turbo kit
- Turbochargers
- Turbo manifold
- Bypass valves
- Westgates
- Intercooler for VAZ
- Intercooler kit
- Piping kit (air ducts)
- Turbo parts
- Adapters for installing an oil cooler | sensors
- Straight pipes
- Blocking
- Vacuum booster
- Clubturbo suspension
- Silencers for VAZ
- Air temperature sensor
- Filler necks
- Moto kits Turbo
- Adapters for installing sports steering wheels
- Keychains
- Bumpers tuning for VAZ
- Hoses | tubes
- Thermal insulation
- home
- Catalog
- Engine
- Gaskets | Oil seals
- Valve cover repair kit CS20 PU, VAZ 2108, kit
Valve cover repair kit CS20 PU, VAZ 2108, kit
Valve cover gaskets and bushings for VAZ Samara, Samara 2, 110, Kalina, Kalina 2, Priora, Granta cars equipped with an 8 valve engine. The gasket and bushings are made of high quality heat-resistant silicone. Color: blue. Manufacturer: CS-20. The parts have high wear resistance. Manufacturer's warranty: 3 years or 100,000 km.
Specifications:
Typical breakdowns
The clutch can fail for several reasons:
- The surfaces of the friction linings on the driven clutch disc have worn out, or defects or cracks have formed on them;
- Diaphragm springs are worn out;
- There is wear on the clutch flywheel;
- The release disc blades are worn out or broken;
- The release bearing is broken or worn.
To find the reasons for the failure of the clutch, you will have to disassemble it. But don't be afraid of this process. Even beginners can disassemble and return the unit to functionality if they study the instructions, design, and watch visual videos.
Advice
For those who have not removed the bearings from the seat. In general, all bearings are pressed into place at the factory. In garage conditions, there is no press; in addition, equipment (beds, tables with stops, mandrels) is also needed. Therefore, to remove the bearing by blow, you need a very massive hammer. So that the blow is massive at a low speed of movement of the hammer. Even with a strong blow, the bearing cannot be removed with a light hammer - the blow will be elastic.
The drive seal is now clearly visible. To remove the oil seal, use a large flat screwdriver point-blank, tapping it diametrically in a circle.
Now be sure to inspect and clean the seat of the right drive oil seal with a rag. If it has holes or corrosion, in addition to cleaning, it is advisable to use a seating lubricant for the new oil seal.
Everything is ready for assembly. We press the axle shaft seal into the seat using a mandrel or head of suitable diameter.
Assembly is carried out in reverse order.
On all “classic” models (VAZ 2101-07), replacing the oil seals of the right and left drives occurs in the same way.
Clutch selection
When choosing a clutch kit, you should focus not only on your available budget. By saving or buying a fake, you risk getting even more problems in the future.
Today there are several main manufacturers whose clutches should be purchased for the VAZ 2109.
| Manufacturer | Peculiarities |
| VIS | This is a stock clutch that the VAZ 2109 is equipped with from the factory. If there are laser markings on the discs, this is definitely not a fake. Plus, the company allows you to send an SMS indicating an identification code. If it is a fake, you will be notified accordingly. Not bad quality, but nothing special can be said about them. |
| Valeo | A French manufacturer, which is actively counterfeited on the domestic market. To catch fraud, pay attention to the cost and quality of components. Although the brand is from France, Valeo couplings can be produced in Italy, Spain, and South Korea. Good quality components ensuring smooth, easy operation. Perfect for female drivers. If you use the clutch correctly, it will last for about 150 thousand kilometers. The flywheel is almost eternal, and the discs are not afraid of overheating within acceptable limits. |
| Luk | A German company that has proven itself well in its homeland and has also earned a lot of praise among Russian motorists. They dampen vibrations perfectly, and real Luk clutches always have an element for damping vibrations of the pressure and driven disk. |
| Kraft | You can only find negative reviews about Kraft couplings from competitors. An impressive part of the sets under the Kraft brand, presented in Russia, were produced in Turkey, but under a German license. The kit includes a soft release bearing that performs well even under heavy use. The flywheel is very durable. On average, the clutch can withstand 150 thousand kilometers. But if you don’t spare the clutch, the service life will be significantly reduced. |
Regardless of the quality of the selected kit, if it is installed incorrectly or due to rough operation of the vehicle, the life of the clutch will not be able to reach those declared by the manufacturer. Therefore, drive your car accordingly.
Valve cover gasket Lada Granta / Kalina-2 / Priora, Datsun
- Description
- Reviews (0)
- Question answer
Valve cover gasket for Lada Granta / Kalina-2 / Priora, Datsun for 8-cl engines. Material: white silicone.
Includes 1 gasket and 2 valve cover bushings.
We recommend watching
Valve cover bushing BRT Lada Granta / Kalina-2, Datsun (2 pieces) ..
New items
Body reinforcement for cars Lada Kalina, Kalina-2, Granta, Datsun from the manufacturer TechnoMaster is designed using ma..
Set of rear drum brake pads for Lada Vesta cars. The pads are produced under the LECAR brand (the company's own brand..
Set of front brake pads for Lada Vesta (all versions), Lada Largus (all VAZ engines, as well as Ren..
Set of 2 mudguards for the rear wheels of Lada Vesta (sedan, SV, except Cross versions). Mud flaps protect against dirt emissions,...
On a new car, the doors are fixed in the extreme and middle positions, but after a few years the fixation is lost. The reason is wear and tear..
On a new car, the doors are fixed in the extreme and middle positions, but after a few years the fixation is lost. The reason is wear and tear..
LED license plate light. Installed to replace the standard backlight. Applicability: Lada Kali..
Winter thermocouple LUZAR with an opening temperature of 92°C for thermostats: Granta (all engines) Kalina-2 (all engines..
Original factory washer reservoir for Lada Vesta cars (in any body). The kit includes a tank, lid and fi..
M6 flange mounting bolt. Used in Lada Vesta, Granta, Kalina-2, Datsun and Largus cars (with VAZ engines) for fastening..
Connector for connecting the handbrake limit switch of a new type on Lada Vesta and Granta FL cars. ..
The cap for the Lada alloy wheel is dark gray with an X pattern. Suitable for alloy wheels Lada Largus Cross, Granta FL, XRAY. Specialist..
The cap for the Lada alloy wheel is silver with the inscription CROSS. Suitable for alloy wheels Lada Largus Cross, Granta FL, XRAY. ..
Left front bumper cover (installed instead of PTF) for Lada Granta FL. The plug will be needed to replace a damaged one.
Right front bumper cover (installed instead of PTF) for Lada Granta FL. The plug will be needed to replace a damaged one..
This item is shipped on prepaid basis only (not available for orders with payment on delivery, i.e. cash on delivery). ..
This item is shipped on prepaid basis only (not available for orders with payment on delivery, i.e. cash on delivery). ..
Standard factory lower bumper grille for Lada Granta Sport. ..
Heater control panel (backlight light guide) Lada Kalina, Kalina-2, Granta (except FL) for cars with air conditioning. ..
Heater control panel (backlight light guide) Lada Kalina, Kalina-2, Granta (except FL) for cars without air conditioning. ..
- Guarantees
- About Us
- Payment Security Policy
- Regulations on the cumulative discount system
- Shipping and payment
- Contract of sale
- Personal data processing policy
- Write to us
- Site Map
- Personal Area
- History of orders
- Our partners
- FAQ
- Manufacturers
- Articles and news
- Checking order status
- Didn't find the product you were looking for? Leave a request!
st. Dzerzhinskogo, 70, entrance 3, Mon-Fri, from 10 to 18 (Samara time)
Phone: +7-8482-90-33-63 (online store with delivery of orders)
Phone: +7-8482-44-42-33 (pickup and retail store)
Repair work
If you decide to do everything yourself, follow the following sequence of actions.
- Drive onto an overpass or pit. This will make it more convenient for you to work.
- Raise the front of the car using a reliable jack and securely fix the nine.
- Remove the wheels.
- Disconnect the clutch housing ground and clutch cable. Next you will have to remove the transmission.
- To do this, remove the starter by disconnecting the wires, terminals and unscrewing the three mounting nuts.
- Disconnect the speedometer cable and reverse cable.
- Remove the brace fastenings to the suspension arms and move them to the sides.
- Disconnect the ball joints from the swing arms. To do this, you need to remove the cotter pin, unscrew the nut, and knock out the support pin. Then the two nuts are unscrewed and the hinge is disconnected.
- Using a pry bar, press out the tip of the inner CV joint. Be sure to plug the hole formed in the gearbox using improvised means, otherwise oil will begin to pour out of the gearbox.
- Remove the lower clutch housing protection. There are only 3 bolts holding it in place.
- Make supports from bars, bricks for the box and engine.
- Remove the rear supports.
- Unscrew the remaining fasteners and pull the gearbox horizontally. Be careful not to deform the pressure spring lobes with the input shaft.
Removal and inspection
- When unscrewing the mounting bolts, it is better to secure the driven disk with something. A regular large screwdriver will do.
- Be careful not to give out the driven disc and remove the clutch assembly.
- Examine the current condition of the parts. If mechanical damage is noticed on them, we recommend replacing them immediately.
The next step is to check the condition of the parts.
| Object to be checked | Peculiarities |
| Release bearing | Try to crank it up. If crunching or extraneous sounds occur, the part must be replaced. |
| Driven disk | Check it for signs of wear and damage on rubbing surfaces. Also, the rivets should be located at a depth of at least 0.2 millimeters, and the springs in the sockets should only be solid and tightly installed. Otherwise replacement. |
| Basket | This is the pressure plate. Check it for damage or cracks on the working surface. Plus, the condition of the flywheel is checked. |
| Diaphragm spring | If there are cracks here, the petals dangle or are located in different planes, the part goes to scrap, and a new one is installed in its place. |
It is quite rare that individual components of the clutch change independently of the others. Mostly repairs involve replacing the assembly, which includes the pressure plate, release bearing and clutch driven disc.
Assembly of the unit is performed in reverse order. Just make sure that you choose really high-quality parts for replacement. For example, a normal quality clutch disc will cost about 1,000 rubles today. We do not recommend taking cheaper options.
Nuances of machining
The procedure ends with machining of the new element. Here you should cut the appropriate chamfer. It is best to use a special machine for such purposes. This way it is possible to achieve maximum accuracy.
The cutter is firmly centered and the processing process begins. It is important to understand that it is impossible to achieve the same accuracy using hand cutters.
But in the absence of other options, we have to act with cutters. You will need to cut 3 edges. These are external, internal, and also upper central. The last one is the narrowest. It is with this that the valve comes into contact.
If you are in doubt about the accuracy, as well as the quality of your own workmanship, find a metalworking shop nearby. Even a regular milling machine will do. And the result will probably be better than using a roller cutter. But here the decision is yours.
Boring is an objectively complex task that requires maximum precision and accuracy. Therefore, such work is carried out independently solely at your own peril and risk. The best solution is to seek qualified help.
Has anyone had to change valve seats? What was the most difficult thing? Did you manage to achieve the desired result? Which way to solve the problem do you think is optimal? With your own hands or through a workshop?
Other ways to adjust the roller
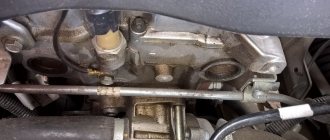
If you look at the standard and proper operation of the timing belt, then the tension roller should be located exactly in the middle of the pump and camshaft gears. However, some VAZ-2114 owners, in order to avoid the belt slipping, pull the roller to the side, closer to the camshaft, thus the belt, receiving the greatest bend in its upper part, is more firmly fixed in its place.
All tension roller components for VAZ-2114.
Not a tricky way to adjust the belt
There is another simple way that helps VAZ-2114 owners avoid the belt slipping by adjusting the position of the tension roller.
In order to fix it in this position, it is necessary to pre-make a blank in the form of a half washer made of aluminum (an aluminum can works well - approx.), which must be fixed between the spacer ring and the cylinder block.
Such a need can arise only if the spacer ring has differences in its thickness. You can take its measurements yourself, using only a caliper.
Camshaft and crankshaft
New camshaft gear
Also, judging by the numerous reviews of “our tubers”, it is possible to eliminate the occurrence of timing belt slippage after replacing the camshaft and crankshaft gears.
However, such a procedure can bring results if the car’s mileage on old spare parts is at least 100 thousand kilometers. Otherwise, such a replacement may not bring the desired result.
Rust on the crankshaft gear
Crankshaft gear rusted
This situation arises as a result of the lack of dirt protection. The gear rusts and begins to work incorrectly.