Waxing the body or pouring magic additives into the oil or fuel tank does not mean taking care of the condition of your car. Wax and additives can be not only not useful, but also harmful, and in the case of domestic front-wheel drive VAZs, it is much more useful to check the condition of the brakes and engine before each trip. However, there is one thing that is often forgotten and then regretted. This is the drive belt of the VAZ-2114 generator. Let's take a closer look at it.
FAULTS IN THE GENERATOR SET DRIVE
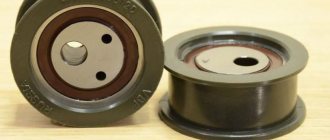
The drive, which at first glance seems simple in design and low maintenance, nevertheless plays an important role in ensuring the energy independence of the vehicle. During operation, it is not only subjected to mechanical tension, it must also withstand possible chemical and thermal effects.
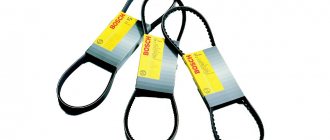
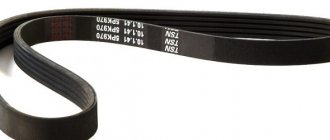
The VAZ 2114 generator belt, which is installed in the drive, has a length of 698 mm. Such products are subject to increased requirements. The car plant installs products from a Russian manufacturer, but products from GATES have proven themselves well.
There may be several signs of malfunction, but the most common are:
- Clearly audible noise and whistling of the VAZ 2114 generator belt;
- Belt drive slippage. This problem can arise not only from weak tension, but also from the ingress of coolant or oil. The latter leads to the destruction of the belts;
- The tension is too strong, which at best ends in a gust, and in the worst case – failure of the generator bearing.
This rubber product does not take up much space, so find a “secret” place for it in the car, and carry a spare belt with you.
Also a sign that you need to tighten the alternator belt will be dim headlights, a blinking warning light on the instrument panel, or failure of other electrical appliances. The whistling sound of the generator set can be easily eliminated if you simply tighten the VAZ 2114 generator belt, which has become stretched.
Introduction
Most drivers are well aware that to drive a car, it requires not only fuel, but also electricity. To independently produce electricity, the car is equipped with a generator. It should be noted that the generator drive is of great importance in the operation of the entire car. It is with its help that torque is transmitted from the crankshaft to the power-generating unit. And it is the belt, whether it is torn, weakly tensioned or of the wrong size, that will cause the car’s battery to receive less power while driving and subsequently completely discharge and become unusable.
What is needed to replace the alternator belt on a VAZ-2114
On a VAZ-2114 car, replacing the alternator belt takes place quite quickly and without the use of special tools. Depending on the replacement method, we will select the necessary tool, and work on replacing the alternator belt on a VAZ-2114 can be done either from under the hood or from the wheel arch.
In terms of time, both methods are almost identical, so if the work is carried out in Murmansk and in December, then it’s easier to do everything from under the hood, and if it’s warm and dry outside, then you can slowly remove the wheel, it’s a little more convenient, or you can replace the belt from -under cars.
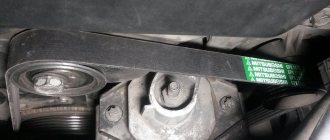
New alternator belt
Apart from the standard tools and a new belt, you won’t need anything else, except for unforeseen circumstances, such as rusted fasteners, but this happens extremely rarely. In these cases, either WD-40 spray or brake fluid will come in handy. If everything is ready for replacement, all that remains is to install the car on a flat surface, and if we change the belt by removing the right front wheel, then a jack with a wheel wrench will also come in handy. Now that's it, let's go.
Belt removal algorithm
The replacement procedure itself will not create any difficulties, but you should adhere to some general rules, and here is the first of them.
God protects those who are careful, so when doing any work on the on-board electrical system, you need to turn off the power to the car. The easiest way to do this is using a ground switch, and if there is none, then you just need to remove the negative terminal from the battery. This will reduce the risk of an accidental short circuit.
>
Precautionary measures have been taken, the tool has been prepared, a new belt has been purchased. You can get to work
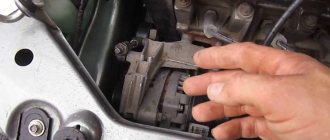
- For convenience, remove the side protection from dirt. Generator without side protection from dirt and water Side protection mounting bolt
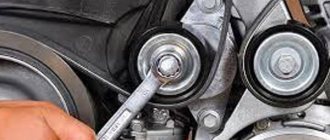
- Loosen the nut of the bolt securing the generator housing to the cylinder block.
This can be done from under the hood using a socket with a wrench, or from under the car with a regular spanner. Alternatively, you can remove the wheel, fender liner, engine mudguard and do all the work from the side. Loosen the nut of the bolt securing the generator housing to the cylinder block - Loosen the top nut securing the generator with a 13mm wrench. It presses the generator body against the guide rail. It is enough to unscrew it a few turns. Loosen the nut securing the generator to the mounting plate. Upper bolt securing the generator
- Release the tensioner mechanism until it stops.
You can loosen the generator and not completely, we will be able to remove the old stretched belt, but it is unlikely to install a new one. Therefore, it is better to release the generator all the way. We loosen the belt tension by rotating the bolt counterclockwise - We remove the old alternator belt and assess its condition before throwing it away. Its damage or traces of liquid can tell a lot about the condition of the cooling system and lubrication system. In addition, it is worth wiping the generator pulleys and the drive pulley on the engine before installing a new belt on the VAZ-2114. Condition of the old alternator belt Worn alternator belt
- Install the new belt on the engine in the reverse order.
Since the belt is new, we will tighten it in two stages. Having moved the generator to the cylinder block, install a new belt - Pre-tighten the belt. The factory recommends applying a force of 100 N (10 kg) to one of the belt branches, and it should bend no more than 10-15 mm. How they calculate these 100 N at the factory is a mystery to everyone, but an experienced motorist knows how much force needs to be applied.
Replacement
To change the belt, it is better to remove the front right wheel, hang the front part, remove the crankcase protection (standard or installed independently), then:
- Loosen the nuts securing the generator;
- Unscrew the adjusting bolt as much as possible;
- We move the generator as close to the cylinder block as possible;
- We remove the old belt and put on a new one.
Next, we adjust the tension and tighten everything. At this point the repair can be considered complete.
Source
VAZ 2114 generator bearing numbers
Once we were convinced that bearing replacement was inevitable, all that was left was to simply select the bearing and replace it. In general, everything is simple, but with the huge number of fakes that flood the market, it would not hurt to know the dimensions of the bearing so as not to get into trouble. Since there are only two ways to find out the dimensions of the bearing - remove the generator and measure it with a caliper, or ask knowledgeable people. Knowledgeable people say that: the front bearing of the generator has an internal diameter of 17 mm and an external one of 47 mm; the rear bearing has an inner race with a diameter of 15 mm, and its seat is 35 mm; The width of the bearing race of the VAZ 2114 generator is 11 mm at the rear and 14 mm at the front.
The front bearing should be marked 6302, and the rear bearing - 6202. The price of a generator bearing for a VAZ 2114 should not be higher than 220 rubles. Although, depending on your luck. And also, if you are too lazy to play with pressing the bearing out of the cover, as an alternative, you can buy a cover assembled with a bearing. It will cost no more than 400 rubles, and the replacement will be much more pleasant.
Right size
Another reason why the connection whistles may be an incorrectly selected belt size. But this, as a rule, becomes clear immediately after installation. Therefore, you need to know the size before going to the car market or store. In fact, there are quite a lot of sizes, as if the designers selected the length individually for each model.
Timing belt Contitech VAZ 2110 (16kl.)
Here are the main sizes that should fit the “ten”:
- If there is no power steering and air conditioning, take the size 742 mm;
- The VAZ 2110 generator belt with power steering is 1115 mm long;
- With air conditioning, even more – 1125 mm.
It is also possible that the size of Kalina or Priora will suit you.
Belt Contitech VAZ - 1119 Lada Kalina
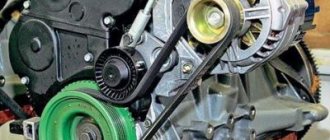
LAYOUT
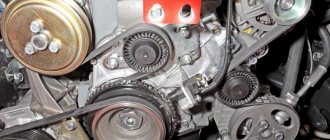
On this car, however, as on the VAZ 2113 and VAZ 2115 models, the power unit is located across the body. With this engine arrangement, if you open the engine compartment hood, the generator set will be located on the left side of the engine.
On this side of the engine, the timing gear drive pulleys, water and oil pumps are also installed. This drive is covered with a plastic cover, and the generator drive passes over it. The belt installation diagram is shown in the figure.
Alternator belt installation diagram
The figure shows the generator drive parts:
- Bracket for attaching to the engine block;
- Connection of the generator with the bracket;
- Tension screw;
- Generator set pulley;
- Axial screw;
- Drive belt;
- Generator pulley on the crankshaft.
The red arrow indicates the place to check the deflection of the belt drive, and the letter “A” shows its value. If the tension of the generator belt is done correctly, then the bending at the point being checked should not be more than 10 mm, under a load of 10 kg.
How to change it yourself?
You can replace the belt on an 8-valve VAZ 2114 with an injector engine yourself or by ordering the appropriate service at a service station. During the shift process, there are nuances that must be taken into account when performing the task. If you make mistakes and do not change the strap correctly, this can lead to rapid wear and breakage. Below are instructions for replacing the belt in a VAZ 2114 8 valve.
Tools
If you change the belt yourself, prepare the following:
- a set of open-end wrenches, you will need tools for 13 and 17;
- long flat blade screwdriver;
- 10mm ring wrench, you can use a ratchet head;
- key for installing the tension roller;
- wheel wrench;
- jack.
User Pro Remont shared a video that describes in detail the procedure for replacing the timing belt pulley and timing belt in a VAZ 2114 car.
Algorithm of actions
How to change a belt correctly:
- Drive the car into a garage with a pit. The surface on which work is performed must be level. Switch the gear selector to neutral position.
- Loosen the bolts on the front right wheel. Place this part of the car on a jack so that the wheel can be rotated.
- Open the hood of the car. Using a 10mm wrench, remove the three screws that secure the plastic strap protector.
- Using a 13mm wrench, you need to loosen the bolt that secures the tension roller. Remove the device.
- You can see a mark on the camshaft gear; it is made in the form of a rectangular protrusion on the edge. When performing work, it is necessary that this mark coincides with the protrusion located on the fastening of the strap casing. If these marks do not match, you need to turn the wheel until they match.
- Then find the rubberized plug installed on the top of the clutch housing; it is located to the right of the power unit’s BC. The part is carefully pryed off with a screwdriver and removed from the seat. Under the plug you can see the flywheel crown; there is a mark on this device. It should be opposite the triangular protrusion located on the left. If the marks do not match, then take a 17mm wrench and loosen the tensioner. Using a pulley removal wrench, turn the device counterclockwise to loosen the timing belt.
- When the upper part of the belt is removed from the gear assembly, take a 17mm wrench and turn the crankshaft until the flywheel marks are opposite each other. The flywheel itself must be secured in this position; to secure it, use a screwdriver and install it between the teeth. If you have an assistant, ask him to hold the tool to prevent it from turning.
- Now you can remove the right wheel. Unscrew the screws that secure the arch protection and dismantle it.
- Using a 17 mm wrench, unscrew the nut securing the generator set pulley. When unscrewing, make sure that the flywheel does not turn.
- Dismantle the generator pulley and remove it from its seat.
- Remove the timing belt from the crankshaft disc.
- Using a 17mm wrench, completely unscrew the tensioner pulley lock and remove it from its seat. If you loosen the fastening, the belt can be removed.
- Install the new product onto the crankshaft disc. When installing, make sure that the marks are not broken. Install the generator set drive pulley by first placing a strap on it.
- Place the product on the gear of the mechanism. Install the tension roller.
- The strap is being installed. During installation, the tension roller must be turned with a special tool purchased in advance at the store. If you don't have one, you can use two self-tapping screws and a screwdriver. Self-tapping screws are installed in the grooves, and a screwdriver secures them. Turning is done counterclockwise. Tension the belt using the tension roller and tighten the screw that secures the roller.
- It is necessary to set marks if they are lost during the work process. The installation procedure for all components is performed in reverse order.
Photo gallery
Photos of belt replacement are shown below.
Remove the screws securing the timing belt guard.
The mark on the camshaft gear must coincide with the mark on the housing mount
Loosen the strap tension roller by turning it counterclockwise
Remove the belt from the pulleys and install a new product
Unscrew the nut securing the generator shaft
Put on the new belt and tighten the roller
The importance of belt tension
The degree of belt tension in a given belt drive is a critical parameter that it is advisable for car owners to regularly monitor. With significant weakening, there is a risk of slipping along the pulley profile, because rotation is transmitted due to friction. Due to the low interference, the friction coefficient decreases, and the voltage generation is lower than the standard established by the car manufacturer. Due to low voltage, negative factors arise:
- lack of battery charging;
- the on-board electrical system experiences a voltage shortage;
- electrical appliances included in the circuit operate with increased load, which negatively affects their service life.
Important! Weak tension on the alternator belt causes it to slip, heat up due to friction, and lead to rapid failure due to loss of its performance characteristics. Motorists should also not tighten the seat belt too much.
Such actions will also not bring positive results. Great effort results in rapid wear and also often leads to the transmission breaking at an unexpected moment. A high tension force negatively affects the operation of the bearings, which must be installed on the generator output shaft and on the crankshaft output shaft. Exceeding the optimal load accelerates their production. Long-term operation in extreme conditions reduces their service life
Motorists should also not tighten the strap too much. Such actions will also not bring positive results. Great effort results in rapid wear and also often leads to the transmission breaking at an unexpected moment. A high tension force negatively affects the operation of the bearings, which must be installed on the generator output shaft and on the crankshaft output shaft. Exceeding the optimal load accelerates their production. Long-term operation in extreme conditions reduces their service life.
Tension using adjusting bolt
Adjustment with a bolt on a VAZ-2110
This method is more progressive and is used in most modern machines. It is based on the use of a special adjusting bolt, by turning which you can adjust the position of the generator relative to the engine.
The algorithm of actions in this case will be as follows:
- loosen the generator, its upper and lower fastenings;
- Using the adjusting bolt, we change the position of the generator;
- fix and tighten the generator mount.
The belt tension level in this case can be determined during the adjustment process.
What does tension affect?
Excessive force will lead to rapid failure of the generator bearings. A breakdown in the initial stage manifests itself as a hum from the generator. When replacing a belt, it is advisable to check the condition of the bearing. To do this, unscrew the pulley by hand. Rotation should occur evenly and silently. If a hum still appears during engine operation, you can remove the belt, and then for 10-15 seconds. start the engine. This way you can determine whether the noise is coming from the alternator bearing or timing rollers.
Insufficient tension leads to belt slippage and accelerated wear. The first sign of such a malfunction manifests itself as a squeak when cold or when wet. Excessive stretching will result in no charging
That is why it is important to know how to check the tension of the alternator belt
Types of construction
There are two types of generator drive:
- individual - the generator is connected to the crankshaft pulley by a separate belt drive. The tension is carried out using a special adjusting bolt, the rotation of which will move the generator away or closer. In other cases, the force is regulated by the position of the body;
- common - one service belt is used for the generator, crankshaft, cooling system pump and power steering pump. In this case, the force is set automatically by the tensioner, which is fixed with a special roller.
How to determine the correct tension level:
- Using a ruler, the difference between the resting and tensioned positions is measured. In this case, the applied force, the measuring point, as well as the standard difference are indicated in the vehicle repair and operation manual. The photo shows a diagram for a Chevrolet Niva. You can measure the tension at points A and B, that is, in the middle between the pulleys in the most convenient place for you. The measured value for point A should not exceed 10-15 mm, and for point B - 12-17 mm. The applied force (98.1 N, that is, 10 kgf) can be measured by tensioning the belt using a hand-held spring scale;
- twist test. If you do not have accurate information about tolerances, you can use the traditional method. It is considered that the generator belt is tensioned correctly if it cannot be twisted around its axis by more than 90º in the middle of the generator pulley and the crankshaft. The degree of effort exerted is difficult to describe, but with experience this feeling comes automatically;
- using a frequency meter. Owners of VAZ cars have probably heard about the Lada Norma-Pinar device. The device is designed to measure vibration frequency. The data obtained allows us to determine the degree of tension. To check, you need to bring the sensor to the belt, and then run your finger along it, like along a guitar string. The automaker regulates the normal frequency for each internal combustion engine model. This method is used infrequently, since purchasing a device for repairing a personal car is impractical. But such a device can be built with your own hands.
Tension
Let’s look at how to properly install a car’s alternator belt using the example of two types of construction:
- loosen the tensioner bolt by unscrewing the locknut. Rotating the bolt itself will tighten and loosen the belt. After setting the tension, secure the tensioner bolt with a wrench and tighten the locknut;
- loosen the bolts securing the generator to the brackets. Place a pin between the generator housing and the engine. Pull the belt using lever force, after which you can tighten the generator fastenings;
- in systems with a single service belt drive, tensioning can be carried out automatically. The design contains a special tensioner, to loosen it you need to loosen the roller bolt and then remove the tensioner using a wrench.
In the case of a ripple belt, start and stop the engine before making a final check of the tension level. This will ensure that the belt is in the correct position in the pulley grooves.
The performance of the internal combustion engine depends on the quality of the generator. After the engine starts, the device is the main source of electricity on board the car. However, in order for the rotor to rotate smoothly, it is necessary to properly tension the car’s alternator belt, otherwise problems with current generation will occur.
How to tension a car's alternator belt.
Tension with adjuster bar
Securing the generator using a strip
This method is used for older cars (for example, “classic” VAZs). It is based on the fact that the generator is attached to the engine using a special arc-shaped strip, as well as a bolt and nut. By loosening the fastening, you can move the bar with the generator relative to the engine to the required distance, thereby adjusting the tension level.
Actions are performed according to the following algorithm:
- unscrew the fastening nut on the arc-shaped bar;
- Using a pry bar, we adjust the position (move) of the generator relative to the engine;
- tighten the nut, fixing the new position of the generator.
The procedure is simple, it can be repeated if you were unable to achieve the required level of tension the first time.
What is a drive belt tensioner?
Drive belt tensioner (tension roller or drive belt tensioner) is a component of the drive system for attachments of an internal combustion engine; a roller with a spring or other mechanism that provides the required degree of tension of the drive belt.
The operation of the power unit and the ability to operate the entire vehicle largely depend on the quality of the drive of attached units - generator, water pump, power steering pump (if equipped), air conditioning compressor. A necessary condition for the normal operation of the drive of mounted units is the correct tension of the belt used in the drive - if the tension is weak, the belt will slip along the pulleys, which will cause increased wear of parts and a decrease in the efficiency of the units; Excessive tension also increases the wear rate of drive parts and creates unacceptable loads. In modern engines, the required degree of tension of the drive belt is provided by an auxiliary unit - a tension roller or simply a tensioner.
The drive belt tensioner is critical for the normal functioning of the power unit, so this part must be replaced in case of any malfunction. But before you buy a new roller, you need to understand its existing types, design and operating principle.
ABOUT GENERATOR SET DRIVE BELT TENSION
Even novice drivers perform this operation independently. Just keep in mind that for power units with a volume of 1.5 and 1.6 liters, it is produced differently, this is due to the fact that devices of different designs can be installed. First, let's look at how the alternator belt should be tensioned for a one and a half liter engine.
To perform this work you need to prepare the following tools:
- Key to "10";
- Key to "13";
- Rags and gloves.
The procedure for performing the operation in which you will do the tensioning yourself will be as follows:
- Place the car on level ground and tighten the handbrake;
- Next you need to open the hood of the engine compartment;
- At the bottom of the engine, on the right side of the car in the direction of travel, they find a generator;
- Loosen the nut on the bracket bar with a wrench to “13”;
- Use the key to “10” to set the desired degree of belt tension. To tension the drive belt, the screw must be turned clockwise, and if it is removed for replacement, then it must be turned counterclockwise to loosen it.
- Check the belt tension, which should be no more than 10 mm, with a load at the test site of 10 kg;
- Tighten the nut on the bracket bar with a wrench to “13”.
Now let us remind you how to properly tension the alternator belt of a VAZ 2114 with a 1.6-liter engine. You need to prepare the following tools:
- Wrench set to “17”;
- Key to "19";
- A small pry bar or a powerful screwdriver;
- Work gloves and rags for wiping generator components.
The VAZ 2114 generator belt is tensioned in the following order:
- The machine is installed on level ground and secured with a hand brake;
- The hood of the car's engine compartment opens;
- Find the mounting location for the generator set;
- Use a key set to “19” to loosen the nut of the lower axis of the generator;
- Using the key at “17”, release the upper nut on the tension bar;
Loosen nuts number 4 - Having installed the “mounting” between the cylinder block and the generator, move the device to the front of the machine to tension the drive belt;
- Check the tension, and if it corresponds to the norm, tighten the lower nut on the axle with a wrench to “19”, and then tighten the upper nut with a wrench to “13” - on the tension bar.
In this case, the main condition is not to overtighten the belt, in order to avoid failure of the generator bearings.
As can be seen from the above text, there are no difficulties in servicing the drive belts of generator sets. For this type of service there is no special need to contact auto centers. The cost of repairs at a car service can range from 200 to 300 rubles. We can say with great confidence that for such “pennies” they will not contact you, but they will definitely impose some other operation.
Read this article several times, prepare the necessary tools, and feel free to get to work.
Finally
Regardless of which method you used to adjust the position of the generator, after the procedure you need to turn the crankshaft 2-3 times using a wrench, and then make sure that the tension level of the hanging belt has not changed. We also recommend driving a short distance (1...2 km), and then checking again.
If you have not found information about the tension level of the alternator belt or cannot perform this procedure yourself, contact a service station for help. If the adjusting mechanisms are set to the extreme position and the belt tension is insufficient, this indicates that it needs to be replaced. As a rule, the mileage of a car between belt replacements is 50...80 thousand kilometers, depending on the model and brand of the car, as well as on the material from which the belt is made.
The replacement procedure is as follows:
- 1. Place the car on the handbrake;
- 2. Put in fourth or third gear;
- 3. Unscrew the three bolts and remove the timing cover;
- 4. Turn the crankshaft counterclockwise and remove the generator drive belt;
- 5. Put the gear in neutral;
- 6. Rotate the crankshaft clockwise and observe the marks and flywheel. When the mark is parallel to the scale division, stop rotating;
- 7. Loosen the tension roller nut. If the roller wears out, replace it;
- 8. Release the tension on the strap using the tension roller;
- 9. Pull a new belt onto the crankshaft pulley;
- 10. Pull the product onto the camshaft pulley so that there is no sagging;
- 11. Rotate the crankshaft and if the marked marks do not match, reinstall the belt;
- 12. Unscrew the crankshaft mount and install the generator pulley;
- 13. Adjust the product by turning the roller counterclockwise. Install the alternator belt.
At the end of the work with the engine running, you need to determine the belt tension by the noise level.
If necessary, replacing the VAZ 2114 timing belt is done with your own hands without the help of specialists. There is nothing complicated in this operation, you just need to follow the instructions.
The timing belt is an important element in a car engine, so you shouldn’t ignore it. This element needs to be checked every 15 thousand kilometers, and replaced every 60 thousand.
Sources
- https://ladaautos.ru/vaz-2114/instrukciya-po-zamene-grm-remnya-na-vaz-2114-8-klapanov-svoimi-rukami-video.html
- https://carfrance.ru/probuem-zamenit-remen-grm-na-8-klapannom-xetchbeke-2114/
- https://vashalada.ru/mashiny/vaz-2114/zamena-remnya-grm-na-vaz-2114-podrobnaya-instrukciya-s-foto-i-video.html
How to change it yourself?
How to tighten the timing belt on a VAZ
You can replace the belt on an 8-valve VAZ 2114 with an injector engine yourself or by ordering the appropriate service at a service station. During the shift process, there are nuances that must be taken into account when performing the task. If you make mistakes and do not change the strap correctly, this can lead to rapid wear and breakage. Below are instructions for replacing the belt in a VAZ 2114 8 valve.
Tools
If you change the belt yourself, prepare the following:
- a set of open-end wrenches, you will need tools for 13 and 17;
- long flat blade screwdriver;
- 10mm ring wrench, you can use a ratchet head;
- key for installing the tension roller;
- wheel wrench;
- jack.
User Pro Remont shared a video that describes in detail the procedure for replacing the timing belt pulley and timing belt in a VAZ 2114 car.
Algorithm of actions
How to change a belt correctly:
- Drive the car into a garage with a pit. The surface on which work is performed must be level. Switch the gear selector to neutral position.
- Loosen the bolts on the front right wheel. Place this part of the car on a jack so that the wheel can be rotated.
- Open the hood of the car. Using a 10mm wrench, remove the three screws that secure the plastic strap protector.
- Using a 13mm wrench, you need to loosen the bolt that secures the tension roller. Remove the device.
- You can see a mark on the camshaft gear; it is made in the form of a rectangular protrusion on the edge. When performing work, it is necessary that this mark coincides with the protrusion located on the fastening of the strap casing. If these marks do not match, you need to turn the wheel until they match.
- Then find the rubberized plug installed on the top of the clutch housing; it is located to the right of the power unit’s BC. The part is carefully pryed off with a screwdriver and removed from the seat. Under the plug you can see the flywheel crown; there is a mark on this device. It should be opposite the triangular protrusion located on the left. If the marks do not match, then take a 17mm wrench and loosen the tensioner. Using a pulley removal wrench, turn the device counterclockwise to loosen the timing belt.
- When the upper part of the belt is removed from the gear assembly, take a 17mm wrench and turn the crankshaft until the flywheel marks are opposite each other. The flywheel itself must be secured in this position; to secure it, use a screwdriver and install it between the teeth. If you have an assistant, ask him to hold the tool to prevent it from turning.
- Now you can remove the right wheel. Unscrew the screws that secure the arch protection and dismantle it.
- Using a 17 mm wrench, unscrew the nut securing the generator set pulley. When unscrewing, make sure that the flywheel does not turn.
- Dismantle the generator pulley and remove it from its seat.
- Remove the timing belt from the crankshaft disc.
- Using a 17mm wrench, completely unscrew the tensioner pulley lock and remove it from its seat. If you loosen the fastening, the belt can be removed.
- Install the new product onto the crankshaft disc. When installing, make sure that the marks are not broken. Install the generator set drive pulley by first placing a strap on it.
- Place the product on the gear of the mechanism. Install the tension roller.
- The strap is being installed. During installation, the tension roller must be turned with a special tool purchased in advance at the store. If you don't have one, you can use two self-tapping screws and a screwdriver. Self-tapping screws are installed in the grooves, and a screwdriver secures them. Turning is done counterclockwise. Tension the belt using the tension roller and tighten the screw that secures the roller.
- It is necessary to set marks if they are lost during the work process. The installation procedure for all components is performed in reverse order.
Photo gallery
Photos of belt replacement are shown below.
Unscrew the screws securing the timing belt protective casing. The mark on the camshaft gear should coincide with the mark on the casing fastening. Loosen the belt tension roller by turning it counterclockwise. Remove the belt from the pulleys and install a new product. Unscrew the nut securing the generator shaft. Put on the new belt and tighten the roller.
Replacing the alternator belt on VAZ 2113, VAZ 2114, VAZ 2115
Welcome! Alternator belt - thanks to it, the generator begins its work when the car’s engine starts, and the generator is a very important part in which an electric current is generated when the engine is running and this current that is generated in it is sent to the entire on-board network, including the battery (Therefore especially the battery is not discharged when the engine is started, but on the contrary, it is recharged from the generator), thus all devices burn stably (This is if the generator is working) and voltage surges are not observed in them (For example, the dashboard shines either brighter or weaker, perhaps You’ve even seen this in some cars, and it indicates that the alternator voltage regulator is faulty), but if the belt is removed, then the entire load will immediately be applied to the battery (the car will start without the alternator belt, but it will only drive a little and as soon as the battery completely discharged, then all the devices will first turn off in the car and you won’t be able to start it with the key) and therefore you must definitely monitor this belt and, if necessary, change it to a new one when necessary.
Note! In order to replace the alternator belt in a car, the following tools will be useful to you: Wrenches and that’s it, but if you are going to change the belt from the top of the car, some people just change it from the bottom (It’s easier from the bottom, but it takes longer) and in this case, you will need to take a wheel wrench to unscrew the wheel mounting bolts, a jack with which you will raise the car, and the same set of wrenches, a socket wrench, you can also use other keys that you have in your toolbox!
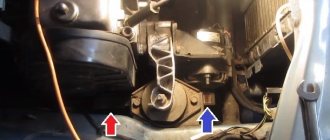
Where is the alternator belt located? On most cars that are produced or were produced by VAZ, the generator is installed in the same place (This only applies to front-wheel drive), namely on the right side of the car (If you look in the direction of travel of the car) deep in the engine compartment you will find the generator and as soon as it will be found (Indicated by a blue arrow), find a roller next to it (a round roller comes from the generator, on which the belt sits, but behind the belt you will not see this roller, well, only if part of it sticks out a little) on which the generator belt is attached ( For clarity, the belt and a small part of the roller are indicated by red and yellow arrows in the photo below).
When should you change the alternator belt? As such, there is no rule of frequency in its replacement, that is, exact numbers, for example, after 30,000 thousand km. you will need to change it, no one will give it to you, since everything is determined by appearance and if the belt is worn out, that is, there are cracks on it, it whistles (By the way, you have 100% heard this whistle many times in your entire life, because it is on many happens in cars), drops of various kinds of liquids are visible on it (This may be due to torn pipes of the cooling system or due to a leaky radiator of the same system), then such a belt needs urgent replacement (Although the liquid can be wiped off from it and therefore in this case, the belt may not need to be replaced at all, but only before wiping off the liquid with a rag, eliminate the reason why water or some other liquid gets on it, otherwise there will be no use in wiping it with a rag), but By the way, a whistle can still occur if the belt is poorly tensioned, in this article we indicated how to tighten it correctly, so if anything, use it to tighten the alternator belt on the car.
Note! In fact, this whistle can appear for various reasons, for example, if you buy an oak belt (made of bad rubber), it will whistle, if water or other liquid gets on it, it will also whistle, even in cold weather this whistle is you will hear (This is because the rubber hardens and the belt becomes oak, over time the car will warm up and this whistle will go away), oh Yes, we completely forgot to tell you one important news, the alternator belt is not always in the trunk of the car (Although such things as the alternator belt, timing belt, must necessarily lie in it, because when one of these belts comes out, the car will either be completely immobilized, or it will drive, but from the electrical part, the light, for example, nothing will work anymore) and therefore for the future we will give you advice, instead, you can use a tie for a short time (you only have to tie it tightly) or a men’s belt, for more detailed information, see the video clip that we posted just below:
Why does the whistle occur?
There are several reasons why the characteristic whistle-like sound occurs.
- Weak tension. The element slips, and this happens most actively at night. The increased intensity of the whistle at night is explained by the fact that the generator additionally works for lighting.
- Gradually the component is destroyed. The belt can dry out, causing its structure to be disrupted and it literally crumbles into pieces. The first signs are cracks, and then whole pieces break off. When moving, the pulley hits and slipping begins. Only replacement is required here.
- Although moisture gets on the belt very rarely and evaporates almost immediately, the connection can still whistle. In this situation, tension is required.
- The generator itself jams.