The modern “Prior” engine is a sixteen-valve injection unit with built-in valves, which, unlike previous analogues, are highly reliable and have a long service life. But when the timing belt breaks, the pistons collide with the valves, which can cause the latter to bend. Further operation of such a vehicle is no longer possible. The solution is to replace the valves on the Priora (16 valves). Reviews from motorists note that such a malfunction occurs extremely rarely. Most often this happens due to untimely replacement of the belt. In today's article we will look at how to replace valves (Priora, 16 valves), as well as installing spark plugs and cleaning injectors.
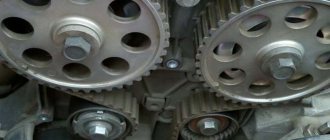
Belt condition
Drivers should take into account that the valves can last a million kilometers if high-quality fuel is used. However, this is not the only condition for reliable and long-term operation. The fact is that if you regularly check the condition of the timing belt for breaks and microcracks, you can completely eliminate valve bending. If you find any defect in the coating of this part, immediately purchase a new belt. This way you will reduce the chances of parts bending several times.
What to do if they are already bent?
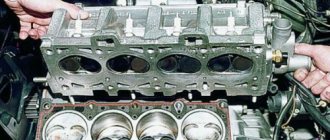
If this incident has already happened, you should know that dismantling these elements, as well as replacing hydraulic compensators (Priora, 16 valves), is not such an easy process, since it requires disassembling the cylinder head. It is worth noting that disassembling the cylinder head itself is carried out only in extreme cases. That is, only when replacing springs, valves and other important mechanisms. Also, each time the cylinder block is disassembled, a new gasket is installed.
The replacement of valves on a Priora (16 valves) begins with disassembling the engine. Of course, you don’t need to disassemble the entire motor - just remove the head and install it on a special workbench so that the distribution heads are located at the top. Next you need to remove the engine mount on the left side. To do this, unscrew the nuts holding the support. Once they are unscrewed, it will be very easy to remove.
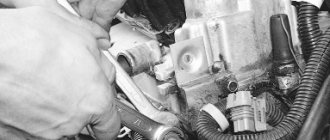
At the next stage, you should dismantle the support bracket, having first removed the bolts securing the fuel pipe and phase sensor. Next, using a 21 key, disconnect the sensor from the emergency system. This element signals a critical oil level; it is located in the bearing housing.
Useful tips for choosing
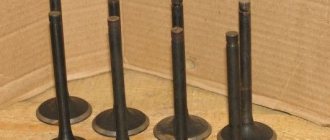
In stores and on the market they offer a wide selection of valve kits for Lada Priora. Therefore, it is often difficult to decide on a model. The product must meet the following requirements:
- Sufficient hardness.
- High thermal conductivity.
- Strength.
- Low coefficient of thermal expansion.
If you just need to replace a worn-out spare part, then you should choose a standard kit. If you want to improve the dynamic performance of the car, then it is recommended to purchase and install lightweight titanium intake and exhaust valves. But you need to take into account that they are more expensive than usual.
Preference should be given to new spare parts. They will last much longer. It is also important to buy products from reputable brands. It is desirable that the kit be original. But, if you can’t find it or it’s too expensive, then you should choose among analogues. Well-compatible spare parts for Lada Priora cars are produced by SM , RemKom , TMZ , VolgaAvtoProm and FOR-MASH .
Source
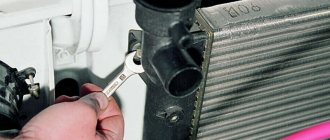
Thermostat
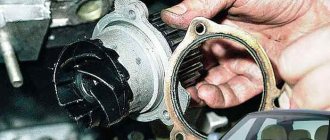
Next you need to switch to the thermostat. "Priora" (16 valves), in which replacement of the thermostat itself is not required, remains still not running. The next step is to remove the temperature sensor from the element body. It is used to monitor the coolant temperature. Now you can loosen a few fixing bolts and freely remove the thermostat out. The sealing gasket is removed from the studs. After this, you need to remove all the candles. At the same time, the Priora (16 valves) will not require such action as replacing the pump. Below you will find detailed instructions for dismantling the spark plugs.
Why is it necessary to change valves and how is their malfunction determined?
The most common reasons for replacement are:
- bending of the rods when the timing belt breaks (occurs on engines with a volume of 1.5 liters and 16 valves, since they did not have special recesses on the pistons);
- wear or deformation of the working surface (burnout) - occurs due to a lean mixture, engine overheating or the use of low-quality components;
- bending of the surface that occurs due to wear of the return spring - in this case, repairs will be more labor-intensive and expensive.
Tools for work
In order to extract these elements, we need the following set of tools:
- Spark plug wrench 16 mm with rubber seal.
- 10mm wrench with ratchet.
- Ratchet handle.
- Extension. Without him we won't get to the wells.
Initially, the upper engine casing (plastic decorative trim) is removed. By the way, before doing this you need to remove all the ignition coils. To do this, remove the plug from each side and unscrew the bolts securing each of them. Next we move on to the candles. To do this, it is recommended to use a spark plug head with a rubber ring to grip the part from the well. At this stage, the extraction of candles can be considered complete.
Twisting force
During further assembly, pay close attention to the force with which you tighten them back. For a car like the VAZ Priora, the torque is 30-40 Nm. If you don’t have a torque wrench, you can use the traditional method. To do this, twist the candle with one hand until it stops. These efforts are quite enough to screw the parts into the well. By the way, if you lightly clamp the spark plug, it can simply shoot out while the engine is running due to the high pressure in the combustion chamber of the engine.
What about the cost? A set of new parts can be purchased at a price from 500 to 2 thousand rubles, depending on the manufacturer. For injection engines, choose products marked “R”.
Factors on which the price of a part depends
A set of valves for a Lada Priora can cost differently. The price of the set may be influenced by the following factors:
- The number of products included and their purpose.
- Weight of the spare part.
- Material of manufacture and quality.
- Company manufacturer.
- Originality.
- State.
- Place of purchase.
- The need for delivery and its cost.
- Seller's pricing policy.
FOR-MASH valve set (light version)
What's next?
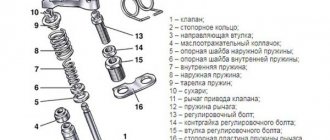
The replacement of valves on the Priora (16 valves) does not end there. After unscrewing the spark plugs, you should unscrew all the bolts securing the camshaft, and then remove this part. There are two of them on the sixteen-valve Priora, and both shafts need to be removed. To do this, you will also need to remove the plugs located in the end part of the cylinder head. After the motor is disassembled, the valves are directly replaced. On the Priora (16 valves) it is done as follows.
After removing the camshaft, use a puller to remove the fastening “crackers”. It is recommended to place a small stand under the “plates”. How do you then replace the valves on the Priora (16 valves)? After removing these parts, the plate is removed along with the springs.
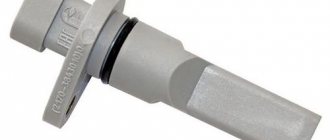
You should be very careful, as the spring force is quite large. If you are careless, they can jump off the plate. There is another part under the springs. These are stubborn plates. They also need to be removed. But this is done only after removing the valve seal. In order to dismantle it, we will use a special grip.
The dismantling process is as follows. We clamp the oil seal with a grip, while pressing it a little. After making a couple of turns left and right (at the moment of turning), we pull the oil seal up. It is not recommended to make such tilts with a pressed grip, as there is a risk of damaging the seating shoulder of the mechanism on the guide sleeve. That's it, we've done most of the work. Now all that remains is to remove the old valves and install new ones.
Replacing valves on a Priora 16 valve
In the new generation of VAZ 2170-2172 Priora cars, the Tolyatti Automobile Plant not only improved the design, but also over time equipped them with a new 16-valve engine. This engine began to be installed on all subsequent models.
But, in addition to improvements in dynamics and power, this engine brought a new problem to the lives of their owners - rapid wear and bending of valves, since this happened much less often in 8-valve engines. 16 valves in the engine head increased the car's power from 76 to 92 hp. But they also made car repairs a little more difficult.
What should I do to prevent the valves from bending?
Often, motorists solve this problem by installing a 124 type piston group. However, this replacement is not worth the money, according to reviews. After all, to do this you will need to remove the old piston group, take out the engine, disassemble it, remove all the shafts, and so on. At the service station they will charge you about 50 thousand rubles for such a procedure.
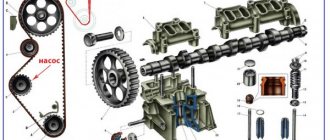
But there is a simpler and cheaper way - simply regularly diagnose the timing belt for defects and, if necessary, replace it with a new one. It is also worth noting that you should only buy a branded belt. Otherwise, there is a risk that it will break within the next 10 thousand kilometers. High-quality belts last 100-200 thousand kilometers and do not need to be replaced. Therefore, you should not save on such a responsible purchase. Well, the most reliable option is to use a chain instead of a belt (as on the ZMZ 406), but, unfortunately, this cannot be done on “Prior” engines.
The main signs that replacement of these parts is necessary
- A sharp drop in engine power.
- “Trippling” (when one of the cylinders in the engine stops working).
- Increased fuel consumption.
- Difficulty starting the engine even when “hot”.
Cleaning the injectors is a more affordable solution compared to replacing them with new parts; moreover, in both cases they will have to be removed. Below we will look at how to remove and clean this part from accumulated deposits.
First you need to remove the ramp. This is the part in which the injectors are located. When replacing, the engine itself must be cool.
So how do you remove the ramp? First, we de-energize the fuel pump by disconnecting the wires from it, start the engine and let it run on the remaining fuel that is in the fuel lines until it stalls. This way we will remove pressure differences from the gasoline supply system. Next, we safely remove the ramp, having previously de-energized it (the wiring is located on the interior side).
For further dismantling, unscrew the fuel hoses and all wiring connected to the ramp. These are the idle speed regulator, the pressure regulator, and the throttle position sensor. Using a hexagon, unscrew the 2 ramp fastening bolts. The last part can now be safely removed in a direction parallel to the ground.
Now the injectors
They are cleaned on a separate clean surface. For further work we will need the following elements: injectors, a 12-volt light bulb, a can for cleaning the carburetor, a switch and a pair of wires. We connect all the parts in series:
- Lamp.
- Nozzle.
- Switch.
Using a plastic clamp, we attach a hose 30 centimeters long at the outlet of the spray nozzle. Next, turn on the nozzle, and lower the end of the tube into the cleaning liquid. Then we monitor the change in jet spray. It can expand or contract (it all depends on the degree of contamination). After the jet has stopped changing, you can safely complete the cleaning process. The element is assembled in the reverse order similar to removal. For the future, it should be taken into account that such an operation must be repeated at least once every 30 thousand kilometers (as well as replacing spark plugs).
So, we found out how to replace valves on a Priora (16 valves) with your own hands. As you can see, this process is very complicated, but you can still cope with it.
Video showing cylinder head repair (1.5 l engine)
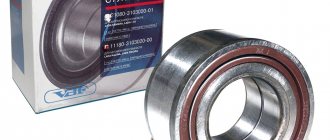
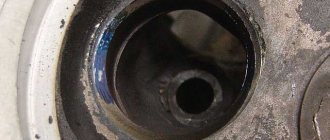
If, when starting the 16-valve Priora engine, you hear knocking noises in the engine compartment, which will disappear as the power plant warms up, then you should check the hydraulic compensators (HC). When every start of a cold engine is accompanied by a knocking sound, this is a clear sign of a worn hydraulic compensator. We will tell you how to replace expansion joints yourself. We will also look at a component such as the cylinder head check valve, which can also cause defects in the operation of compensators.
Hydraulic compensators are sensitive to the quality of lubricant. If mechanical impurities are present in the oil, the part may fail ahead of schedule. Faulty hydraulic compensators cannot be repaired. After installing new compensators, you may be upset by the knocking of the remaining main valves - this is normal, but not for a long time.