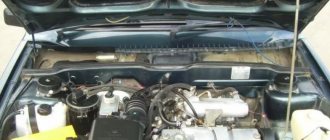
Fuel pump VAZ 2107 injector
The injection “seven” has a number of fundamental differences from the carburetor version of the car. This difference relates primarily to the fuel supply system. In the design of the VAZ 2107, the injector does not have a carburetor, and the gas pump pumps fuel directly to the injectors: this is reminiscent of the supply system of diesel engines.
Purpose and device
An electric fuel pump, unlike a mechanical one, is responsible not only for delivering fuel from the tank to the combustion chamber, but also for creating high pressure in the fuel system. Fuel injection in injection systems is carried out using nozzles, and gasoline must be supplied to them under high pressure. Only an electric pump can cope with this task; a mechanical one is not suitable here.
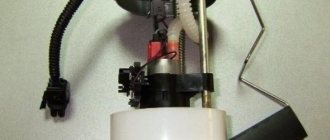
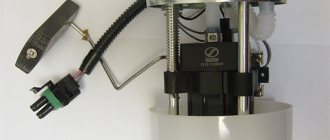
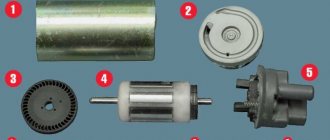
The VAZ 2107 fuel pump injector is designed quite simply and thanks to this it has a long service life. Essentially, it is an electric motor with blades located on the front of the shaft, which pump gasoline into the system. The pump inlet pipe is equipped with a coarse fuel filter in the form of a mesh to retain large dirt particles. The design of the electric pump is complemented by a fuel level sensor, which transmits a signal to the instrument panel.
The operation of the VAZ 2107 fuel pump injector is provided by an electric motor with blades located on the front part of the shaft, which pump gasoline into the system
Operating principle
To better understand the principle of operation of the gas pump, you need to have an idea of the injection system as a whole. Such a system consists of:
- Air intake.
- Air filter.
- Air sleeve.
- Throttle valve.
- Ramps with four nozzles.
- Fuel filter.
- Gasoline pump.
- Gravity valve, thanks to which fuel does not spill out of an overturned car.
- A pressure regulator (bypass valve), which is responsible for maintaining the pressure in the system at the required level.
- Safety valve.
- Fuel tank.
- Adsorber.
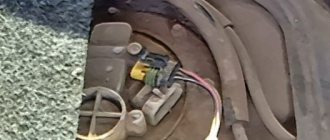
The fuel pump VAZ 2107 injector is located in the fuel tank
The VAZ 2107 fuel pump injector starts working after the driver turns the ignition key. At this moment, the electric motor of the pump turns on, and the pressure in the system begins to rise. When the fuel system pressure reaches 2.8–3.2 bar (280–320 kPa), the engine starts. While the engine is running, the gas pump pumps fuel into the system, and the pressure is maintained at the required level. After the engine is turned off, the pressure drops within a few minutes.
Where is
The fuel pump of the VAZ 2107 car, the injector is located inside the fuel tank. If you open the trunk lid, the tank with the pump can be seen on the right. The advantage of this arrangement is the simplification of the fuel system, the disadvantage is difficult access to the fuel pump.
Which fuel pump is better
If we compare an electric and mechanical fuel pump, it should be said that:
- the injection system itself is more reliable due to the fact that it does not have a carburetor, which requires additional maintenance;
- an electric pump is preferable to a mechanical pump, because it: provides direct fuel supply to the injectors;
- can be located inside the fuel tank (i.e., it saves engine compartment space);
- rarely fails due to the simplicity of the design.
Due to its location in the fuel tank, the electric fuel pump does not overheat and saves engine compartment space
Pump fault
It happens that the fuel pump hums, but there is no pressure, and the car will have difficulty starting, run intermittently, and stall. There could be perhaps three reasons:
- the pump is faulty;
- the coarse mesh is clogged;
- The fuel pressure regulator is faulty.
I described checking the pump pressure in the article about replacing the fuel pump. The same article describes how it is removed.
A malfunction of the regulator can only be determined by using a pressure gauge.
Fuel pump drive
The VAZ 2107 mechanical fuel pump is driven by a pusher and an eccentric. Among drivers, it is customary to call the pusher a rod, although the rod is another part of the fuel pump. The eccentric is located on the intermediate shaft, which operates from the gas distribution mechanism.
The fuel pump drive includes (see figure):
- 1 - pusher;
- 2 — heat-insulating spacer;
- 4 — adjusting gasket;
- 5 - sealing gasket;
- roller (cam).
The pusher is driven by an eccentric located on the shaft of the auxiliary mechanisms
Device and principle of operation
The operation of the mechanical fuel pump drive is not based on the fact that:
- the oil pump shaft is driven through a timing chain;
- the cam (or eccentric) begins to press cyclically on the pusher;
- The pusher transmits force to the lever and the fuel pump begins to pump fuel.
Drive faults
Problems with the mechanical fuel pump drive lead to interruptions in the operation of the fuel supply system. Actuator malfunctions are most often associated with deformation or excessive wear of the pushrod or cam.
Fuel pump rod bends
The fuel pump pusher is often made of metal that is not strong enough. There are often cases when, after 2–3 thousand kilometers, such a pusher bends and flattens the constant impact of the cam. The length of the pusher should be 82.5 mm. If your fuel pump tappet does not meet this size and is flattened on the cam side, it will need to be replaced.
If the fuel pump pusher is flattened on the cam side, it needs to be replaced.
Causes
There are several reasons why a VAZ fuel pump may not work:
- no power to the fuel pump;
- motor is faulty;
- pump is faulty.
Let me clarify some points. If the electric motor malfunctions, power is supplied to it, but if the brushes are broken, the rotor or windings are faulty, the motor will not spin and you will not hear a characteristic hum.
If the fuel pump malfunctions, a hum will be heard, but there will not be enough fuel or, in my case, the pump is simply jammed.
What is the device
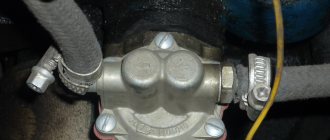
The gasoline pump is a cylindrical barrel measuring 20x15 cm, located under the hood of the car in the carburetor area. It has two tubes, one of them pumps gasoline, and the other supplies it to the carburetor. It also has a lever that is designed for manual pumping of fuel if the mechanical system is not functioning.
The design of the device includes:
- The chamber into which fuel flows from the tank.
- Fuel inlet and outlet valves.
- Diaphragm.
- The ghost lever operates the pumping mechanism.
- Return spring.
- Fist.
- Camshaft
- Sealing gasket.
The operating principle will tell you what each part does.
Operating principle
It works quite simply, just like regular water pumps. In order for the device to begin to function, a mechanical action is applied to it, carried out by the diaphragm. It moves up and down due to the effects of vacuum and pressure. During the downward stroke, a vacuum is created and fuel is sucked into the chamber. When the diaphragm moves upward, it creates pressure and the suction valve closes, and the discharge valve opens, through which fuel flows into the carburetor. The return spring performs the function of causing the movement of the diaphragm.
What are the causes of malfunctions?
The main problem that causes malfunction of the fuel pump of a VAZ-2107 car lies in the sealing gasket. It creates a sealed chamber where the phenomenon of rarefaction and pressure occurs. When this gasket wears out, the seal is broken and not only gasoline, but also air is sucked into the chamber. When the diaphragm moves back, fuel leaks out through a loose seal. Another reason for the pump not to function is clogging of the inlet valve channels. But, this problem was solved by installing a special filter element in front of the gas pump, which extends the service life of the fuel injection device much longer. Rupture of the internal membrane also poses a threat to the performance of the element. If such a problem occurs, it is very difficult to start the engine even when pumping fuel manually.
How to determine the malfunction?
For a VAZ-2107 car, it is easy to find out if the fuel pump is not working. To do this, you need to disconnect the tube from which gasoline enters the carburetor. Next, manual pumping is carried out and if liquid leakage is observed, then the cause of the malfunction is not in the fuel pump. If fuel does not come out of the tube, then the device is faulty, or rather, the problem most likely lies in the inlet valve. You can check this as follows:
- Remove the intake valve tube.
- Close the inlet port with your finger.
- Press the pump lever.
If you feel a vacuum on your finger, then the device is working properly and there is no point in disassembling it.
Fuel pump repair
The device for pumping fuel into the carburetor is subject to repair, unless, of course, the service life of the device is very long. Repair includes disassembling the device, cleaning and replacing worn parts. So, repairs are best carried out with the device removed from its seat, but there are also simple breakdowns that can be repaired without removal. Repairs are carried out in the following sequence:
- The main semicircular cover, which is secured with a bolt, is removed.
- After removing the cover, we carry out a visual inspection. The filter is removed and needs to be washed and blown out for cleaning.
- Further analysis of the device is underway. The six bolts are unscrewed using a screwdriver and the device is separated into two parts.
- The intake and exhaust valves are cleaned. You can wash it in gasoline or solvent and spray it with a stream of dense air.
- To remove the diaphragm, you need to rotate it 90 degrees and carefully remove it.
- Next, we repair the diaphragm, unscrew it and remove all the components.
- Only flexible membranes are damaged, so it is these that need to be replaced.
- When the replacement is made, it is important to assemble the diaphragm in the same sequence as originally.
- The device itself is assembled in the reverse order of removal.
- When installing the filter, it is necessary to ensure that the hole in it is located above the valve.
- By connecting the two parts, a gasket is installed, which can be additionally lubricated with sealant.
The repair is complete, all that remains is to install the fuel pump in its seat and check its functionality.
Replacing the device
If the fuel pump has outlived its usefulness, then it is better not to torture yourself and the car, but install a new part. Replacing a fuel pump on a VAZ-2107 is not difficult even for a beginner. First, disconnect the fuel hoses, then use a head to unscrew the two nuts securing the fuel pump. After this, disconnect the pump from the engine block. Before installing a new pump, clean its seat from dust and dirt. Initially, it is necessary to put a sealing gasket on the cleaned area, the thickness of which should be 0.7 mm or more.
Important! Next, a thermal insulation gasket is installed, which has a thickness of about 0.3 mm. The thickness of the two gaskets is necessary to achieve a minimum pusher exit clearance of at least 0.8 mm. Therefore, it is better to use new gaskets rather than suffer with old ones.
If the thickness is less, this may result in improper functioning of the fuel pump due to the incorrect position of the pusher. After this, the device is installed and tightened with nuts, two hoses are inserted and secured with clamps. All that remains is to check the functionality of the installed equipment.
Knowing not only how the replacement is carried out, but also the operating principle of the fuel pump of your VAZ-2107, you can easily carry out any repairs without using the help of specialists at a service station and thereby saving your money.
Unfortunately, it is possible that when you turn on your “Seven” you cannot hear the usual sound of the fuel pump, and this usually happens at the most crucial and inopportune moment. Of course, if such a problem arises, you can postpone your affairs until later and turn to a professional auto electrician for help, or you can go your own way, showing willpower and trying to fix the problem on your own.
Strange as it may seem, a fairly detailed power supply diagram for the VAZ 2107 (meaning as convenient as possible for use) is a certain rarity even on the Internet, and the option given below allows, to some extent, to facilitate the search for the cause of the failure of this important unit.
If we talk about practical implementation, then the most optimal version of the algorithm for troubleshooting the electrical power circuit of the VAZ 2107 fuel pump looks like this.
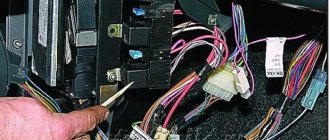
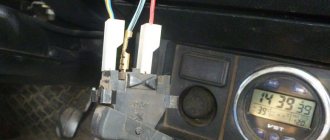
First of all, you should find a panel with three executive relays located in the glove compartment area and, for ease of operation, dismantle it and pull it towards you. Next, on the middle relay (it actually supplies power to the fuel pump), with the ignition on, we measure the presence of + 12V voltage on the thick pink wire. If voltage is present, then we bridge the indicated pink wire with a thick gray wire that goes directly to the fuel pump (on the relay these are contacts “30” and “87”).
If the operation of the unit is still not audible, we proceed to check the wiring, paying special attention to the connecting connectors in the trunk, one of which is black and slightly elongated, and the second (white) is located directly on the fuel pump cover. It is characteristic that, according to the “law of meanness,” the break is most often located in the second connector, and it will not be possible to get to it without removing the pump. By the way, if the contact is actually broken in the white connector, then in order to avoid problems during further operation, you can completely eliminate it by soldering the wires directly (the load in this circuit is significant, and the contacts simply burn out).
Don’t forget, also, to check the condition of the ground wire and the reliability of its connection (black wire, screwed with a self-tapping screw in the lower right part of the trunk).
Now let’s consider the option when, when the pink and gray wires are short-circuited, the pump starts working. In such a situation, you should check for the presence of +12V on contacts “85” and “86” of relay R2. In other words, when the ignition is turned on, a stable + 12V should appear on one of the contacts (relative to the “ground” of the car), and on the other contact this voltage should remain for several seconds (when connecting the “ground” from the ECU). The normal appearance of voltage on contacts “85” and “86” indicates that the electric fuel pump is in working condition and that relay F2 is most likely faulty. If the desired voltage is not present, then the situation becomes more complicated and the search will have to be continued. At this stage, it is necessary to determine what exactly is missing from the relay. If the positive comes, then we call a thin gray wire with a black stripe and if it is not damaged all the way from the relay to the ECU, the matter is bad and you cannot do without an experienced specialist. In the event of a complete absence of voltage, both at pin “85” and at pin “86”, fuses F1, F2, F3 are sequentially checked, as well as the wiring going to the main relay.
Among other things, when dealing with the problems of powering the fuel pump, we should not forget that modern security systems quite often provide for blocking this unit as additional protection against theft, and the malfunction can be explained by malfunctions in the car alarm.
The fuel systems of classic VAZ models, such as 2106 and 2107, differ in the type of supply of the combustible mixture to the cylinders. For some, the carburetor is responsible for this, for others, the injector. However, the coordinated operation of the power unit for both depends not on the design of the system, but on the serviceability of its elements, and primarily the fuel pump. Every car enthusiast should, if necessary, be able to repair and replace this element with his own hands.
Diagnostics and replacement of the electric fuel pump on cars of the Zhiguli family
In injection engines of classic VAZs, the fuel pump may lose its functionality both due to problems with the power supply to it and due to a malfunction of its electric motor. In the first case, the situation can be corrected by diagnosing and repairing the electrical circuit of the device. But if the electric motor of the pump fails, only replacing it will help.
Checking the protection devices for the electrical circuit of the fuel pump on injection VAZs of the Zhiguli family
If there is a problem with the electrical equipment of the fuel pump circuit, it usually does not turn on at all. Turn on the car's ignition without starting the engine and listen. First, you should hear a click from the relay, and then a characteristic “squeal” emitted by the pump’s electric motor. If you don’t hear anything like this, start diagnosing with the electrical circuit of the device.
The pump circuit is connected to the on-board network via a separate relay, and its protection is provided by a fuse. Both of these devices are located in the vehicle's optional mounting block. You will find it under the glove box. It contains 3 relays and 3 fuses. The fuel pump relay (indicated R2 in the diagram) is located in the middle, and the fuse (F3) is to the left of it. We pull the fuse out of its seat and check it by “ringing” it with a tester. If a malfunction is detected, we replace it, not forgetting to comply with the rating (15 A).
You can check the functionality of the relay by installing a known working device in its place. Instead, replace it with the relay located to the right of the one being diagnosed, which is responsible for the radiator fan circuit. If this option does not suit you, turn on the ignition and measure the voltage between the pink wire going to the relay and the vehicle ground. The device should show 12 V. This means that the device is powered. After this, you need to connect the pink wire with the gray one at the relay terminals. So we will connect the fuel pump directly to the battery. If it works (that same “squealing” sound will be heard), simply replace the relay.
The fuel pump relay is located in the middle (R2), and the fuse is located to the left of it (F3)
Checking the fuel pressure in the system
The main indicator of the operation of a fuel pump is the pressure it creates in the system. If the device turns on, pumps fuel, but the engine runs intermittently, take the time to check the pressure. To do this, you will need a pressure gauge with a measuring range of 5–7, equipped with a gas-resistant hose and a threaded fitting (if there is no special one, you can use a regular tire pressure gauge). The sequence of actions is as follows:
Replacing fuses
If a fuse link fails or a section of the circuit fails, you can find and check the condition and serviceability of the required fuse. To do this you should:
- Open the cover on the power supply and find the serial number of the required protection element.
- If the damage is not visible visually, then you should remove the fuse-link from the board socket and “ring” it with a multimeter, measuring its resistance. This operation should be performed with the vehicle's power turned off and it is additionally required to disconnect the battery terminal.
- A failed fuse should be replaced with a similar one corresponding to the specified current value on the housing or the rated current of the circuit.
- Removing the insert from the board socket and replacing it with a new one from the group of reserve inserts located in the block is done using tweezers attached to the block body. In the absence of tweezers, work is performed with small pliers.
Checking, repairing and replacing a mechanical fuel pump
Methods for diagnosing fuel pumps for carburetor and injection engines of Zhiguli are also different. Checking a mechanical pump consists of determining its performance, as well as assessing the condition and performance of its component elements.
How to check the performance of a mechanical fuel pump
The productivity of the DAAZ mechanical pump is 1 liter per minute. To check the amount of pumped fuel you will need:
- a piece of gas-resistant hose (50–80 cm);
- 2 clean containers with a volume of at least 2 liters (plastic bottles are acceptable);
- 1.5 liters of gasoline;
- watch with stopwatch;
- crosshead screwdriver;
- assistant.
Check procedure:
If the amount of gasoline is less than 1 liter, the fuel pump is faulty.
Assessment of the condition and performance of component parts
The following pump elements must be checked:
Required tools:
- crosshead screwdriver;
- slotted screwdriver;
- key to 10;
- key to 13;
- caliper or ruler.
Check procedure:
Do-it-yourself repair of a mechanical fuel pump
It is not advisable to purchase faulty fuel pump parts separately. It is much more profitable to purchase a repair kit, which includes elements that may fail, namely:
Repairing a fuel pump involves dismantling and disassembling it. They are produced according to the same algorithm that was described earlier in the diagnostics section. If, after disassembling the fuel pump body, you find that there is dirty deposits or debris on its walls or on the inner surfaces of the fittings, clean them with carburetor cleaning fluid and a piece of coarse cloth. When removing plaque, use a small wooden spatula and toothpicks. It is highly undesirable to use metal objects for these purposes.
To replace the pump valves, they will need to be removed from their seats. To do this, using a thin slotted screwdriver or knife, you need to knock out three cored areas in each of the sockets, after which the valves will come out of them freely. Having installed new parts in place of the faulty ones, the sockets must be cored again by hitting the edge with a core (screwdriver) in three places.
Replacing fuel pump valves
Important: when replacing valves, do not confuse the intake and exhaust!
In order to replace the diaphragms, you need to unscrew the nut in the upper part of the rod on which they are mounted with a 10mm wrench, then remove them and install new ones in their place in a certain order. The lowest diaphragm is the safety diaphragm. This is followed by a small and large spacer, and on top of them are two other (working) membranes.
As for the thermal spacer, it rarely fails. More often there is a manufacturing defect, which manifests itself in the unevenness of the mating plane to which the pump housing is attached. This may cause oil leakage. To replace the spacer, remove the old one from its seat, remove the old gasket from under it, and install a new spacer with the corresponding gasket from the repair kit.
Installing pump gaskets
The DAAZ fuel pump repair kit includes three gaskets of different thicknesses:
- 0.27–0.3 mm (A);
- 0.7–0.8 mm (B);
- 1.1–1.3 mm (C).
Gasket “A” is installed between the cylinder block and the thermal spacer, and the other two are used to adjust the protrusion of the pusher (rod) above the mating plane of the spacer.
Determination of the protrusion of the pusher
We install the new rod in place, and slowly turn the engine crankshaft (using the wrench on the pulley nut), select the position when the rod is extended to its minimum length. We place gasket “B” on the mating plane of the spacer and measure the amount of rod overhang above it with a caliper. It should be 0.8–1.3 mm. If the offset is greater, instead of spacer “B” you need to install spacer “C”, and if it is less, swap the first and second positions. Having achieved the result, we put the fuel pump in place and secure it with nuts. For greater tightness of the joint, the gaskets can be lubricated with a thin layer of automotive sealant.
Replacement procedure
If you decide not to repair the fuel pump, but to replace it with a new one, it is even easier. The replacement process will not take more than 30 minutes. Tools you will need:
- crosshead screwdriver;
- key to 13;
- dry, clean rag;
- small capacity.
The replacement procedure is as follows:
Video: replacing a mechanical pump on a VAZ 2101–2107
Additional designations
The fuses of the VAZ 2107 car are located as follows:
- taillights and reversing lights;
- electric motor of the heater fan, headlight washer and glass wiper pumps;
- indicator for turning on the rear window heater VAZ 2107;
- direction indicators and hazard warning relays;
- fog lights;
- tachometer, voltmeter;
- control lamps for oil pressure, fluid, fuel level and reserve indicators on the instrument panel, instrument panel lighting;
- cigarette lighter and clock;
- VAZ sound signal;
- interior lighting (up to 2000 there was one lamp on the ceiling, for those manufactured after 2000 there were two lamps on the rear door pillars);
- high beam headlights;
- high beam warning lamp;
- engine compartment lighting and license plate lighting;
- glove compartment lighting;
- right headlight;
- left headlight.
Replacing the fuse box, video
Work to replace the fuse and relay box is carried out only if repair is impossible.
Video of replacing the VAZ 2107 fuse box.
The sequence of operations is as follows:
- The ground terminal is disconnected from the battery.
- The air filter housing is removed.
- Undocking all the harnesses that fit the power supply.
- The shelf in the cabin under the dashboard and the glove compartment housing are removed, then the harness with the connector is disconnected from the unit.
- Using a 10mm head, the block mount is unscrewed and the housing is removed along with the seal.
Unscrew the bolts - The new device is installed in the reverse order.
What fuel pumps were equipped with classic VAZ models?
Classic VAZs include all models of the Zhiguli family, produced from 1970 to 2012 and their modifications:
- VAZ 2101;
- VAZ 2102;
- VAZ 2103;
- VAZ 2104;
- VAZ 2105;
- VAZ 2106;
- VAZ 2107.
Depending on the year of manufacture, the engines of these vehicles were equipped with different fuel systems. In all the first Zhiguli models, the fuel mixture was injected into the cylinders using a carburetor, and the fuel was supplied by a mechanical fuel pump. The latest modifications of the VAZ 2104, 2105 and 2107 had an injection system and an electric fuel pump.
Carburetor cars of the Zhiguli family were equipped from the factory with mechanical fuel pumps of the diaphragm type DAAZ 2101 (catalog number 1106010) produced by the Dimitrovgrad Automotive Unit Plant. Thanks to their simple design, reliability and maintainability, they have proven themselves well not only on the “classics”, but also on cars of the Sputnik and Samara families, which were equipped with their modified versions.
Carburetor VAZ 2101–2107 were equipped with DAAZ mechanical fuel pumps
Injection Zhiguli models were equipped with domestically produced electric fuel pumps. They were produced by the Pekar and Utes enterprises under catalog number 21073–1139009. The latest modifications of the Zhiguli were equipped with products (catalog number 2112–1139009). The same devices were installed on all models of the Samara and Lada families.
Injection models of classic VAZs were equipped with electric fuel pumps “Pekar”, “Utes”, “Bosch”
Electric fuel pump device
injection pump
ordinary and conditionally can be divided into two parts:
The most important thing is its structure itself. The fuel pump in the VAZ 2107 is a replacement. The fuel pump fuse (injector) is also clogged. Testing and replacement of the VAZ injector fuel pump, replacement of the VAZ 2110 fuel pump. The electric fuel pump itself is hermetically sealed to protect against the ingress of fuel. The fuel enters the pump through the filter and the intake hole and is supplied to the power system through the outlet hole (sealed from the electric motor).
Here is such a scheme you can find. I would like to point out that it does not happen that the rotor of the engine spins in water and, moreover, in gasoline. Return to contents Description of work. The location of the VAZ 2110 injector fuel pump is in the gas tank located under the bottom of the car, in the area of the rear seat. Firstly, a spark appears on the collector when the engine is running. You yourself realize that this will lead to a fire. Replacing a VAZ 2107 fuel pump: photos and videos. Checking and replacing the VAZ 2110 fuel pump can lead to overheating of the VAZ-2110 injector fuel pump. Secondly, rotation of the rotor in water is so difficult that gaining speed and developing pressure is simply out of the question.
Diagnostics
The very first thing when diagnosing, as noted above, listen when you turn on the ignition to see if there is any noise from the fuel pump. The absence of a characteristic buzzing may indicate that:
- VAZ 2107 fuel pump fuse is faulty;
- relay malfunction;
- open circuit of the fuel pump;
- motor malfunction;
- ECU malfunction.
Below is a simplified connection diagram for a VAZ 2107 injector fuel pump:
You can check the fuel pump on a VAZ 2107 injector simply by checking the voltage at its connection block with a tester. The presence of voltage will indicate a malfunction of the electric motor. Instead of a tester (multimeter), you can use a test lamp to diagnose a malfunction.
In the absence of one, this can be done by disconnecting the connection block for the fuel pump and fuel level control and applying voltage with wires from the battery to the place where the gray wire is connected +12 and to the place where the black wire is connected - minus. A humming pump will indicate a faulty fuse, power circuit or ECU.
