When is repair of the bumper and its fastenings necessary?
There are a number of reasons why bumpers have to be dismantled and repaired. But all the reasons boil down to one goal - to prevent further destruction of parts, which is prevented by installing new elements or overhauling the standard structure.
Main situations requiring repair:
- significant damage due to an accident;
- scheduled or emergency maintenance of other vehicle components. This may require removing the bumpers;
- improvement of some parts of the body, as well as tuning of the entire car;
- modernization of attachment points;
- noticeable loosening of factory dampers.
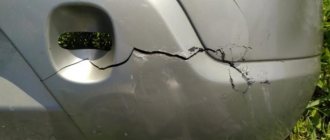
As practice shows, the rear bumper is the most vulnerable part of the design of any vehicle. This element suffers most often. It is almost completely destroyed in an emergency. It is impossible to restore parts and fasteners even with the slightest damage.
Dismantling for restyled models (2nd generation)
The bumper of Renault Duster 2016 and later releases is slightly different. In this case, you need to start with the screws located under the hood. They are unscrewed using a T30 key.
Then you need to unscrew 6 screws, unlike 9 in the pre-restyling version.
Here are the main attachment points:
- From the side of the fender liner, at the level of the connection between the wing and bumper
- One is located next to the lower false grille
- The lower grill itself is not removable and is supplied assembled. The bumper is screwed through it directly to the body with two self-tapping screws. You can unscrew it using a T20 bit.
The process of complete removal will already occur in exactly the same way as with 1st generation models. You need to carefully bend the top part of the plastic, while removing the bumper from the latches, moving it to the side.
“It is important to remember that there are 3 latches on each bracket. Usually, during removal, they skip the one located in the center, as a result of which the bracket is deformed.”
If during work it is necessary to replace several fastening elements, article numbers of original spare parts and their equivalents may be required.
Is it possible to find an alternative to Torx keys?
To carry out quality work, you must use a set of original tools. This is due to the fact that the screws have a specific head, with a recess for the key in the form of an asterisk, the edges of which have very thin edges. In addition, such screws use a larger tightening torque, so if you use a regular screwdriver, you can damage the slots. The result will be an additional set of work to drill out the old screw. A screwdriver may only be needed in pre-restyling models to remove deflectors and PTF holders.
Therefore, to carry out the work, it is necessary to prepare in advance two Torx bits with sizes T20 and T30.
Classification of fasteners
The bumper is the first protective element of the body. But it protects the structure of the car only conditionally. Manufacturers mainly install plastic parts. They are light in weight and can be removed and returned easily and quickly. There is one drawback - the plastic breaks at the slightest impact. The only thing that remains for manufacturers is to ensure reliable fixation of the part.
Bumpers can be installed in a variety of ways. As a rule, the fastening consists of separate elements and special slots for snapping into the grooves. Fastening pistons are widely used in cars of foreign brands.
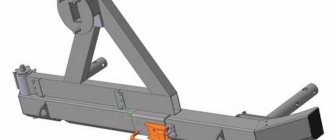
Brackets
This sample most reliably fixes the product on the car body. Each manufacturer makes bumper mounting brackets according to its own unique design. They look like small elongated parts. The distinctive characteristics of the products are strength and durability. The elements can last for many years without breaking down even in conditions of poor-quality road surfaces. However, they also suffer in road accidents.
Brackets have been used by manufacturers of various car brands for a long time. This type of fasteners is most widespread in Europe, Russia and the USA.
Latches
Trying to minimize the cost of manufacturing vehicles, companies switched to a simpler type of fastener - latches. They are made from the same sheet of plastic as the bumper. The principle of quick-release fastening is that the part, thanks to the presence of special slots, is inserted into the grooves.
In what cases is it necessary to replace the bumper?
The presented element performs a protective function for the vehicle body, therefore it takes on the bulk of the damage in a collision. With minor impacts, cracks and other defects appear on the product, which must be restored. However, in some cases, for example, after a serious accident, repairs are impractical and a new bumper must be installed. Among the reasons that necessitated this procedure:
- the protective element is completely destroyed;
- individual parts of the product are missing;
- through holes of a large area were formed.
In these situations, replacing the bumper is much more profitable and faster. This process includes several key steps:
- Assessment of the nature of damage.
- Dismantling elements that block access to the fasteners of the part.
- Removing the damaged bumper.
- Restoring the geometry of adjacent body elements.
- Installation of removed elements and new parts.
Our specialists have extensive experience in working with various brands and models of cars, so they replace the bumper as accurately, quickly and in strict accordance with factory regulations. The cost of work depends on several factors (the degree of damage, the price of new spare parts, etc.), therefore, it can only be clarified after a preliminary inspection.
Please note that experts do not recommend changing the bumper yourself. The lack of precise knowledge about the technology of work (especially in the presence of serious body defects) is fraught with broken geometry of parts, broken fasteners and other unpleasant consequences for the car owner.
Features of repairing broken fasteners
If it is impossible to continue operating the vehicle, you should purchase new fastening materials or repair old parts.
The front bumper mounts are distinguished by their reliability. However, these retainers also require periodic repair. You can repair the bumper fasteners yourself. To do this, cut out a small rectangular plate from a sheet of strong metal and adjust the product to the required dimensions. After this, experts recommend making holes for the mounting bolts using small drills. The bolts will be located in these holes.
As a rule, this repair method is recommended to be used solely for the purpose of temporarily solving the problem. Ideally, you need to purchase a new product. If you can’t do without a “collective farm”, then you need to make the most reliable fasteners. Then you should begin installing the fixation lug. Installation is carried out using screws. After this, you can install the rivets.
Searching for new fasteners for a specific car modification is not always an effective solution. Sometimes it is advisable to select identical fasteners and completely replace expensive fasteners. This will allow you to significantly save on bumper repairs.
Withdrawal algorithm
First, let's select the necessary tool. We will need a 10 and 13 wrench, 8 and 10 sockets, and a Phillips screwdriver. Just in case, it is better to have penetrating lubricant (WD-40) and a rag on hand.
Keys and screwdriver.
WD-40 lubricant.
We carry out the work in this order:
- If the car has fender liners installed, you need to remove them: a 10 nut and two 8 screws in the far part of the fender liner (closer to the door). Then unscrew the two screws on top and the three screws securing the fender liner to the lower edge of the bumper. You can not remove the fender liner completely, but release only the front part, but this is not so convenient.
Unscrew the 2 screws of the lower fastening of the fender liner to the bumper.
We also unscrew the screws of the upper fastening. - Remove the false radiator grille. Under the hood, unscrew the two bolts along the edge and remove the grille from the grooves below.
Using a 10mm wrench, unscrew 2 screws.
Having released the lower clamps, pull the grille up. - Remove the negative terminal from the battery.
- If fog lights are installed, turn them off by removing the contact blocks on each headlight.
We disconnect the fog lamp blocks.
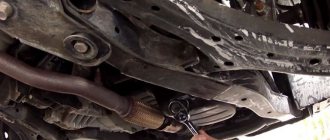
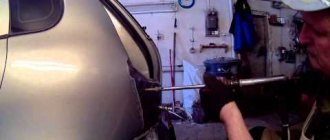
- From below, the bumper is attached to the vehicle's load-bearing frame with two bolts - on the left and on the right.
- From below, unscrew the five points attaching the bumper to the mudguard.
- Lastly, unscrew the two bolts of the upper fastening of the bumper to the power frame. Now the bumper is supported only by the side clamps.
Unscrew the bolts securing the bumper to the bracket from below.
From above, unscrew the bolts securing the bumper to the front panel. - Carefully and evenly push the bumper towards you from each side and remove it from the car.
Use a 10mm socket to unscrew the mudguard screws.
Remove the bumper by sliding it forward.
Installation of a new or repaired bumper is carried out in the reverse order. Good luck and keep your bumpers away from curbs!
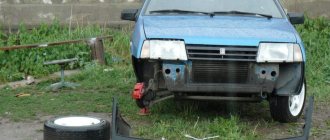
The car bumper acts as a protective buffer. It is he who suffers primarily in collisions and touches. It is possible to repair a part locally in rare cases. Therefore, removing the front bumper of the VAZ 2110 for restoration work will be the most correct solution. If you have minimal plumbing tools, the entire operation will take no more than 1 hour.
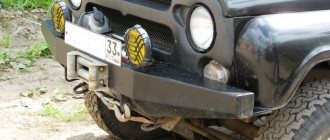
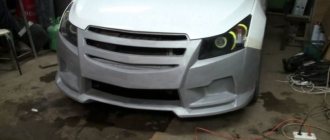
Features of installing tuning elements
Since most body kits significantly increase the mass of parts, the fasteners must be of the highest quality. You cannot use the cheapest materials for expensive tuning bumpers with a skirt.
The best way out is to contact a specialized service center. Experienced employees will be able to securely fasten the body kits, guaranteeing a long service life of the products.
After installing non-standard parts, you should check the rigidity of the fixation after some time. The peculiarity of tuning elements is that they are not always made of reliable materials. Therefore, the attachment points become loose.
Installation example:
Thus, following simple step-by-step instructions, you can not only remove and install bumpers if necessary, but also repair fasteners.
Did you manage to solve your problem using the recommendations from the article?
Yes!
46.43%
No. More answers required. I'll ask in the comments now.
38.42%
Partially. There are still questions. I'll write in the comments now.
15.14%
Voted: 799
Original
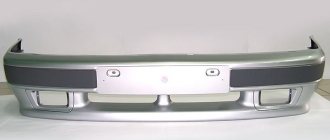
Original parts for both the front and rear bumpers for the Creta are, naturally, produced by Hyundai-KIA. The range includes everything you need, including:
- top panel;
- the bottom panel;
- molding;
- protection;
- amplifier;
- absorber.
The totality of these parts is quite enough to build the architecture of a new bumper from them.