Why does the fuel pump on the VAZ-2110 8 valves not work?
If the fuel pump does not work when you turn on the ignition, the cause may be:
- fuel pump relay
- fuel pump fuse
- the fuel pump itself
- wiring
- alarm (its blocking)
Let's talk about this now.
Causes: fuse, relay, connector
The pump power circuit includes many elements: closed relay contacts 5, fuse 3 (15 A), “+” wire, “pump-to-ground” wire. The most difficult defect is a short circuit of the “+” wire to ground. By the way, the cord itself is laid on metal, so such a defect cannot be ruled out.
Both the relay and the fuse are located in a block located under the dashboard on the right. A fuse can blow in two cases:
- The “+” cord makes contact with ground;
- The motor resistance decreases due to overheating.
The first defect may be “floating”, and then it will be difficult to identify. But before calling an electrician, try checking everything else:
- Relay 5 should click twice: when the ignition is turned on and after 1.5 s. If this does not happen, replace the relay;
- Check fuse 3. If it is blown, you need to look for the cause.
Consider the situation: the relay is working, but the fuse is blown. Then we do this: disconnect the pump connector, install a new fuse and measure the voltage at the terminals. Details are below.
Fuel pump power supply diagram
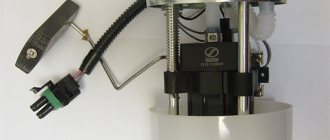
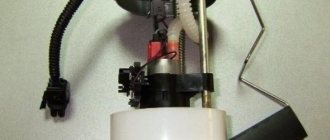
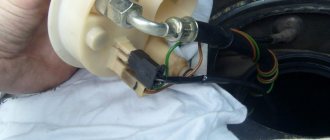
The fuel pump module looks like this.
- When you turn the key, positive is supplied to the fuel pump relay.
- The relay closes and already supplies power to the fuel pump itself. There is also a fuse built into the circuit.
Often, when installing an alarm system, a blocking relay is also built into this circuit.
This is a diagram of the main electrical components - simplified to make it clearer.
Verification algorithm
You should start checking by inspecting the relay and fuse.
On older machines, the positive wire often frays and shorts to ground, which causes the fuse to blow. This is a common occurrence.
The fuel pump relay and fuse are located inside the panel.
To access the block you will need to unscrew 3 bolts. They are circled in red in the diagram.
The fuel pump fuse and relay are marked in the diagram.
The fuse can be checked with a multimeter, but it is better to buy a new relay, it is inexpensive.
Put it in the car, it may come in handy at the most inopportune moment.
Final check before replacing the starter
We turn the key to position II, and nothing happens... In this case, open the hood and remove the air filter by unscrewing the screw on the body and loosening the clamp on the pipe. The starter is located under the filter housing. In the photo we see the following: someone disconnected the solenoid relay cord.
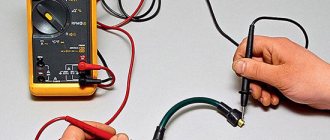
What we found under the filter, we check with a needle probe that when you turn the key, “+12” appears. Then, after checking, we wrap the cord with electrical tape.
- The copper is polished to a shine;
- The wire (see photo) is supplied with “plus”;
- The starter doesn't even click.
The first thing you need to check is the battery contacts. We remove the terminals (key “10”) and look at what is under them. There is no point in measuring the voltage with a probe - it will show “12 Volts”.
Checking the power supply at the fuel pump terminals
The fuel pump is installed in the tank. To access it you will need to remove the rear sofa cushion, it is not difficult.
The fuel pump is protected by a cover.
Fuel pump power supply.
When the ignition is turned on, there should be a voltage greater than 12 Volts at these terminals.
If there is no voltage, then you need to:
- ring the ground on the body. This is a white and gray wire. It is convenient to check the continuity of the bolt securing the rear seat belt fasteners.
- check the positive contact using a tester, or call it directly from the battery, etc.
Try to “fiddle” the wires; they often fray. The negative wire (ground) is connected to the handbrake bolt.
Check directly
It is necessary to carefully strip the wires and apply power to them. (As in the diagram)
If, when voltage is applied, the fuel pump shows no signs of life, then it is faulty.
Causes: fuse, relay, connector
The pump power circuit includes many elements: closed relay contacts 5, fuse 3 (15 A), “+” wire, “pump-to-ground” wire. The most “difficult” defect is a short circuit of the “+” wire to ground. By the way, the cord itself is laid on metal, so such a defect cannot be ruled out.
Mounting block for dashboard
Both the relay and the fuse are located in a block located under the dashboard on the right. A fuse can blow in two cases:
- The “+” cord makes contact with ground;
- The motor resistance decreases due to overheating.
The first defect may be “floating”, and then it will be difficult to identify. But before calling an electrician, try checking everything else:
- Relay 5 should click twice: when the ignition is turned on and after 1.5 s. If this does not happen, replace the relay;
- Check fuse 3. If it is blown, you need to look for the cause.
Consider the situation: the relay is working, but the fuse is blown. Then we do this: disconnect the pump connector, install a new fuse and measure the voltage at the terminals. Details are below.
Connectors under the hatch, disconnecting them
You need to remove the hatch under the rear seat: two screws are unscrewed with a Phillips screwdriver. Next you need to disconnect the connector on the module, and then move on to the block under the dashboard.
First, turn off the fuel pump!
Replace the fuse. Let's move on to the fuel pump: connect the probe (zero cord) to any of the mounting studs. Voltage should appear on the “gray” wire when the ignition is turned on. And also check the potential difference between the “gray” and “black” wires - it should be equal to 12 volts, and also at the moment the ignition is turned on. Wiring:
- The two outer cords are the FLS sensor;
- “Black” – minus power supply;
- "Grey" is a plus.
The "black wire" sometimes loses contact with ground. At the last step, we checked exactly this version.
There are reviews from owners that say: the fuel pump on a VAZ-2112 does not work if the electric motor is working properly and there is voltage in the connector. This happens when the contacts of the internal terminal block oxidize (see photo).
Internal connector - yellow
Getting to the connector on the motor is not easy - you need to remove the fuel pump module by unscrewing 8 nuts around the perimeter.
Diagnosing the fuel pump
Safety precautions
Before unscrewing the nuts, you need to disconnect the two hoses. But first try starting the engine. The power supply to the fuel pump is not connected.
Please note - the power is turned off here!
Everything is ready for dismantling if:
- External connector is disabled;
- It is impossible to start the engine, although the on-board network is not de-energized;
- It is better if the tank is filled less than 50%!
You need to unscrew two fittings from the module cover (top photo). Then use a socket wrench to unscrew the nuts from the studs and remove the retaining ring.
There is very little left to the internal connector
Having gained access to the internal connector, you need to clean its contacts. Assembly is carried out in reverse order. Good luck!
Advantages of injection models
The main function of the pump is to supply fuel to the combustion chamber. It must meet certain requirements. The main criterion is pressure.
The pumps for injection and carburetor engines are different. Thanks to the engine with direct fuel injection, there is no need for preliminary preparation of the combustible mixture. As you know, the carburetor is the weak link. Difficult adjustments, clogged jets, difficult starting in cold weather create inconvenience for owners of classic VAZ brands.
Tens and VAZ-2112 internal combustion engines have significant advantages. Let us note the advantages of injection units:
- support for environmental standards;
- direct injection into the combustion chamber;
- fuel economy;
- system reliability;
- increased engine power;
- starting a cold unit without warming up;
- dispensing a portion of the mixture;
- The fuel module is controlled electronically.
Unfortunately, the injector has a number of disadvantages. Maintenance and repairs have to be carried out at a service station. It also requires qualified personnel and a computer to determine the malfunction of electronic components. Let us point out other disadvantages:
- design complexity;
- high requirements for the octane number of gasoline;
- complex diagnostics and repairs;
- expensive spare parts and equipment.
How do fuel pump breakdowns manifest themselves?
We will not consider a broken relay or a blown fuse as a serious reason. Sometimes the relay itself is enough to be removed and inserted into place, and the system will work; the contacts are simply oxidized, and the fuse needs to be tested with a tester and, if necessary, replaced with a similar one.
A much less pleasant situation is when the coarse filter, which is located in the fuel module along with the pump, becomes clogged. The symptoms of a breakdown are floating, so it’s quite difficult to immediately understand what needs to be done. The first signs of a clogged coarse filter:
- reduction in engine power;
- lack of traction at high speeds;
- Unstable engine operation at low and idle speeds;
- Difficulty starting the engine.
Master node of the system
The VAZ-2110 fuel pump is equipped with an electric drive. Its body is lowered into the fuel tank. Gasoline is both a pumpable fuel and a coolant. It should be remembered that traveling with an empty tank is fraught with overheating of the VAZ-2110 injector fuel pump.
This electrical device is an independent unit. Accordingly, its operation does not depend on the state of other mechanisms. A necessary condition for rotating the VAZ-2110 fuel pump rotor is maintaining normal voltage on the on-board network.
The voltage comes through the ignition switch. When the key is moved to position 1, the circuit is closed to turn on the drive. The VAZ fuel pump fills the fuel rail. The engine is ready to start.
How to check and replace the fuel pump relay
If the electric fuel pump does not show signs of life when the ignition is turned on, this does not mean that it has burned out. The cause of the breakdown may also be the “relay”. The simplest method of checking the fuel pump relay is by ear - it should click when the ignition is turned on. If you don’t hear a click, then most likely the relay is faulty.
However, everything is not so simple - the breakdown can be “tricky”, for example, the car does not start the first time. The cause of the breakdown may be burnt relay contacts.
In this case, checking the functionality of the pump is very simple:
- Remove the protective cover that hides the fuse and relay block.
- Unscrew the fastenings of the block and remove it; it will remain attached to the wires.
Diagnostic device
To determine the pressure in the main line, a device is needed. It's easy to do it yourself. You need to take a 10 atmosphere pressure gauge, a fitting and an oxygen hose with an internal diameter of 9 mm. We twist all the elements and tighten them with clamps.
The meter is connected to the ramp. To do this, remove the plastic cap from the end of the tube. Next, use a tire cap to unscrew the nipple.
Bleed off excess gasoline. Before draining the flammable liquid, place a rag to prevent gasoline from getting on the generator. Smoking and using electrified tools near the hood is strictly prohibited.
The free end of the hose is pulled onto the ramp. Secure the clamp. After connecting the battery, turn on the ignition. They take readings. The pressure of the VAZ-2110 fuel pump injector will deflect the pressure gauge needle to 3 atm.
After starting the engine, observe the movement of the needle. On working equipment, the pressure will be maintained within 2.8-3.2 units. If no deviations are found, then the VAZ-2110 fuel pump, injector and regulator are working correctly. It is advisable to remember the characteristics of the equipment.
The pump capacity is about 2 liters per second. If problems arise with the fuel supply, the pump must be replaced. Before checking the pump, make sure that the remaining elements are in good working order. The filter or mesh may be clogged. The fuel filter is changed and the mesh is cleaned.
No power supplied
As the pinout indicates, there are 4 wires going to the pump:
- in the center - plus and minus;
- at the edges – fuel level control.
To check whether current is flowing, connect a light bulb (12 V) to the negative and positive contacts and turn on the ignition. If everything is in order, it will flare up. If there is no result, the plus and minus removed from the pump connector are connected in turn to its ground, and then to the relay block.
Next, when:
- the lamp (when the negative wire is connected to ground and the ignition is turned on) blinks, then this contact is damaged;
- the improvised indicator did not flash - there are problems with the plus.
If the wire is installed on the relay and the lamp lights up, there is a break between it and the pump. Disassemble the harness and replace the faulty wire. You don’t need pinouts in this situation either.
When it turns out that it was the pump motor that burned out, it will have to be replaced - it cannot be repaired.
Removing the pumping unit
Before starting work, you must disconnect the terminal from the battery. This will prevent damage to electrical equipment. In addition, replacing the fuel pump may cause a fire.
Let's prepare tools and materials. To remove the VAZ-2110 fuel pump, you need the following:
- Screwdriver.
- 10mm socket wrench.
- Collar.
- Open-end wrench 13.
- Rags.
The device itself is located under the rear seat cushion. To get to the installation location of the fuel pump 2110, you need to remove the seat. Under the casing we find a hatch. We unscrew the hatch. Disconnect the electrical drive connector.
Using an open-end wrench, unscrew the tips of the fuel pipes. We pull off the pipes. Using a spanner, unscrew the 8 nuts around the perimeter of the clamping ring. Release the flange.
There is a gasket under the pressure ring of the fuel pump 2110. The gasket is removed. It is better to change worn tires.
Then we raise the VAZ fuel pump together with the float. Gasoline will leak from the body. To avoid staining the interior, place a rag. There will be up to 1 liter of gasoline left in the old building. Drain it into the tank.
Assembly is carried out in reverse order. There is an arrow on the top of the cover. It should point towards the trunk. This is the correct pump position.
When replacing, do not forget to remove the float and level sensor.
These spare parts are installed on the new structure.
All operations, including preparation, will take less than an hour. After replacement, perform a test. Start the engine. Finally, you should check the fuel pump, make sure the connections are tight and there are no leaks.
Features of the injection power system
The tasks of fuel pumps in carburetor and injection engines are somewhat different. If for a carburetor engine it is important to simply supply gasoline to the carburetor, then for an injection system this is not enough. The fuel pump must not only pump fuel from the tank to the ramp, but also create a certain pressure, without which the engine simply will not start.
Access to the fuel pump in injection cars is also complicated by the fact that in cars of recent years of production it is mounted together with a fuel receiver and a coarse filter directly in the gas tank. This complicates the diagnosis, repair and maintenance of the entire fuel module, but simplifies the design of the pump, since the gasoline itself lubricates and cools it. But this is precisely what often leads to unit breakdowns.
The fuel pump and its role in the fuel system of the VAZ 2110
In the “ten”, as in other cars where power plants for fuel are installed, the gas pump serves as an element that pumps fuel in the “fuel tank-motor” circuit. It supplies gasoline to the metering component, the function of which, depending on the design of the fuel complex, is played by either a carburetor or an injector in the injection engine system.
In cars of different types of fuel supply, an electric fuel injector pump is used, or a mechanical fuel pump on carburetor modifications. Accordingly, in order to buy a gasoline pump, you need to know what type of gasoline units are installed and operated in a car that requires repair of the fuel system.
To buy VAZ 2110 fuel pumps, the price of which is affordable for most of our car enthusiasts, should be factory-made. Of course, this part for an injection engine is structurally more complex and costs more, but the price limits are very reasonable and acceptable within their limits. In addition, the fuel injector pump, the price of which is higher than its analogue on a carburetor engine, is technologically more complex and has a number of significant advantages.
When should you check your fuel pump?
It is necessary to check all potentially faulty components one by one, and the fuel pump first.
Problems when starting and running the engine are not always associated with the fuel pump. Sometimes the signs of a fuel pump breakdown are the same as those of a faulty fuel pressure regulator , injectors or jets, spark plugs and high-voltage wiring. Even experienced specialists who know by heart all the signs of a “dying” pump cannot unambiguously determine the type and cause of the breakdown the first time, and it is necessary to check all potentially faulty components one by one. In this case, the fuel pump is usually checked first. In this case, there are two types of malfunction - the fuel pump does not work at all or does not produce the required pressure. In the first case, the malfunction can be recognized by ear, since it should start when the ignition is turned on. In the second case, you need to know how to check the pressure of the fuel pump. Here you need to use a special pressure gauge. We list the main symptoms of a fuel pump malfunction:
- the engine does not start;
- the engine is unstable;
- the engine lacks traction during sharp acceleration;
- The engine lacks traction at low speeds.
The principle of operation of the mechanism
Product diagram for injection engines:
Mechanical products are used in cars with a carburetor fuel system, where fuel is supplied under low pressure, and electric fuel pumps in vehicles with fuel injection equipment, where gasoline is supplied under high pressure.
1. Fuel pump on vehicles equipped with a carburetor as a dispenser. The drive lever (pusher) is in constant friction, but the diaphragm shifts to the lower plane only when it is necessary to fill the product chamber with fuel. The return spring moves the diaphragm to the upper position, thereby supplying fuel to the dispenser. Composition of a mechanical fuel pump:
- Fuel filling chamber;
- Inlet and outlet type valves;
- Diaphragm seal;
- Return spring;
- Pusher (drive type lever);
- Cam;
- Camshaft.
2. Electric fuel pump on injection cars. Such a device is similar in operating principle to a mechanical prototype: the core is pulled into an electromagnetic valve until the contact group opens, blocking the flow of electric current. Composition of this product:
- Fuel filling chamber;
- Inlet and outlet type valves;
- Diaphragm seal;
- Return spring;
- Electromagnetic valve;
- Fuel pump mesh;
- Core;
- Contact Group.
For beginners, we inform you where the VAZ 2110 fuel pump is located: it should be looked for under the rear seat cushion of the car.
What to do Lada Kalina won't start
Stylish crossover Kalina
A lot of time has passed since AvtoVAZ announced the launch of a new project called Lada Kalina. Grandiose advertising and hope for a bright future did their job: millions of Russians, out of patriotic feelings, decided to choose the domestic Kalina, discarding numerous projects by Renault, Volkswagen and other factories positioning reliability and quality. But the joy was short-lived.
Already in the first months, Kalina did not show her best side, showing a capricious disposition. And it turned out that Kalina’s owners began to spend more time in the garage doing repair work than on trips. Engineers know their shortcomings and try in every possible way to get rid of them in each next generation of cars, to come up with something to increase the reliability of the car.
But for some reason the results are still little noticeable. As before, the car cannot please you with its endurance and wear resistance. The most unpleasant problem is that Kalina does not start from time to time. To return the machine to working order, it is necessary to find out the causes of the malfunction, and there are many of them. So, let's try to figure out why the Lada won't start.
Signs of a fuel pump malfunction
Signs of unit malfunction:
- a metallic howl or increased noise during its operation is detected by ear;
- the product does not pump fuel or the contacts do not work;
- The power of the power unit is sharply reduced.
First of all, we check the pressure of the “tens” fuel pump in the common fuel system by connecting a pressure gauge to the fitting. If the pressure in the product is more than 3.3 kgf/cm2, it becomes clear that the malfunction is a defect in the pressure regulator, which requires replacement. If the pressure gauge readings are less than 2.8 kgf/cm2, it is necessary to replace the fuel filter of the fuel pump, which caused the defect. If the car continues to act up, it is advisable to dismantle the fuel unit and clean the fuel filtration mesh.
In other cases, the VAZ 2110 injector fuel pump is replaced, because repair of the product did not give positive results. Also, when checking this electrical device, it is necessary to test the fuel pump relay, which is subject to elementary “sticking”. It would be a good idea to check the unit's fuse, which may also blow out and require replacement.
Starter malfunctions and reasons for their occurrence
The unit does not spin the flywheel due to many factors. Below we will discuss defects in the immobilizer, pull-out relay, injector, as well as in the car wiring. Sometimes repairs are not enough, in which case the device needs to be replaced.
Faulty injector
The standard version of the VAZ 2110 is not equipped with injectors, but they can be supplied separately. Drivers choose these devices for many reasons: reduced fuel consumption, no need to warm up the engine in cold weather, increased power characteristics.
Article on the topic: We eliminate damage to the front and rear side lights on a VAZ 2114
The arrow points to the starter relay
If the starter is not working well, then you need to check the injector, which may be acting up due to bad gasoline. This is the only drawback of the injector - it requires high-quality fuel. It is also worth checking whether the connection diagram is followed.
Overrunning clutch failure
If the overrunning clutch breaks, the engine starts and runs perfectly. But when the car stops, the engine cannot be restarted; it clicks but does not start. In this case, you need to wait until the power plant has cooled down, and only then try to start it.
Also in this case, it is worth inspecting the wiring that comes from the coupling. Sometimes replacing damaged wires can solve a problem where the engine clicks but won't start. Another sign of a faulty clutch is the radio turning on spontaneously.
Solenoid relay
Once behind the wheel, the driver inserts the key and turns it, the fuel pump starts working, the dashboard lights up, but when turning further, the pump and the panel turn off, and the starter does not turn. In such a situation, the solenoid relay is most likely to blame.
Removing the solenoid relayFirst of all, you need to check whether there is voltage going to it. If it does, then it’s worth checking the lock itself or the alarm system, which may close the circuit. If all the elements work separately and do not start together, then the starter does not turn due to the solenoid relay.
Article on the topic: Independent replacement of the front and rear crankshaft oil seals on a VAZ 2110
Poor contact
In this case, the starter starts after several attempts, but it still clicks. This problem occurs due to damaged contacts. The inspection should begin with the battery. If the terminals are oxidized, you need to clean them.
If this does not help, then you should check the starter contacts, because when they are oxidized, the device turns poorly or does not start the crankshaft at all. If the starter refuses to work, but the immobilizer is running, then there is a malfunction in it. Here you won’t be able to remove the defect yourself - you need to go to a car service center. Now readers know how much it costs and why the starter does not work; it is worth doing the work yourself only if you have experience working with wiring.
Replacing the electric fuel pump
Such a replacement is carried out in the following cases:
- failure or incorrect readings of the fuel sensor;
- weak throughput effect or defect in the fuel intake grid;
- failure of the electric fuel pump.
The tools you will need are a screwdriver and a 10mm socket wrench with a wrench.
- Reduce pressure in the fuel supply system.
- Using the fuel supply hose tip clamp, disconnect 2 hoses in turn.
- Disconnection should be carried out slowly, without using unnecessary force, so that the fuel block fittings remain intact.
- Unscrew the 8 nuts around the circumference of the clamping ring and remove it.
- A wire with negative polarity is attached to one of the nuts; it must be removed carefully.
- We take the electric pump block out of the fuel tank, tilting it slightly, to keep the fuel level indicator sensor lever intact, otherwise it will produce incorrect parameters.
- Remove the sealing rubber ring of the fuel block. If its properties are lost, the product must be replaced.
- Install the product in reverse order.
Important: during installation, the installation arrow on the electric pump cover must point towards the rear of the car!
Important: when installing fuel hoses, follow the direction of fuel supply indicated by the arrows!
Many people ask where the VAZ 2110 fuel pump relay is located? Let us clarify that this electronic device is located in a special recess on the front passenger side of the floorplane. You need to unscrew the plastic cover, there will be 3 relays. Closer to the hood is the required part.
Final check before replacing the starter
We turn the key to position II, and nothing happens... In this case, open the hood and remove the air filter by unscrewing the screw on the body and loosening the clamp on the pipe. The starter is located under the filter housing. In the photo we see the following: someone disconnected the solenoid relay cord.
What we found under the filter
Using a needle probe, we check that when you turn the key, “+12” appears. Then, after checking, we wrap the cord with electrical tape.
- The copper is polished to a shine;
- The wire (see photo) is supplied with “plus”;
- The starter doesn't even click.
The first thing you need to check is the battery contacts. We remove the terminals (key “10”) and look at what is under them. There is no point in measuring the voltage with a probe - it will show “12 Volts”.
Replacing a mechanical fuel pump
Unscheduled replacement of a mechanical type device takes place in the following order:
- We dismantle the air purification filter.
- Remove the fuel supply line to the fuel pump.
- First loosen the tightening of the clamp.
- Remove the fuel supply line to the carburetor.
- Unscrew the fasteners of the product.
Installation is in the reverse order. At the same time, do not forget to look at the arrows on the products showing the direction of movement of fuel to the carburetor.
Safety precautions
Before unscrewing the nuts, you need to disconnect the two hoses. But first try starting the engine. The power supply to the fuel pump is not connected.
Please note - the power is turned off here!
Everything is ready for dismantling if:
- External connector is disabled;
- It is impossible to start the engine, although the on-board network is not de-energized;
- It is better if the tank is filled less than 50%.
You need to unscrew two fittings from the module cover (top photo). Then use a socket wrench to unscrew the nuts from the studs and remove the retaining ring. There is very little left to the internal connector. Having gained access to the internal connector, you need to clean its contacts.
Oxidation of the terminals of the internal connector is a typical disease of the VAZ-2112 fuel pump, and only one of the contacts does not work. The “+” terminal is more often oxidized.
VAZ 2110 fuel pump is a common cause of breakdown
The new VAZ 2110 models use injection engines, which are so popular today. To confidently drive any car, you need to know what can break down in it in order to quickly fix the breakdown or prevent it. The fuel pump of the VAZ 2110 is one of the most vulnerable points of this car. If the fuel system is not properly maintained, it will quickly fail.
The fuel pump in injection engines is very important, since it is the one that supplies the fuel injectors with the required pressure. If there is no pressure or it is incorrect, the injectors will supply fuel to the engine in the wrong dosage.
Fuel pressure is measured in the fuel rail using a special device.
In essence, the device for measuring fuel pressure on a VAZ 2110 is the same pressure gauge, only for measuring liquid pressure. If the pressure in the ramp on a VAZ 2110 does not fit into the values of 3.6-4 atmospheres, then the car is faulty and needs to be repaired urgently, as this can lead to failure of the fuel pump, if it has not already failed.
Symptoms of VAZ 2110 breakdowns
If suddenly the car begins to twitch at high or medium speeds, this indicates a drop in fuel pressure in the rail. The same applies to the case when the engine develops dips or even stalls.
The fuel pressure in the system can drop not only when the fuel pump fails, but also when the RTD or even the injectors themselves fail.
The fuel pump on the VAZ 2110 constantly pumps gasoline while the engine is running. In this case, excess gasoline is simply returned back to the gas tank through the return channel. It is on this channel that the check valve is installed. To check it, use a pressure gauge. After the engine is turned off, the gasoline pressure should drop gradually, not suddenly. The slower the pressure drops, the better the quality of the RTD valve.
Diagnosis and Troubleshooting
It is relatively simple to verify that the electrical network is faulty - this can be done without removing the fuel pump. When the sound of its operation is not heard when the ignition is turned on, you must immediately check the fuse responsible for this circuit. It is installed in a block mounted at the bottom in front of the front passenger seat. You need to remove the block cover, find the fuse marked F3, rated for 15 A, and replace it. This kind of work can be done on the road.
If the operation of the fuel pump has not resumed, you should switch your attention to relay K2, located in the same block. It closes the power circuit of the pumping device based on a signal from the controller. You can also check the serviceability of the relay in road conditions, for which you will need a piece of copper wire
Diagnostics are carried out in the following order:
You can also check the serviceability of the relay in road conditions, for which you will need a piece of copper wire. Diagnostics are carried out in the following order:
- Remove relay K2 from the connector.
- Turn on the ignition.
- Using a wire, connect the contacts marked “30” and “87”; the numbers are marked on the relay. Another option is to apply power to pin “11” located in the diagnostic connector. The +12 V voltage can be taken nearby, from the cigarette lighter.
- If you hear the pump humming, then you need to change relay K2.
If after the above manipulations the unit is still “silent”, it is necessary to check the integrity of the wiring and the reliability of the contact at the place of its connection. This will require a device, so it will not be possible to carry out such work in the middle of a field. Unless you can check the serviceability of the fuel pump itself by disconnecting the connectors from it and supplying 12 V directly from any convenient source. If the pump still does not hum, it should be replaced.
It will not be possible to diagnose insufficient fuel supply to the injectors under road conditions, unless you carry a pressure gauge with a corresponding hose for connection to the fuel rail. The amount of gasoline supplied is characterized by the pressure in the network, to measure which you will need a pressure gauge. The check is performed as follows:
- Twist off the plastic cap covering the diagnostic fitting. It is located at the end of the fuel rail and is a regular spool.
- Press the spool rod to release the pressure in the line. In case of gasoline leakage, place a small container under the spool. Perhaps the malfunction will make itself felt already at this stage if there is no pressure in the network and no fuel flows from the fitting.
- Unscrew the spool and put the hose from the pressure gauge onto the fitting. With the ignition off, apply 12 V directly to the pump. To clearly record the readings, it must work for at least 10 seconds.
If the pressure is below 3.6 bar, you must first change the coarse filter. If this does not help, then you will have to check the RTD and the tightness of the injectors. This is the only way to accurately determine the source of the problem.
Problems with the operation of the vacuum type device
The vacuum pump may malfunction. This can happen for several reasons:
| Problems | Causes | Solution |
| Insufficient vacuum | Insufficient oil level | Add oil to the required level |
| The oil has become dirty | Dirty engine. The higher the alkali content in the oil, the faster the engine cleans and the oil turns black. | Replace the oil with clean oil. If the alkali content is high, replacement is required after 5,000 kilometers. |
| The oil fill hole is clogged | Small particles on the surface of the lid | Clean the inlet and rinse the filter |
| The integrity of the hoses is compromised | Wear, mechanical damage, hose connection failure | Check hoses and their connections |
| Insufficient pump power | Loss of voltage from the generator to the pump due to unsuccessful implementation of standard wiring, insufficient device size | Replace the wiring or purchase a new part of the required power |
| Oil started leaking | The integrity of the oil container is damaged | Replace container |
| The cover of the hole for draining the oil does not fit well or the rubber ring has become unusable | The thread of the cover is torn off, the ring is worn out | Replace the cover and replace the gasket |
| Oil splashes | Permissible oil level exceeded | Drain some of the oil to the desired level |
| The pressure at the air evacuation fitting has been exceeded | Insufficient pump power | Install a more powerful pump |
| The pump is hard to start | The temperature has become too low | The device must be turned on and off several times in a row or the oil must be heated |
| Breakdowns in the electrical part of the pump | Voltage surges, short circuit | Check and eliminate breakdowns |
| Garbage has accumulated inside | Dirt in the gas tank | Examine the contents and remove the blockage, clean the gas tank |
Ground contact
Problems with the fuel pump ground can be indicated by an incorrectly indicating fuel level sensor. Poorly secured ground can cause the fuel pump to stop pumping fuel. The ground wire is located under the dashboard and runs through the entire interior of the car. You need to find it, clean the contacts and secure it properly to the fuel pump.
Next to the ground, under the dashboard, there is a fuel pump relay. After turning on the ignition, the operating relay allows the pump to create the required pressure in the system in a few seconds, after which it turns off. When you turn the key in the ignition, you can hear a soft click, which means that the fuel pump relay is turned on, and exactly the same when it is turned off. If the relay does not make a click, then the problem is in it or in its contacts. Then it is advisable to replace it with a new one.
When looking for the cause of a non-working fuel pump, you need to check the fuse. It is located under the hood and has a resistance of 15 A. It must be carefully inspected; if it is not working, it should be replaced with a new one. The fuel pump in the VAZ-2110 car is immersed in gasoline for active cooling, and the bad habit of driving a car with a minimum amount of gasoline in the tank can very soon cause the fuel pump motor to become inoperative due to burning.
Source
Wiring
On almost all car models, the wiring to the fuel pump consists of three wires: “positive”, “negative” and a wire for determining the amount of fuel in the tank.
If the fuel pump stops pumping, the wiring may be damaged. You can check the power using a 12 W lamp, powering it from the external connector of the fuel pump. When the ignition is turned on, the light should light up. If not, then the external circuit is broken somewhere. To check the external wiring, you need to connect in turn the “positive” and “negative” contacts removed from the fuel pump power connector. It is necessary to close the “negative” contact to ground, after which the light will light up when the ignition is turned on. So, it can be determined that the contact is inoperative. If the lamp does not light up, then the “positive” contact is damaged. Placing a contact on the relay in which the light does not light up, there may be a problem with the wiring in the section from the relay to the fuel pump.
Ground contact
Problems with the fuel pump ground can be indicated by an incorrectly indicating fuel level sensor. Poorly secured ground can cause the fuel pump to stop pumping fuel. The ground wire is located under the dashboard and runs through the entire interior of the car. You need to find it, clean the contacts and secure it properly to the fuel pump.
Next to the ground, under the dashboard, there is a fuel pump relay. After turning on the ignition, the operating relay allows the pump to create the required pressure in the system in a few seconds, after which it turns off. When you turn the key in the ignition, you can hear a soft click, which means that the fuel pump relay is turned on, and exactly the same when it is turned off. If the relay does not make a click, then the problem is in it or in its contacts. Then it is advisable to replace it with a new one.
When looking for the cause of a non-working fuel pump, you need to check the fuse. It is located under the hood and has a resistance of 15 A. It must be carefully inspected; if it is not working, it should be replaced with a new one. The fuel pump in the VAZ-2110 car is immersed in gasoline for active cooling, and the bad habit of driving a car with a minimum amount of gasoline in the tank can very soon cause the fuel pump motor to become inoperative due to burning.
Source
Prevention
Actually, prevention is necessary for all systems and components of the car. But most often, the driver himself is to blame for a “missed” minor malfunction of the fuel pump, which leads to its subsequent failure.
Need to:
- listen to how the car works, and not to its musical part;
- regularly check the condition of the filters and change them on time;
- at least after winter (or better yet, when the season changes), remove and wash the gas tank. At the same time, check the serviceability of the fuel pump and change the mesh in it.
