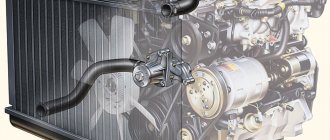
The cooling system of the VAZ 2107 includes many elements, the main ones being the radiator and water pump.
They are responsible for effective cooling of the engine during operation. In addition to direct cooling, the system is responsible for heating the air to heat the interior. Therefore, a faulty VAZ 2107 radiator can affect engine performance and comfort in the cabin during cold periods.
Signs of a radiator malfunction
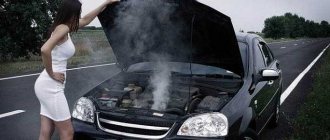
- Poor engine cooling. When operating a car with low-quality antifreeze or water instead, scale and other contaminants are deposited on the walls of the radiator tubes. This reduces the throughput and heat transfer efficiency and the engine will begin to overheat even if the thermostat is working properly and the coolant level is sufficient.
- Coolant leak. The tubular design of the radiator is not very durable. Holes and cracks may appear in it as a result of stones flying from under the wheels of cars. Sometimes the cracks are small in size, so the coolant leaks out in small “portions”, immediately evaporating. This can only happen when the engine is warm.
These faults usually require replacement of the radiator. In some cases, you can only get by with repairing it (soldering), which requires removing it from the car. Before removing the VAZ 2107 radiator, drain the coolant
How to replace the heater radiator on a VAZ 2107
The interior heating system of the VAZ 2107 is durable and reliable. But, like any other node, it can fail. Such breakdowns include a malfunction of the heater radiator. This is expressed by a leak of coolant from the radiator, clogging of the channels, which prevents the normal circulation of antifreeze through the heater radiator. These problems can occur on cars with any engine, be it a carburetor or an injector.
We will look at the signs of a breakdown of the VAZ 2107 heater radiator and the method of replacing it.
- Signs of a malfunction of the VAZ 2107 heater radiator
- Removing the heater radiator
- Installing a stove radiator
- Video on replacing a stove radiator
Coolant
The manufacturer recommends using exclusively antifreeze as a coolant for the VAZ 2107. For the uninitiated car enthusiast, antifreeze and antifreeze are one and the same thing. Antifreeze is usually called all coolants without exception, regardless of where and when they were produced. Antifreeze is a type of antifreeze produced in the USSR. The name is an abbreviation for “separate laboratory organic synthesis technology.” Without exception, all coolants contain ethylene glycol and water. The differences are only in the type and quantity of anti-corrosion, anti-cavitation and anti-foam additives added. Therefore, for the VAZ 2107 the name of the coolant is not of great importance.
The danger comes from cheap, low-quality coolants or outright counterfeits, which have recently become widespread and are often found on sale. The result of using such liquids can be not only a radiator leak, but also failure of the entire engine. Therefore, to cool the engine, you should buy coolant from proven and well-established manufacturers.
Radiator repair methods
- You can try to clean a clogged radiator using high-pressure running water. A special product that is poured inside for several hours will help remove scale and other deposits.
- If there are leaks in a copper radiator, it is better to contact an experienced solder. Perhaps he will be able to repair the crack or hole.
- Fixing a crack in an aluminum radiator is quite difficult. In this case, it will be easier to replace the heat exchanger.
- It is not advisable to use mustard or similar industrial products to seal the radiator. Having eliminated one breakdown (leak), there is a high probability of getting another (clogging).
Main types of heater problems
Doesn't heat
- Airing of the cooling system when replacing antifreeze or repairing any of the components (thermostat, pump, radiator, etc.). In this case, you just need to remove the air plug, add coolant and enjoy the warmth that appears.
- The heater valve closes the main line even in the open position. This occurs due to clogging or scale formation when using water as coolant. It is necessary to disassemble the faucet, clean it or replace it.
- A cold stove may indicate such a serious breakdown as a stoppage of the water pump. If the supply pipes to the heater and cooling radiator remain cold, and the engine is already warmed up to operating temperature, then the pump requires repair.
- Clogging of stove honeycombs is one of the most common problems. It may occur due to scale formation or due to oil getting into the antifreeze. The stove can be removed and washed thoroughly. After this, it will still serve the car owner.
- If both pipes connected to the heater are warm and the heater is cold, then the rubber partition in the radiator may have failed. It moves from its seat, creating a direct path from the inlet to the drain. Then the heating radiator will have to be changed.
Antifreeze leaks in the cabin
- Antifreeze leaks through the stove tap. It can be replaced without touching the radiator.
- The cause of antifreeze leakage may be a burst pipe. Replacing it will also not cause serious trouble.
- The stove radiator could not withstand the pressure in the heating system, and a leak occurred. Only removing the radiator will show whether it can be repaired or whether a new heat exchanger will be needed.
What is the difference?
Is there a fundamental difference between different Lada car models when it comes to the operation of DTOZH?
It would be useful to note that there is an unspoken division of vase models into groups, thanks to which it is possible to carry out repair work on one car, relying on the instructions for another. This may not apply to all systems, but regarding this topic it works quite well and does not harm either the car or its owner.
The first group is the VAZ 2101 and the following models up to the VAZ 2107. The coolant temperature sensor on the VAZ 2106 is located in the cylinder head (cylinder head), like all cars of the model range listed above. Accordingly, the signs of breakdown, diagnostic and replacement methods will be similar for them.
What should you pay attention to if the coolant temperature sensor of a VAZ 2107 fails? First of all, this is the inability to start the engine in any weather, as well as poor idling, uncharacteristic exhaust color and excessive fuel consumption. How to replace a temperature sensor on a VAZ 2106? First of all, you need to cool the engine and drain the coolant.
Then remove the terminals from the battery and remove the protective casing, after which the wires are disconnected from the detector, it unscrews itself and a new one is put in its place
Reverse assembly manipulations are carried out and the engine is started in order to check the proper operation of the system.
Then remove the terminals from the battery and remove the protective casing, after which the wires are disconnected from the detector, it unscrews itself and a new one is put in its place. Reverse assembly manipulations are carried out and the engine is started in order to check the proper operation of the system.
How to replace a temperature sensor on a VAZ 2106? First of all, it is necessary to cool the engine and drain the coolant. Then remove the terminals from the battery and remove the protective casing, after which the wires are disconnected from the detector, it unscrews itself and a new one is put in its place. Reverse assembly manipulations are carried out and the engine is started in order to check the proper operation of the system.
- The second group is VAZ 21099, VAZ 2108 and VAZ 2109. Despite the apparent difference, the main nuances when working with DTOZh remain the same in the case of these car models. Moreover, no matter whether the VAZ 2109 is an injector or a carburetor, the signs of a device failure will be absolutely the same as the basic principles of replacing it.
- The third group is the VAZ 2110 injector/carburetor and the following VAZ 2111 and VAZ 2112. Regardless of the type of engine and its features (8 valves or 16 valves), the system still gives a signal if the DTOZh fails, it also fails, when the sensor is faulty and wastes fuel to the same extent where it is not so necessary, if the system is deceived by incorrect data. Replacing the coolant temperature sensor of a VAZ 2110 is possible on your own if you only have a key of the required size.
- The fourth and last group on the list is the so-called Samara - 2 series, which includes the VAZ 2113, VAZ 2114 and VAZ 2115. A distinctive feature of this model range is the presence of two temperature sensors - DTOZH and a coolant indicator sensor. The fact that there are two of them in no way complicates replacing a broken device, it only forces the owner to be a little more careful when diagnosing a malfunction.
Design and principle of operation of the VAZ 21074 injector cooling system
One of the main conditions for the smooth operation of the engine is its high-quality cooling, since without timely heat removal and maintaining the required temperature, the engine quickly overheats. The cooling system on the VAZ 21074 injector is a complex mechanism consisting of many elements.
Design and principle of operation of the cooling system
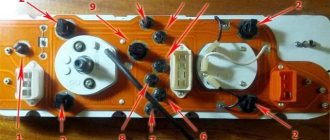
The cooling system on the VAZ 2107 car is liquid injector, closed type, with forced circulation. The system consists of the following parts:
- pump;
- radiator;
- expansion tank;
- non-separable thermostat;
- four-blade electric fan;
- cylinder block cooling jacket;
- pipelines and hoses;
- drain plugs.
The coolant in the cooling jackets picks up heat from the heating engine parts, then, under the influence of pressure created by the pump, begins to circulate through the system, thereby carrying out heat exchange.
If the liquid does not have time to cool down to the required level, the fan automatically turns on and will run until the liquid cools down.
Malfunctions
Under normal temperature conditions, the indicator needle does not reach the red field, which means the temperature is within 80-100 degrees. But if the needle still crosses the red zone, it means that the engine’s thermal conditions are increased, and the following problems may be present in the cooling system of the VAZ 21074:
- loosening of the pump drive belt;
- Leaking or insufficient coolant;
- thermostat malfunction;
- electric fan malfunction;
- pump malfunction;
- difficult road conditions.
Replacing the water pump
The pump (water pump) of the VAZ 21014 ensures the circulation of fluid throughout the system, and it is this that most often fails. A faulty water pump is indicated by traces of coolant leakage, as well as a characteristic hum when the engine is running. If the unit is faulty, it will need to be replaced.
Replacing the pump on a VAZ 21074 yourself will require the following tools:
- ratchet, large and small;
- open-end wrench 13;
- extension;
- socket heads for 10 and 13;
- container for draining liquid;
- flat screwdriver.
The procedure for replacing the pump in the VAZ 2107 injector engine cooling system will be as follows:
- The plug on the left side of the engine block is unscrewed and the coolant is drained into a specially prepared container. If you need to completely replace the coolant, then the drain plug is unscrewed on the cooling radiator too.
- The generator belt is removed by unscrewing the tension nut.
- Using a screwdriver, loosen the hose clamp that fits the pump. After this, the pipe is removed with little effort.
- Next, use a ratchet handle with a 10mm socket to unscrew and remove the thin coolant supply tube. You should act carefully so as not to accidentally damage the tube.
- The longest bolt securing the pump body, located on top, is unscrewed. After unscrewing, the bolt must be removed, sometimes you have to use penetrating lubricant to do this.
- The two remaining bolts at the bottom are unscrewed. An open-end wrench is best suited for this.
- The pump along with the housing is carefully removed and pulled out. The seat needs to be thoroughly cleaned.
- The new pump is put into place in the reverse order. In this case, it is advisable to replace all gaskets. After the pump has been successfully replaced, coolant is poured into the system.
- At the end of the work, you will need to bleed the system. To do this, disconnect the hose from the intake manifold.
Replacing a pump on a VAZ 2107 injector usually takes no more than an hour.
Units and pipes
For high-quality cooling of vehicle mechanisms, the following units are included in the design of the hydraulic system:
- Water pump or pump - for circulating coolant. Pumps are used that are driven by a belt together with a fan, a toothed belt, or an electric drive, regardless of the motor.
- A fan that serves to improve heat exchange and increase the air flow passing through the radiator. Typically, fans of an axial design are used (the air flow flows along the axis of the fan).
- Connecting pipes. For example, there are four pipes of the VAZ-2107 cooling system (injector), each with its own name and application:
- outflow, or lower;
- leading, also called upper;
- water pump coupling;
- bypass pipe or corner.
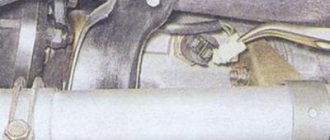
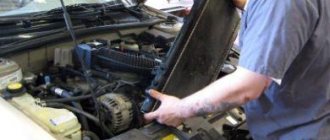
Removing the heating radiator
- screwdrivers (flat and Phillips),
- open end and socket wrenches.
- In the engine compartment, it is necessary to loosen the two clamps that secure the hoses to the heater pipes. When removing the hoses, a little antifreeze will leak out.
- Here you need to open the screws of the rubber seal and remove it.
- The rest of the operations are performed in the salon. You should start from the radio panel. It is usually secured with two self-tapping screws.
- Using a 7 mm wrench or a screwdriver, the cable is disconnected from the stove tap.
- There are four brackets on the fan casing, which can be removed using a screwdriver.
- The casing moves down and moves towards the pedals. The electric motor power wires will not allow the skins to be completely removed.
- However, there will be enough free space to carefully remove the radiator from under the panel.
Modifications
- LADA-2107 (engine 2103, 1.5 l, 8 cl., carburetor)
- LADA-21072 (engine 2105, 1.3 l, 8 cl., carburetor, timing belt drive)
- LADA-21073 (engine 1.7 l, 8 cells, mono injection - export version for the European market)
- LADA-21074 (engine 2106, 1.6 l, 8 cl., carburetor)
- LADA-21070 (engine 2103, 1.5 l, 8 cl., carburetor)
- LADA-2107-20 (engine 2104, 1.5 l, 8 cells, distributed injection, Euro-2)
- LADA-2107-71 (engine 1.4 l, 66 hp engine 21034 for A-76 gasoline, version for China)
- LADA-21074-20 (engine 21067-10, 1.6 l, 8 cells, distributed injection, Euro-2)
- LADA-21074-30 (engine 21067-20, 1.6 l, 8 cells, distributed injection, Euro-3)
- LADA-210740 (engine 21067, 1.6 l, 53 kW/72.7 hp 8 cells, injector, catalyst) (2007 onwards)
- LADA-21077 (engine 2105, 1.3 l, 8 cl., carburetor, timing belt drive - export version for the UK)
- LADA-21078 (engine 2106, 1.6 l, 8 cl., carburetor - export version for the UK)
- LADA-21079 (rotary piston engine 1.3 l, 140 hp, originally created for the needs of the Ministry of Internal Affairs and the KGB). Years of production: 1986—1991
- LADA-2107 ZNG (engine 21213, 1.7 l, 8 cells, central injection)
How does a radiator work?
The cooling process involves releasing into the environment the heat that has accumulated in the metal of the combustion chamber. The mediator in this process is liquid antifreeze (most often antifreeze), which fills the engine water jacket. The radiator is designed in such a way as to quickly reduce the temperature of the liquid that has already warmed up. It is located in the front part of the engine compartment and is blown by a flow of oncoming air. Antifreeze, entering the radiator, cools and then reenters the water jacket.
In the VAZ-2107, cooling circulation passes through a dual-circuit system, including small and large cooling circles. In a small circle, antifreeze passes only through the thermostat, bypassing the radiator. A large circle opens when the liquid is heated at a sufficiently high level. If necessary, heat can be released not into the atmosphere, but into the car interior through the heater air ducts, then the radiator acts as a stove.
Why do you need a fan?
During the hot season or while driving on city roads, the volume of natural air flow may not be enough to operate the cooling system. Then forced airflow is turned on using a fan installed on the radiator housing.
In the first VAZ-2107 models, this process is started mechanically: the fan impeller begins to rotate as soon as the engine is started. The fans of later “sevens” are equipped with electric motors with special sensors that automatically respond to high coolant temperatures (90°C and above). This way, mechanical fans run continuously, while electric fans only run when needed.
Removing antifreeze from the cooling system
Coolant (antifreeze) is highly toxic and requires precautions when working. The first thing you need to make sure before draining the antifreeze is that the engine has cooled down.
On a hot engine, the coolant is under pressure and if you try to open the radiator tank or remove the clamp from the hose, it can burst out in the form of a hot fountain, which can cause serious burns. For the same reason, you should not check the fluid level on a hot engine by opening the expansion tank cap.
After making sure that the engine has cooled down, open the cockpit of the interior heater radiator. To do this, the upper heater control lever must be moved to the extreme right position.
After this, the work is transferred to the engine compartment. The procedure is as follows:
- Place a container with a volume of at least 10 liters under the drain hole.
- Unscrew the coolant drain plug, which is located in the lower left corner of the radiator. Liquid will begin to flow out.
- Remove the expansion tank and radiator filler caps. This will prevent vacuum in the system and speed up the process of antifreeze leakage.
- Disconnect the electric fan connector.
- Unscrew the three bolts securing the electric fan to the radiator (an 8 mm wrench is required).
- Remove the electric fan.
- Using a 10 mm wrench, unscrew a pair of radiator mounting bolts.
- Remove the cooling radiator (the radiator should be removed carefully, being careful not to damage it).
- Check the condition of the radiator rubber cushions. Replace them if necessary.
After dismantling, the radiator should be checked. The presence of deposits clogging the tubes is difficult to determine. If the reason for removing the radiator was to search for the causes of a coolant leak, you can carry out a simple check.
Checking the radiator tightness
You can check the radiator (brass or aluminum) in a bath of water. To do this, you need to plug the holes, immerse the radiator in water and supply air into it at a pressure of 0.1 MPa. If air bubbles appear, the radiator needs to be soldered and replaced. Aluminum radiators, which are equipped with most new VAZ classic models, should be checked at an air pressure of 0.2 MPa.
Minor damage to the brass radiator can be soldered. If the damage is extensive, or if the radiator is made of aluminum, it needs to be replaced.
Dismantling
You can remove the radiator on a “Classic” (VAZ 2101, 2102, 2103, 2104, 2105, 2106, 2107) using approximately the same procedure. The main thing is to free it from all hoses and fasteners. You will also have to first remove the radiator cooling fan. But first things first.
- Remove the hose that leads from the expansion tank
- Remove the upper supply hose. It is located under the expansion tank pipe
- Remove the lower outlet pipe (in the image, for clarity, the cooling fan was previously removed)
- Let's start dismantling the electric fan. First you need to disconnect the connectors of its wires, as well as the fan switch sensor.
- Using a size 8 wrench, unscrew the fastening bolts (there are three in total).
- We take out the fan very carefully so as not to hit the radiator with it and damage its thin walls.
- The time has come to dismantle the radiator itself. This can be done as easily as possible. The device is secured with just two bolts and is mounted on rubber grooves at the bottom. Therefore, using a 10mm wrench, unscrew the fastening bolts.
- To access the bolt on the right, you will most likely have to remove the battery, or you can simply use a ratchet handle and a special attachment.
- And we remove the device very carefully so as not to accidentally harm it.
- Be sure to check that the rubber pads are in good condition and replace them if necessary.
Attention! A slight impact on surrounding metal elements will be enough to damage the thin walls of the radiator. This is only uncritical if you plan to replace it with a new one. But even old devices, after minor repairs, sell well on the used goods market.
Step-by-step instructions for replacing a VAZ 2107 radiator heater
If you follow our instructions, replacing the radiator will be quite simple:
On the passenger side, on the wall of the partition of the engine compartment and the car interior, we find two pipes going from the engine to the passenger compartment. Using a shaped screwdriver, unscrew the clamps that compress these pipes and remove both hoses in turn. There may be a small amount of liquid left in the hoses; prepare a clean rag in advance to wipe off the drip. Near the outlet pipes, you need to unscrew two screws, then release the stove mount. To do this, use an open-end wrench size 7. Now carefully remove the rubber seal. Once you wipe your hands, the work is now transferred to the inside of the car. You have to remove the tape recorder shelf and partially disassemble the panel. It sounds loud, but in reality you need to unscrew two screws. Behind this panel is the heating valve. Again we use the key on 7, we release the cable fastening and its drive. We move the freed cable to the side, otherwise it will constantly create interference. The next obstacle is the casing, in the depths of which the stove radiator is hidden. It consists of two halves, fastened with steel brackets, two on each side
You need to snap off all four and remove the lower part of the casing. A faulty radiator contains residual coolant inside; carefully remove it from the casing. It's time to disconnect the faucet from the heat exchanger. You will need a 10mm wrench, unscrew two bolts, separate the tap from the body and check the condition of the connecting gasket
Most often, it is better to replace the gasket. We unscrew both bolts of the inlet pipe, use the same 10mm wrench. It is worth checking the condition of this gasket too.
We check the functionality of the stove tap. Recommends replacing the faucet if it works with deficiencies, for example:
does not open completely; sticks; moves with difficulty, etc.
What's the point of having to do repair work on the stove again after a short time, if everything can be provided for right away. Now we do all the steps in reverse order.
- Lubricate the gasket of the inlet tube with sealant, and also lubricate the valve gasket. We screw the inlet pipe to the new radiator, not forgetting to install the lubricated gasket. We screw the tap on and check the presence of the gasket.
- We put the assembled radiator in its place in the upper housing of the casing.
- We don’t assemble the casing, we get out of the car. We fasten the radiator tubes to the interior partition using a rubber seal and two bolts.
- Before installing pipes and clamps, it is necessary to check their condition. The pipes should not have any cracks, they should be flexible. If the condition of something is in doubt, it should be replaced.
- We pull the pipes onto the radiator tubes and compress them using clamps.
- Before pouring coolant into the system, make sure that the drain hole is closed and the heater valve is fully open. Fill in the liquid, close the radiator and expansion tank with caps.
- Now you can start the engine, you need to warm it up before the thermostat opens.
- We don’t turn off the engine, we begin checking our work. The radiator is new, there should be no complaints about it, but the connections may leak. We check the gaskets for moisture and fluid level. Add coolant to the required level if necessary.
Having made sure that everything is in perfect order, we proceed to the final stage of assembly.
- Having connected the cable to the crane drive, we fix it.
- We place the lower part of the casing body in place and secure it using metal brackets.
- All that remains is to install and strengthen the tape recorder shelf with self-tapping screws.
Radiator repair
The most common radiator malfunction is a leak. Due to wear or mechanical damage, cracks appear in the radiator housing, which at the initial stage you can try to eliminate with various chemical additives. Practice shows, however, that such a measure is often temporary and the leakage resumes after a certain time. In this case, some car owners use so-called cold welding - a plasticine-like mixture that hardens when applied to metal. The most effective and proven means of combating radiator leaks is soldering the case with a regular soldering iron.
When starting to repair a radiator using the soldering method, you need to have on hand to begin with:
- Phillips screwdriver;
- socket wrench or 10mm socket with extension.
This set of tools is sufficient to remove the radiator, provided that the system is already freed of coolant. To remove the radiator, you must:
- Use a Phillips screwdriver to loosen the clamps holding the hoses to the nozzles.
- Remove the hoses from the inlet, outlet and safety connections.
After the radiator is dismantled, you should prepare:
Soldering damaged areas is performed in the following sequence:
- The damaged area is cleaned, degreased and treated with rosin or soldering acid.
- Using a well-heated soldering iron, the damaged surface area is evenly filled with tin.
- After the tin has cooled, the radiator is installed in place.
If a crack occurs on one of the radiator tanks, you can replace the failed tank with a similar one removed from another radiator. To do this you need:
- Using a flat-head screwdriver, press out the tabs that secure the tank to the radiator housing.
The radiator is installed in the reverse order of dismantling.
Radiator fan VAZ-2107
The electric radiator cooling fan installed in the VAZ-2107 car automatically turns on when the coolant temperature reaches 90 °C. The main purpose of the fan is to ensure normal engine temperature, regardless of external conditions and vehicle driving conditions. For example, if the car is stuck in a traffic jam, the engine continues to run and heat up. Natural air cooling of the radiator does not work at this time, and a fan comes to the rescue, which is turned on by a signal from a sensor installed on the radiator.
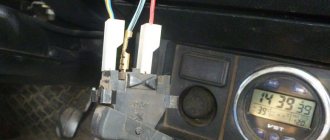
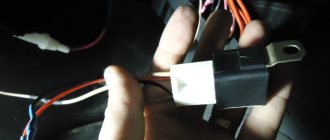
Fan switch sensor
The sensor must ensure timely activation of the fan in a situation where the radiator cannot cope with cooling the engine on its own. If all devices and mechanisms are working properly, then initially, after starting the engine, the coolant circulates in a small circle until it heats up to 80 °C. After this, the thermostat opens and the liquid begins to move in a large circle, including the radiator. And only if the radiator’s work is not enough for cooling and the liquid temperature reaches 90 °C, the fan is turned on at the command of the sensor, which is located in the lower part of the radiator and fixed in a specially provided hole. If the sensor is missing for some reason, the hole is closed with a plug.
If the fan does not turn on at 90 °C, do not touch the sensor immediately. First, make sure that the coolant level has not dropped below the permissible level. Another reason for overheating may be a malfunction of the thermostat: if the temperature has exceeded 90 °C, and the lower part of the radiator is cold, most likely, this is the problem with this device. You can check the serviceability of the sensor by disconnecting the terminals and shorting them together. If the fan turns on, it means the sensor has failed. You can check a sensor that is not yet installed on the car using an ohmmeter. To do this, the device is lowered into water (the part that is located inside the radiator), which begins to heat up. If it is working properly, the ohmmeter will work when the water heats up to a temperature of 90–92 °C.
To replace a failed sensor you must:
- disconnect the ground from the battery;
- empty the system of coolant;
- remove the wires from the sensor contacts;
- Use a 30 mm wrench to unscrew the sensor nut;
- if the copper sealing washer is unusable, replace it;
- lubricate the threads of the new sensor with heat-resistant sealant;
- install the sensor in place;
- fill the system with liquid;
- turn on "ground";
- check the operation of the sensor.
Expansion tank
Installed on the body in the engine compartment. It is necessary to maintain the fluid level in the engine cooling system. When antifreeze heats up, it expands and increases in volume. When cooling, the reverse process occurs. With all this, it is necessary that the liquid always, regardless of temperature, be kept at the same level. This is what the tank is for.
Its functions are the same as those used in heating structures of houses for the operation of boilers. Without it, the cooling system of the VAZ-2107 will not be able to work. The carburetor also needs to be heated, so the height of the reservoir is the same as that of the fuel injection device. Please note that there are marks on the expansion tank indicating the minimum and maximum liquid levels. It is necessary to adhere to the golden mean.
Tank design
RB is a plastic sealed container with a lid. To maintain close to atmospheric pressure in the tank, a rubber valve is installed in the lid. At the bottom of the RB there is a fitting to which a hose is connected from the neck of the main radiator.
To maintain pressure, a rubber valve is installed in the tank lid
On one of the walls of the tank there is a special scale for assessing the level of coolant in the system.
Operating principle of the tank
When the coolant heats up and expands, excess pressure is created in the radiator. When it rises by 0.5 atm, the neck valve opens and excess antifreeze begins to flow into the tank. There the pressure is stabilized using a rubber valve in the lid.
Tank malfunctions
All RB malfunctions are associated with mechanical damage and subsequent depressurization or failure of the lid valve. In the first case, the entire tank is replaced, and in the second, you can get by by replacing the lid.
Installing a VAZ 2107 radiator
Installation of the radiator is carried out in the same way as removal, only in reverse order. We will give only a few general recommendations.
Remember that you need to act very carefully, because the slightest impact can damage the device again. Make sure that all clamps are in good condition and provide a reliable seal. If possible, use worm-drive clamps, which are easier to use and more reliable.
If possible, use worm-drive clamps, which are easier to use and more reliable.
Make sure that all clamps are in good condition and provide a reliable seal. If possible, install worm-drive clamps, which are easier to use and more reliable.
Also, if necessary, replace the pipes. You should not put the oak and cracked pipe back on. It is better to replace it with a new and elastic one. It is recommended to soak the hose in hot water before putting it on the neck. This will make it easier to install, and when it cools, it will better crimp the neck, which will ensure a good seal.
If the coolant is still good, you can add it back. But since it touched many dirty parts, it is better to first strain it through several layers of gauze.
If you decide to install the old radiator back, then you need to flush it through the pipes using a special flushing fluid that will clear it of clogs and deposits.
Fault diagnosis
If someone in this area carried out statistics, it would most likely turn out that in 99 percent of cases the radiator may be faulty for two reasons: contamination or loss of tightness.
- Contamination or scale occurs as a result of using low-quality antifreeze. Sometimes drivers fill the system with plain water, which will inevitably lead to the formation of plaque. Contamination of the internal surfaces and walls of the tubes leads to a decrease in the throughput of the mechanism, and also makes heat transfer less efficient. This is evidenced by frequent engine overheating, which can be judged by the engine oil temperature.
- Damage to the integrity of the structure. Most often we are talking about the formation of cracks or holes on the walls due to flying stones or other reasons. If the gap is large enough, you may find a small puddle of antifreeze under the car after it has been idle. If it is small in size, then the antifreeze flows out only when the engine is warm and immediately evaporates, leaving no traces behind. But a decrease in the coolant level in the expansion tank indicates that the seal is broken somewhere.
To eliminate the malfunction or replace the radiator with a new one, it is necessary to dismantle it. But before that you will have to drain all the antifreeze from the system.