Front-wheel drive VAZ cars are very popular in Russia due to their high maintainability, relatively low cost of spare parts, and simple design. But due to the large number of modifications, it is not easy for the driver to understand even the instructions where this or that unit (part) is located, in particular, on the VAZ-21099 car the injector.
Before repairing a car, some parts have to be searched for a long time and painstakingly, thus wasting a lot of time. In this article we will help you figure out where this or that device is located on the VAZ model 21099, and we hope that the information will be to some extent useful to car owners who have just bought a car, or to novice drivers.
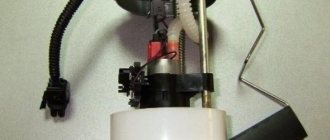
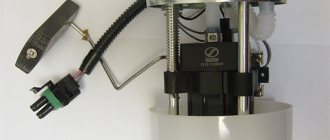
Where is the fuel pump located on the VAZ-21099 injector
Removing and installing a gasoline pump (PG) is not a difficult job and does not require extensive plumbing experience or high qualifications. But if you don’t have to look for a fuel pump on carburetor cars for a long time (it is located on the engine, under the hood), then a beginner may not find it on the injector on the first try. Where is the fuel pump located on the VAZ-21099 sedan injector? Let's figure it out step by step:
- we move the front seats in the car forward as much as possible to free up space in the rear;
- open the rear left door of the car, find a small hinge on the rear sofa, which is located at the junction of the “seats” approximately in the middle of the cabin;
- pull the loop up, thereby raising the back of the lower seat;
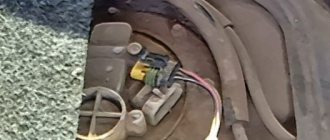
- under the carpet we see the gas tank flap;
- unscrew the two fastening screws, remove the hatch and find the fuel pump underneath.
Description of power supply
First, let's look at the description of mounting blocks with fuses and relays on a VAZ 21099 carburetor or injector with a high and low panel. In the ninety-ninth VAZ models, two types of shields can be used - new and old. Devices belonging to the old-style category are marked 17.3722. These devices are equipped with finger safety mechanisms made in a cylindrical housing. They were installed by engineers on cars produced in 1997 and early years. As for the new type of blocks, they were installed on vehicles manufactured after 1998. These products are equipped with U-shaped safety elements.
Blocks of the new model on the VAZ 21099 of 1999 and later years of production can be marked with the following markings:
- 2114-3722010-60;
- 2114-3722010-10;
- 2114-3722010-18.
Where is the fan relay VAZ-21099 injector
Quite often a problem arises with the Ninety-Nine when the engine fan does not turn on and the coolant begins to boil. If such a malfunction occurs, first of all they check the functionality of the fan itself by applying voltage directly to it from the battery, but there may be other problems.
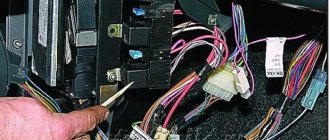
In order to check the entire circuit, it is important to find where the VAZ-21099 injector fan relay is located, since it is responsible for turning on the airflow. We find this part in the front of the car, on the passenger side, it is installed under the glove compartment, at the passenger’s feet.
The required relay in the picture is indicated by an orange circle, and here you will also find a fuse that blows when the cooling fan is short-circuited.
All answers
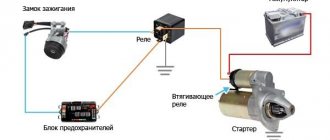
The wire to the fuel pump relay coil comes from the 30th contact of the main relay (#18).
It’s like an “ignition” relay, the “+” goes a lot from it, i.e. without it, the car would not work at all. The second contact of the fuel pump relay winding (relay #24) immediately goes to contact number 3 of the control unit (ECU)
plus 12V is supplied to the fuel pump relay contact through fuse #23. From the other contact of this relay, the wire immediately goes to the fuel pump.
Relay #18, #24 and fuse #23 are located under the passenger footwell panel.
Where is the mass of the VAZ-21099 injector (main)
If the starter turns weakly, or the engine does not start at all (clicks occur when starting), various electrical problems arise, it is likely that the car does not have normal weight. Fixing such a problem is generally not difficult, but to do this you still need to know where the mass of the VAZ-21099 injector is located.
The main mass (thick) wire goes from the negative terminal of the battery to the engine, the thinner wire is connected to the car body, all energy consumers in the car depend on this connection. If the contact is poor, the battery stops charging normally; in order for the starter to turn well, you should check the reliability of these contacts and clean the metal from oxidation. If, due to a heavy load (for example, when installing additional equipment), the ground wire heats up and there is clearly not enough of it, you can “lay” additional ground almost anywhere where good contact between the engine and the body is ensured. The main thing is that this wire has a sufficient cross-section.
Electrical diagram of VAZ 2110 features
Each VAZ-2110 car is equipped with electrical equipment, which is designed to ensure its operation and create comfortable conditions for the driver and passengers. All electrical appliances are integrated into a single network. To understand its composition and order of operation, an electrical circuit diagram of the VAZ-2110 was created. The on-board DC network has a voltage of twelve volts and includes energy sources and consumers, protective and distribution devices, wires and switching elements.
Where is the temperature sensor located?
If the temperature sensor does not show on the instrument panel, there is a high risk of overheating the engine, since the instrument panel does not inform the driver about the heating of the internal combustion engine coolant. Of course, the instrument panel or electrical wiring may be faulty, but most often the temperature sensor (DTOZH) on the engine itself refuses to work.
Where is the temperature sensor located on an injection car 099? Of course, you need to look for it in the engine compartment:
- open the hood;
- we find the wiring that is located between the rear of the engine valve cover and the air filter housing;
- where the DTOZH is located can be seen in more detail in the following photos.
Where is the speed sensor located?
The speed sensor (DS) on front-wheel drive VAZ cars reads pulses depending on wheel speed and transmits the data to the electronic control unit (ECU). When braking the engine, the fuel supply is turned off with the help of the diesel engine and the computer, thus achieving more economical operation of the internal combustion engine. If the sensor is faulty, an error code is recorded, gasoline consumption increases slightly, and idle speed decreases, especially during heavy braking. It is difficult to immediately detect where the speed sensor is located, since it is hidden under the air filter housing (AFC).
We find the part we need as follows:
- open the hood of the car;
- Using a 10mm wrench, unscrew the two KVF fastening bolts;
- loosen the clamp of the air “corrugation”, disconnect the “chip” with the wires;
- we take out the KVF, now the sensor has already appeared in the field of view, it is located on the gearbox (gearbox) housing, wires are connected to it, connected using a connector.
The DS can be easily unscrewed by hand, and the plug with wires can be pulled out even after the sensor has been unscrewed (but carefully so as not to damage the wiring during rotation).
Where is the fuel filter located?
The fuel filter (TF) on the VAZ-21099i is designed to clean gasoline from debris, dirt and various impurities; it is a monolithic structure with a rigid metal body and a filter element inside. The frequency of its replacement is every 20-30 thousand km of the distance traveled, also if the car begins to move jerkily, and diagnostics showed that the fuel pump is clogged.
It’s easy to find out where the fuel filter is located; to do this, you need to install the car on an inspection hole or a car lift. The TF is located on the bottom of the body, next to the rear beam and the gas tank, and is secured with a special clamp, which is tightened with a bolt and nut.
Before you start changing the filter, you need to relieve the fuel pressure, otherwise when you unscrew the fuel fittings, gasoline will splash under high pressure. You can relieve pressure in the line using a special nipple located at the rear of the fuel rail. Before starting such an operation, it is necessary to prepare a plastic container into which gasoline should be poured, then unscrew the safety cap.
To release the pressure, you can use a standard flat-head screwdriver; when you press the nipple valve, gasoline will come out of the system.
After removing fuel from the line, we proceed to replacing the fuel pump.
Related articles:
- The influence of the fuel vapor recovery system on the operation of the Lada Kalina engine. Modern technologies are developing, equipment is becoming more complex and sophisticated, and progress does not bypass motor vehicles. Carburetor cars were very simple, and understanding them [...]
- Front spar of the VAZ-2109 - replacement, repair, cost of work The VAZ-2109 is a car that does not have a strong body; iron corrodes quite quickly, and almost all body parts rust. Replacement of the front side member is required […]
- Features of replacing the VAZ-2114 oxygen sensor, signs and causes of malfunction In connection with tightened environmental standards, all cars began to be equipped with additional systems that reduce the toxicity of exhaust gases, and on almost every car with […]
Work process
Electric fuel pump for VAZ 2110
The driver turns on the ignition switch, a signal is sent from the on-board computer to the electric motor of the pump, in which an electric charge occurs. A motor starts working inside the pump itself, creating a working pressure level in the fuel supply system in a few seconds. After three seconds, the on-board computer does not give a signal to start the engine, and the pump motor automatically turns off. At this time, you can hear the operation of the electric fuel pump. In the first seconds of the pump starting to operate, gasoline enters it through the tube. The fuel exits through a special one-way valve installed by the manufacturer, which traps debris and impurities.
One thought on “Location of components and parts on the injection car VAZ-21099”
I have a fan relay on a 2109 injector, located to the left of the one marked in the photo
If the starter of your car turns normally, but the car does not start, the first thing you need to do is check that the fuel pump is turned on. On domestic cars, its operation can be heard from the passenger compartment; when the ignition is turned on, a characteristic buzzing sound comes from under the rear seat or trunk. If the fuel pump does not work, you need to check the integrity of the fuses and the activation of the main relay of the engine management system and the fuel pump relay. On the VAZ-2107, VAZ-2108, VAZ-2109 and their modifications, relays and fuses are located on the shelf under the glove compartment or under it. On VAZ-2110 and similar ones, you should look in the heater console on the passenger side by unscrewing the fastening screws and removing the side cover. On GAZ cars they are located under the hood on the front wall of the cabin, closer to the passenger side.
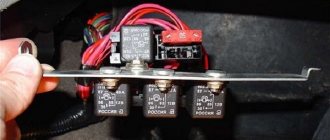
Additional block
It is located in the cabin, under the panel on the right, mainly on cars with injection engine types.
Decoding
p, blockquote 32,0,0,0,0 —>
| 1 | 15A Main relay |
| 2 | 15A Injection system power supply circuit (non-switchable voltage input) |
| 3 | 15A Fuel pump |
| K1 | Main relay |
| K2 | Electric fuel pump relay |
| K3 | Cooling fan relay |
We have also prepared a video on this publication on our channel. Watch and subscribe.
p, blockquote 34,0,0,0,0 —> p, blockquote 35,0,0,0,1 —>
Still have questions? Ask them in the comments.
Comments 3
Hello. I have a VAZ 99. Year of manufacture 1998. The car has been converted. I have an injection one. ECU January. Now the question is - is there a difference in the carburetor fuse block from the injection one? I have a block before the 1st sample (finger type), the car sometimes does not start, in general there are a bunch of reasons. A month ago I opened the block, water got in there, I didn’t bother and bought a used one exactly like this and installed it. after replacement even more problems. Should I install another block? Please let me know.
For the injector you need a block in which the side connector goes up (in the catalog it is designated 2114 or 2115 (newer modification)), and the pin connector is for the carburetor, most likely your fan is not working and the generator is not charging at idle, and little things Problems
Hello. Tell me please. I have a VAZ-2109. fuse box option-2. fuse f-13 left headlight does not light low beam. There is no power to this fuse. everything else rang. I don’t know where to dig next?
Source
The fuel pump relay does not turn on.
If the fuel pump does not work, then first of all you need to check the attraction of the main relay and the fuel pump relay. If the main relay does not click, then it is necessary to check its switching circuit and its serviceability. How to do this is described in the article the main relay does not turn on,
In the case when the main relay turns on, but the fuel pump relay does not, it is necessary to check the power at pins 85 and 86. When using a test lamp, its current consumption should not exceed 0.25A, otherwise damage to the controller may occur. If the control lamp does not light up on any terminal, then the relay is not receiving power. This may be caused by a blown fuse or a broken power cord.
In the case when the lamp burns brightly on one terminal, and at half-glow on the second, and the relay may be activated, you should remove the relay from the socket and connect terminals 85 and 86 with a test lamp. When the ignition is turned on, the control lamp should light up and go out after approximately 20 - 30 seconds. If the lamp lights up and there is poor contact in the connection between the block and the fuel pump relay. If the lamp does not light up, there may be a break in the wire connecting the relay to the controller or the controller itself may be faulty.
The fuel pump does not work, the relay turns on.
Checking relay power.
In the case when the fuel pump relay turns on when the ignition is turned on, but the pump itself does not work, you need to check the power at terminal 87 of the fuel pump relay. To do this, touch terminal 87 of the relay socket with the output of the control lamp connected to the vehicle ground, and the lamp should light up. If the lamp does not light, it means the fuse has blown or there is a break in the wire.
If there is power at terminal 87, you should remove the relay from the socket, and instead place a jumper between pins 87 and 30. In this case, if the pump and connecting wires are working properly, the pump should start working and if this happens, the relay should be changed. If the pump does not start working, then, without removing the jumper, you need to touch the power wire on the fuel pump with a test lamp connected to the vehicle ground.
Checking the fuel pump power circuit.
If a submersible pump is installed on the car as part of the fuel module, you need to remove the connecting connector and touch one of the thick wires. When you touch one of them, the indicator lamp should light up. If the lamp does not light up on any of the wires, then it is necessary to eliminate the break in the wire from the fuel pump relay to the module connector or the pump itself, if the pump is of a remote type. One of the reasons for the break may be the anti-theft blocking of an installed non-standard alarm system.
Tips for motorists
VAZ-2109 passenger cars of the last years of production had injection engines, so on these “nines” an electric fuel pump was installed in the fuel tank. And on a small part of the VAZ-2109 with a carburetor engine still in use today, mechanical fuel pumps were installed.
Failure of the fuel pump on VAZ-2109i injection engines is determined quite simply, since when the ignition key is turned to the “ignition on” position, the driver simply will not hear the characteristic noise that the operating electric motor of the fuel pump makes. Typically, drivers of “nines” begin their search for the cause of a fuel pump failure by checking the condition of the fuse that protects this electrical circuit.
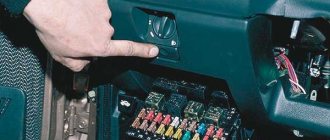
It is located under the front panel shelf, which is located below the glove compartment. When you unscrew the fastening screws, the block of three relays and three fuses on the wires will move lower, so it will be more convenient to work with it. You will need to check the rightmost fuse and the condition of its contacts. If a blown fuse is detected, it will have to be replaced with a new one. And also find the reason why he burned out.
If the fuse is intact and the contacts are not oxidized, then the next step in troubleshooting is to check the functionality of the fuel pump relay. It is located in the same block as the fuse and is located on the far right. Drivers usually check it by replacing it with a known-good relay. If after such a replacement the fuel pump starts working, then you will have to purchase and install a new relay.
But when the fuel pump still continues to be “silent”, then you will need two wires four meters long. They are needed to check the condition of the fuel pump itself by connecting it to power directly from the battery. To do this you will need to: lift the rear seat cushion, remove the hatch cover, disconnect the plug block and connect the wires from the battery to the fuel pump terminals. There are three terminals in the block: one for ground, the negative one from the battery is connected to it, two more positive ones, for the fuel pump and the fuel level indicator in the tank.
If the fuel pump, when connected directly, works, then you will have to ring the wires going from it to the fuel pump relay, and if it does not work, then either replace it with a new one, or you will have to disassemble it and look for a fault inside the fuel pump.
On “nines” with a mechanical fuel pump, the most common malfunction is wear of the fuel pump diaphragm, as a result of which gasoline will leak through the drainage hole in the housing when it operates. The second reason for the failure of such a fuel pump is wear of the pusher, which transmits force from the camshaft cam to the fuel pump drive lever.
