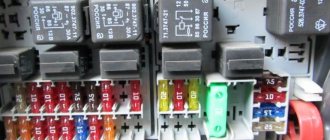
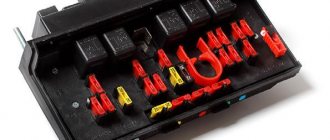
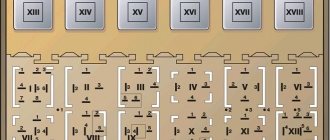
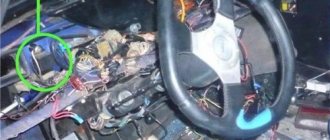
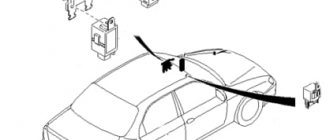
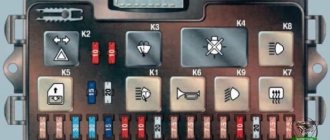
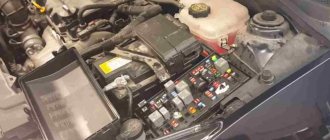
One of the key components of the electrical circuit of a VAZ 2105 car is the fuse box. Many problems with electrical equipment that arise during the operation of a vehicle are associated with this particular unit. Car enthusiasts, as a rule, carry out maintenance and diagnostics of faults in the fuse box on their own.
- Block under the hood
Table: which fuse is responsible for what - How to remove the mounting block
- Repair of mounting block
- Replacing a burnt track
Video: how to repair a blown fuse box track
- How to identify a blown fuse
Purpose of the VAZ 2107 relay
| Relay number | Relay purpose |
| R1 | Heated rear window relay |
| R2 | Relay for headlight cleaners and washers (wiper relay) |
| R3 | Signal relay. If there are two signals, then there is a relay. If there is only one signal, a jumper |
| R4 | VAZ 2107 cooling system fan relay. Or a jumper if the car is fuel-injected |
| R5 | High beam relay |
| R6 | Low beam relay |
On VAZ 2107 cars with an injection engine, several more relays and fuses can be found under the glove compartment. They look like this:
WHY DO FUSES FAIL?
There may be several reasons for this. You need to start with trivial cases when a device with a lower current is placed in the circuit. When you turn on, for example, the lighting, the starting current of the cold filaments exceeds the working current, so if the circuits are working properly, a fuse of a lower rating will simply blow out.
A short circuit in the protected circuit is one of the most dangerous electrical equipment faults. If in the circuit where the short circuit occurred there is a fuse of a higher rating, then the track of the printed circuit board of the mounting block may burn out instead. If the culprit for the blown fuse is a short circuit in the circuit, then before installing a new protective element, you need to try to eliminate it.
To increase reliability, a new type of fuse block was developed and installed in the electrical equipment system of VAZ 2105, VAZ 21051 and VAZ 21053 vehicles.
Relay for turn signals, alarm and ignition relay for VAZ 2107
The turn signal and ignition relay is located behind the instrument panel. To replace or check the relay, you need to remove the instrument panel and you can see it behind it:
| Relay number | Relay purpose |
| R4 | Ignition relay VAZ 2107 |
| R5 | Relay for alarm and turn signals VAZ 2107 |
Mounting block in the cabin
In the first VAZ 2105 models, the fuse box was located inside the car. Such a block can still be seen today in some “fives” under the instrument panel next to the left door. Each of the fuses on the block located in the passenger compartment is responsible for the same section of the electrical circuit as the corresponding fuse on the block located under the hood.
How to identify a blown fuse
If problems arise with any group of electrical equipment in the car, the likelihood that the problem is in the fuse is high, but not one hundred percent. To make sure that a fuse has failed, sometimes an external inspection is enough: if there are burnt marks on its body, most likely the fuse has burned out. This method of checking is quite primitive, and in this case it is better to use a multimeter, which allows you to diagnose the malfunction:
- by voltage;
- by resistance.
In the first case it is necessary:
- Set the multimeter to voltage measurement mode.
- Turn on the circuit being tested, such as lighting, stove, etc.
- Check the presence of voltage at the fuse terminals. If there is no voltage at one of the terminals, the fuse must be replaced.
In the second case, the multimeter is switched to resistance measurement mode, after which the tips of the device are connected to the removed fuse. If the resistance value is close to zero, the fuse requires replacement.
If the resistance value is close to zero, the fuse requires replacement
Unit dismantling and repair
The fuse box located in the passenger compartment is removed in the same sequence as that installed under the hood. It is necessary to unscrew the fasteners, remove the connectors and remove the unit. Just as in the case of the block located under the hood, repairing the mounting block installed in the cabin involves replacing fuses and restoring the tracks.
If the fuse blows on the road and you don’t have a spare at hand, you can replace it with a wire. But at the first opportunity, the wire must be removed and a rated fuse installed instead . The fuse location diagram is usually shown on the inside of the mounting block cover.
It should be remembered that there are several types of mounting blocks that do not differ from each other in appearance. The differences lie in the wiring of the tracks. When replacing a block, you need to make sure that the markings of the old and new blocks match. Otherwise, the electrical equipment will not work correctly.
I changed the mounting block in the VAZ 2105 about six months ago. When I changed it, I didn’t know that there were several types. The sellers at the car market claimed that there was only one type, and since my old one was completely falling apart, I had to take what I had. Two problems immediately appeared with the new unit: the wipers stopped working (this problem was solved by throwing a jumper from the first fuse to the second). The second problem (and the most important) is that when the car just sits with the engine turned off, it drains the battery (the charging wire, if it matters, is inserted into the 3rd slot, 1st socket, I don’t know how to say it differently, I have almost no knowledge of auto electrics at all. Completely charged in about 8 hours, it discharges to 0. The third problem (not so important) - the turn signal indicators disappeared. I went to an auto electrician, he just threw up his hands, looked at the panel and could not do anything. I threw out the old panel, as it was almost completely crumbled, not I knew that such a problem would happen, so I have nothing to compare it with.
A pedestrian
https://www.semerkainfo.ru/forum/viewtopic.php?t=2040&start=100
Old style fuse box
Old style mounting blocks use cylindrical (finger) fuses, which are installed in special spring-loaded connectors. Such connectors are not reliable and durable, which is why they cause a lot of complaints from car enthusiasts.
The old-style VAZ 2105 mounting block uses cylindrical fuses
Each of the 17 fuses located on the old-style mounting block is responsible for the same groups of electricity consumers as the corresponding fuses on the new-style block (see table above). The only difference is the rated current for which the cylindrical fuses are designed. Each plug fuse (on a new type block) has a rated current:
- 10 A corresponds to a finger fuse with a rated current of 8 A on an old-style unit;
- 20 A - 16 A;
- 7.5 A - 8 A.
Maintenance and repair of the VAZ 2105 fuse box in most cases does not cause difficulties for car enthusiasts. To independently determine the malfunction of the mounting block and fix it, even a little driving experience is enough. For reliable operation of electrical equipment, it is important to use fuses with the parameters specified in the technical documentation.
What is the difference between a gear starter and a regular one on a VAZ 2110?
Every driver wants to get more performance from their car. The question often arises: what differences are there between gearbox and conventional starters? Which engine starting device is better and more reliable? The gear starter on the VAZ ATEK differs in that the torque is transmitted through the gearbox, while in a simple starter it is transmitted through an overrunning clutch or Bendix.
The main differences between these devices
A regular starter is very large, but a classic gear starter is almost 50% smaller in size. Regarding the converter, it is located inside the housing between the armature and the bendix. Knowing the advantages and disadvantages of each unit will allow the car owner to analyze the performance of the car in all conditions, both weather and road.
Gear type starters have an electric motor, which is no different from a conventional one. But, the load on the electrics with this type is less, there is no load on the front hub. In addition, a car with a converter device will last longer since the energy consumption is much less.
Why do most people choose a gear device?
The VAZ 2110 gear starter is more convenient, reliable, and uses a low energy charge. Voltage surges during startup are much smaller than with a simple mechanism. The advantage of this device is also its small size, which allows it to fit into the engine compartment of the latest car brands.
Advantages of a gear starter:
- trouble-free operation in the cold season, quick engine starting is guaranteed;
- the presence of plastic protection for the traction relay;
- elimination of short circuits in places where power wires are attached;
- no moisture getting inside the mechanism due to installed rubber sealing rings;
- low power consumption;
- work safety;
- long-term operation.
The choice of starter device is quite important, since the correct operation of the entire engine system depends on it. Confidence in the manufacturer, reliability in operation, reliability - all this must be taken into account. The gear starter from TM “ATEK” on the website atek-avto.com meets all these criteria, it will provide you with a confident start of the car engine in any weather conditions and will serve faithfully for a long time. Belarusian quality at an affordable price!
Car modifications
VAZ-2104 . The basic version of the station wagon, with a carburetor engine from the VAZ-2105, 1.3 liters and 64 horsepower. Equipped with a 4-speed gearbox.
VAZ-21041 . A prototype of a station wagon, it was equipped with a carburetor engine from a VAZ-2101, with a volume of 1.2 liters and a power of 62 hp. Just like the base model, it was equipped with a 4-speed manual transmission.
VAZ-21042 . Export version, the steering wheel was located on the right. The car also received a carburetor engine from the VAZ-2103, with a volume of 1.5 liters and a power of 72 hp.
VAZ-21043 . The car was equipped with electrics and interior from a VAZ-2107, some copies had a VAZ-2106 interior. The carburetor engine was borrowed from the VAZ-2103. The gearbox was either 4 or 5 speed.
VAZ-21044 . An export model, equipped with a 1.7-liter VAZ-2107 engine with mono-injection, as well as a 5-speed gearbox.
VAZ-21045 . The export version with a 1.8-liter engine did not enter mass production.
VAZ-21045D . It was produced in small series since 1999, equipped with a VAZ-341 diesel engine with a volume of 1.52 liters and a power of 50 horsepower. The gearbox is 5-speed.
VAZ-21047 . A prototype with an engine starting from a penny. An improved version of the “Four”, it was equipped with a VAZ-2107 interior and a VAZ-2103 carburetor engine with a volume of 1.5 liters and a power of 72 hp. The gearbox was 5-speed. On export versions, the radiator grille was installed from the VAZ-2107.
VAZ-21048 . Diesel station wagon, with a 1.77-liter VAZ-343 engine. The gearbox is 5-speed.
VAZ-21041i . A car equipped with a VAZ-21067 injection engine. volume 1.6 liters. The gearbox is 5-speed. The electrical equipment and interior are from a VAZ-2107 car, and the front seats are from the Izhevsk hatchback IZH-2126.
VAZ-21041 VF . The interior, electrics and front seats are the same as the previous modification; the radiator grille is also borrowed from the VAZ-2107. It was equipped with a 1.5 liter injection engine from the VAZ-2103 and a 5-speed manual transmission.
Diagram of the carburetor solenoid valve control system
- 1. Carburetor limit switch
- 2. Ignition coil
- 3. Solenoid valve
- 4. Mounting block
- 5. Ignition relay
- 6. Ignition switch
- 7. Wire harness block connected to the electro-pneumatic valve control unit.
- 8. Solenoid valve control unit
A. The order of conditional numbering of plugs in the control unit
Signs of trouble
If malfunctions occur in the electrical circuit, sooner or later the driver will find out about it in any case.
There are several types of car condition in which the car owner must troubleshoot:
- The car engine does not start, therefore, operation of the car is impossible.
- The car starts, but the equipment does not work correctly, intermittently (the author of the video is the Auto Repair and Maintenance channel).
The main reasons why problems with electrical wiring may occur:
- Poor contact of the electrical circuit with the on-board network. The reason may be damage or oxidation of the contacts. Problems of this kind can be solved either by replacing damaged contacts or by cleaning them, if possible. The contacts could have oxidized on the connectors and plugs; cleaning them with a wire brush or sandpaper can solve this problem.
- Broken wire or breakdown of insulation. For this reason, the equipment simply stops working. If the damage is minor, you can try to restore the functionality of the damaged cable by wrapping several layers of electrical tape around it. But as a rule, worn-out wires are replaced to prevent possible problems in the future.
- Failure or incorrect operation of the generator. This unit consists of many elements and the failure of one of them can affect the functionality of the unit as a whole. For example, often the generator does not work correctly due to a failed voltage regulator relay or worn brushes. In this case, the problem can be solved by dismantling the unit and further disassembling it and replacing failed components. You should periodically check the degree of tension, as well as the condition of the drive belt - if during the check you see signs of damage or wear on it, then in the near future the belt will need to be changed.
- Low battery. Sooner or later, all car owners without exception face this problem. The battery belongs to the category of consumables, so when its service life comes to an end, it must be replaced. In order to prevent such a problem, the battery must be recharged periodically.
- Fuse failure. As mentioned above, all electrical circuits of a car are protected using safety devices, so if a part burns out, it must be replaced. Frequent fuse failures may be associated with power surges; in this case, it is necessary to find out the cause of the overvoltage.
Photo gallery “Main faults”
How to repair a starter yourself
I'll tell you how to sort out and restore the starter using a specific example. I came across a sample with the following breakdown: the starter turns the crankshaft slowly, even with a high battery charge.
Having dismantled and disassembled the device with the connected starting wires, when it starts, it rotates quite confidently. After some time, the device stopped and smoke appeared.
When the back cover of the starter was removed, black dust fell out of it. This means that the brushes are worn out. After removing the brush mechanism, remove the housing with magnets and rotor.
In order to better examine the cause of the problems, you need to sort out the starter, blow out all the mechanisms with a compressed air cylinder and wash them in gasoline. After these manipulations, it becomes clear that the brushes have practically worn out, the springs that pressed them have weakened, the brush holders have turned blue due to overheating, and the coils have melted.
How to resuscitate and repair the starter in this case? You need to take the brush mechanism (assembly) and bring it to a company that repairs automotive electrical equipment. Ask for an analogue. Approximately this will cost you 450-500 rubles. And if you compare it with the price of a starter (5,000 rubles on average, it all depends on the brand), it turns out to be quite cheap.
Then we thoroughly clean the rotor and inspect the commutator, which is in constant communication with the brushes. It turns out that the collector is also worn out (marked with arrows in the picture), but it will be able to work for some time without re-grooving it. Therefore, we simply clean the collector using fine sandpaper. As a rule, a commutator can easily work through a couple of sets of brushes. But if the collector fails, then most likely the entire starter will have to be replaced.
Go ahead. Let's carefully examine the Bendix (overrunning clutch). Let's try to rotate its gear manually. It should spin one way, but not the other. Also, the bendix should move easily along the shaft axis. In my case, everything is fine with him. If there were problems with the overrunning clutch, it would also be quite difficult to find it on the market. Most often, the rollers and springs wear out in the Bendix, which is why the gear does not lock but slips during reverse rotation. As a result, the starter works, but the engine does not. In this case, it is best to replace the bendix or the entire device.
Then he inspects the condition of the gearbox itself. We remove the gears, then wash them with gasoline. If everything is fine, then we apply just a little CV joint or high-quality bearing grease to the bearings and gears.
Additionally, let's inspect the contacts of the retractor relay. To open it you will need a soldering iron. You need to unscrew two screws and solder solder on two contacts (indicated by arrows).
The contacts were in perfect order. Clean them with a piece of sandpaper. Then you need to heat up the pistons that go on the lid and slam the lid on the table with a sharp movement. Extra pieces of solder will come out of the pistons and the holes will become free. Then the cover can be put on the wires without any problems and soldered everything in place.
Under no circumstances should the core of the solenoid relay be lubricated with anything, because in the cold this will cause it to jam. To calm your soul, you can lightly apply motor oil and wipe everything dry.
Then we assemble the starter device in the reverse order. Be sure to apply some grease to the rear rotor hub.
Some people ask how to rewind the starter? If there is a problem with the winding of the device, then re-winding is not entirely effective. Here it is better to replace the entire part or device.
Before installing the repaired starter on the car, grind the brushes to the commutator. To do this, connect the device using battery cables. Let him work for a couple of minutes intermittently. Everything is ready, the starter can be installed on the engine and enjoy a confident start.
