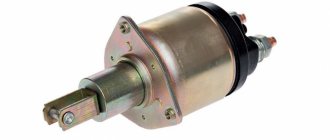
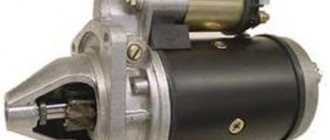
The starter is a complex unit that is needed to start the car; it spins the flywheel, which in turn begins to spin the engine itself. But the starter cannot work without such a seemingly small, but very important element as the bendix, it is attached to the shaft and plays a very important role. But few people have heard about this small unit, and even fewer motorists have any idea how it works. Although many malfunctions are associated with it
Let's start with a definition.
The starter Bendix is a kind of gear that at a certain moment engages with the flywheel, spinning it; after the engine starts, this gear leaves. You need to say its “output” and the engagement controls the solenoid relay
To put it in simple terms, this is an improved gearing unit; it is, of course, not exactly a gear, but a whole mechanism.
Operating principle and features of the bendix mechanism parts
The drive gear with an overrunning clutch serves to ensure that the operation of the starter motor does not coincide with the engine speed. Both parts rotate synchronously, together with the armature shaft in only one direction. In the other they rotate freely. Moreover, this indication does not depend on the state of the armature, which is located in such a part as the starter. Bendix on domestic Volga-made cars is a roller tool that works on the wedge principle.
When this device is actuated, the armature revolutions are transmitted to the outer race of the clutch. The outer ring begins to rotate relative to the inner one. Often the last part remains stationary while the Bendix is running, because the gear is in connection with the flywheel of the idle engine. Under the influence of friction, the rollers move to the narrow part of the wedge space, thereby separating both cages from each other. Thus, the starter bendix drives the armature, while simultaneously driving the flywheel.
It should also be noted that this part has a special retractor spring and inclined splines in its design. They serve to ensure that the starter bendix comes out of the connection with the flywheel wreath. These parts are installed on the armature shaft. The hub moves along them to meet the rotation of the engine.
Principle of operation
The starter Bendix has a gear that contacts the flywheel of the car's engine. In order to start the engine, it is necessary that the starter begins to rotate it at a speed of fifty to one hundred revolutions per minute. It should not rotate faster, as it is not designed for that. He can work intensely only for short periods of time. And it is for this reason that a dangerous situation may arise when the engine itself starts. In this system, everything must work accurately, since the slightest delay can result in ruin for him. In the event that the driver does not turn off the starter in time after starting the internal combustion engine, the Bendix protective element comes into operation.
The speed of the car engine is much higher than the speed of the starter, so the role of the Bendix in this case is to protect the starter from the transmission of torque from the internal combustion engine to it. The bendix rotates only in one direction; it is not rigidly connected to the engine shaft; in a free state it can rotate. And at the moment when the speed of the internal combustion engine begins to exceed the speed of the starter, the clutch (another name for Bendix) rotates freely.
We recommend: Why engine detonation occurs when the ignition is turned off: the main reasons
Structurally, the coupling has the following form: two rings, and between them there are balls or cylinders, which in turn are supported by a spring. Constructive, well-thought-out grooves on the inside of one of the rings in which these cylinders are located make it possible to create jamming when rotating in one direction, and free rotation in the other. Bendix has another common variation - the ratchet overrunning clutch. But this version is usually used on bicycles. But in order to understand the principle of operation of the Bendix, you can take a quick look at it. It is used as a drive; when we pedal, the clutch spins and the bike moves forward, and when we try to pedal in the opposite direction, the brake is applied. I hope my example is clear.
As mentioned above, the Bendix starter may have several more options. For example, the shaft on which the coupling is located has ground splines, which are also the seat of the coupling. The system of operation is the same here: when rotating in one direction, the coupling locks rigidly with the splines, and when it rotates in the opposite direction, it comes off them and rotates freely.
The only significant drawback of the Bendix starter design is its increased and very intense wear. At the same time, the nature of wear is such that very often it is necessary to replace the entire bendix and it is not possible to replace only an individual worn-out part, because all its component parts wear out approximately equally.
Bendix starter device
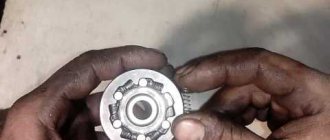
The main elements of the drive are: driven cage with gear - provides clutch with the flywheel; drive cage - located on the starter armature shaft and rotates with it; buffer spring - softens the moment of contact of the gear with the flywheel crown (sometimes the clutch does not occur the first time and thanks to this spring the gear bounces back and engages again); rollers and pressure springs - allow the gear to rotate in only one direction (if the rollers wear out, the gear will slip when the engine starts).
Most often, breakdowns occur due to wear on the teeth of the starter drive gear. In this case, you have to remove the starter and replace the Bendix, although in some stores you can find repair kits in which the gear is sold separately. Be that as it may, repairing a starter without proper preparation is quite difficult. Less often, the buffer spring weakens. It is also easy to make sure that it has weakened - when you turn the key in the ignition switch, you can hear a grinding noise. The engine will start, but such a misalignment of teeth will lead to rapid wear of both the Bendix gear and the flywheel crown (and repairing it will cost much more than replacing the Bendix).
Also, the cause of the breakdown may be a break in the bendix fork, which connects the bendix to the solenoid relay. If this fork breaks, the overrunning clutch gear will not engage with the flywheel. Over time, the rollers located in the drive holder can also wear out. They look very small, but it is thanks to them that the gear can only rotate in one direction. If the gear rotates freely in all directions, then this indicates either a defect or complete wear of the rollers and weakening of the pressure plates. It is worth saying that the starter is a rather complex device and breakdowns most often do not occur due to the Bendix. The service life of the starter is significantly less than that of the engine, so sooner or later it will still have to be replaced.
Possible faults
The design itself is quite reliable; on modern machines it rarely fails. But nevertheless it happens.
If, when starting the engine, the motorist hears characteristic sounds reminiscent of a ratchet, but the engine itself does not start, the reason is most likely in the Bendix. Clicking sounds mean that the starter is trying to turn the engine flywheel, but it doesn't have enough effort.
Bendix Bosch. 1 — overrunning clutch casing; 2 — driven cage with gear; 3 - ring; 4 — washer; 5 - roller; 6 — pressure spring; 7 — driving clip; 8 — buffer spring; 9 and 11 — support cups; 10 — drive fork ring; 12 — retaining ring.
Most often, the teeth of the drive gear fail. It is the gear and rollers that bear the main load during startup. The teeth are destroyed, ground down, and lack a working surface for engagement.
The rollers also wear out and lose their shape, as a result the gear begins to rotate idle and cannot transmit torque. An accompanying failure is often the destruction of the cage in the area where the rollers operate.
Sometimes a breakdown is caused by wear on the starter shaft guides. In this case, the engagement with the flywheel becomes incorrect.
In those models where there are springs, they are also the cause of failure. Over time, the springs stretch, burst, and are lost.
How to check starter bendix
If the starter bendix does not turn, then you can check its operation in two ways - visually , by removing it from the car, and “by ear” . Let's start the description with the latter, as it is simpler.
As stated above, the main function of the bendix is to engage the flywheel and spin the engine. Therefore, if at the moment of starting the engine you hear that the starter motor is spinning, and characteristic metallic clanging sounds - this is the first sign of a Bendix malfunction .
So then it is necessary to dismantle the starter and disassemble the bendix in order to inspect it in detail and determine the damage. The removal and replacement procedure is described below.
And so, the bendix was removed, it is necessary to inspect it. In particular, check whether it rotates only in one direction (if it turns in both, it means it needs to be replaced) and whether the teeth are eaten. Also check to see if the spring is loose. You should also remove the fork from the Bendix, check its integrity, signs of wear, and if necessary, replace it. In addition, be sure to check if there is any play on the armature shaft. If this occurs, then the bendix should be replaced.
Comprehensive battery health check
Before checking the starter battery, it must be removed. Each car does this differently, so there is no point in describing this procedure. Try to remember which wires go where. This will be needed for diagnostics and reinstallation under the hood .
The main thing is that before any electrical work in the car, you need to remove the “negative” terminal so as not to accidentally short-circuit the wiring.
To test the functionality of the starter with a battery, you need three wires with clamps. We connect one of them to the negative terminal of the battery, and its second end to the housing of the removed starter.
We connect the second wire at one end to the positive terminal of the battery and the free power bolt of the starter. We also connect the third wire to the “plus” of the battery. With its other end we touch the control contact.
At this moment, this is what should happen:
- Click the solenoid relay. This closes the contacts of the power bolts with a movable plate.
- “Shoot” the bendix.
- The electric motor will start.
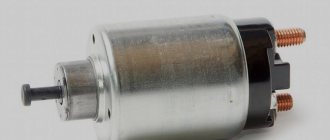
If this does not happen, then in 90% of cases the power relay is to blame. How to correctly diagnose it and what causes of its failure can be read in the article “Checking the starter retractor relay.” Everything is described there in detail with pictures and explanations of each stage.
If, during the check of the power relay, it was found that it is serviceable, but the electric motor did not start, then proceed to the next step. We will check the electric motor.
I can say from experience. If the starter does not turn on the car, but works perfectly when tested on the table, that is, under load it shows signs of malfunction, but not at idle. So the problem does not lie in the power relay. Most often, the breakdown is in the electric motor or bendix.
Possible causes of failure
As mentioned above, gear rotation is only possible in the direction of rotation of the starter armature. If rotation in the opposite direction is possible, this is an obvious malfunction, that is, the bendix must be repaired or replaced. There may be several reasons for this:
- Reduction in the diameter of the working rollers in the cage due to natural wear. The way out is to select and purchase balls of a similar diameter. Some car enthusiasts use other metal objects, such as pieces of a drill, instead of balls. However, we still do not recommend doing it yourself, but buying balls of the required diameter.
- The presence on one side of the roller of flat surfaces formed due to natural wear. Repair recommendations are similar to the previous paragraph.
- Grinding the working surfaces of the driving or driven race in those places where they come into contact with the rollers. In this case, repair is hardly possible, since such excavation cannot be removed. That is, it is necessary to replace the bendix.
Note! It is often better to completely replace the bendix than to repair it. This is due to the fact that its individual parts wear out approximately equally. Therefore, if one part fails, the others will soon fail as well. Accordingly, the unit will have to be repaired again.
Another reason for failure is wear of the gear teeth. Since this happens for natural reasons, repair in this case is impossible. It is necessary to either replace the mentioned gear or the entire Bendix.
Since the starter not only experiences heavy loads, but also comes into contact with the external environment and is susceptible to irritants such as moisture, dust, dirt and oil, freewheeling can also occur due to deposits in its grooves and rollers. A sign of such a malfunction is the noise of the armature when the starter is started and the immobility of the crankshaft.
Let's sum it up
Bendix is an important starter part. It transmits rotation from it to the engine flywheel. If the support clutch fails, the car will not start. You can determine the breakdown by ear. If the starter turns, but the gear starts to slip and does not rotate the engine, then it is the overrunning clutch that has failed. You can remove and repair it yourself. But if wear appears on the surface of the rollers, outer race or gear, then it is better to install a new bendix.
If you have any questions, leave them in the comments below the article. We or our visitors will be happy to answer them
How to remove, clean, disassemble and what to lubricate?
Let's consider one of the simple but effective ways to clean the clutch: remove the starter from the vehicle; The removed part must be immersed in a container with gasoline for 2-3 hours. This will help clean it thoroughly from dirt; to clean the coupling grooves from deposits accumulated inside them, it is necessary to rotate its gear without removing the device from the container with gasoline; Now you can take out the device, and then thoroughly wash its body.
If such a measure does not give the desired result, it will be necessary to remove and disassemble the coupling. Let's look at how to change the Bendix on the starter: Open the hood and remove the minus terminal from the power source, thereby completely de-energizing the vehicle's on-board network. After which it is necessary to remove the power wires from the solenoid relay and the starter housing and begin dismantling it. Unscrew the fasteners that hold the element. Please note that to remove the element, you will most likely have to dismantle the adjacent parts. We assess the condition of the flywheel.
To replace the overrunning clutch, you will have to completely disassemble the starting device of the power unit. First, you should remove the cover, then remove the fastener from the traction relay winding and pull out the washer. We remove the fasteners, after which the engine starting device is disassembled into two halves. It happens that there is a ball inside it, it is advisable not to lose it. Since the starter is in a disassembled state, it is worth diagnosing all its components and, if they malfunction, replace them.
We dismantle the traction rod, the rubber insert and the retaining washer to gain access to the remaining small parts of the device. We release the protruding part of the bendix by prying it with a screwdriver, after which it is necessary to dismantle the lock washer or ring located on the shaft. We remove the worn out bendix and install a new element in its place. Litol is ideal as a lubricant. If it is missing, you can get by with motor oil. Everything is assembled in reverse order.
Diagnostics and replacement
During operation, the starter constantly receives serious loads, and is also very often exposed to various irritants (dirt, dust, oil, moisture). All this leads to rapid destruction of the insulating coating of the electric motor and to drive failures.
Among other causes of breakdown and failure, the main one is slipping of the Bendix during free movement. This occurs because a certain amount of dirt gets into the grooves and rollers. The first sign is the noise of the armature when the starter is turned on, while the crankshaft is stationary. In such a situation, repairs cannot be avoided.
In order to diagnose the Bendix itself directly, you can do this in a car. You need to do this as follows:
- We turn on the transmission;
- Release the brake;
- Start the starter.
Now you need to listen. If you hear a sound that characterizes the rotation of the armature, then this is a sign that the starter bendix is slipping. This means that it immediately needs to be repaired or replaced with a new bendix.
Minor Bendix repairs:
- The starter is removed from the car;
- It is immersed in a prepared container with gasoline and remains there for several hours. This is done in order to wash and clean it from dirt;
- Without removing the product from the container, rotate the clutch gear several times, this will help to better clean the grooves;
- After that, it is taken out and washed.
If, as a result of such cleaning, you have not achieved the desired result, then you will have to remove the overrunning clutch and disassemble it.
Let's look at the disassembly and repair of the Bendix step by step:
- First of all, I advise you to disconnect the car's starter. But before this, you must disconnect the negative terminal from the battery. After this, you need to disconnect one wiring from the solenoid relay, and unscrew the other using a wrench on the starter itself. The key set to “13” is most often used;
- Now you need to unscrew all the fasteners that hold the starter. Each machine has its own fastening system. So be prepared for the fact that when dismantling the starter you will have to dismantle some more elements along the way;
- Already at this stage it is easy to determine the condition of the flywheel;
- In the event that you decide to change the bendix, you need to disassemble the starter. First of all, remove the cover fasteners, and then disconnect the fastening of the winding output to the solenoid relay. You can get a washer-bracket;
- Then you need to remove the last fasteners and disassemble the starter in half. If we find a ball inside it, it is necessary to save it;
- Advice: if you have already disassembled the starter, look at all its components, which also sometimes fail. Outdated parts can also be replaced;
- If necessary, remove the solenoid relay, rubber insert and washer. Then we take out all the remaining small parts;
- Next, using a screwdriver, we remove the ears of our Bendix;
- In order to free yourself from the stopper, you need to lower the washer down, while using the same screwdriver. It happens that instead of a washer there is a locking ring. In this case, for convenience, you can use a hammer and wrench. Place the key on the stopper and knock it down with a hammer;
- The retaining ring that remains can be pulled off the shaft by prying it off with a small screwdriver or a special puller;
- Now all that remains is to remove the bendix and install a new part in its place;
- To put everything back together, you need to do all the steps in reverse order.
Some tips from experienced drivers
Here are some tips from experienced motorists that will help you avoid possible problems and inconveniences when repairing or replacing a Bendix:
- Before installing a new or repaired bendix, always check its operation and the drive of the unit.
- All plastic washers must be intact.
- When buying a new Bendix, it is advisable to have the old one with you in order to verify their identity. Often similar parts have minor differences that are not visually memorable.
- If you are disassembling a Bendix for the first time, it is advisable to write down the process on paper or put the individual parts in the order in which they are dismantled. Or use the manual with photographs, video instructions above, and so on.
Instructions for replacing the overrunning clutch
To repair the device, the starter assembly must be dismantled, after which you can begin to disassemble it.
Replacing the bendix on the starter is as follows:
- First, the screws that secure the case are unscrewed. You also need to unscrew the screws that secure the solenoid relay, after which the part is removed. If there is dirt on the structural elements, it must be washed off.
- The starter drive unit is dismantled; to do this, remove the washer and remove the restrictor ring.
- Before installing a new drive, the installation site, in particular the axis, must be treated with a special temperature lubricant.
- Most often, difficulties arise with the installation of the retaining ring and washer. For faster installation, you can use sliding pliers, an open-end wrench, a clamp or other tools.
- After installing the drive, all rubbing elements of the mechanism are treated with temperature lubricant.
Price issue
The cost of a Bendix is determined by the model of the car on which it will be used. The choice of devices is very large, prices vary from 450 to 4000 rubles.
Price issue
Finally, it’s worth adding that Bendix is an inexpensive spare part. For example, a Bendix VAZ 2101 (as well as other “classic” VAZs) costs about $5...6, catalog number is DR001C3. And the price of Bendix (no. 1006209923) for VAZ 2108-2110 cars is $12...15. The cost of Bendix for FORD cars of the Focus, Fiesta and Fusion brands is about 10...11 $. (cat. no. 1006209804). For TOYOTA Avensis and Corolla cars Bendix 1006209695 - $9...12.
Thus, repairs are often impractical for Bendix. It's easier to buy a new one and simply replace it. Moreover, when repairing individual parts, there is a high probability of rapid failure of others.
Bendix analogues
You might be interested to know that a Bendix-like part is also used in manual transmissions. Especially in situations where the car is driving down a mountain. But Bendix variations are widely used not only in cars. As mentioned above, such a device is used in bicycles, as well as in the design of helicopter propellers. In fact, the device can help in any mechanism during startup.
The most important thing is to choose the right one and change the Bendix parts on time. Now you finally know what a starter bendix is and you will no longer torment yourself with this question. And since this is truly one of the key parts, every motorist should understand its operation and design. Always replace Bendix parts on time and make sure that it is not filled with unnecessary debris, then you will feel safe on the road.
How to test armature windings
To check the starter armature, several steps are used:
- Break in the windings.
- Short circuit to the armature shaft and core.
This can be done either with a multimeter or with a test lamp. Since the steps are the same, we’ll tell you about checking with the device.
Turn on the multimeter in dialing mode. We touch the collector lamella with one probe, and the adjacent lamella with the second. If the device beeps, it means there is no break in this winding. So we go through all the contact pads of the collector. They should all “ring”; if not, there is a break in one of the starter armature windings.
The integrity of the windings is also checked with a test lamp. If the light comes on on each of the contact pads, then the winding is intact.
Checking for a short to core or shaft
You can use a “control” or a multimeter in the “diagnosis” mode. One probe touches the shaft, the other touches the collector pads. Moreover, you need to go through all the sites. If the device buzzer does not work or the lamp does not light up, then there is no short circuit to the shaft .
In the same way, we check for a short to the core. One probe is on the core, the second is on the commutator. We also go through all the contact areas. If there is a squeak, it means that the armature windings are shorted to the core .
There is another way - checking the windings with a 220 V lamp
We connect a 100 W lamp into the open circuit of a 220 V lamp. We wind one end of the wire of this circuit to the armature shaft, and touch the second end, which goes to the light bulb, to the contact pads of the commutator. If the lamp lights up, there is a breakdown of the winding and armature turns.
This method is used if the “control” test shows nothing, and the starter does not turn and quickly discharges the battery. This happens if the insulation of the wire turns is not completely destroyed. A voltage of 12 volts is not enough to “break through” it, and the multimeter will not detect this short circuit.
I do not recommend checking the starter using this method. To do this, you need to place the armature in a dielectric, put on dielectric gloves on your hands and have certain skills. In a word, this method is not suitable for diagnosing a starter at home.
You can switch the multimeter to the resistance measurement mode of 200 KΩ or 20 KΩ. And run the test again. If there is any resistance on the device screen other than infinity, then the armature is “broken .
Video on how to check the starter armature windings yourself:
Checking turn-to-turn short circuit
For such diagnostics you need a special device. Ordinary car owners haven't had it for a long time. And for those who are just interested, I’ll tell you. For this you need the Soviet device “E 236” . It is a transformer with a cut off secondary winding.
The armature of the tested starter is placed on the cut of the primary winding and measurement mode “2” is turned on. We take the blade of a hacksaw for metal in our hands and move it along the core, smoothly rotating the armature. If on one of its sections the canvas is magnetized to it and buzzes, then there is an interturn short circuit of the winding.
