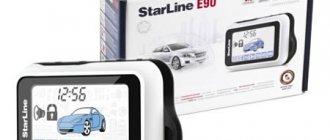
The starline a91 alarm system, one of the most popular on the Russian market, is distinguished by an excellent set of functions and a non-scannable control code, as well as a control range of up to 2000 meters, although in the field)))
Users of the starline a91 key fob are faced with poor performance of the first button, and sometimes it fails completely. The service only recommends replacing the button. The cost of replacement is about 500-700 rubles, depending on the service.
But as a rule, the problem is not at all a broken button, but poor contact due to dust getting under the Starline A91 button, and the button simply does not work due to dust. To prevent dust from getting into the keychain itself, a silicone cover for the keychain will save you.
To restore the functionality of the key fob, simply drop Wd 40 under the button and wipe off the remaining liquid with a napkin
Many owners of cars equipped with alarms find themselves in an unpleasant situation at the most inopportune moment when nothing happens when they press the key fob buttons.
If you press it hard multiple times, the alarm still goes off, but soon the problem returns, and it all ends with the button stopping working altogether.
The first thing that comes to mind in this case is the battery running out. However, replacing the battery does not always solve this problem.
What to do if the battery is fine, but the alarm key fob does not respond to the buttons? In this case, you need to look for the cause of the malfunction in the key fob itself.
Most often this happens due to the following circumstances:
- The key fob received mechanical damage due to a fall, etc.;
- Moisture got inside the key fob, which led to oxidation of the contacts and tracks on the board;
- The button on the key fob is stuck . In this case, when you press a key, you do not feel a characteristic click;
- The button broke off from the contacts on the board;
- The button is damaged/worn and needs to be replaced.
If the case itself and/or the key fob board are damaged, the entire remote control may need to be replaced, since it is not possible to purchase a suitable board separately.
If the reason is a sunken, broken or worn button, you can fix the key fob yourself without contacting a service center.
At the same time, the price of the issue in most cases does not exceed 30-50 rubles - this is how much a new button for the StarLine, Mongoose, Sherkhan, etc. car alarm key fob costs.
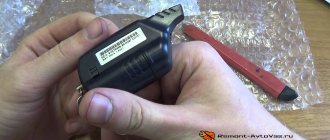
If there are no visible damages on the key fob itself, to make a “diagnosis” it is necessary to disassemble it and conduct a more thorough inspection.
To do this you need to do the following:
- Remove the battery cover;
- Remove the battery;
- Unscrew the fastening screw, which is hidden under the battery;
- Unscrew the other mounting screws on the housing (if any);
- Remove the back and front parts of the housing;
- Remove the key fob board. In most cases, it consists of two paired boards; to gain access to the buttons, the boards must be carefully separated;
- Carry out a visual inspection of the tracks and contacts for dirt and/or damage;
- Clean the board from dirt using a cotton swab and alcohol-containing liquid;
- Clean the contacts of the button itself. To do this, apply a small amount of alcohol to it and make 15-20 presses. Such manipulations will help clean out accumulated dirt.
If during inspection any defects are found on the button itself, it will need to be replaced.
Replacing a key fob button using the example of a StarLine car alarm
If the button on the alarm key fob is broken , you can replace it yourself.
To do this, it is enough to have minimal experience working with a soldering iron and have the following tools and materials on hand:
- new tact button;
- small Phillips screwdriver;
- soldering iron with a thin needle tip;
- tweezers;
- alcohol or nail polish remover;
- solder;
- soldering flux;
- hot glue gun or glue stick with a lighter.
Let's consider the process of replacing a key fob button using the example of a StarLine car alarm.
VIDEO INSTRUCTIONS » alt=»»>
Since key fobs for different alarm systems have a similar structure, these instructions for replacing the button can be considered universal:
- We disassemble the keychain (the process is described above);
- We disconnect the two boards;
- Warm up the soldering iron. If it operates from a 220 volt network, then after warming up the device should be unplugged from the outlet;
- Solder the old button. It is soldered in four places: two points are the contacts themselves; the other two are installation;
- We remove excess solder, clean the contacts;
- Solder the new button, holding it with tweezers;
- We clean the soldering area and degrease the button connection area with alcohol;
- Additionally, we strengthen the button with a drop of hot-melt glue and let it cool;
- We assemble the keychain in reverse order.
Modern car alarms perform not only the functions of security systems. The owner of a car equipped with a Starline A91 alarm system has the opportunity to start the engine remotely using the remote control, set the necessary requirements for warming up the car (by clock, alarm clock or temperature) by pressing certain buttons, and also configure the turbo timer parameters. This article is devoted to the features of setting up the Starline key fob, and also contains a detailed video with instructions.
Unpacking the keychain and official instructions
Good evening. I've been dreaming about this since I bought the car. When I received the keys, I was slightly upset that the screen on the key fob was leaking. Actually, I wasn’t in much of a hurry to change the key fob, since in the summer it doesn’t really matter to me if it’s there. But when winter came, I realized that without a display it would be difficult to set auto heating, so I decided to look for a new key fob. Studying the search results, I came to the conclusion (which, for some reason, I had never even thought about before) that you can change not the key fob, but the display! And the price will be 10 times cheaper...
Having stocked up with the necessary components and watched enough of the video, I began the replacement. I’ll say right away that I decided to take the display on a cable, and not “on legs,” because I don’t want to bother with soldering a bunch of wires and then not having to worry about laying them out.
The key fob is very easy to disassemble - remove the battery and unscrew the only screw. All that remains is to halve the keychain.
For convenience, I removed the antenna module (it can be easily pulled out). Then he tore the cable off the board. We don’t throw away the culprit too far, as we will need it later! Then you need to clean the contact pad (I wiped it with alcohol and cleaned the contacts with a utility knife).
Next, let's return to the old display. I noticed one useful point in the video: on the old cable you can “adjust” the temperature of the soldering iron. Since my soldering iron is connected through a transformer on which you can change the output voltage, I simply “twisted the knob” until I reached the point where the old cable stopped melting from the soldering iron, but at the same time the cable stuck to the surface (in my case, to piece of paper).
After setting up the soldering iron, you must first “glue” the cable to the display. At first I was afraid that I had come across a display with a “torn off” cable, but when I watched the video, I calmed down, since this is the case everywhere. You need to find translucent “legs” on the front of the display on the bottom side. You need to hit them with the black stripes of the train. Peel off the paper from the cable and stick it on the legs of the display. After making sure that we hit the legs clearly, we use a soldering iron so that everything sticks. The main thing is not to overdo it! After that, I glued a small strip of double-sided tape to the bottom of the display so that the display fits neatly into place. Then we bend the train onto the back side of the keychain and cut off the excess (the train is a little longer than necessary, just in case). We heat it up with a soldering iron in the same way and you’re done.
We put the antenna module in place and put on the battery for testing. Voila!
I was very happy that everything worked out! This was my first time doing this, it was a little scary! But everything turned out to be even easy. Next, it remains to change the glass in the case.
But the Chinese, as always, are in their repertoire! Having squeezed out the old glass, I realized that the new one did not fit in size. It is slightly larger than expected! After 20-30 minutes of adjustment on the “zero” level, I achieved the desired dimensions. Since I don’t have thin double-sided tape, I decided to glue the screen with glue. Unfortunately, this led to some error, which now confuses me... Somehow, along with the glue, the black paint of the outline spread and went beyond its boundaries. As they say, the first damn thing is lumpy. But in any case, this is much better than what was before!
How to install the StarLine A91 alarm system
This security system is relatively simple to use, so you can install it yourself. In order to install a car alarm on a car, you will need:
- a set of tools including screwdrivers, open-end wrenches, etc.;
- new alarm system Starline A91;
- driver's door activator;
- soldering accessories: lamp, tin, rosin;
- insulating tape, heat shrink tubing;
- additional protective diode and door limit switches.
If you need to install the system on a Priora, then you need to proceed as follows (the instructions are also relevant for other car models):
- dismantle the steering wheel trim;
- Unscrew the screws securing the tidy;
- we mount the LED on the windshield, the shock sensor on the beam, and the Valet service button in a convenient but hidden place;
- connect the 18-pin connector of the central unit in accordance with the manufacturer’s instructions and diagrams;
- connect the 6-pin connector to control autostart functions;
- we connect the central locking;
- connect the door switches.
Connecting the key fob to the alarm system
After the alarm is installed, you need to bind one or more remote controls to it. To do this you will need to know where the Valet button is. If the installation of the Starline A91 car alarm was done with your own hands, then the owner knows about its location. If the installation was done at a service center, then you need to check the following places:
- glove box;
- pockets for small items in door cards;
- space around the steering column;
- place near the pedal assembly;
- check the central tunnel between the seats;
- Look under the decorative cover of the front panel at the place near the fuse box.
After this, you can begin the main procedure.
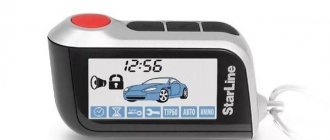
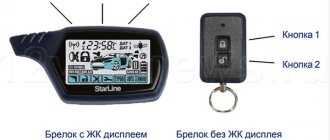
How to register the main key fob
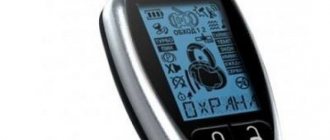
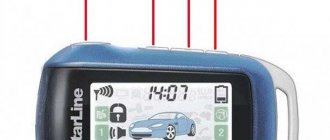
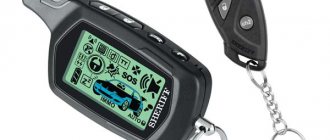
The Starline A91 alarm system has one main remote control with three buttons and a monochrome LCD display, which displays current functions, time, etc. The key fob also has feedback, so the owner can receive additional information about the condition of the car. It's easy to connect the remote control to the car yourself. The procedure is carried out in several steps:
- with the ignition off, press the Valet service button seven times;
- turn the key to the On position. After this, the car will blink its headlights seven times and emit a similar number of signals. This means that the alarm has switched to the appropriate mode;
- now the second and third keys on the key fob are pressed simultaneously until a melodic signal and one siren sound;
- turn the key to the Off position. The successful completion of the operation is signaled by five flashes of the car’s side lights.
Common faults
The need to disassemble and restore the operation of the device occurs when the following problems occur:
- Failure of the battery or oxidation of the contacts inside the compartment. A low battery will cause the anti-theft system to stop responding to commands transmitted from the pager or to do so unstably. In this case, the display of symbols under the glass will be dimmer, and the blinking color of the LED light will also deteriorate. To restore the device yourself, you need to change the battery, and you will have to disassemble the pager if you need to clean the contacts.
- Damage to the display. This malfunction is usually caused by a serious physical impact on the pager body. In case of critical hits, a protective cover will not be able to save the situation. If the screen fails, the user may still be able to control the security mode and some other options. However, additional functionality will not be available to the consumer, since configuration requires the use of the display in any case.
- One or more buttons on the communicator have fallen off. Over long periods of use, the controls will wear out, which can cause them to stick. If the button fails, to restore the functionality of the key fob, the user will have to disassemble the remote control themselves and carefully check the board. Before replacing the key, you need to purchase a new part. In practice, the cause of the problem is usually a damaged contact on the control element, so re-soldering the button is usually enough to fix it.
- Damage to the pager body. Frequent falls can cause scratches on your device; over time, more serious defects may develop. Keyrings from Starline are generally characterized by low strength, so it is better to prevent them from being hit. The device must be repaired if there is serious damage, since liquid can get onto the board through a crack in the case.
- Hardware faults are usually caused by moisture in the pager circuitry. During prolonged operation in conditions of high humidity, capacitors, as well as other elements of the remote control, fail. Do-it-yourself repair in this case consists of disassembling the device body and drying it. You cannot dry your communicator on a household stove or with a hairdryer, since high temperatures can completely damage it. To dry, it is recommended to place the device in a warm place, for example, on a radiator, for several hours.
Video: troubleshooting the key fob
In a video, user Alexander Shkurevskikh showed the process of identifying problems in the operation of a car pager in the absence of feedback.
Enabling start based on engine temperature
More relevant during cold weather is automatic start based on engine temperature. Unlike the previous method, the engine will not start if it is warm and there is no need to warm it up. This option is programmed as follows:
- turn off the ignition, press the Valet key six times;
- turn on the ignition, listen to six beeps, click Valet four more times;
- Now the first button on the remote control will set the parameter -5 degrees, the second - minus 10, the third - minus 18. A long and then short press of the first button is responsible for setting the parameter - 25 degrees Celsius.
Setting the duration of starter cranking
It happens that the car does not start in cold conditions if the starter operates for about a second (Starline A91 factory settings). In this case, you can extend its operating time. The instructions are as follows:
- with the ignition off, you must press the Valet service button six times to enter the programming mode;
- after turning the key (On), the car's lights will blink six times. Then you need to press the Valet key nine more times;
- pressing any button on the key fob determines the starter rotation speed (first – 0.8 seconds, second – 1.4 seconds, third – 2.0 seconds). Long plus short click of the first button – 3.6 seconds.
To prevent the starter from turning when the engine is running, you need to connect the gray and red wire to the tachometer panel for automatic stop.
Setting up the closer
How to set the key fob to turn off
In order to avoid accidental clicks in your pocket and activation of unnecessary functions, there is an option to turn off or block the Starline A91 key fob. To do this, press the first and third buttons simultaneously. Unlocking occurs when the second and third keys are pressed simultaneously.
Reset
If various problems or car alarm glitches occur, it is recommended to reset the settings to factory settings. To remove them, you must perform the following procedure:
- the ignition key is inserted into the lock and turned to the On position;
- after this, press the Valet service key 10 times;
- Now you need to turn the key to the Off position. The machine will blink its dimensions ten times and also emit ten beeps, confirming a successful transition to the user settings reset mode;
- press the Valet button again, and the car beeps again;
- The first button on the key fob is now pressed. A short melody will confirm that the operation was successful and all parameters are returned to factory settings;
- To complete the procedure, you need to turn the key to the On position. The second way is to not press anything for ten seconds. The car itself will indicate that the exit has been completed by blinking its dimensions. The keychain will play a short melody.
How to set up the key fob after replacing the battery
- press and hold button three until the third beep. The clock on the display now flashes.
- using the first and second keys we increase or decrease this indicator;
- The next click on the third key takes you to setting the minutes. It is carried out in a similar way (keys one and two);
- Next comes setting the alarm clock, as well as setting the time on the timer;
- To confirm the parameters, just do not click anything for several seconds.
Next, you should restore the remaining parameters set by the user.
What to do if the sheriff lost the key fob for the alarm?
What to do if you lost your alarm key fob
- Step 1- Get into the car First you need to get into the interior of the car. ...
- Step 2 - Find the alarm unit and Valet button. ...
- Step 3 - Disabling the alarm...
- Deactivation of Starline A1, A2, A4. ...
- Deactivation of Starline A91.
Aug 27
2022 Interesting materials:
How to remove paint from a denim bench? How to remove paint from a sweater? How to wash red wine from a linen shirt? How to wash old kitchen towels? How to wash kitchen towels from greasy stains? How to wash kitchen towels with baking soda? How to wash cuffs and collar on a white shirt? How to wash very dirty kitchen towels? How to wash very dirty towels? How to remove paraffin from a candle?