The car is subjected to serious overloads. Poor road surface conditions often lead to headlight damage. Broken asphalt pavement or its absence, and unmade roads are typical for our country. The body and other external elements quickly become covered with scratches and chips.
Manufacturers have invented ways to protect themselves. The optical system is located at the bottom of the body, exposed to impacts from stones, tree branches, grass, etc. Films on the headlights will protect the optics from damage. This coating has its own characteristics and performs several functions.
How to tint headlights with film or paint
Film for tinting headlights is available in a variety of colors
Both methods of applying tinting have their adherents and, accordingly, opponents. The use of film still seems preferable for a number of reasons:
- Film is cheaper than special varnish or paint.
- Reducing the brightness of the light device when using film is no more than 15%.
- Wide selection of quality materials of various colors and shades.
- The film is a good protection for the headlight from impacts from small gravel, branches of bushes and trees. Even if the headlight breaks due to a strong impact, the glass will not fall out, and the lamp will remain undamaged. You can still ride with such optics until you get around to repairing it.
- It is extremely resistant to ultraviolet radiation and high humidity.
Well, if you do your own film tinting of headlights, then the main, “impenetrable” argument comes into force: this method is quite within the capabilities of any car enthusiast. Unlike paint, which without skills and experience is almost impossible to apply in an even thin layer, and even without smudges. In case of failure, the film can be removed and then a new one can be glued. Removing paint is a problem because... Solvents cannot be used - the glass can be damaged irrevocably.
Materials and tools
To reserve headlights yourself, you will need tools and accessories:
- material,
- drying. You can use a hairdryer; in extreme cases, a narrowly directed hot fan is used to heat the surface,
- a roller for smoothing the coating or a soft spatula,
- surface degreaser,
- scissors,
- rags for wiping.
In addition to film, protection for car headlights involves the use of special varnish as an alternative. Xenon headlights can be armored using one of the materials (varnish, film) or in combination. If halogen lamps are installed, only one of the options is selected.
How to glue removable silicone tint to a windshield with your own hands
How to tint rear and front headlights with film and varnish
https://youtube.com/watch?v=rWywJ-EgVcM
Window tinting is done not only to hide the interior of the car. This includes image, internal thermoregulation of the cabin, and additional protection of glass from chips and scratches.
The very first of all possible methods of tinting glass was spraying a special composition. The advantage of this method was its extremely low cost. Disadvantages: the coating “mirrored”, did not protect the glass from scratches, it was impossible to restore.
Modern tinting methods:
- electronic;
- automatic;
- athermal;
- film
The most affordable way is to cover glass with special tinting films. The main advantage of removable silicone tint is the possibility of its repeated use. At the same time, applying it yourself will not be difficult. A minimal set of tools and a desire to make your car unique will allow you to complete the entire procedure in an hour and a half.
According to the size of the windshield, a template is cut out of the film 5-7 mm larger than the size of the glass itself
To tint your car glass yourself with silicone film you will need:
- silicone film;
- plastic spatula;
- liquid soap or shampoo;
- spray;
- stationery knife;
- window cleaner;
- napkins made of non-woven material;
- pure water.
According to the size of the windshield, a template is cut out of the film 5-7 mm larger than the size of the glass itself. The glass is thoroughly washed, degreased and wiped dry. Both the glass and the inner surface of the film are generously wetted with a soap solution. The film is applied to the glass and, using a rubber spatula, carefully, using smoothing movements from the center of the glass to its edges, foam and air bubbles are removed. The resulting excess film is cut off with a knife. The procedure is completed.
Tinting can also be removed without any problems, but due to the elasticity of the material, the thickness of which is only 0.1 mm, there is a possibility of damage. The disadvantages of using silicone films include a reduction in transparency by 15-20%.
Let's turn to GOST
You probably know that there are rules and laws regarding tinting car windows. Just recently I talked about removable tinting, and we also discussed the issue of curtains for a car. I advise you to refresh your memory and read the materials again.
In addition, I would suggest that you familiarize yourself with removable tinting on a rigid base, the link to which will be here, and removable silicone tinting with a link here.
Now let's talk specifically about the rear lights. There are no requirements for their tinting. There are only regulations for the operation of automotive lighting equipment. Regarding the rear optics, it states that only yellow, red and orange light can be used. All others are prohibited.
There is one correction here. To illuminate the reversing lamp in the Russian Federation, only white light is used, as well as to illuminate the license plate.
These are the only official rules regarding this matter. That’s why you need to rely on them when you decide to tint the rear optics. If any color other than those listed is used, when recording this fact, law enforcement officers will classify this as an offense. Therefore, you will be issued a fine.
Potential penalties
If there is tinting on the rear optics that does not correspond to the characteristics prescribed in the Code of Administrative Offenses, then the driver of the vehicle will be fined.
Only here there are important nuances. The thing is that in the current legislation there are no specific clauses that relate specifically to rear optics. Just don’t think that it’s now legal to tint your headlights any color you like.
Here, traffic police officers will rely on Article 12.5 Part 1 of the Administrative Code. That is, they will charge you with a violation due to vehicle malfunctions in accordance with the requirements for permitting a vehicle to operate. If your taillights are in poor condition, get ready to receive a fine of 500 rubles.
Drivers note that traffic police officers rarely issue fines for such violations. And if you tint the optics without changing the color of the instruments, then there will be no problems at all.
Even though there is practically no threat of a fine in this situation, it is still necessary to remind you about the methods of paying fines. A link to interesting and useful material about this will be here.
Tips before you start wrapping your car
How to tint headlights and will there be a fine for this?
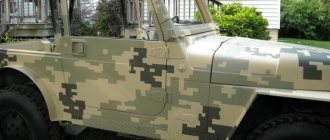
To properly cover a car with vinyl film yourself, you need to follow these tips during work:
- When you heat the vinyl film with a hairdryer, be sure to ensure that it does not overheat. Otherwise, this is fraught with loss of its adhesive properties or, in general, damage to the material.
- When heating, you need to keep the industrial hair dryer at a distance of 20 centimeters from the heated surface, constantly moving the air flow. The entire coating should be heated evenly.
- Don't let the vinyl flooring backing get wet or you may have serious problems removing it.
- Do not cut vinyl into plastic bumper parts or car moldings. It is best to dismantle them before starting work.
- An extra pair of hands will never hurt you, so it’s better to enlist the help of a friend than to wrap the car yourself.
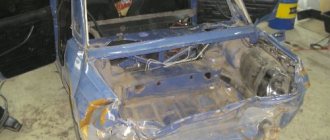
How to repair a hole in a car body without welding: the best ways
First of all, you should remove the rust using an angle grinder or any other suitable equipment.
Next, we cut out the patch from aluminum, and then attach it to the body using masking tape.
When the putty sticks, peel off the tape and putty the remaining places
It is important that the layer is as thin as possible, without tubercles or other irregularities.
When everything is dry, sand everything using coarse sandpaper or a sander. Having achieved a flat and smooth surface, apply a second ball of putty - automotive putty. We wait until it dries and level it again.
Then the surface is primed (do not forget to cover the areas that do not require painting with film).
How to properly apply tint to headlights yourself
How to remove fog from a headlight without removing it. What can happen if your headlight fogs up from the inside. Headlights sweat, what to do Folk remedies are the best helpers
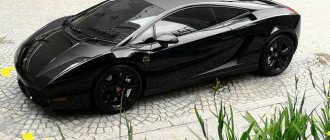
Headlights, with their appearance, brightness and shine, affect the overall impression of the car no less than tinted windows. They take their place of honor among the most frequently tuned parts.
Many manufacturers produce ready-made tinted headlights, but their offerings do not always correspond to the desired design and general tuning concept. Therefore, tinting your headlights yourself is important for many car enthusiasts.
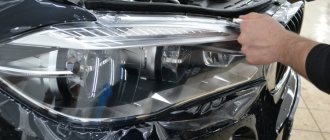
To protect the paintwork, the contours of the headlights are transferred with a pencil onto tracing paper and, with an allowance of 3 cm, are transferred to the film. The headlights are thoroughly cleaned and degreased. The film blank is carefully applied to the headlight, air bubbles are removed from the center to the edges with your hands or a spatula, and the required configuration is formed with a hairdryer. Excess film is trimmed with a margin of 2-3 mm, which goes into the gap between the optics and the body element.
Classification of protective films
There are two types of protective coating:
- Decorative and protective.
- Protective.
Decorative ones are characterized by the presence of patterns, sparkles, crumbs and other additional elements:
- Smooth.
- Textured. They are characterized by high density.
- Textured without color.
- Colored. May have additional effects and texture.
- Chameleons.
The last option is interesting because it has several shades that change depending on the viewing angle. Other types have different shades. Transparent, gray and black are used more often. On headlights, chameleon film and any colored coating look impressive, but do not affect the quality of light.
Simple protective films for headlights make the glass matte or glossy.
What to do and why this happens
It's no secret that every year manufacturers are trying to reduce costs when producing cars. So how does this affect the optics? Modern front fog lights are equipped with durable, but very thin glass, which leads to cracks due to temperature changes.
As for plastic headlights, everything is more complicated: a plastic headlight has a protective layer, which should prevent the appearance of small scratches and prevent clouding of the glass. Of course, it doesn't last forever, and after a while it stops coping. Solving this problem is simple; just polish the headlights at a service center and they will sparkle like new again. Unfortunately, modern plastic has a very thin protective layer and after 2–3 polishings it can be completely erased. And if there is no protective layer on the optics, then the headlight will become cloudy in a matter of days, and simply polishing will not get rid of it.
Just as dynamically as saving on materials, a young but already well-known direction in the auto industry - auto vinyl - was developing. Among the many films, there are three types that can protect your optics from the destructive effects of our roads)))
Let's go in order. Let's start with protecting PTF with glass. Here, in fact, there is only one option - a special film for glass headlights. It is quite thick (about 2-3 mm), it has a special glue that can withstand high temperatures. As a result, when the PTF is turned on, the film heats up and becomes elastic, like a rubber ball, and the pebbles simply bounce off without harming the optics. By slowing down heat transfer, the film protects the glass from destruction when water enters.
With plastic headlights the situation is a little different. Here you can choose polyurethane film or regular vinyl. Both films have the same thickness, but vinyl film is less resistant to damage. Vinyl film is cheaper, although it will do an excellent job of protecting the plastic from sandblasting. Vinyl film is also capable of self-healing when heated and small scratches will be less noticeable. Polyurethane is more reliable and durable, although it is not able to protect against brick.
Most often, applying film to headlights is not an easy task and, given the complex shapes of the front lights on a modern car, it is recommended to contact a specialist.
When choosing a film, pay attention to well-known manufacturers: 3M, Venture, KPMF, Oracal. It is in their arsenal that there are films that will not become cloudy, whose adhesive layer will not turn yellow over time, and when dismantled, the optics will retain its original appearance
Be careful and don’t try to save too much on film: if you save 500 rubles, you may regret it after a while.
If you calculate the costs of the film and its application and compare it with the price of polishing or replacing a headlight, then you can confidently say that such an investment will help save not only money, but also your time. To summarize, we can say that modern films can protect your optics for many years, and even after 7 years the headlights will shine like new, and your budget will hardly suffer.
Features of care and operation
After booking, it is not recommended to drive the car or wash it for 2 days so that the material adheres properly. When washing armored headlights, you should not use abrasive detergents, they damage the material and it loses its transparency.
Although the booking material is quite strong, its uniformity is negatively affected by such factors as:
- alcoholic drinks;
- chemicals;
- artificial oils.
High temperature also has an adverse effect on the material.
How to do the pasting correctly
If the car has been in use for more than two years, before armoring the headlights with film yourself, polish the lenses. Small scratches are polished with a special paste, medium scratches are polished by hand, and deep scratches are polished using a special set of tools. If polishing headlights and armoring with film cannot be done at home, then it is better to turn to specialists.
After polishing, the lenses are thoroughly washed and wiped with alcohol. Then the film blanks are cut to size, leaving a margin of 2-3 cm.
After heating with a hairdryer, the workpiece is applied to the plastic lens without removing the backing. The protective layer is removed after cooling, carefully smoothing it with a spatula, preventing the formation of bubbles.
You may need to remove the old film.
Advice from the experts
To get a high-quality coating and completely restore the appearance of your headlights, you should use the recommendations of professionals:
Before applying varnish to polycarbonate headlights, you should not use polishing pastes: they reduce the adhesion of the composition to the surface. To prevent streaks from forming during polishing, the work is performed in stages, changing the direction of movement perpendicularly. The grain size of abrasive materials is changed gradually
An abrupt transition from a coarse grain to a too fine grain creates an undesirable holographic effect on the surface of the lens. During polishing, it is important to monitor the force applied. Uneven pressure will lead to irregularities, which will subsequently distort the light beam. If a two-component varnish is chosen to cover a polished headlight, dilute it in small portions so that it is used up in 5 minutes. Polycarbonate headlights are primed with a special compound for plastic before applying varnish. When using a sander, it is important to control the surface temperature
Overheating can cause the plastic to warp. Turning on the headlights for the first 10 minutes or exposing the paint to hot air from a hair dryer helps speed up the drying of the varnish layers. Final drying is carried out at natural temperature. In the first 48 hours after varnishing, the headlights are not washed. Any, even the highest quality varnish will be scratched, so it is better to cover the headlights with anti-gravel film.
Polishing headlights and varnishing improves the quality of lighting, prevents lens clouding and extends its service life. The process is not particularly complicated, so you can do it yourself in a regular garage.
DIY headlight tinting. Video
Today we’ll talk about tinting your headlights yourself (VIDEO) and dispel the myth that Chinese car film can only be applied to cheap cars.
One of the cheapest ways to make your car stand out from the crowd is to tint the headlights. After watching the video, you will be able to tint your headlights yourself.
To tint your headlights yourself, you will need: 1. A warm room (desirable temperature not lower than 12°C)2. Tools:
- a regular sewing needle - a combined squeegee - an industrial hair dryer - an Olfa knife for fine work (can be replaced with a regular stationery knife) - a solution of water and isopropyl alcohol 1:1 (a total of one liter is enough), - installation fluid - a spray bottle (any will do, for example for flowers) - microfiber
What is mounting fluid? Mounting liquid is a soap solution that is used so that the film can be easily repositioned during gluing. In our case, the installation fluid is a solution of water and Jonsons Baby shampoo (1 liter of water + 2-3 drops of Jonsons Baby).
Note: 1. The film used for tinting headlights was Oracal 8300 dark gray (074).2. Room temperature - 15ºС.3. The rear optics are quite simple to apply.4. The headlights were tinted “wet” - installation fluid was used (1 liter of water + 2-3 drops of Jonsons Baby).
Before you start tinting the headlights with your own hands, wrap the combined squeegee with a microfiber cloth and secure it with masking tape, or maybe with electrical tape - this is so as not to scratch the surface of the film and not leave streaks.
DIY headlight tinting process: 1. Warming up the room to 15°C.2. The rear optics are pre-washed.3. We take measurements of optics.4. We cut off pieces of film with a margin of 5-7cm on each side. Remove the film.5. We degrease and clean the rear optics using a soft microfiber with a solution of water and isopropyl alcohol 1:1.6. Apply the mounting fluid to the surface of the headlight and film in a thin layer using a sprayer.
Next, it is better to study the steps of tinting headlights with your own hands in the video.
If there are small bubbles of water left on the surface of the headlight after pasting, carefully break them with a sewing needle - over time, the water will evaporate on its own.
The most popular colors for tinting headlights with your own hands are dark gray (Oracal8300_034), extreme black CF, and matte black film CF. But the choice of colors is very rich - yellow, blue, red, green, purple and other colors of films for tinting headlights with your own hands.
PS Oracal 8300 film for tinting headlights with your own hands has a high initial adhesion, so to make it easier to reposition we used mounting fluid. The film has a thickness of 80 microns, therefore it is very elastic and has a high stretch coefficient - 250% - it is possible to cover almost any spherical surface. The film is perfect for tinting headlights with your own hands - but to more reliably protect the headlight, use a thicker film, for example, CF headlight tinting film with a thickness of 200 microns, especially when it comes to headlights. The film for tinting CF headlights with a thickness of 200 microns will not only serve as decoration, but will also reliably protect the headlight from chips, scratches and even a glancing blow.
Regarding the myth that Chinese film is only applied to cheap cars, we invite you to watch another small video - the result of partial wrapping (hood + roof + trunk lid) of a Honda Civic with 3d Orajet carbon fiber and tinted rear optics with Oracal 8300 (074) film. In general, the partial carbon fiber covering and tinting of the rear optics looks very harmonious, beautiful, and holistic.
Of course, we will return to films for tinting headlights and conduct a detailed review of the manufacturers.
Sincerely, Valery Churukanov.
Advantages and disadvantages
The obvious advantages include the following aspects:
- It is easy to apply the film yourself, so the cost savings are obvious.
- High-quality glass protection, scratches and chips will not appear.
- Damaged headlight glass may return to its original appearance after being covered with film.
- The light passes through evenly.
- The color of the film can be chosen to suit your taste. Then it will perform not only a protective function, but also please the eye.
- There are types of coatings that can be polished.
- Long-term use does not lead to wear or deterioration of color.
- The ability to create a perfectly smooth surface.
If we talk about shortcomings, there are only a few of them. Firstly, with the lights turned off, the car is practically invisible. Secondly, the cost of the source material makes you wonder whether this manipulation is necessary.
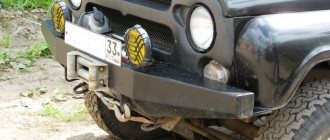
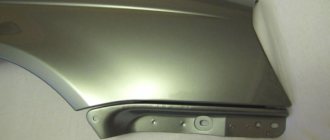
What is reservation of car headlights?
The procedure for booking headlights, as well as booking a car as a whole, are somewhat similar. At least for the purpose pursued by car owners. The procedure is also quite similar. The only thing that differs is the materials and technology. Indeed, in the second case, the car is strengthened with the help of special additional materials in case of an explosion or shooting, to protect passengers and the driver. With optics, the meaning remains almost the same. They only protect the headlights from stones that can harm both the headlight itself and the lamps in it.
Until recently, special gratings were used for such purposes. But as practice has shown, they turned out to be not so effective as to be widely used. In addition, they significantly spoiled the appearance of the car. Therefore, thanks to modern technologies, special vinyl films were developed, which began to serve as additional protection for headlights. The thickness of films presented on the domestic market ranges from 0.6 to 2 mm.
There are also polyurethane films used for these purposes. But they are more expensive and less commonly used by ordinary car enthusiasts. The way they are used mainly for armoring complex and intricately designed headlights. But the principles, as well as the essence of the process, are similar to vinyl materials.
Headlight with protective film
Which film to choose
In addition to the above classification, the choice is made according to the type of material from which the film is made.
Vinyl
Vinyl-based materials are cheaper, have a large selection of thicknesses, colors, and have good light transmission. Such films, if they are produced by a serious manufacturer, stretch well and are capable of repeating complex curved surfaces.
Article on the topic: How and with what to cover a car dashboard yourself
The material is constantly being improved; if previously such films did not last for a long time, now they can last up to three years and this is not the limit. They are quite easy to apply, which is important when used independently.
Polyurethane
Not as widespread as vinyl, but have increased strength and durability. The rather high price limits its use. Good elasticity makes application work easier.
The most logical choice of polyurethane would be for new and expensive headlights. Moreover, for older cars, polyurethane kits may not be available for sale. There is no point in covering used car optics with it, since such a coating will outlive it due to natural aging.
Booking efficiency
At the same time, the film itself is not something super durable. This is regular vinyl. However, due to the peculiarities of the structure of the film at the moment the stone hits the surface of the headlight, the impact energy at the point of contact is noticeably weakened. This effect is achieved by the fact that the film transmits a non-point blow to the glass surface at the point of contact between the stone and the film. And it distributes the impact energy to the maximum area. This leads to the fact that the impact on the headlight glass does not occur in a single point, but over the entire surface, which greatly reduces the risk of destruction of the headlight and the lamp in it. And if the headlight is destroyed, then the same film will prevent it from scattering into fragments and will hold everything in place. This will allow you to drive the car for a short time to buy and install a new one.
Making a homemade nozzle
In order to turn a Karcher mini washer into an effective sandblasting unit using a homemade nozzle, you will need the following structural elements:
- a nozzle through which a mixture of water and sand will be supplied to the treatment zone;
- trigger;
- reinforced hose that will be able to withstand high pressure;
- dispenser necessary to make the consumption of abrasive material more economical.
Nozzle diagram: 1 – thread; 2 – low pressure chamber; 3 – nozzle; 4 – fitting for sand supply; 5 – junction of two parts of the nozzle; 6 – smooth tapering transition
For the nozzle, if you intend to use your sandblaster regularly, it is best to purchase one that is made of ceramic. This type of attachment, which is constantly exposed to abrasive material, will last you much longer than its metal counterpart.
Homemade water sand blasting nozzle
Nozzle details: 1 – pistol; 2 – nozzle; 3 – nozzle holder; 4 – sandblasting nozzle
The efficiency of the sandblasting machine with a homemade nozzle, which you will equip your Karcher sink with, is greatly influenced by the quality of the nozzle. It’s worth starting to create such an element yourself only if you have the opportunity to drill an exact hole in a metal rod, the diameter of which is at least 15 mm. But if this is not possible, then it is better to purchase a factory nozzle, the quality of which will determine the operation of the entire device. The advisability of purchasing a serial nozzle also lies in the fact that some models of such products are already immediately equipped with triggers.
When choosing a hose, the length of which must be at least 2 meters, you should pay attention only to reinforced products. This is explained not only by the fact that such a hose will work under high pressure created by the compressor, but also by the fact that its internal walls will be constantly exposed to abrasive, which will quickly render the unreinforced product unusable
When starting to assemble and attach the nozzle to equip the Karcher washing machine, you should adhere to the following algorithm of actions:
- a ceramic or metal tip must be fixed to the nozzle of your homemade nozzle using a threaded connection;
- the dispenser, with which you will regulate the flow of the water-sand mixture coming under high pressure from the nozzle, should be attached to the metal or ceramic tip of the nozzle;
- the hose through which sand will be supplied from the hopper must be secured to the back of the nozzle, for which a fitting and a clamp of the appropriate diameter are used.
Scheme of operation and example of manufacturing a nozzle for collecting sand
When assembling and installing a nozzle for Karcher, you should take into account the fact that all elements of such a device will operate under high pressure created by the compressor of the device. That is why all formed connections must be ensured with maximum tightness and reliability. It is not difficult to fulfill this requirement if you make such connections using a special fum tape.
There is one more trick that will allow you to save abrasive material. It consists of the following: cleaning must be performed over a special container with a grid into which the waste mixture of water and sand will be collected. This mixture can be reused by lowering the end of a reinforced hose into it, which is connected to the nozzle of the device. There must be a grate on the top of this container; it is necessary in order to hold processing waste and prevent it from getting into the water-sand mixture.
Karcher sink with sandblasting nozzle in use
Instructions for gluing
By following all the rules, you can quickly and efficiently cover your car with auto vinyl.
General principles and rules
If vinyl is chosen for covering, it is better to cover the body completely rather than partially. This is due to the fact that it does not allow sunlight to pass through, and the color of the car will not completely fade. This will be very noticeable after removing the film.
Before the coating itself, it is necessary to carefully prepare the surface of the car. If there is rust somewhere, this place needs to be treated and puttied to prevent the spread of metal corrosion.
Conditions for pasting
Initially, you need to choose the place where the work will take place. This could be a garage with good lighting; the room temperature should be at least 20 degrees.
Cleanliness is the key to quality coating. The smallest speck of dust or particle caught under the film coating will ruin the entire appearance. The work will have to start again. Therefore, before starting work, wet the floor surface to prevent dust from flying.
Preparing a car for wrapping
Before sizing a car, it must be carefully prepared. The preparation stages include:
- If the surface contains some suspicious places (where the paintwork may come off), it is better to clean it immediately, since the film may be adjusted several times during the work.
- For convenient gluing in hard-to-reach places, it is better to disassemble the body in as much detail as possible.
- Wash and dry the surface very well.
- Treat the surface with a degreaser solution.
- When gluing, apply a primer in bend areas for better adhesion to the surface.
Pasting process
After preparing the car, you need to move on to preparing the material for wrapping. Make patterns in accordance with the places where the gluing will take place:
- apply vinyl around the perimeter to the surface;
- secure with paper tape;
- make appropriate marks, taking into account the reserve;
- cut out.
When pasting wet on a prepared surface:
- a soap solution is applied;
- the protective layer is removed from the film;
- The material is glued in the center and then slowly move to the edges, smoothing with a squeegee;
- if bubbles have formed, carefully remove them from the place of formation with a squeegee along with a soap solution and the bubbles will disappear;
- in the bend areas, heat the material with a hairdryer, and apply a primer to the edges, from the side of the adhesive base;
- if irregularities appear on the bend, heat it up a little more;
- After applying the film, the entire surface is heated for better adhesion and getting rid of some imperfections.
When pasting using the dry method, the application process is repeated, the difference is that the material is applied to a dry surface of the body. After application, the carbon coating is heated. Pass over the surface with a felt squeegee and wipe with a dry cloth or rag.
When applying, carefully ensure that the material does not stretch too much and bubbles do not form. If this happens, it is recommended to press the unfinished area with a wet rag and treat it with a hot stream of air. The vinyl should shrink a little, the imperfections will be hidden.
We recommend watching this video before starting work:
Tinting optics with varnish
Let’s say right away, forget about all the cheap varnishes that are sold in a wide range in our car stores. When dried, they will give the exact opposite effect of the desired one. Instead of a shiny gloss, the lanterns will be dirty matte, which, you understand, will nullify all conversations about aesthetics. For a given purpose, you need to choose expensive professional materials, slightly darkening them with a special varnish. This gives the shine the necessary depth, emphasizing its richness. The final result is magnificent. Over time, the varnish can be polished and minor scratches that may have occurred during use can be removed. Let us separately make a reservation that tinting with varnish at home is extremely difficult. For these purposes, it is better to resort to the services of professionals who will carry out the necessary work in a special spray booth.
Advantages:
Low cost.
Flaws:
- It is better to remove the optics before tinting;
- Less light transmission;
- Uneven application, difficult to apply varnish evenly;
- It is impossible to remove varnish from optics without consequences.