In order to successfully replace the trunk lock in a domestic car Lada Kalina in a sedan, station wagon and even a hatchback, you will need to stock up on some tools and accessories. The algorithm of actions is simple, so such work is available to owners subject to responsible preparation.
Next, we will consider in detail the nuances of the replacement process.
Trunk lock: removal, installation, replacement of the cylinder – Lada Kalina blog
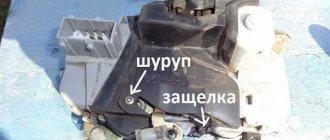
In order to gain access to the rear door (trunk) lock, you first need to remove the inner plastic trim, which is attached to two bolts at the handle attachment points and latch pins, which are pryed off with a flat screwdriver and removed.
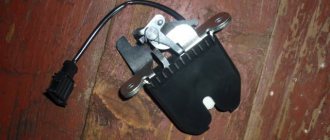
The design of the trunk lock on the Lada Kalina consists of two parts: the cylinder where the key is inserted and the door locking mechanism itself. All this is disconnected separately and will be written about this in more detail below.
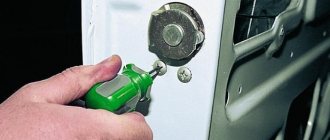
- If you need to replace the larva, it is quite easy to remove it. You can do this using an 8mm socket and a flathead screwdriver. Below is shown which bolts need to be unscrewed to release this part along with the body.
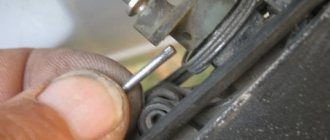
- Now that the bolts are unscrewed, take a plastic screwdriver and use it to pry off the plastic retainer that secures the rod to the body of the cylinder. For clarity, below is a photograph that clearly shows what needs to be done:
- Then, carefully take the larva so that its spring, which is located inside, does not jump out. If you need to replace a part, then replace it with a new one and assemble everything in the reverse order.
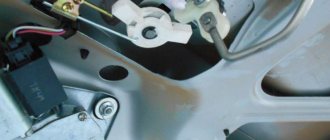
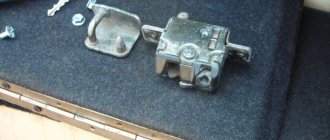
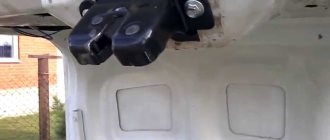
- If it is necessary to completely remove the entire mechanism, then you will have to do a little more work. We unscrew the door locking mechanism itself with a large Phillips screwdriver, there are only two bolts:
When everything is done, you need to pull it a little towards yourself and it can be easily removed; all that remains is to disconnect the plug with the power wires from this structure:
That's all the repairs, which will take about half an hour if you have the right tools and this manual. We install all the removed parts, which can be bought at absolutely any auto store, in the reverse order. I hope that I helped someone with this photo report using the example of my Lada Kalina station wagon.
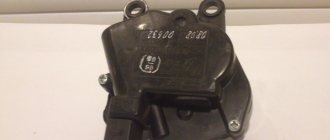
Installation of the locking device drive
Removing the fifth door opening button is the easiest thing. It is more difficult to seal the remaining hole. This can be done using a special putty. One of the tricks is to process the hole cavity so that the surface becomes as rough as possible. This will create optimal adhesion to the putty. Next comes sanding, priming and painting. The work can be done independently without special training and practical skills. After that, you don't have to worry about aesthetics.
Of course, all dismantling work can be carried out only after the installation of the electric drive is completed, as well as the installation of the trunk opening button in the cabin. The trunk lock drive and how to install it are all relatively clear. Both the location and the connector of the wires in Kalina are determined in advance for this.
But where to install the button will have to be decided by the owner himself. The two most popular places are the dashboard in front of the gear shift and the driver's door. The first method is convenient because the button can be reached from almost anywhere in the cabin. The button on the driver's door is primarily a convenience for him.
Once the location for installing the button has been selected, it is time to install the electrical wiring. About 4 m of wire will be required. The connection point is located under the rear seat. The connection is made to connector 13, it is signed, so searching will not cause any difficulties. The work can easily be done independently. Thus, it became clear how to make a trunk lock drive.
How is the activator installed?
The only way to get inside the trunk of a Lada Kalina is this manipulation - turn the key and press the button. This action is not always associated with convenience. For example, in bad weather or when your hands are full, this is not easy to do.
This circumstance prompts owners to consider purchasing and installing an activator. Installing this useful element is quite simple. Here you will need a self-tapping screw, which will secure the device we are considering. To check the functionality of the activator, you should connect it with the standard connector from the on-board network.
After the current supply to the activator is stopped, the door is locked with the first latch, but remains not completely closed. To get back inside the luggage compartment you will need to use the key.
Installing a push-button lock is not a very difficult task. To implement it, you will need to assemble a circuit, which requires wiring. Here you will need to “attract” the programmable channel present in the alarm.
You can connect the device using two options.
- We connect the button with the positive output of the activator (12 V), bypassing the relay. The advantage of this scheme is the absence of unnecessary components and simple connection. As a negative aspect, it should be noted the need to lay additional wire lines.
- The second method is more labor-intensive. Here you will need to use additional components (diodes). You also need to find the ground connection point. The main advantage is the need for a minimum number of wire lines.
Experts prefer the first method because it is simpler. For switching, you can use copper wire type PV-3, the cross-section of which is 1 mm2. Laying should be done on the left side along the thresholds. You can connect by means of a clamp and subsequent wrapping with electrical tape.
The control wire of the activator may be a standard red-pink cable. It is subject to commutation with the relay, followed by winding the contact and placing it under the BUS fixation frame. The entire list of manipulations is performed with the battery disconnected.
Electric drive: easy installation
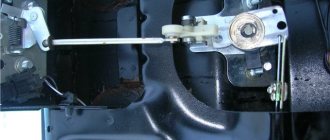
The manipulation algorithm is very simple. Here you will need to make the rotary plate together with the rod yourself. The wiring is laid directly to the lock and connected to a special control unit. When the car is “disarmed”, the electric drive of the luggage lock is activated following the unlocking of the button responsible for opening the rear door of the Lada Kalina.
The whole essence of the action comes down to connecting the electric lock to two cable lines. You can buy the product at a specialized retail outlet. The end of the luggage compartment will need to be hidden in order to prevent the risk of moisture getting into it. If this is neglected, then with the penetration of water a short circuit will be observed in the designated area.
Much attention should be paid to the area near the door hinges, because broken wires are a common occurrence here. To prevent this, it is recommended to regularly monitor this section of the highway.
Before starting the procedure for installing the electric drive in a Lada Kalina car, you will need to remove the plastic trim. Here you need to be careful not to damage the specified protective element.
The choice of a lock for LADA Kalina should mean that there is no subsequent need for modifications before installation. This means drilling additional holes.
Door seals for Lada Granta
Hood deflector Lada Granta
Which is better Priora or Kalina
An important point in the installation procedure is the laying of electrical lines. For these purposes, you will need about 3.5 m of appropriate cable. You can use standard wiring suitable for the rear door. The power source can be a cigarette lighter socket. It is also important to install the fuse correctly.
We do all switching in LADA Kalina in accordance with the diagram.
Important! The main line in this version may include a wire that goes to the courtesy lamp for lighting the space inside the trunk.
How to get to the door mechanism
According to the recommendation of the magazine "Behind the Wheel", in the absence of casing, access to the lock is always available. Simply put, there will be no need to remove the inner lining made of metal. The steel sheet is simply bent to the side.
The rotating part with the protrusion is called the “drive”, and this is what you will need next.
Replacing the larva will be easy:
- The key in the cylinder currently fixed in the door is turned 90 degrees;
- Using a steel ruler, knife or thin screwdriver, you need to press the locking tongue located opposite the slot in the body of the cylinder. You need to place a screwdriver between the rotating and stationary parts of the mechanism. Know that in the driver's door the slot is made from the bottom (looks “to the floor”), in the passenger doors - from the top!
- By pulling the key towards you, the larva is pulled out;
- The new cylinder is installed like this: with the key inserted, it is pushed into the lock until it stops. The locking tab will need to be pushed inward.
The following photo illustrates the “second step”.
The slot itself, when the mechanism is assembled, is located between the drive and the lock body (at least that is how it is designed). You need to manage to squeeze a screwdriver into the space between these parts. Sometimes this action does not lead to a positive result, and then the lock has to be removed as an assembly.
How to defrost a car door lock in cold weather
So, let's look at the listed and other methods of opening locks in more detail, providing comprehensive information.
Method one. Checking locks
The simplest thing a car owner can do when it turns out that the driver’s door won’t open because the lock is frozen is to check the functionality of the locks on other doors. If you own an SUV or a hatchback or station wagon, then also check the lock on the trunk. With proper dexterity and average physical fitness, you can easily get into the cabin through the trunk.
These are the steps you should take first. Next, if you managed to open at least one of the doors and you climbed into the driver’s seat, start the car and turn on the heater. The lock will gradually thaw under the influence of hot air. For the same purpose, you can use a hair dryer, which is of little use for removing ice on glass, but is just right for spot heating of surfaces.
Method two. Key rotation
If you managed to insert the key all the way, but the lock does not turn, you can try the following steps simultaneously:
- rotate the key in different directions (right-left);
- tap the area of the door under which the lock mechanism is located.
Methods for installing the trunk lock activator
The first option is to saw off one “tongue” from Kalina’s lock.
Particularly gifted craftsmen do this without any removal of the lock, right on the spot, using an angle grinder. You have to work very carefully. If you don’t have a grinder, the same steps can be done with a hacksaw. It just takes much longer, and one can only guess about the physical effort required for such a process. If you are not confident in the intricacies of your own work, it is better to remove the lock for modification. In this case, it will be easier to work with both a grinder and a hacksaw. Novaya Lada: Central locking on Kalina does not work - reasons - malfunctions and methods for eliminating them
The second option is to replace the lock. Many car owners installed a trunk lock for their Lada Priora instead of the original one. This option is perfect for those Kalina owners who do not have the desire and/or ability to cut anything. All other steps for installing the Kalina station wagon trunk lock activator are extremely simple.
- A rotary washer is installed on the plastic activator pusher, then the entire system is secured with a locking ring.
- The complete activator is placed in a standard place.
- The activator wires are connected to the corresponding connectors. Naturally, all electrical work is carried out only with the battery disconnected. The point is not what can “knock” an electric current: 12 volts of direct current for a person is just nonsense. But capricious electronics, if something suddenly “shorts”, may suffer. In the best case, problems with functionality will begin, in the worst case, something will completely fail.
- The next stage is installing and adjusting the rods.
- A check is in progress. First, the lock itself, regardless of whether the original one was modified or another one was installed (from Priora). All detected problems are corrected. The activator is being tested.
If everything worked perfectly, then it is quite possible to install the trunk trim in place, if only there were “hedgehogs”. Car owners are advised, since they had to remove the trunk trim, to also check which parts are making noise, knocking or vibrating. If such small problems are discovered, they can be solved by installing plugs from pieces of foam rubber of the required size. This will not only solve the problem with the lock, but also increase comfort when driving the car.
Luggage compartment lock
You can, if desired, modify the trunk lock of the Kalina hatchback in exactly the same way as was considered in the case of the Kalina station wagon. One of the main nuances, oddly enough, is not in the electrics or body design features, but in the fastening of the trunk trim. The point is that the Kalina hatchback is supported not only by pistons, but also by plastic corners.
That is why, when removing the trunk trim of a Kalina hatchback, you must pull the trim from the top: while the “hedgehogs” are easy to replace, the stationary plastic holders are only easy to break. And more about plastic. The bottom line is that the Kalina hatchback has a plastic trim on the trunk lid. According to the observations of many car owners, these are two problems at once. The first is that plastic is not entirely suitable for this part.
Constant efforts to open the fifth door, combined with a small number of stiffeners, gradually lead to the appearance of cracks in the plastic. Then everything follows domino rules. Perhaps the plastic will soon “fly”, and then you will have to think about repairs. Or, which is no easier, the plastic cover may remain in place, but will begin to “walk” along the metal part. And these are scratches on the coating and subsequent corrosion.
There are also aesthetes among Kalina hatchback owners who simply do not like the look of the trunk lid opening button. In general, all of the above reasons often lead hatchback owners to the same decision: an opening button on the fifth door is not needed. To solve all the problems at once, you can not only modify the Kalina trunk lock, but also remove the button from the fifth door, and, on the contrary, install a button in the car interior.
Trunk won't close on Kalina
From the moment I bought the Swallow, I was tormented by its trunk. The fact that it closed very poorly - it had to be closed literally on a grand scale. I read on the Internet that many people experience this. And I also found a simple recipe: unscrew the screws and adjust the position of the lock mate (it should move up and down).
However, when I looked at what I had with the response part, I was upset - it was already, as it seemed to me, in the most extreme position and there was nowhere to adjust it. In any case, that’s what I thought... Look at this: It would seem that there is nowhere to adjust downwards, since the piece of iron rests on the plastic. But!
Now I can close the trunk simply by lightly pushing it down with the same force as Kalina's door.
I think I'm not the only one who has trouble closing the trunk. Who is fighting this? I've already sunk in the rubber plugs, but it doesn't help.
Source
Advantages and options for upgrading car locks
Volume and features of the trunk of the Lada Kalina: station wagon, sedan and hatchback
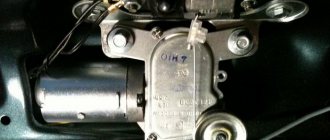
The technique is simple, the only thing needed is to make a rotating plate and a rod for it yourself. The wiring should be routed to the electric lock and connected to a special control unit. When disarming the car, the electric trunk lock will be activated after the fifth door opening button is unlocked.
The entire installation task is based on connecting the electric lock to two wires. You can purchase the part at any auto store. The trunk end must be additionally hidden to prevent water from getting into it. Otherwise, it will periodically short out during rain.
An important attribute is the trunk hinges. Wires are often broken in this place, so their condition must be carefully monitored.
An important step in the installation process is wiring; you can use those wires that are standardly suitable for the fifth door of the car.
Power is taken from the cigarette lighter. An important point is the installation of a protective fuse. The wire is laid along the threshold; it will take approximately 3.5 meters. Then the installation takes place.
Any option for modifying your own car has its pros and cons. It was already discussed at the beginning why exactly it is worth modifying the trunk lock of the Kalina hatchback and station wagon. Now about the possible options. Installing the trunk lock activator alone solves one problem - the issue of using the key.
True, you no longer have to remove the key from the ignition. That is why the issue of installing a trunk release button for Kalina hatchback and station wagon remains relevant. This modification option has its drawback: you will have to run the electrical wire through almost the entire car. Most car owners are willing to put up with such inconveniences, since they are one-time use.
DETAILS: Replacing lamps on a Mazda 3 Photo instructions on how to change the front lamps on a Mazda 3
The Kalina hatchback trunk lock drive and the issue of modification are a matter exclusively for the car owner. It is possible that it is impossible to independently modify the trunk lock of the Kalina hatchback, and there is nowhere to turn. In some regions, purchasing a lock for a Lada Priora car can be difficult. According to many motorists, this disadvantage can somehow be put up with.
For particularly skillful car owners, options for controlling door opening/closing mechanisms, including the fifth door, are available. For example, the simplest option is one in which all the doors of the car are unlocked simultaneously.
Car doors do not open well
The most common manufacturer defect is that the rear and front doors on Kalina are difficult to open. The flaw occurs in used cars and those that have just come off the assembly line. The reason is incorrect or insufficient adjustment of the door handle or the door itself.
The problem can be solved with the help of a service center or fixed by yourself. The second option is more acceptable for experienced drivers, experienced auto mechanics and those who like to experiment with their car.
First of all, it is important to find out the reason why the back door on a Viburnum does not open well. An external inspection of the defect is carried out and a comparison with the original position of the part is carried out. Based on the results of the check, you can adjust the elements yourself.
In a similar way, malfunctions of the front and rear doors are eliminated, including the trunk door, if the car has a hatchback or station wagon body, but in this case there are nuances.
How can you not defrost locks?
Often, drivers try to unlock a frozen car lock using various means that are unacceptable for use:
- boiling water;
- gasoline and other flammable substances;
- antifreeze liquid or glass defrosting composition.
Boiling water can cause irreparable damage to the paintwork of a car, which becomes cloudy due to sudden temperature changes. This option does not solve the problem: since hot water is poured into the locks, temporary thawing occurs, and then the larva is covered with ice again. A similar effect is achieved by various anti-freezing compositions containing water - constipation is defrosted for a short time.
Whether gasoline will help solve the problem is unknown. But it is quite capable of damaging some plastic and rubber elements, so it is not suitable as a life-saving remedy.
Door adjustment process
To eliminate defects in the operation of door elements, it is necessary to find out the cause of its occurrence. In some cases, treating moving parts of the mechanism with lubricants helps. The seals between the trim and the body are subject to wear and tear, and they also require replacement periodically.
- the gap in the extreme part of the structure causes the door on the Kalina car to not close tightly;
- The problem is caused by a faulty door lock.
Violation of the geometry of the structure in the doorway is the most common cause of the defect. Gaps can appear in any part of the joint with the body. Most often this happens from above and below. The adjustment in these cases is similar, but has minor differences.
Adjusting a door with a large gap at the top
Failure to correctly position the door is not always due to a manufacturing defect. The appearance of an enlarged gap in the upper part of the doorway is often associated with natural processes. Poor quality roads, driving on rough terrain, and heavy weight of the structure lead to the door sagging relative to its original position.
Restoring the position of the element relative to the body is carried out by a similar physical impact in a state of incomplete closure. The glass goes down completely. The door closes with one click. In this state, the size of the gap is regulated by moving the door toward or away from you, depending on the force applied.
Alignment is considered successful if the gaps are the same on all sides. The front doors are calibrated in the same way.
With heavy trunk doors of Lada Kalina hatchbacks and station wagons, the procedure is more complex and technological. The design is designed in such a way that when slammed, the lock tongue snaps into a metal bracket. The specific fastening of the lock with bolts creates additional instability.
The bolts should be found and tightened with a screwdriver. The lock is coated with silicone grease. Checking for opening and closing will indicate further actions. If the defect has not been eliminated, rubber stops are used to strengthen the drive traction of the luggage lock. However, you should not overuse force to install them, as this may have the opposite effect.
New Lada: Replacing drums and brake pads on Kalina — »
Why do the doors fly off the casing?
Most often, the front or front door trims are removed to reach the interior cavities where the power windows are installed. Although there are other situations during the life of the vehicle when it is necessary to take off
frame:
- install speakers built into door cards;
- in case of failure of electric window buttons;
- for disassembling glass for tinting or replacement;
- For repairing or lubricating windows;
- Replace worn or scratched panels over many years of machine use.
- Lada Kalina entrance door maps
- It is also impossible to do without removing the cladding during body work, when you need to weld rotten elements, update a paint machine, or carry out anti-corrosion treatment.
The note. Many motorists remove the gasket to add additional vibration and sound insulation to the body.
Preparing for disassembly
Unscrew the fastenings and take off
Door trim, you need to prepare a simple set of tools:
- a screwdriver with slots in the shape of a cross;
- long flat screwdriver;
- sharpened tool, for example, sewing.
Door disassembly tool
How to Remove Nissan Qashqai Wipers
Kia Dashboard Doesn't Work
How to Remove the Trunk Button Ford Focus 2
A former employee shares what it's like to work for Tesla
Since the door card of the Lada Kalina car rests on plastic clips (otherwise - clips, plugs), there are warnings about operating conditions.
It is strongly not recommended to disassemble door freezers when the plastic becomes brittle and breaks easily. Therefore, there is a risk of breaking all the clips when removing the decorative panel.
Replacement door handle Lada Kalina
disassembling and gluing vinyl boots Kalina
2 hatchbacks.
There are no summer residency requirements; remove skin even outdoors. There is only one recommendation: in windy weather it is better to drive the car into the garage, otherwise it will cause a lot of dust when opening the doors.
This is what a door card latch looks like
Advice. In cars over 5 years old, the plastic from which the locks are made dries out and becomes brittle. Separating the Trim from the Door With a machine like this, you're bound to ruin some of the clips.
Instructions for removing cladding in Kalina
The first three operations are the same for all Lada Kalina doors. The exception is the hatchback hatch in hatchback and station wagon bodies; the disassembly procedure is much simpler. How to remove the front and rear door trim on a Kalina Lada. Here's what to do:
- Unscrew and remove the lock cover designed to lock the door lock inside.
- Using a Phillips screwdriver, remove the 4 screws that secure the music speaker.
- Remove the speaker and disconnect it from the speaker.
Unlocking the blocker and acoustics
- Replacing Shock Absorbers Toyota Camry 30
- How to Lock a Skoda Octavia Without a Battery
- Replacement Rear Door Handle Kalina
- How to Disassemble the Rear View Mirror of a Kia Sportage
- Which Diesel Engine is Suitable for Moskvich 2141
Advice. The acoustics can be attached either to the door card itself or to the metal frame of the door. If, after removing the speaker, you stick to the first option, it is better to repeat it when installing the mounts, drilling holes for the screws. The acoustics should be installed on the door, not on the trim.
Front passenger door
Here the decorative panel is supported by 8 clips, 2 screws for attaching the internal handle and two screws located under the plastic pocket. The disassembly algorithm looks like this:
Carefully support the awl with the edge of the plastic plug that covers the screw in the door handle, gave it away. Remove the screw with the second cover in the same way. Remove both handle screws. Pull the handle to open the door, turn the locking screw and remove the lever
Then succeed in taking off the whole pen. Remove the 2 screws at the bottom of the door card, under the plastic pocket. Take a flathead screwdriver and support the top right corner of the trim panel to close the first latch. Grasp the skin with your fingers and remove the rest of the cap by hand. After removing the panel from the door, disconnect the wires coming from the power button. how to remove the door trim from the viburnum on the carriage door (rear). To do this, turn the screwdriver on the protrusion of the connector and pull the block out of the button assembly. Dismantling of the cladding is completed.
Repair of the trunk lock of the Lada Kalina hatchback
A reliable way to repair the Kalina trunk lock
Hatchback and Station Wagon.
The trunk door lock of the Lada Kalina Hatchback and Station Wagon is a rather capricious unit that can seriously spoil the blood of its owners.
As soon as you put a large load in the trunk that puts pressure on the lid, for example a couple of bags of potatoes, and drive a dozen kilometers on a bumpy road, it stops opening.
If, after pressing the button, the mechanism does not return back, then you will have to open it from the interior by pressing the latch with a screwdriver. The plate on the lock body has disengaged and the thrust stroke has sharply decreased, which does not allow the force to be transferred to the latch.
The design of the drive is puzzling. Even if the developers were faced with the task of minimizing the cost and high manufacturability of the assembly, this is not an excuse.
Any component of the car must work out its service life without failures. The plastic insert in the pressure unit is fixed by bending the latch on the lock body.
The lug is a few millimeters in size and easily breaks after several disassemblies necessary to clean the rotating mechanism.
The new case is sold only assembled; you most likely will not be able to buy the sleeve separately. Moreover, such a solution to the problem will not ensure durability. There are descriptions online of repairing a unit using a self-tapping screw screwed into a hole drilled in the eye.
That's exactly what I did, after having to open it from the inside with a screwdriver a couple of times. As it turned out, this method is too short-lived. The ear broke very quickly.
I had to implement it in my own way, so that I could forget about the problem forever.
To work, you will need a minimum of tools - a set of 8, 10 wrenches, a drill, a screwdriver, a vice and a file.
The materials you need are a piece of metal perforated profile or DIN - 35 rails, approximately 350 mm long, a pair of M5-M6 screws, with nuts and spring washers, several “hedgehog” fastening inserts, well known to all owners of VAZ cars.
First of all, remove the plastic cover. To do this, you need to unscrew the 2 screws securing the pocket handle and remove the cover plate by slightly prying it up with a powerful screwdriver from below. The force should be applied in the downward direction (open upward) to avoid breaking the guides.
The fastening latches may break, but there is nothing to worry about - they are considered disposable items, are inexpensive and are sold at any automotive store. Then we measure the required length of the profile so that the existing perforated holes coincide with those located on the body.
Cut to size and file the sharp edges. You can use a steel strip 20-40 mm, 2-4 mm thick. This bus is used for grounding loops. It will require drilling 3 holes of 9-10 mm. The third hole in the middle is for attaching the pressure plate.
The best option is to make a strip from a DIN rail, which is sold at any electrical goods store. I found a perforated steel profile in the garage, so I made a strip from it. The second design detail is the aforementioned pressure plate.
Its purpose is to provide a rigid connection between the bar and the lock plate.
The pressure plate can be made from any suitable piece of metal 2-4 mm thick, for example from a piece of the same profile. The main thing is to choose it so that the bent part of the eye rests against the lock plate with little effort when assembled. There is nothing complicated, look at the photo and everything will become clear.
Next, we attach the pressure plate to the rail with an M5 screw and nut. By attaching the bar to the surface of the door, we make sure that the bent ear rests on the surface of the lock plate. The bar needs to be slightly bent in a vice so that it follows the shape of the door surface. If necessary, the ear is bent in a vice with light blows of a hammer.
We fasten the rail with screws to the trunk door and check the functionality of the lock.
At the same time, we adjust the force of locking the trunk by rotating two rubber bushings located at the edges of the door. The trunk should close smoothly the first time.
If you have to press hard on the body to open the trunk, then you need to adjust the length of the pull rod, achieving minimal force. That's it, all that remains is to put the plastic door trim in place.
It is advisable to replace the double-sided tape glued to the surface. Tightly fitting the lid will improve sound insulation.
Conclusion: Here is a reliable method for repairing the trunk lock of a Kalina Hatchback or station wagon. The work will take a couple of hours of time for a person with minimal plumbing skills. The lock repaired in this way has been in operation for six months.
Top 10 ways to open a lock
The door lock can freeze if moisture gets inside it and severe frost hits it. The water freezes and expands, making it impossible for the driver to get inside the car. If the locks on your car are frozen, use our tips.
Open another door
The first thing that comes to mind when the driver's door lock freezes is to check the other doors. The trunk lock might not freeze; you can get into the car through it. This method is convenient for drivers of SUVs and station wagons with a large trunk. After getting inside, turn on the stove, which will warm up all the parts.
Heating the door key
Use matches or a lighter to warm up the key and insert it into the lock. If it is inserted all the way, twist it slightly from side to side. The main thing is not to overdo it and break the key.
Heating the lock cylinder
Carefully, so as not to spoil the paintwork, heat the larva with a handy object. A lighter, gas burner, and matches are suitable for this. Ask another car enthusiast for a hot cigarette lighter and apply it to the lock.
Liquid car key
If the lock in your car is frozen, you can buy a special defrosting agent - a liquid key. This is a special solution that comes in the form of an aerosol with a thin nozzle. You need to insert it into the lock and inject some liquid. The product dissolves ice, removes moisture, cleans surfaces of dirt and lubricates them. After application, you need to wait 2-3 minutes for the product to take effect. An important point - do not store such a product inside the car.
Kerosene based product
- Google+
- LJ
- Blogger
If your car lock is frozen, spray it with WD-40. Work carefully so that the solution does not come into contact with your skin. After a few minutes the ice will melt and you will open the door.
Make a heating pad
- Google+
- LJ
- Blogger
You can make a heating pad for your car from scrap materials. At home, pour boiling water into a plastic bottle and apply it to the lock. The bottle can be replaced with a household heating pad or rubber glove. It is more convenient to apply them to the door. The generated heat will help you quickly open the car.
What to do with alcohol to open the door
Pure alcohol melts ice - everyone knows this. Theoretically, all alcohol-containing preparations are suitable for defrosting locks:
- Cologne;
- Eau de Toilette;
- Alcohol.
If you have a glass defroster on hand, that will work too.
Breathing and exhaust gases
Warm air can also melt ice crusts. The easiest way is to warm the mechanism with your breath. The most effective way to do this is with a cocktail straw. If the driver's door lock freezes and breathing does not help, use a more powerful remedy - the exhaust gases of another car. Algorithm of actions:
- Take a long tube, the diameter of which is suitable for the exhaust pipe.
- Place it on the exhaust pipe of a running vehicle.
- Bring it to your car.
Antifreeze liquid
You can try using windshield washer fluid to open a frozen car lock. But do not forget that it is diluted with water, which means it can freeze again.
Warm room
- Google+
- LJ
- Blogger
If all else fails, you need to tow the car to a warm garage and wait until it melts on its own. Storing your car in such a garage will prevent such problems.
Now you know how to open a frozen car. Under no circumstances should you heat the doors with boiling water. If it is very cold outside, it will quickly cool down and freeze inside the locking mechanism. Hot water also damages paintwork.
Removing the door trim yourself
The casing is attached not only to screws, but also to plastic pistons. The number of screws holding the part in question is four:
Numbers here indicate all fastening elements. But to get to them, you need to remove the screw cap “3”, as well as the inner door handle. The pawl handle also needs to be unscrewed.
If these actions are completed successfully, the casing begins to be dismantled, moving it away from the metal. Dismantling is carried out starting from any of the corners, but care must be taken: the pistons holding the plastic are fragile.
If the package includes power windows, you will need to disconnect the connector connected to the button block. Also, another similar connector is present in most trim levels - where there is a central lock. Both connectors must be disconnected.
New Lada: Removing the cylinder head Kalina with a VAZ-11194 engine
All the steps described here involve electronics in any case.
Therefore, at the stage before dismantling the trim, you need to open the hood, take the “10” key and unscrew the negative terminal. We are talking about the battery terminal, which can be connected last (when the last screw is screwed in). Anyone who breaks this rule will look for blown fuses. Draw a conclusion.
Recommendations from the magazine “Behind the Wheel”
Let’s turn again to the “Behind the Wheel” review, which discusses how to remove door locks in a VAZ-1118 Kalina. If the casing has been dismantled, this is not bad. Next, according to the recommendations, unscrew the screw securing the inner handle:
The door handle is attached here
The lock mechanism is connected to two rods made in the form of rods. Both of them are dismantled by disconnecting the plastic clips:
Disconnect the rods from the lock
To disengage the latch, press on the plastic tab with a screwdriver.
At the last step, as you might guess, all that remains is to unscrew the screws holding the mechanism motionless.
Three screws, cross head
But first, you need to dismantle the external handle. To do this, unscrew two bolts equipped with an “8” hex head.
Two bolts hold the handle
By the way, if the central locking connector is attached to the mechanism module, it is also disconnected.
Central lock connector built into the module
Let the wiring harness for the central locking drive remain in the door.
Of course, all door locks must be unlocked with one key, which is supposed to be used in the future.
The work indicated here is carried out on each of the four doors. In addition, it is very desirable that the ignition key also unlocks the doors. However, replacing the cylinder on the steering column will not be so easy. Can you handle the total amount of work that needs to be done? Decide for yourself.
Now let's change the lock
The Lada Kalina will allow you to completely replace the trunk lock without any problems. A friendly car, what can I say.
First follow the previous instructions. To replace the lock, you need to remove the cylinder. You already know how this is done.
Now a couple more steps:
- use a large Phillips screwdriver to unscrew the locking mechanism;
- You need to unscrew 2 mounting bolts;
- pull the knot towards you;
- it should give in and be easily removed;
- do not forget to disconnect the plug with power wires from the system.
Is it worth picking the trunk lock of a Lada Kalina station wagon or another body type? No. This is an extra hassle. A worn or broken lock is difficult to repair. Usually impossible.
It’s easier, faster, and also cheaper to buy a new unit. And replace it on the car.
Replacing the ignition switch yourself
Unfortunately, the Lada Kalina cannot please you with its reliability and durability; many systems, including the ignition switch, fail within a couple of years, so in order to save on repairs at expensive car repair shops, it is better to find out how to do it yourself. So, having come to the conclusion that the lock needs to be changed, we buy a new lock, which costs around a thousand rubles. In the kit we will receive three cylinders (on the doors and trunk) and 2 keys. You also need to purchase four shear bolts, since the old ones will no longer be suitable after dismantling.
In addition to the product itself, we will need the following tools:
- chisel;
- two screwdrivers, a flat one for removing the clamps and a cross for the bolts;
- 10mm wrench or 10mm ratchet;
- key to 8.
Let's get started
1. First you will need to disconnect the battery cable from the negative.
2. Armed with a cross-head screwdriver, unscrew the fasteners on the steering column. To make it more convenient for you, we immediately warn you: there are two bolts on the right and left sides (3), two at the bottom in the middle (2), and two at the very bottom (1). There is also a self-tapping screw located directly under the steering wheel (4).
3. We take out the clamps holding the steering column switches. We dismantle the switches.
4. Now we need the help of a chisel. It is necessary to apply blows of medium power and unscrew the bolts. Bolts, as a rule, become very sticky after several years of use, so you will have to work hard. As soon as you notice that the bolts begin to move out of place, you can pick up pliers and continue to work only with their help.
5. We need to get to the lock connectors, of which there are only two (main power and immobilizer antenna). The connectors are hidden under the console casing. To gain access to the connectors, you need to slightly pull the wiring harness away from the lock and pull them out.
6. Unplug the connectors, and then remove the ignition system switch.
Now we replace the old lock with a new one and reassemble it in the reverse order. But don’t forget that you need to do a little more magic on the doors and trunk, changing the lock cylinders.
Design of VAZ-2109 locks and disadvantages
The lock cylinder is a cylinder that is equipped with a secret mechanism. In all locks with a flat key, the cylinder is replaceable. For example, on VAZ-2109 cars it is replaced like this.
The rotating part that is connected to the rod is called the “drive”. As we can see, this drive has a hole for removing the cylinder. By applying pressure with a thin axle or an awl, the larva is pulled out.
There is only one drawback - it is hardly possible to complete the steps indicated here without first removing the lock completely.
It should be noted that even when the mechanism is removed, it will not be easy to pull the larva out of it.
Therefore, before dismantling, be sure to insert a key into the cylinder and turn it left or right 90 degrees. The purpose of this action is to be able to dismantle the larva. This action is performed effortlessly, and the key is then simply pulled towards you.
Preventive action
To prevent the door lock and rubber seal from freezing due to moisture ingress, follow these instructions:
- When you finish washing your car, open the doors and let the mechanisms dry. Blow out the larvae with a universal aerosol lubricant or spray that displaces the water that has penetrated inside.
- Wipe the door seals with a rag and treat them with any silicone compound. These lubricants are neutral towards rubber.
- A car caught in “icy rain” must first be thawed in a warm parking lot or garage. Then carry out operations to remove moisture and treat the seals.
- With the door open, lubricate the locking mechanism with water-repellent silicone grease.
If there is no warm garage, the ends of the doors and openings will have to be washed with warm water, wiped dry and applied silicone. Pump an aerosol into the lock and take it with you after use. If in the morning you find that the lock has frozen again, you can open the door without any problems.
The ice inside the door locks can be melted just fine with a regular hairdryer, provided there is an outlet nearby. Use this simple household appliance to completely dry the lock cylinder and other elements of the lock.
Severe winter frosts, characteristic of almost the entire territory of Russia, can cause a lot of trouble for car owners. One of the troubles that almost everyone has encountered is the inability to open the car doors after several hours of parking at temperatures below zero degrees. The reason is simple - the moisture accumulated in the core of the lock and on the door seals freezes. To open the doors in this case, you will need to melt or destroy the resulting layer of ice. There are several ways to do this.
