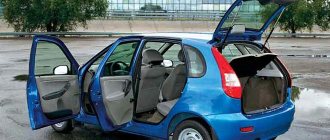
LADA Kalina was produced by the Volzhsky Automobile Plant from 2004 to 2018. The equipment belongs to the small class family of group 2; over the years of production, the model has undergone one update. In 2013, the second generation of front-wheel drive hatchbacks, station wagons and sedans entered the market.
Kalina belongs to the budget price segment. The owners appreciated the model’s unpretentiousness to fuel quality, its minimal consumption, and a large number of spare parts. Replacing the Kalina rear door handle is not one of the common consumables. The part breaks relatively rarely; repairs are carried out both at a specialized service station and independently.
Replacing the door handle of Lada Kalina
The door handle on Kalina is loose! How to repair the Kalina door handle , what should I do to prevent it from swaying? Thank you.
- Modification of the rear handle on the VAZ 1118 Kalina - 1 answer
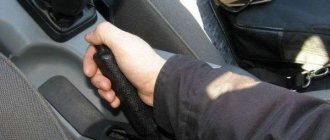
The handle begins to wobble due to the fact that the metal petal with the “groove” unbends during operation. This is the peculiarity of the mechanism.
To fix this, to repair Kalina’s door handle, you need to remove the door trim, and then tighten the screw with a Phillips screwdriver and then try to bend the shaped petal.
It happens that the thread on the handle breaks off (if you overtighten the nut). To fix it, you need to remove the handle and grind off the screw head, then drill out the remaining parts from the petal into a cone. Next, you need to select a suitable countersunk screw and solder it.
Removing the rear door trim on Kalina is quite simple. To do this you will need: a flat screwdriver, a small piece of rag, a knife or a super thin screwdriver. This work is not very difficult, you can easily do it without outside help, even if you have no experience in car repair.
And so, having obtained everything you need, you can begin to remove the casing. First, let's remove all the decorative trims - two on the handle and the cap on the lock lock. To remove the first ones, it is best to use a thin knife or flat-head screwdriver.
We gained access to the 2nd bolts - unscrew them. Now comes the fun part. You need to remove the window lowering/raising handle. It is secured with a plastic retaining ring. It's up to you to pull it out. This ring has a latch on the back. We insert a knife or screwdriver behind the locking ring, pull it towards you and pull it up.
Often, removing this handle causes difficulty for everyone. But, as you can see, it’s nothing complicated if you know the design.
Now all that’s left to do is to tear off the trim from the door. Wrap the screwdriver in a rag, insert it between the trim and the door itself and pull. The entire rear door trim on Kalina is attached using clips. So push on, don’t be afraid. It’s just advisable to have several of these clips in reserve, in case something goes wrong.
Once the rear door trim has been removed, you can perform basic repair work. This includes replacing the outside door handle.
DIY repair option
One of the common reasons for replacing handles is play and rattling. This occurs due to a poor-quality plate located inside the structure. A fixation screw is screwed into its hole. After a certain period of operation, the porous metal is damaged and backlash appears.
Option to temporarily eliminate the defect:
- Remove the handle.
- Disassemble it and remove the steel plate.
- Make a hole in it and on the plastic cover for the screw.
- Connect the structures and check for any play.
The screw needs to be cut to 3-4 turns, since the installation depth will be small. The head is semicircular, but does not extend beyond the plane of the plastic cover.
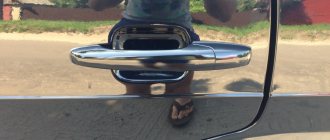
Replacing the rear door handle Kalina
The handle is secured with one nut inside the door and one bolt outside.
We unscrew them. First, we pull out the part of the handle that is closer to the center of the door. Now we pull the entire handle towards the center of the door, lift it up a little, pull the bottom towards us and pull out the handle completely.
The new rear door handle and trim are installed in the reverse order.
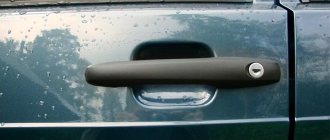
We will show you how to replace the outside door handle on Lada Kalina and Lada Granta cars. I think many owners have encountered this problem: the front doors open from the outside without any problems, but to open the rear doors, you have to put in at least twice as much effort to get the lock to work. You have to pull the handle very hard, as a result the mechanism does not hold up and the metal tongue breaks off on the inside. In such cases, the entire handle assembly is usually replaced.
Review of spare parts prices
| Name/article | Price, rub.) |
| 00001003833121 Bolt M5x10 with serrated shoulder | From 100 |
| 00001003831801 M5 nut with serrated shoulder | From 100 |
| 00001002624101 Washer 5 mm | From 50 |
| 00001003275901 Screw M6x10 | From 50 |
| 00001002605371 Lock washer 6 mm | From 50 |
| 21230610542000 Lock cylinder | From 550 |
| 11180610515000 External front right handle | From 650 |
| 11180610515100 External front left handle | From 650 |
| 21900610518000 Inner front right handle assembly | From 950 |
| 21900610518100 Inner front left handle assembly | From 950 |
*prices are current as of November 27, 2018.
When choosing spare parts, always give preference to original ones. Good, high-quality parts are always 10 - 15% more expensive than analogues. At the same time, by purchasing a factory part, you can count on a long service life of the mechanism.
A cheap counterfeit does not provide even a third of the required resource. The final choice is up to the owner of the technical device. The deciding factor is the budget.
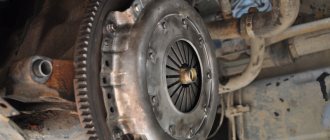
Replacing the rear door window lift mechanism
Remove the rear door trim.
Putting the handle on the shaft, set the glass to the upper position, and then remove the handle.
Remove the vibration damping element from the window handle shaft.
We fix the glass in the raised position by installing two wooden wedges between the glass and the inner door panel.
Using a 8-mm socket with an extension, unscrew the two bolts securing the glass holder to the guide slide of the window lift mechanism.
Using a socket or a size 8 wrench, unscrew the three nuts securing the window lift mechanism.
Using a socket or a 10mm wrench, unscrew the three nuts securing the guide of the window lift mechanism.
We remove the window lift mechanism through the lower technological hole in the inner door panel
Rear door window lift mechanism
Install the rear door window lift mechanism in reverse order
Install the rear door window lift mechanism in the reverse order.
How to start a VAZ-2107 without a key
The most difficult task is starting the VAZ-2107 engine without a key. You need to act according to the instructions:
- Open the hood. Remove the positive wire from the battery terminal.
- Move the gear shift lever to neutral.
- Remove the cover from the steering column using a Phillips screwdriver.
- Remove the bundle of wires from the ignition switch.
- Take the red wire to the side and twist the rest together so that they are in contact with each other. Secure the bun with a paper clip so that it does not fall apart when moving.
- Pull the carburetor choke control handle towards you. Set the parking brake and depress the clutch.
- Using the red wire and twist, start the engine - to do this, you need to momentarily connect the exposed contacts. To prevent the starter from malfunctioning, insulate the red wire and keep it separate from the rest. When the engine is running steadily, lower the clutch and push in the carburetor damper control handle.
The problem is that the steering wheel is locked, which will prevent you from starting to drive. Many car enthusiasts recommend simply using force, but then you will need to repair the steering.
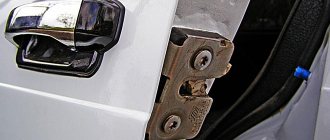
Replacing the rear door lock and outside handle
The outer handle can be changed without removing the lock.
Removing the door trim
Using a 8mm socket with an extension, unscrew the nut and bolt securing the handle
and, moving the handle forward, remove it.
To remove the door lock, disconnect the wire terminal from the negative terminal of the battery
Using a Phillips screwdriver, unscrew the screw securing the intermediate lever of the locking rod, and remove the lever together with the rods from the rectangular protrusion, removing the locking rod from the plastic holder (shown by the arrow).
Using a Phillips screwdriver, unscrew the screw securing the base of the inner door handle and remove it. together with traction from a hollow pin.
Recommendations from the magazine “Behind the Wheel”
Let’s turn again to the “Behind the Wheel” review, which discusses how to remove door locks in a VAZ-1118 Kalina. If the casing has been dismantled, this is not bad. Next, according to the recommendations, unscrew the screw securing the inner handle:
The door handle is attached here
The lock mechanism is connected to two rods made in the form of rods. Both of them are dismantled by disconnecting the plastic clips:
Disconnect the rods from the lock
To disengage the latch, press on the plastic tab with a screwdriver.
At the last step, as you might guess, all that remains is to unscrew the screws holding the mechanism motionless.
Three screws, cross head
But first, you need to dismantle the external handle. To do this, unscrew two bolts equipped with an “8” hex head.
Two bolts hold the handle
By the way, if the central locking connector is attached to the mechanism module, it is also disconnected.
Central lock connector built into the module
Let the wiring harness for the central locking drive remain in the door.
Of course, all door locks must be unlocked with one key, which is supposed to be used in the future.
The work indicated here is carried out on each of the four doors. In addition, it is very desirable that the ignition key also unlocks the doors. However, replacing the cylinder on the steering column will not be so easy. Can you handle the total amount of work that needs to be done? Decide for yourself.
Removing and installing the rear door
It is more convenient to disassemble and reassemble the door when it is installed on the car.
At the same time, there is less chance of damaging the paintwork.
The sequence of disassembling the rear door is the same as when removing the front door. An assistant will be required to complete the work.
1. Remove the window regulator.
2. Remove the glass from the door.
3. Remove the outer door handle.
4. Remove the door lock.
Disconnect the corrugated hose of the wiring harness from the rack.
Disconnect the wiring harness connectors.
When disassembling the door, remove the corrugated hose from the wiring harness and remove the harness through the door opening.
Disconnect the door opening limiter from the pillar.
We turn the axles out of the hinges and remove them in the same way as shown on the front door. How to repair the front door of a Lada Kalina
Having coated the working surfaces of the hinges and axles with grease, install and assemble the door in the reverse order
To ensure reliable contact in the connecting block of the door wiring harness, we treat its terminals with a special agent for cleaning and protecting electrical contacts.
Preparation for dismantling
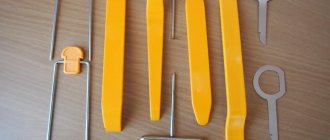
To unscrew the fasteners and remove the door trim, you need to prepare a simple set of tools:
- screwdriver with cross slots;
- long flat screwdriver;
- a pointed tool, such as an awl.
Door disassembly tool
Since the door card of the Lada Kalina car is held on by plastic fasteners (otherwise known as clips, pistons), there is a warning regarding the working conditions. It is strictly not recommended to dismantle door trim in the cold, when the plastic becomes brittle and easily destroyed. Hence, there is a risk of breaking all the clips during the process of removing the decorative panel. Therefore, in winter, perform this operation in a heated garage or box.
In the summer, there are no requirements for premises; remove the casing even in the open air. There is only one recommendation: in windy weather it is better to drive the car into the garage, otherwise a lot of dust will be brought into the interior when the doors are open.
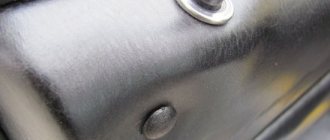
This is what the door card lock looks like
How to tighten door handles on a grant
Tool:
- Small flat screwdriver
- Medium Phillips screwdriver
Notes:
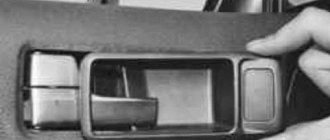
Remove the inner handle to replace it, as well as when removing the glass, window regulator, or door lock. The steps to remove the interior handle are shown on the driver's door. The interior handle on the front passenger door is removed in the same way.
1. Remove the front door trim as described in this article.
2. Using a Phillips screwdriver, unscrew the screw securing the base of the handle to the inner door panel.
3. Remove the bent end of the rod from the hole in the lever of the inner handle (there remains a tightening rubber clamp on the rod, shown by the arrow) and remove the handle.
4. Install the inside door handle in reverse order.
Note:
When installing, the front tab of the handle base should extend beyond the edge of the service hole in the inner door panel.
The article is missing:
- Photo of the instrument
- High-quality photos of repairs
Door adjustment on the Lada Granta is necessary in almost every car in the interior. This problem also occurs in new Lada Kalina 2 cars, so the adjustment has already been perfected by real masters. They will tell us how to approach the problem comprehensively.
This is how poorly the Grant's rear doors open for almost every second owner.
Those who encounter this problem first try to solve it by lubricating the lock. This helps, but only for a short time. The following are methods that can completely eliminate the rear door problem.
Adjusting the rear door locks of the Lada Granta.
Instructions for removing the cladding on Kalina
The first three operations are performed the same way for all Lada Kalina doors. The exception is the trunk hatches of hatchback and station wagon cars, where the disassembly procedure is much simpler. Here's what to do:
- By hand, unscrew and pull out the cap of the latch designed to lock the door lock from the inside.
- Using a Phillips screwdriver, remove the 4 screws holding the music system speaker.
- Remove the speaker and disconnect the wires from it.
Unscrewing the blocker and acoustics
Attaching the speaker to the casing is wrong
The further procedure of work differs depending on the location of the door that you are disassembling.
Front passenger door
Here the decorative panel is held on by 8 clips, 2 screws securing the internal handle and two self-tapping screws located under the plastic pocket. The algorithm for dismantling it is as follows:
- Using an awl, carefully pry the edge of the plastic plug hiding the screw in the door handle and remove it. Remove the second screw cover in the same way.
- Remove both handle screws.
- Pull the door opening handle towards you, unscrew the fastening screw and remove the lever. After which you will be able to remove the entire handle.
- Unscrew the 2 screws at the bottom of the door card, under the plastic pocket.
- Take a flat head screwdriver and pry the top right corner of the trim panel to disengage the first tab. Grab the casing with your fingers and release the remaining pistons manually.
- After separating the panel from the door, disconnect the wires coming from the power window button. To do this, pry the connector tab with a screwdriver and pull the block out of the button block. Dismantling of the cladding has been completed.
Passenger side panel removed
Nuances of disassembling the driver's door
On this side, the decorative panel is removed in the same order as on the passenger side. But due to small differences in the design, it is necessary to take into account the following nuances:
- To make the trim easier to remove, you need to remove the plastic panel covering the rear-view mirror adjustment lever;
- the first screw for securing the armrest is located under the plug, and the second is in the recess of the handle;
- the door opening handle is located on top of the armrest and is removed after unscrewing the fastening screw.
The plastic socket for the mirror drive can be easily removed by hand
The panel on the rear view mirror adjustment is removed using a flat screwdriver, which is used to pry it off from below. On vehicles equipped with electrically controlled mirrors, there is no adjustment lever, and instead there is a plug on the panel.
On the driver's side, the screw is hidden in the armrest
Screw securing the lever for opening the door
Rear door trim
Here the upholstery is pressed to the door by 10 plastic clips and 2 screws securing the handle. The disassembly technology is as follows:
- The first step is to remove the mechanical window lifter handle. Use an awl to pry up the plastic half-ring that secures the lever to the axle. Pull it out and remove the handle.
- Pull out the 2 plastic plugs on the door handle and remove the fastening screws. After this, the element will be easily removed.
- Using a flat-head screwdriver, pull out the lower far corner of the decorative panel and snap out the first piston.
- Grab the door card with your hand and remove it, releasing the remaining clips along the contour. The casing has been successfully dismantled.
Scheme for dismantling the decorative panel
To remove the window lifter handle, you need to pull out the half ring
Otherwise, the upholstery on the doors of the second generation Lada Kalina car is removed in the same way, there are no differences.
This is what the removed rear door trim of Kalina looks like
How to open a VAZ 2107 without a key
Unforeseen situations associated with the unexpected slamming of a car door when the keys remain inside the car are a fairly common problem. How to proceed in this case? How to open a VAZ 2107 without keys and the help of specialists - we will further consider solution options and step-by-step guides to action.
Option 1: use rope or fishing line
The VAZ 2107, as standard, is equipped with door plugs with a characteristic “hat”, using which you can open the car door without a key.
So, first we need to find a fishing line or thin rope of suitable length. The length should be such that it is enough to tie a small “loop”, the “tail” of which corresponds to the height of the glass. Now you need to push the resulting device into the interior of the solon through the upper corner of the car door (usually there is a small gap there). If this free space is not enough, you can use a wooden wedge to slightly widen the opening.
When the fishing line or twine is inside, we perform simple manipulations to put a loop on the shutter cap, tighten the loop around the “cap”. By pulling the ends of the rope, we open the doors.
Option 2: use wire
An alternative way to open a VAZ 2107 is to use steel (or any other, but hard) wire. The main difficulty of this method is to find a wire of the appropriate size: it should be enough for a “hook” 2-3 cm long, bent at an angle of 45 and the height of the car door itself. When the necessary tool is ready, we begin active actions.
Comments
Door handles tuning in a glossy-matte case for VAZ 2104-2107
Includes 4 pads
VAZ 21041 from 01.1984 station wagon VAZ 21045 from 01.1999 station wagon VAZ 21047 from 01.1998 station wagon VAZ 2105 from 01.1980 sedan VAZ 21051 from 01.1981 sedan VAZ 21053 from 01.1980 sedan VAZ 2 1054 from 01.2005 sedan VAZ 21055 from 01.1999 sedan VAZ 21058 from 01.1982 sedan VAZ 21059 from 01.1980 sedan VAZ 2107 from 01.1982 VAZ 21071 sedan from 01.1980 VAZ 21072 sedan from 01.1982 VAZ 21073 sedan from 01.1996 VAZ 21074 sedan from 01.1982 VAZ 21079 sedan from 01.1982 given
Pickup in St. Petersburg
You can receive your order at our pick-up point: St. Petersburg, metro Zvezdnaya, st. Lensoveta, 101 B, 1st floor, pavilion 50.
More details on the contact information page.
Delivery in Moscow within the Moscow Ring Road – 350 rubles
Outside the Moscow Ring Road (within 15 km) - by agreement