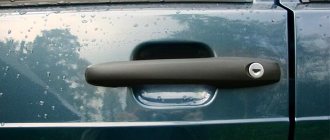
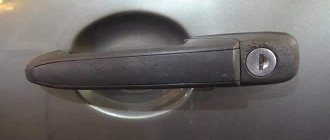
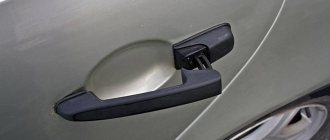
The design of external door handles on VAZ 2113, 2114 and 2115 cars is quite reliable if we consider the old-style handles. But there are often problems with new, so-called Euro pens. But in this article we will look at the replacement of external handles using the example of old-style cars.
In order to make this repair yourself, you will need the following type of tool:
- 8 mm head
- extension
- ratchet handle or crank
- screwdriver short flat
Replacing the front passenger door handle
Photo of replacing the door handle hook, I numbered the photos just in case, in case someone changes the thread, it might come in handy:
Step-by-step instructions for replacing the outer and inner door handles on a VAZ 2115
The elements that open and close the door structures on your car wear out over time. Replacing the VAZ 2115 door handle from the inside or outside may be required due to abrasions, scratches, and deformation. The procedure for removing and installing a new part is different for the rear and front doors, so separate instructions are provided for each situation.
Device Features
On VAZ 2109 and 21099 cars, the design of the front and rear door locks is the same. The key difference is the presence of lock switch cylinders (cylinders) on the outer front door handles. Failed components cannot be repaired, so drivers will have to replace them completely. First of all, motorists will need to prepare the following tools:
- a wrench or ratchet with an 8-point head;
- extension;
- flat screwdriver.
In addition to the listed tools, drivers should also prepare spare parts for replacement. Catalog numbers of VAZ 2109 door locks:
- external for doors VAZ 2108-15: right - 21080610501400, left - 21080610501500;
- internal for the front door of VAZ 2109: right - 21080610501210, left - 21080610501310;
- internal for the rear door of VAZ 2109: right - 21090620501210, left - 21090620501310;
- trunk assembly - 21086305010;
- trunk lock cylinders - 210996100045.
After preparing tools and spare parts, drivers can proceed directly to the replacement process.
Causes of malfunction
Before replacing a part, you should find out the cause of the failure. The main ones:
- damage after an accident;
- mechanical damage to internal elements;
- Hacking attempt;
- failure of the external door opening manipulator;
- pressing hard on the handle.
Most often, the plastic part breaks or breaks as a result of constant opening.
Door lock VAZ 2107
The VAZ 2107 door lock is a part that rarely fails. However, over time, this mechanism may need to be repaired, replaced, or adjusted.
Working principle of the door lock
The “seven” door lock consists of a locking mechanism, a key cylinder, external and internal handles that allow you to unlock the door from the outside and from the passenger compartment, as well as buttons for locking the car from the inside. The lock is controlled by transmitting force using rods. The main element of the lock is a rotor with a slot. When the door is locked, it goes behind the opening bracket. When the door closes, the bracket presses on the latch, as a result of which the ratchet is activated and the rotor rotates. When part of the bracket enters the rotor slot, thanks to the springs it returns to its original position, thereby pressing the door.
When the door needs to be opened, the latch flag is pressed, which causes the rotor to rotate through the ratchet and the bracket to release. When you lock the door using a key or a button from the interior, the latch is blocked. As a result, it becomes impossible to open the door. Since there is a rigid connection between the latch and the lock control handles through rods, they also do not work.
Replacing the inner handle
If the internal door handle of a VAZ 2115 is broken, then cosmetic repairs are impossible. To repair, you will need a standard set of tools: several types of screwdrivers, a sharp knife and a 8mm wrench. It is better to change the part while in the salon. Algorithm for replacing a part:
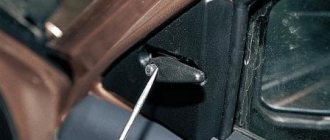
- The lining is removed. It is pryed off with the thin end of a screwdriver. It is important to remove all fragments of decor.
- The door card is being dismantled.
- The rod is disconnected.
- To remove the remains of the broken opening device, the fasteners are unscrewed.
- A new element is installed. It should be attached to the rod, and then the facing elements should be reassembled.
The trim on the VAZ is fixed with special clips. To remove them, you can pry up the edge with a screwdriver. Proceed with caution as they are plastic and may break. This is affected by rough handling, material wear or cold.
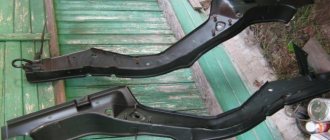
Doors VAZ 2107
VAZ 2107 doors are a car part that is designed for entering and exiting the vehicle. In addition, this hinged body element ensures the safety of the driver and passengers by preventing them from falling out while driving. "Seven" is equipped with four doors - two on each side.
How to remove a door
Sometimes it becomes necessary to dismantle the door on a VAZ 2107, for example, for repair or replacement. At first glance, it may seem that there should be no difficulties in this event, but in fact the situation is somewhat different. The fact is that it is almost impossible to unscrew the fastener with a regular screwdriver. Therefore, you have to use an impact screwdriver.
An impact screwdriver is a special tool that allows you to loosen and tighten fasteners with great force by striking the end of the screwdriver with a hammer. Despite the fact that turning the bit in the desired direction is 1–3 mm, this is quite enough to tear the fastener out of place.
The list of tools may differ and depend on the method of dismantling. The main tools include:
- impact screwdriver with a bit to fit the screw;
- hammer.
Having prepared everything you need, you can start working:
- Remove the door stop.
- Using an impact screwdriver, we tear off and unscrew the fasteners.
If you cannot unscrew the fastener using an impact screwdriver, you can try to drill out the head of the screw with a drill of a suitable diameter (6–8 mm), and then use narrow-nose pliers to unscrew the fastener. Another option is possible: a bolt is welded to the head of the screw and using a wrench they try to rip the screw off.
How to adjust the door
The door on the VAZ 2107 must be installed level and without distortion relative to the doorway. The gap between the body and the door element should be the same on all sides. However, over time, the door begins to sag, i.e., a misalignment occurs, which is due to wear and tear on the door hinges. If there is play or the gap is set incorrectly, the problem must be corrected by adjustment. Otherwise, the door will close with great force. To carry out adjustment work, you will need the same tools as when dismantling the door.
Door adjustment consists of two stages:
- hinge adjustments;
- lock adjustment.
To adjust the position of the door element, perform the following steps:
- Break off the fastenings of the door hinges with an impact screwdriver.
- The door position is set (lowered or raised) in order to correctly adjust the gap between the body and the adjustable part.
- Tighten the fasteners.
- Check the position of the door.
- If necessary, the adjustment is repeated.
Video: door adjustment using the example of a VAZ 2106
Disassembling the door
There are situations when it is necessary to disassemble the door of the “seven”, for example, if the sliding glass, the body is damaged, or if the door itself is repaired. To do this you will need the following tools:
- screwdrivers (flat, Phillips);
- key to 10.
The disassembly process itself boils down to the following steps:
- We take out the decorative plugs on the armrest handle, unscrew the fastening screws and remove the handle.
Door stop
The door stop of the VAZ 2107 plays the role of a latch, i.e., it prevents it from opening excessively. Over time, the limiter may fail, requiring replacement. For this you will need:
To dismantle the lock, first remove the door trim. Then perform the following steps:
- Using a hammer and a punch, knock out the door stop pin.
Replacing the outside door handle
Replacing the inner door handle of a VAZ 2115 is not as difficult as dismantling the outer element. First you need to determine the fastening method, which is specified in the technical document for the car. It will not be possible to get to the fasteners without removing the casing. Armed with screwdrivers and a 8mm wrench, it is important to follow the step-by-step instructions:
- Remove trim.
- Remove the thrust rods from the closing mechanism.
- Unscrew the external fastening screw.
- Remove the rubber seals and remove the handle.
- Inspect and clean the installation site of the new structure.
Assembly is carried out in reverse order.
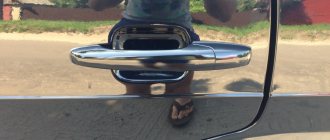
Repair/maintenance: Repair of door handles and treatment of cavities of VAZ-2107
Hi all! In winter, both door handles of the rear doors broke almost simultaneously, that is, the left handle was skewed and although the door opened, the handle was jammed in the upper position and scratches appeared.
The reason was discovered almost immediately - the handle body, which held the axis that helped push the rod to open the lock, burst under the scratches.
Therefore, I purchased a new one in advance, an analogue one.
It was not clear with the right door, the handle simply moved freely up and down and the door did not open, it was the fault of the unhooked rod, so I decided to find out the reason during disassembly.
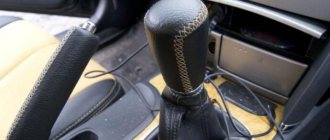
To begin with, I disassembled the left door trim.
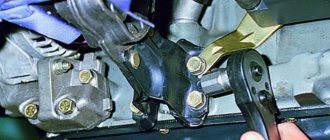
To remove the handle, you need to unhook the rod from the lock mechanism, unscrew the bolt and unscrew the 2 nuts securing the handle itself to the door - in principle, everything is simple.
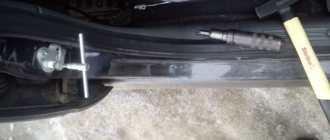
I previously marked the position of the rod relative to the bolt with a marker so that I wouldn’t have to re-adjust it later. Using a flat screwdriver, press the handle away from the door and pull it up, removing it along with the rod.
The breakdown location is on the right.
We move the rod to the new handle, not forgetting about the fixing rubber band, and put it in the reverse order. I pre-coated all the rubbing parts and the rubber seal with silicone grease.
The new handle fits perfectly, the door now opens easier than before. True, the color of the handle differs from the factory chrome, but I did not take the original, since it is almost twice as expensive as the analogue, and the quality looks the same.
At the same time as replacing the handle, I decided to thoroughly seal the door cavity; before that I had already tried to push Movil and kindling through the holes in the trim, but it didn’t work out very well, only the door card got dirty.
The factory Shumka swelled and began to rust under it in places.
I decided to completely rip it off and coat it; by the way, it was glued to bare metal, and not tightly at that. The material looks like ordinary tar, and on top there is paper, something like roofing felt and roofing felt. It is quite easy to scrape off with a sharpened spatula.
First, I coated it with rast-stop so that it penetrated into the small pores of the rye and metal, and then covered the main protective layer with heated pushsal on top. I sprayed the corners where I couldn’t reach with a brush with Movilya from a spray can and thoroughly coated the glass and lock lowering mechanisms with it. First, of course, cleaning the bottom from dirt and adhering dust.
On the right door, during disassembly, it was discovered that the axis on the handle had moved and disengaged from the plate that moves the rod, so it did not open.
I had to hammer it back in and seal the end from the return exit.
I also replaced the torn rod fixing rubber by cutting a new one from the old camera.
Although the axis is bent, the door also opens perfectly.
Under the guise there was already more rust on this door.
I also cleaned and processed everything.
The door clips I bought a long time ago came in handy, as several of them broke when removing the trim.
I did not notice any increase in noise in the cabin due to the fact that I removed the factory noise.
Regardless of the make of the car, the door is an integral part, but the correct operation of the door mechanisms is no less important. Over time, the door and lock need to be adjusted due to the formation of wear. Otherwise, locking becomes problematic and sometimes even impossible. All work on the door element can be done in a garage with a minimum set of tools.
Handle selection
Repair will require a new part. The mechanism is sold for the driver's or passenger's door. When purchasing, you should pay attention to:
- Appearance of the product. Experts recommend taking a closer look at Euro pens.
- Manufacturer.
- Material of manufacture. The standard version is made of plastic, but there may be products with additional elements. Some manufacturers add chrome strips.
It is better to purchase AvtoVAZ products. Factory articles: 2109-6105180 – for internal, 2108-6105177 – for external product.
Adjustment process
The part is adjusted as follows:
- The groove is pulled out from the plastic. In accordance with the adjustment, it is unscrewed and tightened. This allows you to configure correctly.
- Adjustment of door closing without using a key is carried out by changing the position of the latch on the body. Changing its position reduces the required force when closing the door and reduces the noise level in the cabin.
Adjustment is possible in cases where replacement of components is not required.