Home / Terms
VAZ-2107 cars, over the years of their production, were equipped with both carburetor and, subsequently, injection engines. Therefore, the electrical circuits for supplying voltage to the electric motor of the engine cooling system fan differ from each other.
On injection
on VAZ-2107 engines, a two-contact fan sensor, which is located in the upper pipe, when the coolant temperature rises above that for which it is designed, it must send a signal to the computer. The electronic control unit, having analyzed the signal, turns on the fan through a relay.
Therefore, the search for reasons for the fan not turning on begins by removing the connector from the sensor with the ignition on. If the fan itself is working properly, then it should work. By inserting a load in the form of a light bulb into the connector terminals, the fan should stop. Thus, you check the electrical circuit of the fan motor. In this case, it will be fine, but the fan sensor will have to be replaced. However, it should be noted that there are also substandard sensors on sale, which, when installed on the engine, will also not work.
If, after removing the connector from the sensor, the fan does not work, then its functionality must be checked by connecting it directly to the battery. There are only two options for the experiment. If the fan is working, then you will have to check the functionality of the fuse that protects this circuit, the fan relay and the ECU. And if the fan does not work, then you will have to check the condition of its brushes for wear.
On carburetor engines
car VAZ-2107, there will be no ECU in the electrical circuit for turning on the fan, and some “sevens” don’t even have a fan turn-on relay. Therefore, it is much easier to find the reason why the fan does not turn on, and many drivers of VAZ-2107 cars can cope with this.
The VAZ 2107 is equipped with an electric radiator cooling fan. It automatically turns on when the coolant heats up to 90 degrees and under normal conditions ensures a stable engine temperature regardless of air temperature and driving mode.
But there is one problem. Sometimes the relay (sensor) for turning on the fan breaks and the radiator fan of the VAZ 2107
won't start. As a result, the engine overheats and the matter, at best, is limited to boiling and leakage of coolant, and at worst, a major engine overhaul. To avoid problems, you can improve the design by organizing forced cooling of the radiator. There are two ways to do this: mechanical and electrical.
Mechanical forced cooling of the VAZ 2107 radiator
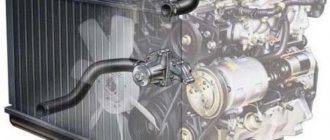
On older VAZ models, the radiator was cooled using an impeller mounted on the water pump rotor. This solution ensured constant airflow to the radiator when the engine was running. Considering that the design of the VAZ 2107 differs little from its “predecessors”, installing such an impeller will not be difficult.
The advantage of this solution is reliability. Forced mechanical airflow of the radiator ensures that the car does not boil while sitting in a traffic jam on a hot day. But at the same time, the efficiency of blowing at low speeds is reduced in comparison with electric blowing. In winter, another disadvantage of forced cooling appears - a cold engine is additionally blown by a fan, which slightly slows down its warming up. The fact that the fan blows on the radiator on a cold engine does not in any way affect the warm-up speed provided the thermostat is working. The fact is that before the engine warms up, the coolant circulates through a small circuit, bypassing the radiator.
The mechanical drive of the VAZ 2107 cooling fan can be improved
:
- Install a diffuser that directs the air flow through the radiator honeycombs. This will improve cooling efficiency.
- Move the radiator a little back, closer to the impeller. To do this, you can tilt its upper part, using rigid steel strips for fastening. The slats must be calculated so that the distance between the radiator and the impeller is approximately 2040 mm.
This way you can protect your car from overheating.
The process of replacing a sensor on a carburetor engine
This is where the process may seem more complicated. After all, given that the sensor is located at the bottom, you will have to drain the coolant. And to do this you need to look for an inspection hole, remove the engine protection, etc. But you don’t have to do this. You just need to quickly screw the new sensor in place of the old one. Naturally, some coolant will spill out, but its amount will be limited to 20-30 ml. In addition, you can always place a properly cut plastic bottle under the connection point.
So, prepare a new sensor and a “30” wrench. Disconnect the wires from the device. Carefully unscrew the sensor using the key. Continue unscrewing it by hand, pressing it against the radiator body. When the sensor comes off the thread, you can pinch the hole with your finger and start screwing in the new element with your other hand. Do not manage to lose the O-ring that is placed on the threaded part of the device. That, in fact, is the whole process. All that remains is to connect the wires to it, start the power unit and check if everything works.
Electric radiator cooling fan (forced)
To prevent a breakdown of the VAZ 2107 fan sensor from causing problems, you can organize forced cooling without replacing the standard electric fan with an impeller mounted on the pump pulley. To do this, it is enough to ensure that the fan is turned on with a button. You will need the following parts and materials:
You will also need a new fan sensor if the old one is faulty. Serviceability can be checked with an ohmmeter or continuity tester. If the fan does not turn on when the lower part of the radiator heats up, it must be replaced.
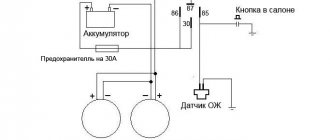
First you need to reduce the current passing through the contacts of the thermal relay that controls the fan. To do this, the VAZ 2107 fan switching circuit must be changed so that it is powered not directly from the sensor, but through an additional relay. In this case, the contacts of the fan sensor (thermal relay) will not burn out, and if the additional relay fails, it will be much easier to replace the latter.
It is also necessary to connect the fan switch button so that when turned on, it duplicates the sensor, supplying voltage to the relay coil when turned on. In this case, if the sensor breaks down, you can manually turn on the VAZ cooling fan and protect the engine from overheating.
Diagnostics and repair
It is recommended to check the fan and elements of its electrical circuit in the following order:
- Fuse.
- Relay.
- Electric motor.
- Temperature sensor.
Checking the functionality of the fuse
The fuse is usually checked first, as this process is the simplest and does not take much time. To carry it out, you only need an autotester or a test lamp. The essence of the diagnosis is to determine whether it passes electric current.
The fan circuit fuse is installed in the vehicle's mounting block, which is located in the engine compartment. In the diagram it is designated as F-7 with a rating of 16 A. To check and replace it, you must perform the following work:
- Disconnect the negative terminal from the battery.
- Remove the mounting block cover.
- Find the F-7 fuse and remove it from the seat.
Relay diagnostics
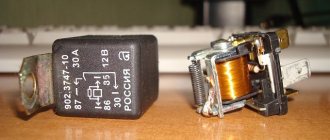
As we have already said, in the injection “sevens” a relay is provided to unload the electrical circuit of the radiator fan. It is installed in an additional mounting block located under the glove box in the car interior, and is designated R-3.
Checking the relay yourself is quite problematic. It is much easier to take a new device and install it in place of the one being diagnosed. If the electric fan turns on when the refrigerant is heated to the desired temperature, then that was the problem.
Checking and replacing the electric motor
- voltmeter or multifunction autotester;
- two pieces of wire;
- socket wrenches “8”, “10” and “13”;
- pliers.
The work order is as follows:
- Disconnect the fan power connector.
- To the contacts of the half of the connector that comes from the electric motor, we connect two wires, the length of which should be enough to connect them to the battery terminals.
Diagnostics and replacement of temperature sensor
Temperature sensors for carburetor and injection "sevens" differ not only in design, but also in their operating principle. For the former, the sensor simply closes and opens the contacts, while for the latter, it changes the value of its electrical resistance. Let's consider both options.
Carburetor engine
Tools and tools you will need:
- open-end wrench at “30”;
- socket wrench or socket to “13”;
- ohmmeter or autotester;
- liquid thermometer with a measuring range of up to 100 °C;
- a clean container for collecting refrigerant;
- container with water;
- gas (electric) stove or household boiler;
- dry clean rag.
The check and replacement algorithm is as follows:
- We place the container under the plug on the cylinder block of the power plant.
Injection engine
The injection “seven” has two temperature sensors. One of them works in tandem with a device that shows the coolant temperature to the driver, the other with the ECU. We need exactly the second sensor. As already mentioned, it is installed on the pipe next to the thermostat. To check and replace it we will need:
- autotester or multimeter with the ability to measure voltage and resistance;
- open-end or ring wrench set to “19”;
- liquid thermometer with temperature measurement amplitude up to 100 °C;
- heat-resistant container with water;
- boiler or stove (for heating a container of water);
- clean dry cloth.
The order of work is as follows:
- We find the sensor. Disconnect the connector from its contacts.
Improving the cooling system with an electric fan
To improve cooling, you can replace the standard VAZ 2107 cooling fan with a more powerful and advanced one. Fans from Viburnum or Priora are suitable for this purpose. The eight-blade fan is especially effective, providing particularly strong air flow.
It is worth considering that the cooling system of the VAZ 2107 was initially designed for efficient operation. If it fails, the reason lies not in an ineffective standard battery, but in clogged radiator cells or a lack of coolant in the system. Therefore, if the engine overheats while the fan is running, it is worth checking the coolant level and cleaning the radiator honeycombs (or replacing it).
This article will talk in detail about the VAZ 2107 forced-air fan. Two types of this design can be distinguished - electrical and mechanical. Any owner of a 7 begins to regret that in the summer, in a traffic jam, his fan switch suddenly fails. After such an incident, as a rule, they begin to think about improving the design. And modernization can be done in several ways.
Troubleshooting algorithm
If the electric cooling fan does not work on your VAZ 2107 (carburetor), you need to do the following:
Turn off the engine and turn on the ignition. Use a flat-head screwdriver to short-circuit the terminals of the fan switch sensor.
Please note that all control is based on mass. If the fan turns on, the sensor is faulty
If it doesn’t work, then the reason lies deeper. Disconnect the block from the electric fan and supply power from the battery directly. A rotating rotor indicates that the engine is running. If the electric fan does not work even this way, you will have to think about replacing it. If the fan and sensor are working properly, you need to check the electromagnetic relay (if present in the circuit). The wires are checked last. Oxidation very often occurs at the joints with the car body. And sometimes a banal break even happens.
The same algorithm can partly be applied to cars on which an injector is installed.
But in order to compare and appreciate the difference, it is worth considering such machines.
Method one - forced mechanical cooling
Perhaps you can call it that. Remember the first VAZ 2101-2107 cars, which did not use electric fans. In them, the radiator was blown through an impeller screwed to the pump rotor. The exact same fan can be installed on a VAZ 2107 injector. The design of the cooling system is not much different.
But we must immediately mention some of the features of this design. The fact is that even in winter the radiator will be blown by air flow. This reduces the engine temperature, so the cabin can be quite cool. It’s good in the summer - the engine is always cooled, the fan is constantly running, the antifreeze does not boil.
But make two more small improvements and summer operation will be just a fairy tale:
- Place a plastic diffuser that will direct the air beam into the radiator honeycombs.
- The upper part of the radiator needs to be installed a little closer to the impeller blades. Fasteners should be made using small strips of hard metal. Try to ensure that the distance from the surface of the radiator to the impeller is in the range of 2-4 cm.
These are the little tricks that will help you improve the cooling of the VAZ 2107 engine. The price of the issue is literally meager - no more than 80 rubles (that’s how much the impeller costs).
All about the fan switch on the representative of the VAZ “classic” - VAZ 2107
The fan switch on sensor (DV) on any car, including the VAZ 2107, plays an important role. It is thanks to this that the engine is cooled using air flow, which prevents the power unit from overheating. Read more about the principle of operation, diagnostics and replacement method below.
On VAZ 2107 engines, it is quite difficult for the injector or carburetor to miss the activation of the fan sensor - the cooling fan itself is quite loud.
In addition, when it is activated, not only does a hum come from the engine compartment, especially if its activation coincides with a large load on the wiring, but the level of body vibration also increases.
And if the carburetor is not adjusted properly, the engine fluid pressure indicator may light up on the dashboard.
Activation diagram of the VAZ 2107 cooling system fan
The cooling system of the “seven” is configured in such a way that the ventilation device is not immediately activated under normal operating conditions. This happens at the moment when a certain temperature regime is reached. To accurately detect this moment, a fan sensor is used, which is responsible for activating this device.
Where is the fan switch located? This question came to the mind of every car owner who has ever repaired a cooling system.
It is located in the radiator, since first of all, a small circle of coolant is heated, after which the system provides for the passage of antifreeze through the radiator. The work of the latter is intensive heat exchange.
Only when the temperature level increases by more than 92 degrees does the DV start working.
There are two coolant sensors on the carburetor, one for the dashboard, the other for turning on the fan. And on the injection unit there is one sensor, it shows the temperature on the dashboard and goes to the ECU, and it controls the inclusion of the fan.
Forced fan activation
Sensor for turning on the fan of the domestic “seven”
The cooling system on the VAZ 2107 does not provide for regular operation of the ventilation device. But despite this, sometimes the principle of its forced activation is implemented. This happens when the regulator fails, and, as you understand, it is impossible to replace it while driving. You can check this like this - the DTOZH, which is located under the hood, demonstrated on the dashboard the critical temperature of the engine when the needle moves into the red zone. In this case, the fan does not activate and if this is the case, then there may be several explanations for this.
First, there was a breakdown of the DV itself, which turned on the fan on the “seven”. This outcome of events, as practice shows, is more favorable for the driver. This is because the system itself remains complete, while the radiator functions properly, and accordingly, some of the heat is still removed from the engine.
In this case, the driver has several options to solve the problem:
- If you are driving on a flat road and the vehicle will be driving non-stop, then simply monitor the temperature on the dashboard. If there are traffic lights or traffic jams along the way, just turn on the stove at full power.
- If you drive for a long time, you can force the fan to activate. To do this, two contacts should be removed from the controller and connected to each other. But before you perform these steps, you need to remove the negative cable from the battery. When the wires are closed to each other, the negative wire can be installed in place on the battery, after which the fan will work constantly and without interruption. The engine temperature in this case does not play a role, just like the driving mode of the car. When the vehicle stops, the fan will function until the battery is completely discharged; to prevent it, you need to open the engine compartment and disconnect the negative from the battery.
Method two - electric
If you have a new car, an injector and an electric fan are installed, is it worth spoiling it with a forced impeller? It would be somewhat more reasonable to leave the electric fan, but make a backup way to turn it on using a button. Purchase several items and materials from the store:
- New sensor (if the old one has become unusable).
- Electromagnetic relay with normally open contacts.
- Red wire with a cross section of 0.75 square meters. mm.
- A button for installation in the dashboard of a VAZ 2107 (preferably backlit).
- Heat shrink insulation.
- Female connectors and relay socket.
The connection diagram is shown in the photo. First of all, turn off the fan and change the sensor for turning it on. Then you assemble the circuit.
Please note that newer vehicles use sensors that can handle very high currents. But despite this, they still burn out. Sudden loads still quickly damage it. What to do? There is only one way out - to reduce the current at the sensor terminals. To do this, introduce an electromagnetic relay into the circuit. Now the chance of sensor failure is reduced. But the chance of relay failure becomes higher. True, it will be easier to change it.
Install a button to force the fan on in the dashboard and stretch two wires from it - one can be connected directly to ground, and the second to the sensor output. It turns out that your button and sensor contacts are connected in parallel. Therefore, if the sensor fails, you can turn on the electromagnetic relay with a button.
Forced fan activation
Some owners of “classics”, including the VAZ 2107, install a forced fan button in their cars. It allows you to start the electric motor of the device regardless of the coolant temperature. Taking into account the fact that the design of the 7’s cooling system is far from ideal, this option could one day be of great help. It will also be useful for those drivers who often travel along country roads or are forced to stand in traffic jams.
Forced activation of the fan is appropriate only on carburetor cars. In cars with injection engines, it is better to rely on the electronic control unit and not make any changes to its operation.
Video: forcing the fan to turn on
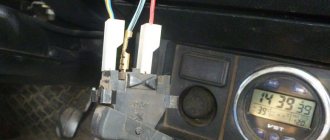
The easiest way to make the fan turn on at the driver's request is to bring two wires from the contacts of the temperature sensor into the passenger compartment and connect them to a regular two-position button. To implement this idea, you only need wires, a button and electrical tape or heat shrink insulation.
If you want to “unload” the button from unnecessary loads, you can install a relay in the circuit according to the diagram below.
The relay allows you to “unload” the fan switch button
In principle, there is nothing complicated either in the design of the fan itself or in its connection circuit. So, in case of any breakdown, you can safely proceed to self-repair.
Method three - perfect fans
To improve the cooling of the VAZ 2107, you can use more modern ones instead of a standard electric fan. Those that are installed on cars of the Kalina and Priora models are perfect. An electric fan with eight blades will work especially well. The air flow from it will be much stronger, therefore, the radiator honeycombs will cool down faster.
You can even get carried away with the issue of improving cooling and install two such fans. But does this make sense? It would be better then to completely clean the cooling system from the inside, replace all the pipes, and install a pump with an improved impeller. And finally, change the radiator. This will be much more effective than making a huge “collective farm” around the radiator.
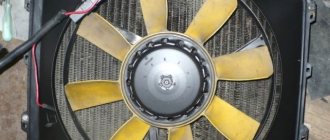
All the main electrical circuits and modifications for connecting the liquid cooling fan (CO) in VAZ cars of various models are provided. What is the essence of VO’s work? An electric motor with an impeller on a shaft is installed inside a rectangular metal frame, with which it is attached to the back of the radiator. When voltage (12 V) is applied to the contacts of the drive, it begins to work, rotating the blades and creating a directed stream of air, which, in fact, cools the antifreeze or antifreeze.
If the cooling fan does not work, do not rush to contact a car service. You can determine the cause of the malfunction yourself. Moreover, for this it is not at all necessary to have special skills - just study the reference material from the site
and follow the instructions to check/replace it.
Fan motor
The electric motor is the main component of the device. The VAZ 2107 used two types of engines: ME-271 and ME-272. In terms of characteristics, they are almost identical, but as for the design, it is somewhat different. The ME-271 engine has a stamped housing, i.e., non-separable. It does not require periodic maintenance, but in case of malfunction, it can only be replaced.
Not every fan motor can be disassembled
Design and characteristics of the fan motor
Structurally, the motor consists of:
- housings;
- four permanent magnets glued around the circumference inside the case;
- armatures with winding and collector;
- brush holder with brushes;
- ball bearing;
- support sleeve;
- back cover.
The ME-272 electric motor also does not require maintenance, but unlike the previous model, if necessary, it can be partially disassembled and attempted to be restored. Disassembly is carried out by unscrewing the tightening bolts and removing the back cover.
ME-272 has a collapsible design
In practice, repairing an electric fan is impractical. Firstly, you can only buy used spare parts for it, and secondly, a new device complete with impeller costs no more than 1,500 rubles.
Table: main technical characteristics of the ME-272 electric motor
| Characteristics | Indicators |
| Rated voltage, V | 12 |
| Rated rotation speed, rpm | 2500 |
| Maximum current, A | 14 |
Fan connection 2108, 2109, 21099
Until 1998, on cars with the old mounting fuse block 17.3722 (finger type fuses), relay 113.3747 was included in the fan circuit. After 1998 there is no such relay.
Also, before 1998, the TM-108 switching sensor was used (the closing temperature of its contacts is 99±3ºС, the opening temperature is 94±3ºС), after 1998 the TM-108-10 with similar temperature ranges or its analogues from different manufacturers. The TM-108 sensor only works in conjunction with a relay; the TM-108-10, reinforced for high current, can work both with and without a relay.
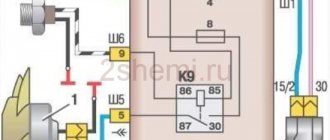
Scheme for switching on the engine cooling fan on a VAZ 2109 with mounting block 17.3722
- Fan motor
- Motor start sensor
- Mounting block
- Ignition switch
K9 - Relay for turning on the fan motor. A - To terminal “30” of the generator
Scheme for switching on the engine cooling fan on a VAZ 2109 with mounting block 2114-3722010-60
- Fan motor
- Sensor 66.3710 for turning on the electric motor
- Mounting block
A - To terminal “30” of the generator
Communities › VAZ: Repair and Modification › Blog › A hackneyed topic: Fan and mounting block VAZ 2107
I’m returning to the already well-worn problem with the new type of mounting blocks. The essence of the problem is that when installing a new type of mounting block on a classic carburetor, the cooling fan stops working. This problem is not new and the Internet is full of articles on how to fix it, but it’s still very difficult to find complete information (as they say for dummies) on the Internet, so I decided to post a clear article about solving this problem.
Solution to the problem:
4 relays in the mounting block are responsible for turning on the cooling fan
Usually, when you buy a block, there is a jumper between 30 and 87 contacts instead of a full-fledged relay.
First, you need to unsolder the missing pin, it is marked 7Ш,7 (green) and goes to pin 86 of the relay.
Everything is simple here, we take a pin either from an old block, or simply grind a metal plate to size and solder it in place:
We sorted out contact 86. Now you need to apply + to pin 85 of the relay. There are many ways, the most competent one, in my opinion, is to do everything according to the diagram and instead of the missing track in the block, just throw a wire:
We insert a regular 4-pin relay instead of the jumper and you're done!
With this arrangement, voltage is supplied to the fan through 4 relays and 10 fuse, as required according to the diagram.
I hope this article helps someone
Thank you for your attention
Where is the fan relay located?
4 – electric fan relay; 5 – electric fuel pump relay; 6 – main relay (ignition relay).
Attention: the order of the relays and fuses can be arbitrary, we are guided by the color of the wires. Therefore, we find a relay from which comes a thin pink with a black stripe wire coming from the main relay (pin 85*) (not to be confused with the thin, red with a black stripe wire coming from the controller) and a thick power white with a black stripe wire (pin 87) (white and pink wires we need), this is the fan relay.
Fan switch sensor on VAZ 2107: do-it-yourself installation
The VAZ 2107, as a representative of the VAZ “classic”, has a fairly loud cooling fan. The moment of its connection cannot be missed.
The vibration of the body increases, a hum is heard from under the hood, if the turn-on time coincides with an increased load on the electrical network (blinking turn signals when the low beam is on, heated rear window) - then the arrow of the load on the power network begins to slide into the red zone.
Advice
And even (if the carburetor is poorly adjusted), the emergency oil pressure light may start to burn. The cooling scheme of the VAZ 2107 is such that under normal conditions the fan does not turn on immediately, but only when a certain temperature in the system is reached. To determine this “convenient temperature moment” there is a sensor, or a fan on/off controller.
The location of the controller on the radiator is not accidental: after all, first the “small circle” of antifreeze is heated, then the cooling circuit provides for the passage of liquid through the radiator, the work of which is intensive heat exchange. And only when the temperature rises above 92 C°, the fan switch sensor is triggered.
About forced fan activation
The cooling circuit does not provide for constant fan operation. But in some cases it is possible to implement the principle of “forced fan connection”.
This is done if the sensor has failed and replacement on the road is impossible. You can check this as follows: the engine temperature controller has already shown the vertical position of the needle on the dial, it persistently “climbs” into the red zone, and the fan is silent and does not turn on. If this is the case, then there are most likely two possible reasons:
- The sensor itself, which turns on the fan of the VAZ 2107, has failed. This situation is more favorable than that described below. Firstly, the cooling circuit is complete, and the radiator works properly. This means that most of the heat is removed. There are two ways out of this situation; the following scheme of action is proposed:
- If there is a straight road ahead and the car will move without stopping, then you can monitor the temperature scale. In case of traffic jams or traffic lights, you can turn on the stove at full power at double blowing speed.
- You can decide to install forced fan activation. To do this, two contacts are pulled out of the controller and short-circuited. Attention! Before this, you must first remove the “minus, ground” from the battery. After the wires are short-circuited, the negative terminal is connected again, and the Carlson begins to work constantly, regardless of the engine temperature and the vehicle’s driving mode. After stopping the VAZ 2107, the fan will work until the battery is discharged, so after stopping you need to open the hood and disconnect the negative terminal.
This is very annoying for owners of a VAZ 2107 with central locking and an alarm system, so you can disconnect the fan wires, however, then they need to be reconnected and insulated.
You also need to find a place for them in the engine compartment so that they do not get under the working impeller blades, because the layout of all the wires in the engine compartment is supposed to be in harnesses. Of course, it’s inconvenient to drive like this for a long time, because constantly opening and closing the hood to connect and turn off will get boring.
In addition, no one will like constant noise, vibration and increased wear on the fan axis bearings. Forced activation is an emergency method.
The sensor that turns on the fan is such a capricious thing that costs a penny, and replacing it yourself on the road is problematic, since you need to drain the antifreeze.
- The second reason is more dangerous: the thermostat has failed, and the engine cooling circuit has become incomplete - the radiator does not turn on. Naturally, when the radiator is empty, the sensor does not respond and the fan on the VAZ 2107 does not turn on. Its danger is that the heat exchange is many times worse, since the heat exchanger of the huge total surface area - the radiator - does not work. The only salvation is turning on the stove at full power, and periodically stopping the VAZ 2107, which does not allow the needle to move into the red zone.
How to check if the new controller is working?
You need to take a precisely calibrated thermometer capable of operating at the boiling point of water;
- Place the part of the controller facing the inside of the radiator in water;
- Connect the tester probes to the contacts and adjust them until the resistance disappears;
- When water is heated, resistance disappears in the temperature range from 87 to 92 degrees Celsius. That's it, the sensor is working, replacement and activation will be successful.
If the cooling fan does not work
To drive the fan, a DC electric motor with excitation from permanent magnets ME-272 or similar is installed. Technical data of the electric fan and fan switch sensor:
- Rated rotation speed of the electric motor shaft with impeller, 2500 – 2800 rpm.
- Electric motor current consumption, 14 A
- Sensor contact closure temperature, 82±2 degrees.
- Sensor contact opening temperature, 87±2 degrees.
The cooling system fan may not turn on due to:
- electric drive malfunctions;
- blown fuse;
- faulty thermostat;
- a failed thermal sensor for turning on the cooler;
- faulty VO relay;
- broken electrical wiring;
- faulty expansion tank plug.
To check the VAZ fan electric motor itself, we apply 12 V voltage from the battery to its terminals - a working motor will work. If the problem is with the fan, you can try to repair it. The problem is usually the brushes or bearings. But it happens that the electric motor fails due to a short circuit or break in the windings. In such cases, it is better to replace the entire drive.
The BO fuse is located in the mounting block of the car's engine compartment and is designated F7 (20 A). The test is carried out using a car tester turned on in probe mode.
- In a car with a carburetor engine,
you need to check the sensor - turn on the ignition and short-circuit the two wires going to the sensor. The fan should turn on. If this does not happen, the problem is definitely not with the sensor. - For injection cars,
it is necessary to warm up the engine to operating temperature and disconnect the sensor connector, disconnecting it from the vehicle’s on-board network. In this case, the controller must start the fan in emergency mode. The electronic unit perceives this as a failure in the cooling system and forces the fan drive to operate in constant mode. If the drive starts, the sensor is faulty.
Checking and replacing the electric motor
A more complex option is to check and replace the electric motor. It is performed according to the instructions:
- Disconnect the fan power plug. Connect two wires to the fan connector, of such length that they can be brought to the battery terminals. After connecting to the plug, connect the wires to the battery and watch the fan react. No response means it needs to be replaced.
- If it works, then you need to check whether voltage is supplied. To do this, you need to place the voltmeter probes on the contacts of the second half of the plug. After this, start the engine. If you have a carburetor engine, then you need to additionally close the contacts of the temperature sensor using a screwdriver. Look at the voltmeter readings, the voltage should be from 11.7 to 14.5 V. If you have an injector, then you need to wait until the temperature reaches +85...+95 °C. After this, the on-board computer will send a signal to the relay to turn on the fan. As soon as this happens, look at the readings on the device, they should be within the same limits. Insufficient voltage or its absence indicates problems in the power circuit.
- After checking, when you realize that the fan does not start due to the motor, it is necessary to replace it. To do this, use socket wrenches to remove the two fasteners of the fan casing to the generator.
- Pull the casing towards you and release the wires from the retainer. To do this, use pliers to squeeze the fastening petals and then push them out.
- Remove the fan. While holding the impeller, unscrew the central nut securing it with a 13mm wrench.
- Remove the impeller from the shaft. Unscrew the electric motor mountings with a 10mm wrench.
- Remove the electric motor and replace it with a new one. After this, you need to reassemble the structure.
Temperature sensors rarely fail, so we will not dwell in detail on checking and replacing them. Most often the problem lies in the electric motor or power circuit.
Today we’ll talk about the reasons why the VAZ 2107 fan (injector and carburetor) does not turn on. A little earlier, we figured out how to improve the engine cooling system. The whole procedure is simple and does not require much knowledge. But an equally pressing problem is that the fan refuses to turn on in a timely manner. Let's try to find out why this happens.
Replacing an electric fan in a car
- We park the car on a flat surface and immobilize it with the parking brake.
- Open the hood and disconnect the negative terminal.
- Using a 10mm wrench, unscrew the fastenings of the air filter housing.
- Using a screwdriver, loosen the air duct clamp on the air flow sensor and remove the corrugation.
- We unscrew the screws securing the cover of the air filter housing and remove the filter element.
- Using a size 8 wrench, unscrew the air intake mount and remove it.
- Using a 10mm wrench, then an 8mm wrench, unscrew the nuts securing the fan casing around the perimeter (6 pieces in total).
- Disconnect the wire block on the fan connector.
- Carefully remove the fan casing along with the drive.
- Using a 10mm wrench, unscrew the 3 bolts holding the electric motor to the casing.
- We put a new one in its place.
- We install the structure in place, fix it, and connect the connector.
- We carry out further installation in the reverse order.
Electrical diagram of VAZ 2107, 21074
This page shows a color diagram of the electrical equipment of VAZ 2107, 21074 cars produced in 1988-2001 with a 37.3701 generator (with a built-in voltage regulator).
To enlarge the wiring diagram, click on the image below.
Electrical diagram of VAZ 2107, 21074 produced in 1988-2001 with generator 37.3701
Explanation of symbols:
- block headlights
- side direction indicators
- accumulator battery
- starter relay
- carburetor electro-pneumatic valve
- carburetor microswitch
- generator 37.3701
- gearmotors for headlight cleaners *
- Fan motor switch sensor
- engine cooling fan motor
- sound signals
- distributor
- spark plug
- starter
- coolant temperature gauge sensor
- engine compartment lamp
- low oil pressure warning sensor
- low brake fluid level indicator sensor
- windshield wiper motor
- carburetor electro-pneumatic valve control unit
- ignition coil
- headlight washer pump motor *
- windshield washer pump motor
- mounting block
- windshield wiper relay
- hazard warning and direction indicator relay
- brake light switch
- reverse light switch
- ignition relay
- ignition switch
- three lever switch
- hazard switch
- socket for portable lamp**
- heater fan switch
- additional resistor for the electric motor of the heater (stove)
- rear window heating indicator lamp
- low brake fluid level warning lamp
- signaling unit
- heater fan electric motor
- glove compartment lamp
- light switches on the front door pillars
- switches for warning lights of open front doors ***
- front door open warning lights ***
- connection block
- cigarette lighter
- watch
- instrument light switch
- diode for checking the serviceability of the low brake fluid level indicator lamp
- fuel level indicator
- fuel reserve indicator lamp
- speedometer
- turn signal indicator lamp
- carburetor choke indicator lamp
- battery charge indicator lamp
- carburetor choke warning switch
- instrument cluster
- econometrician
- light switches on the rear door pillars
- coolant temperature gauge
- tachometer
- indicator lamp for parking brake activation (“handbrake”)
- low oil pressure warning lamp
- high beam indicator lamp
- indicator lamp for turning on external lighting
- voltmeter
- Parking brake indicator switch (“handbrake”)
- outdoor light switch
- rear window heating switch with backlight
- rear fog light switch with on/off indicator *
- fog light circuit fuse
- lampshade ****
- tail lights
- level indicator and fuel reserve sensor
- connectors for connecting to the rear window heating element *
- license plate lights
Control circuit modernization
The cooling fan on the top ten turns on at a temperature of 100-105°C, while the normal operating temperature of the engine is 85-90°C, so the fan turns on when the engine overheats, which naturally has a negative effect.
This problem can be solved in two ways: adjust the switch-on temperature in the “brains” or make a button. We'll focus on the second one. Turning on the fan from the button is very convenient: if you get into a traffic jam, turn it on, drive out, turn it off, and no overheating occurs.
A button for selecting the fan operating mode was installed in the cabin (always off, constantly on, automatically turned on via a sensor) - this “tuning” is not mandatory, but will be a very useful addition.
There will be a large current at relay contacts 87, 30, on the wire from the battery to the fuse and the fan ground, and therefore we must use wires there with a cross-section of at least 2 mm, otherwise the thinner wire will not withstand it and will burn out.
The VAZ 2107 fan switch sensor does not work, diagnostics, switching circuit and replacement
The cooling system is designed in such a way that the fan starts only after the engine has warmed up to the set temperature. A malfunctioning fan switch can lead to serious engine problems.
Do not confuse this sensor with the coolant temperature sensor (DTOZH), which displays the engine temperature on the instrument panel and is installed on the right side of the engine.
It is possible to notice its breakdown in time only perhaps only in the summer, and even then in the city or when driving slowly, since the oncoming air flow is quite enough for the normal operation of the cooling system. The cooling system fan on VAZ 2107 cars starts with a characteristic noise, so the moment it starts is clearly audible.
Where is the switching temperature located?
The fan switching sensor is located on injection models, on the aluminum outlet pipe of the cylinder head (article - 23.3828, used in VAZ-2107i-2112, 21213, 2123, ALFA ROMEO, DAEWOO, FIAT, LANCIA, OPEL), on carburetor models (TM 108 -02 92/87 C) it is installed on the engine cooling radiator.
For the “classic” fan, the operating temperature is 92 degrees and the shutdown temperature is 87 C0, so installing a fan that is suitable in size, but with a different number, is not recommended.
On carburetor models the sensor is located on the radiator
Checking the electric fan and its circuits
In order to check the operation of the fan and power circuits on the injection “seven”, you need to disconnect the connector from the sensor, the ECU will give a command to turn on the fan. If this does not happen, then you need to check not the sensor itself, but the serviceability of fuse F7, the electric motor, the fan relay and the power circuits. Below is a diagram of how to turn on the VAZ 2107 injector cooling fan.
Circuit diagram for switching on the VAZ 2107 cooling fan (injector)
The principle of operation of such a device differs from TM 108 and is based on a change in resistance.
As the sensor heats up, it reduces the resistance; the ECU monitors this change and, when the specified parameter is reached (about 195 Ohms), turns on the fan relay.
On the carburetor model, everything is made somewhat simpler; if the fuse and relay are working properly, then in order for the electric motor to start, it is enough to remove the chips from the sensor and close them together.
The operating principle of the fan switch sensor installed on the radiator is this: in a cold state, the bimetallic plate opens the contacts, and when the temperature reaches 92 degrees (ideally), it closes and the relay is activated. In practice, quite often you can buy sensors with some spread in values. You can check the new one by heating it in water, controlling the temperature and switching on.
Diagnostics
You can check the fan switch sensor by measuring the resistance under different temperature conditions. To do this, use a tester (multimeter) in ohmmeter mode and measure the resistance of the spare part. It should decrease in proportion to the heating of the coolant, as already mentioned, the higher the heating, the lower the resistance.
The resistance can be checked without removing it from the car; to do this, just remove the chip and take measurements on the contacts of the part and warm up the engine by monitoring its heating using the instrument on the panel. See the table with approximate values for the dependence of resistance on temperature below.
note
Before installing a new controller, you can check the change in resistance in a container of heated water.
You can check the electric motor by applying voltage from the battery, the blue wire is “+”, blue and black or just black is “-“.
It happens that the fan starts at unusually high temperature values, this indicates its malfunction.
If during the check it turns out that the electric motor, fuse, sensor are all working properly, in this case you need to check the serviceability of the relay. It happens that the contacts simply burn out. In the photo below
The fan relay on the VAZ 2107 injector is located on an additional unit under the “glove compartment” (see photo) it is on the leftmost number 23-3787.
Fan relay VAZ 2107 (injector)
If you have nothing to replace this relay with, you can repair it. The contact is attached to the plate and to restore its functionality it is enough to tighten the contact. For this:
- disassemble the relay;
- bend the top stop of the plate;
- lift the plate with the contact for easy access;
- press the contact;
- putting it back together.
It should be noted that over time the breakdown is repeated, verified.
Replacing the sensor
Replacing the sensor on an injection model is easier than on a carburetor model, since there is no need to drain the coolant. It is enough to place some rag to absorb the spilled coolant. Using a 19 key, the part is unscrewed, removed and a new one is quickly installed. When installing, it is rational to apply sealant to the threads in advance.
- To carry out the replacement procedure on a carburetor car, you must first drain the antifreeze (antifreeze) and only then unscrew the sensor with a 30mm wrench and install a new one.
- When purchasing temperature sensors and controllers, try to choose branded parts.
Source: https://znatokvaz.ru/dvigatel/sistema-ohlazhdeniya/ne-rabotaet-ventilyator-radiatora-vaz-2107
