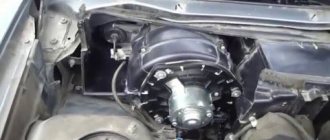
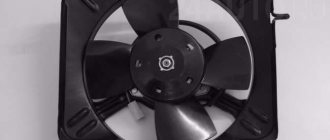
Where is it located?
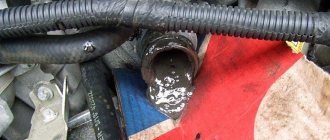
The fan is located on the inside of the radiator between the engine and radiator. Bolted to the radiator housing. In luxury versions of the Lada Priora, a dual cooling radiator is installed, one for the engine cooling system, and the other for the car's air conditioning system. It should be noted that when the car reaches a critical temperature, these radiators begin to work in pairs and cool the engine more intensively.
Nozzle types
The following types of jets exist:
- Jet - washer nozzles in the form of a hollow cylinder. At the bottom of the structure there is a fitting, thanks to which the nozzle itself is connected to the hose. There is a spray nozzle at the top. In this case, the fluid supply force can be adjusted using a special screw.
- Fan nozzles. A special feature of this design is the presence of many nozzles (at least 3). It is also worth noting that in this case the liquid passes through a narrower channel, due to which the liquid is sprayed with greater pressure.
The first type is more often found on “middle-aged” cars, as well as on domestically produced cars, for example, the windshield washer nozzles of the VAZ 2110 have a jet configuration. Foreign cars and cars produced in recent years already have fan jets installed.
Washer nozzles, developed using modern technologies, are not only easy to use, but also easy to install. However, these elements also have their drawbacks.
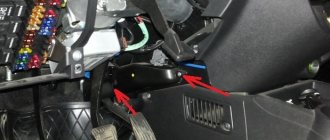
Protection system
Since the fan is an electrical part, it must have some kind of protection against short circuits or overheating. To provide this protection, it uses a relay and a fuse, which quite often fail, resulting in the fan not working.
Priora cooling fan fuse
To protect the circuit from short circuits and overloads, a fuse is used, which breaks the circuit when it overheats or a short circuit occurs in it.
How to choose washer nozzles
It is best to choose jets specifically for your car. If you compare the fan nozzles of the windshield washer of the VAZ 2114 and similar parts for a foreign car, they will be different. Of course, these differences are not critical and you can always customize the part for your car brand, but in this case the installation will be much more difficult.
Or you can purchase universal products that are suitable for different machines. These elements are considered to be injectors with numbers 30655605 and 7845009010. They are presented in the Volvo and Sang Yong catalogs. Both jets are absolutely identical with one difference - the Korean part will cost almost half as much as the Swedish counterpart. Otherwise, both products can be used as windshield washer nozzles for Ford, Mazda, Subaru, Daewoo and other models.
Another alternative option is offered by the Toyota concern, but when purchasing jets under catalog number 85381-AA042 from this manufacturer, it is worth considering that they are sold in 1 piece. Therefore, when placing an order online, you must add two items to your cart. After purchasing the products, you can install them yourself.
Causes of failure
Quite often it happens that the cooling fan on a Priora stops working, this may be due to the following reasons:
- The fuse has blown;
- The fan control relay has burned out;
- The fan switch sensor is faulty;
- The motor winding has burned out;
- The fan power connector has come off;
If the engine cooling fan does not work on your car, then you need to examine all possible options for its malfunction, which are indicated above.
Pad diagnostics
You can assess the degree of wear of the rear pad by the condition of the front one - on a similar AvtoVAZ model it wears out much faster than the rear one. For this purpose, the brake mechanism has a special window with a rubber plug.
The last one needs to be pulled out. Through the viewing slot you can roughly estimate how much time is left before replacing the rear pads on the Priora. If the thickness of the lining is 1.5 millimeters or less, then the front pads also need to be changed. They also require replacement if the linings on them are oily or have deep chips or grooves. It happens that the friction lining peels off from the metal base. This is also a reason for replacement.
To assess the condition of the drums and pads, you need to remove the rear wheel and drums. There should be no mechanical defects on the surface of the latter. If the wear on the working surface is quite severe and there are deep grooves on it, then the part needs to be replaced.
It is also a good idea to check the brake fluid level. The new pads are thicker than the old ones, and to replace the rear pads on a Priora, you will need to press the brake pistons into the cylinder. Liquid may leak from under the expansion tank cap. The handbrake should be released. The parking brake cables must be released as much as possible.
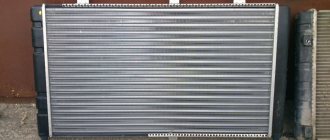
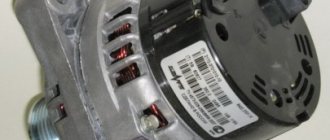
Removing the radiator fan Lada Priora (VAZ-2170)
We remove the fan to replace its electric motor or impeller, as well as when dismantling the radiator of the cooling system.
Remove the power unit mudguard (see “Removing the power unit mudguard”).
Disconnect the wire terminal from the negative terminal of the battery. Remove the air filter (see “Removing the air filter”).
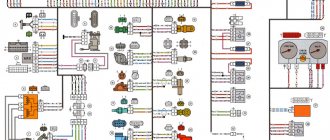
Unfasten or cut the clamp that connects the wiring harness of the engine management system with the wires of the fan motor
Disconnect the engine control system wiring harness block from the fan motor wiring block.
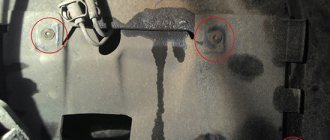
Using a 10mm socket, unscrew the nut of the upper fastening of the fan casing to the radiator...
Elements for fastening the fan casing to the radiator
:
...and two side mounting bolts.
Using a 10mm spanner, unscrew the nut of the lower fastening of the fan casing to the radiator. Remove the fan casing from the radiator studs. To avoid damaging the radiator fins when dismantling the casing, we insert cardboard between the radiator and the casing.
Turn the fan casing like this...
...so that the tides of its side fastening are on top...
Using a 13mm socket, unscrew the nut securing the impeller to the fan motor shaft...
...and remove the impeller. Squeezing the petals of the motor wiring harness holder...
...remove the holder from the casing hole
Using a 10mm socket, unscrew the three nuts securing the fan motor to the casing...
...and remove the casing. We assemble and install the radiator fan of the cooling system in the reverse order.
Video on the topic “Lada Priora. Removing the radiator fan"
HOW TO REMOVE ENGINE COOLING RADIATOR ON PRIOR LUX HALLA Replacing the electric radiator fan Kalina. Consequences of fording REPLACEMENT OF COOLING RADIATOR PRIORA 2171 16v ks PANASONIC
Source
Advantages and disadvantages of fan washer nozzles
Thanks to the successful design of the fan jets, not a narrow stream hits the glass, as is the case with inkjet models, but a wide, finely dispersed stream that covers almost the entire “lobovuha”. Among other advantages, it is worth highlighting the following:
- Thanks to good atomization, dirt is dissolved more efficiently, resulting in fluid savings.
- If in the case of jet nozzles, the wipers start working a little earlier than the liquid hits the glass, then the fan models are connected simultaneously with the wiper. This helps protect the glass from scratches.
When to change the drum?
Replacement must be made based on essential characteristics. When replacing drums, you should pay attention to the condition of the rear pads and replace them if necessary.
Broken brake drum
Signs of a worn drum:
- You can hear the pads rubbing when braking;
- The rear wheels do not brake;
- After replacing the pads, braking did not improve;
- Creaking in the area of the rear drums;
It is recommended to replace the drum with a new one every 100 thousand km.
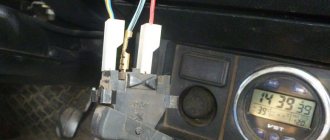
Do-it-yourself modification of the VAZ 2110 steering column switches
We show how to replace the steering column switches in VAZ 2110, 2111, 21112 cars. The steering column switches are responsible for the operation of the wipers, turn signal indicator, high beam, and washer fluid supply. What problems might arise with them? Personally, while owning a car of the tenth family, I encountered such a problem: when driving without low beam, the high beam could automatically turn on. I constantly had to hold the switch so that it did not turn on spontaneously.
First of all, you need to unscrew the bolts of the steering casing, move the steering wheel adjustment lever down and remove the lower casing, it is advisable to remove the upper one. Now we can clearly see our steering column switches, they are attached to two latches, you can replace them with new ones using two fingers, you don’t have to unscrew anything:
Video of replacing steering column switches in VAZ 2110 2111 2112:
Priora
G.M.
Let's begin! So we need: 1) Straight arms 2) GM steering column switches 3) Insert into helicopter 2108 4) wire 5) small and large male and female males 6) heat shrinkage 7) a pair of relays
relay pads 9) time
Well, now about the hands. knowledge of car electronics and hands growing from the right place is a must, otherwise a fire or something else is possible!
We go to the Korean spare parts store and buy left and right steering column switches (I took them from the Lacetti), then either use ours or buy a new helicopter insert 2108!
We use any wire you like!
dads moms small and large, you can use electrical tape instead of heat shrink, but I don’t recommend it!
The original chips were cut off because I couldn’t find the original matching parts, both from the left and right switch!
Let's start with small chips: Left (turn signals-light) 1) Black - general 2) White - clearance 3) Green-black - low beam 4) Yellow - PTF 5) Red-yellow - PTF So what do we have, but we have a difference from switching circuits from the VAZ, since on the VAZ the power supply is low current and the size is divided into dimensions + it weighs constantly and for low current, after turning on the ignition, we will correct this matter with the help of a relay! It would also be advisable to hang a relay on the dimensions, since the output on the switch is low-current, but on the VAZ there are no relays and the entire load from the dimensions falls on the button! PTF can be hung here if desired + permanent can be from the dimensions or from the ignition, I will hang from the ignition!
How to adjust washer jets
No specialized equipment or special skills are required to adjust the nozzles. All you need is a regular needle or pin. In order to figure out how to adjust the windshield washer nozzles, it is enough to understand that they have a spherical shape and rotate freely inside the plastic housing. So it's simple:
- Feel free to insert the pin into the nozzle and begin to turn it in the direction you need.
- If the liquid hits the glass too low, then twist the pin upward.
- If the jet hits very hard, this can also be corrected with a needle.
- On foreign cars, the injectors have 3 jets, which are best adjusted differently. The extreme ones should be at the lowest points, as they hit the sides of the car. It is better to direct the middle ones to the central part of the windshield, and the remaining central jets are better to direct to the upper part of the glass.
You can also clean the washer jets yourself.
Disc rear brake
Sometimes you see Lada cars in city traffic with a self-installed disc brake.
After installing the disc brake system, it must be adjusted on special stands. When braking sharply, the rear drums only help stop the car and do not block the wheels when braking. In the case of disc brakes that are not adjusted, during emergency braking, the car may skid due to blocked rear wheels.
How to maintain front brake discs and how to replace them correctly is described in detail in our article.
Replacing a brake drum on a VAZ 1117-VAZ 1119
Removal
Place the car at speed and remove the parking brake handle all the way down. With the handbrake raised, removing the drum from the car is much more problematic. Remove the wheel from the car (for more details, see the article: “Replacing wheels on modern cars”).
Take a rag soaked in water and clean the entire brake mechanism from excess dirt.
Note! We recommend using a rag or brush instead of a rag. Remember, under no circumstances should you wash off dirt with gasoline, diesel fuel or any solvent!
Now, using a small wrench or socket wrench, unscrew the two guide pins (indicated by the arrows in the picture below) and set them aside in a safe place (such as a small bucket or car). The main thing is not to lose them.
Article: 2123.3709.330, additional articles: 2123-3709330
Order code: 029589
- Buy with this product
- show more
Steering light switch 2123-3709330
Rated voltage - 12 V Switching current - 8 A Applicability
: cars VAZ-2123, VAZ-2170, VAZ-1118
- Passenger cars / VAZ / VAZ-21231 drawing
- » href=»/catalog/vaz-3/legkovye_avtomobili-30/vaz_2123-315/signaly-202/#part978971″>Light alarm switchElectrical equipment / Signals
- Passenger cars / VAZ / Lada Priora 21701 drawing