There are many articles on this topic on the Internet, I read and summarized everything, then did the following.
1. Since I decided not to touch the “native” VR, I bought a VR for the “classics that is not dismountable” on the market (similar to 21213) and began remaking what was not “finished” at the manufacturer.
2. So, we take the “non-separable” BP and remove the metal on a grinding wheel along the outer perimeter of the body until the BP body falls apart into two halves (I first advise you to mark the relative positions of these halves with a chemical marker). We throw away the fallen off piece of the VR body rolling. We separate the BP membrane from the BP body and grind the required size of the groove for the full stroke of the BP (5 mm):
3. We take both halves of the body, insert only one membrane with a rod there for now, orient the marks we made for correct assembly of the body and, holding the body in a vice, drill 8 diagonally located holes with a diameter of 3.2-3.5 mm, moving away from the edge of the body 3.5-4.0 mm (for convenience, you must first mark and tap the indicated holes).
4. Having lightly processed all the burrs on the same abrasive wheel, we assemble the BP together with the springs: main and additional (inserted inside the main one with reverse turns, but I didn’t find one). The additional one acts as a “suspension” for more correct operation of the increased stroke of the BP rod), a spring from the DAAZ “OZONE” accelerator pump is suitable. Can be secured with 8 screws and M3 nuts, but I used rivets (cheap and cheerful). For reliability, the contacting elements (body - membrane - body) can be placed on a sealant, but I used Moment glue (the connection will still be permanent), and I wrapped the top with electrical tape around the circumference. We install the VR on the distributor.
Now, with sufficient rarefaction (vacuum) from the engine, we will obtain optimal advance of the SPD at low and medium speeds, and with a sharp opening of the carburetor throttle valves, the VR will be able to “delay” the SPD to a greater extent, and we are not in danger of detonation combustion of the fuel. The engine speed will also increase (it is necessary to adjust the engine speed) and the initial SOP will need to be adjusted. The total contribution of VR to the SOP will be approximately +15…..+18 g. (for the standard one +10….+12 degrees) only at speeds up to 2500, and at maximum engine speeds only 4-5 degrees. (for standard 3706 VR., tuned to 6-8g.) UOZ.
The effect of VR tuning is felt in the fact that earlier tuning of the initial OZ allows you to save fuel at idle, low and medium speeds (up to 2500 rpm), and eliminate detonation combustion of fuel during sharp acceleration from a standstill. Starting of both cold (plus faster engine warm-up) and hot engines is also improved.
In practice, I’ve been driving like this for 1 month, conclusions:
1. The engine warms up faster. 2. From a standstill, it feels like it accelerates very quickly. 3. In the city, at a speed of 60 km/h, after switching to 5th gear, the car confidently accelerates in 1st gear. 4. There is some slight fuel economy, but I haven’t measured it yet. 5. “Running” uphill is more fun. 6. I did not detect detonation under any engine operating modes.
Here is my implementation of this project.
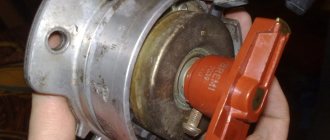
In the body of the vacuum generator, I first drilled 8 holes with a diameter of 3.2 mm, then ground the folding and disassembled it.
Using a file, I expanded the groove that limits the movement of the rod.
With this modification, it is recommended to add another spring from the OZONE carburetor. I didn't find one like that, so everything is assembled with one standard spring. The housing flanges are lubricated with sealant and connected with rivets with a diameter of 3.2 mm.
I didn’t feel any changes in the engine’s performance, because I have an automatic octane corrector with a knock sensor. But on machines that are not equipped with such gadgets, according to reviews from the forums, the acceleration dynamics improve.
Addition dated 08/14/08, author MI><@nick.
The regulator housing can be closed in a simpler way. You need to buy several brackets for attaching the Zhiguli stretch ceiling (price - 2 rubles / piece). They just crowd to the edge:
I filled 10 pieces, but 8 or even 6 would be enough. Pessimists can stuff up to 12 pieces; they simply won’t fit anymore.
Vacuum repair on Trambler
Why do you need a vacuum on the distributor?
And so now there will be some educational information. Vacuum and centrifugal ignition advance systems are used to select a more correct sparking moment. (because the burning rate of gasoline is not constant and varies depending on many factors - pressure, temperature) Without these systems (or one of them), the engine will either not pull or run poorly at high speeds or idle or start poorly, there will be greater fuel consumption .
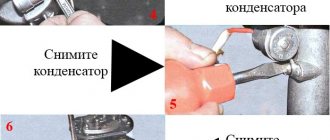
So, if you have similar problems, take a closer look at your distributor. This is not the first time this has happened to me, but just now I found the time to take a photo and describe the entire repair process, which I came up with myself and have never seen such manipulations anywhere on the Internet. It’s easy to check the vacuum diaphragm on a car. Remove the tube that goes to the distributor and blow with your mouth back and forth; at both moments you should feel the air pushing without undercutting. If there is air leakage, replace the diaphragm. And so, for repairs, we need to buy a diaphragm for the pneumatic drive of the second chamber of the Ozone carburetor, reassemble the distributor and remove the vacuum seal from it. Since it is sealed from the factory, it is necessary to cut off the rolling. I did this using sandpaper (I just sharply ground it off). The main thing is not to lose the spring. The only difference between the Zhigov diaphragm and the Honda one is the rod. But to the extent that the threads match, this is a solvable problem. The process is simple and everything can be understood from the photo. I glued everything back with 88 glue, and 505. This is a life hack, so to speak. Use...
Source
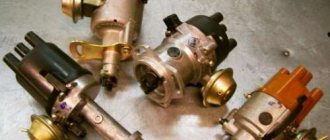
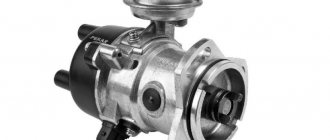
Distributor design
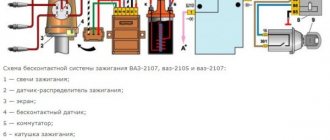
The distributor circuit assumes the presence of such elements as:
- low voltage current breaker;
- high voltage current distributor;
- centrifugal ignition timing regulator;
- vacuum ignition timing regulator.
The distributor circuit is designed so that at a certain moment the breaker opens the primary ignition circuit, as a result of which a high voltage current is created in the secondary winding of the ignition coil. Through the distributor, this current is transmitted to the spark plugs in certain cylinders. The regulators automatically adjust the ignition timing, which depends on the current operating mode of the engine.
Distributor device
The distributor breaker is an electromechanical part and consists of the following parts:
- shaft;
- movable contact plate;
- movable contact plate;
- capacitor;
- frame.
The breaker shaft consists of two main parts. On one of them, depending on the type of breaker, cams are installed, the number equal to the number of cylinders in the engine. This distributor device is not very reliable, since a large number of contacts, as well as the presence of moving parts, lead to regular problems with this unit.
The distributor device, as well as its use in general, are outdated from the point of view of modern electrical equipment, but in our country there are still a lot of carburetor engines, so the problem of the performance of this unit is currently relevant.
As for where the distributor is located in the car, most often it can be found under the hood next to the engine, near the cylinder head or on it. Although the exact location of the node depends solely on the model of the machine.
IZh Moskvich 412 1987, 90 l. With. - roadside assistance
Cars for sale
Comments 47
Ignition advance by displacing the contacts by drawing in air at engine speed. You won’t leave the place without it on your own distributor. It bites immediately and almost stalls when you press the gas sharply. I don’t recommend connecting it specifically to the distributor in the photo. The ignition fails too early and detonates under load. I turned it off and the engine rustled perfectly.
Possible, but very uncomfortable
With the engine running normally, there is no critically noticeable difference. It will spin and drive the same way, a little more stupidly.
A sharp press on the pedal gives a dive comparable to what happens on a cold engine.
This means that something is wrong/not configured. The absence or malfunction of a vacuum does not give such an effect.
Vacuum ignition timing works in conjunction with the intake. If you give gas, the more gas is discharged, the more. That is, depending on the engine load. But I don’t see the point of a centrifuge. Yes, but on engines that spin up quickly, but at speed it spoils everything.
Vacuum and centrifugal ignition advance systems are used to select a more correct sparking moment. (because the burning rate of gasoline is not constant and varies depending on many factors - pressure, temperature)
Without these systems (or one of them), the engine will either not pull or run poorly at high speeds or idle, or start poorly, and there will be greater fuel consumption. For example, they are now selling distributors that are suitable for GAZ engines and Moskvich vehicles. These distributors have different “settings” - if you “confuse” them, the engine will not operate optimally.
The classic vacuum ignition advance system has a “small” drawback - when the gas pedal is fully released, vacuum should not be supplied to the distributor, although the angle should be earlier. This can be felt if you select the advance at idle by turning the distributor by ear, and then try to start the car with the handle - the engine will “give into your hand” and it will be difficult to start.
The best regulator is MPSZ - an ignition system built on a microprocessor - in such a system there are no mechanical backlashes; with correct firmware, the engine will operate with the maximum possible power over the entire speed range.
Fucking experts

