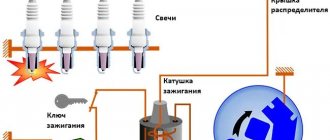
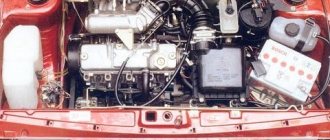
Distributor
- ignition distributor, a mechanism designed to create high-voltage pulses in the ignition system in order to distribute the ignition among the cylinders.
In other words, the task of the distributor is to supply a spark in the selected sequence to the spark plugs of different cylinders synchronously with the operation of the camshaft. photo gallery:
These devices are used in gasoline carburetor engines. Diesel engines do not have an ignition system, and injection systems do not use a breaker.
How to repair a VAZ distributor
The distributor or breaker distributor is a rather complex device and this causes a lot of trouble for the car owner. The distributor is installed on carburetor engines of cars. We will now look at how to repair a VAZ distributor yourself and what is needed for this.
Repairing a distributor of a VAZ car, as a rule, consists of replacing worn parts of the device.
How do you repair a distributor?
- Socket wrenches for “7”, “10” and “13”;
- Two Phillips screwdrivers;
- Special set of flat probes;
- Hammer;
- Special mandrels designed for pressing out and pressing distributor bearings;
- Tweezers.
First, you need to unscrew the 2 screws securing the distributor breaker rotor to the support plate from the ignition timing regulator, then remove the distributor rotor.
Before removing everything, you need to put marks on the springs and weights of the distributor, this will make it easier for you to assemble the distributor (distributor breaker). Using a screwdriver, remove the distributor centrifugal adjuster springs.
Then you need to unscrew the nut securing the ends of the condenser wires and the ignition coil. Remove the distributor capacitor by unscrewing the fastening screw. First, unscrew the screw to secure the moving contact wire, and then you need to remove the insulation, after which we remove the insulating and metal washers.
It is necessary to remove the moving contact from the axis of the contact group, then the lock washer securing the vacuum rod from the moving axis of the distributor.
Remove the rod of the vacuum regulator of the distributor, which is located on the axis of the movable plate of the distributor.
Then we remove the distributor shaft from the housing and unscrew the two screws securing the bearing plates.
In the housing we find a movable plate and a bearing, take them out. We check the condition of the distributor shaft. We examine the distributor roller for wear and we must take into account the fact that significant wear of both the shaft and the roller cams is not allowed.
We take a device for measuring capacitances, with which we check the capacitor. The capacitance of the distributor capacitor should be within the normal range of 20-25 µF.
Next, we check the technical condition of the vacuum chamber diaphragm. The diaphragm is checked by pressing the rod and plugging the fitting. In this case, the diaphragm must maintain thrust.
Make sure that the contacts of the breaker are clean, without traces of dirt; if there are any, clean and rinse the contacts with alcohol.
If the distributor housing bushing is worn, replace it. The housing bushing is also called a bearing. To press out and press in the housing bearing, mandrels are used.
Reassemble in the reverse order of disassembly, taking into account all the nuances and features.
The gap between the breaker contacts should be within 0.35-0.45 mm. If there is a discrepancy, adjust the gap between the breaker contacts.
Lubricate the fillet and spline part of the distributor shaft with engine oil.
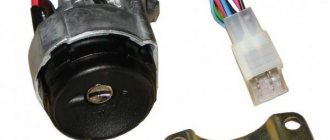
Do-it-yourself distributor replacement Repair VAZ 2109-2108
Before you begin removing the distributor (ignition distributor) on a VAZ 2109-2108, you must disconnect the negative terminal from the battery
This procedure is not as difficult to perform on your own as it might seem, but there are very important points that are worth paying attention to. This will be discussed in detail during the description of the procedure.
To perform this repair you will need the following tools:
- 10 open-end wrench or socket wrench
- Socket head and ratchet handle
- Phillips blade screwdriver
The procedure for removing and installing the distributor on a VAZ 2109-2108
So, before you begin removal, pay attention to the installation position of the distributor relative to the body. Be sure to remember or mark it so that when installing it, put it in the same position
Then you need to disconnect the high-voltage wires from the distributor cap: 4 spark plugs and one central one from the ignition coil:
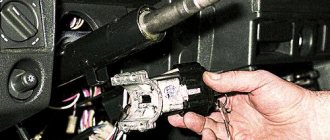
It is also necessary to disconnect the plug with wires, which is clearly shown in the photo below:
Then we pull off the thin hose from the vacuum corrector of the distributor:
Now you can proceed directly to unscrewing the nuts securing the VAZ 2109-2108 distributor itself. There are three of them in total: one is located in the center at the top:
And the other two are located on the sides, and it is more convenient to unscrew them with a regular open-end wrench, since a ratchet with a head simply cannot get there. Do not unscrew the side ones completely yet, as you need to set the TDC marks.
But before removing the ignition distributor, it is necessary to install the piston of the 1st cylinder at TDC. To do this, through the hole in the gearbox housing (after removing the rubber plug), you need to align the marks on the housing and the flywheel. With the gearshift lever in the neutral position, use a 19mm key to turn the crankshaft pulley to the required torque. This is what it should look like:
And only after this we unscrew the two remaining nuts and begin to remove the distributor, removing it from the studs to the side:
If you decide to replace the distributor, then you need to buy a new one, the price of which for VAZ 2109-2108 cars is about 1000 rubles. Before installation, you must remove the cover by unscrewing the two bolts that secure it:
And when you put it in place, make sure that the outer contact of the slider during installation is exactly opposite the output of the first cylinder on the cover:
That is, after the distributor is placed on the housing studs, lean the cover and see if the position of the contact of the slider coincides with the output of the 1st cylinder:
And after that, we finally tighten all the nuts securing the distributor and install the cover in its place. And do not forget that it is necessary to maintain the original position of the distributor relative to the body in order to maintain ignition timing.
Breakdowns of the ignition distribution device and their repair
Malfunctions of the ignition distributor can be different, so this issue needs to be addressed separately. It must be said right away that this device does not last forever and is subject to various breakdowns.
Common faults.
- Contacts burned out. This is a very common breakdown that occurs due to water or dirt getting into the ignition distributor sensor and short circuiting it. In this case, ignition repair must be carried out as follows. You can clean the contacts well, or replace them with new ones.
- Worn camshaft, clutch or bearings. These elements experience constant loads as they rotate. Therefore, when these elements wear out, they can jam. This can also lead to the fact that the shaft speed will not correspond to the required position of the slider, which distributes the electric current to the spark plugs. Repair consists of replacing worn elements with new ones.
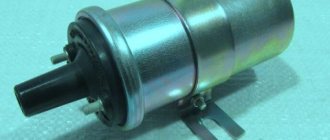
- Capacitor failure. This part plays an important role because it dampens the voltage going to the contacts. Therefore, the failure of such an element leads to the fact that a strong voltage is applied to the contacts and heating of the metal tungsten surfaces occurs. If the heat is strong, they can burn out or weld together. This will immediately lead to loss of spark. The capacitor cannot be repaired; it must be replaced with a new one.
- Hall sensor failure. It was previously said that this element is responsible for the distribution of electric current in injection engines, this is the so-called non-contact ignition. If it breaks down, the ignition distribution sensor stops functioning normally, and the spark completely disappears in the engine. It is not recommended to repair it at home; it is better to entrust it to specialists. The capacitor in it may also fail and will need to be replaced using special equipment.
- Runner failure. When dismantling it, you will notice that its surface has melted or there are dark (black) stripes on it. This indicates that it has been exposed to strong voltage, and therefore the slider needs to be replaced with a new one. In no case should you clean it with sandpaper or other abrasives, this will lead to it constantly sticking to the contacts.
- Breakdown of the breaker-distributor cover. This breakdown is also common and indicates that its dielectric surface has burnt out. In this case, the electromagnetic pulse will go to the engine body, so the current power in the high-voltage wires will be low, which will lead to the formation of a weak spark on the spark plugs or its complete absence. If a breakdown is detected, it is better to replace the cover with a new one.
Some repair work can be carried out independently if replacement of any element is required, and when a more complex breakdown is discovered, it is better to contact a specialized service station to repair it or purchase a new breaker-distributor.
In this case, after installing a new ignition distributor, it is recommended to check the gap on the spark plugs.
The device of the electric current distributor is quite complex, since it is it that distributes the electromagnetic pulse to the spark plugs, which create a spark. Therefore, if it fails, the driver must determine the cause, and then make repairs or completely replace this element.
Installing the ignition on a VAZ ninth model
When adjusting the ignition of a VAZ 2108-09-099 with a contactless ignition system, a strobe light is used. The sequence of actions is as follows:
- The vacuum corrector tube is disconnected, the strobe wires, observing polarity, are connected to the battery, the sensor is connected to the high-voltage wire of cylinder No. 1.
- After this, the sensor with the wire must be placed in the hole in the distributor cover, start the power unit and install the strobe light opposite the hatch with the scale, having previously removed the hatch cover. If the ignition setting of the VAZ 2109 is correct, the point on the flywheel will not reach the center mark of the scale, plus or minus one mark. Optimally, it will be located strictly opposite the central mark. If this is not the case, the ignition on the VAZ 2109 needs to be adjusted.
- To correctly set the ignition on a VAZ 2108 (2109, 21099), you need to turn off the power unit, release the distributor and move it clockwise, looking from the front left wheel, to increase the ignition timing of the mixture (earlier), and counterclockwise to decrease it angle (later ignition).
- After changing the angle, you should secure the distributor, put the vacuum tube on the vacuum corrector and check the torque again. If there is a repeated discrepancy with the optimal parameters, repeat the adjustment operation.
- Cylinder No. 1 is set to TDC on the compression stroke. You can verify this by removing the spark plug from cylinder No. 1 and tightly closing the threaded hole with a rolled paper ball or pressing it with your finger. Paper flying out or air escaping from under the finger when cranking the crankshaft manually will indicate the TDC of the piston at the end of the compression stroke. In this case, the mark on the crankshaft pulley must be aligned with the larger of the three marks on the cylinder block cover or, due to belt stretching, located behind it.
- The distributor is set to the zero position of the octane corrector. The contacts of the ignition distributor breaker should open at TDC of the first cylinder. A 12V test lamp with pieces of wire and clamps will help confirm this. The “positive” clamp is connected to the “positive” contact of the ignition coil, the “negative” - to the “ground” of the car.
- After this, you need to turn on the ignition. If the breaker contacts are open, the lamp will light up. If it does not light up, it is necessary to loosen the locking plate of the ignition distributor and slowly turn the distributor body in one direction and (or) the other until the control light comes on. The position of the distributor at which the lamp lights up (or goes out) will be the optimal ignition moment.
After finding it, you need to secure the locking plate without changing the position of the ignition distributor. If after adjusting the ignition the engine speed increases, it should be reduced to 800-900 rpm. Having completed the described steps, you need to make sure how the ignition on the VAZ is set when the car is moving using the method described above.
The main causes of distributor breakdowns
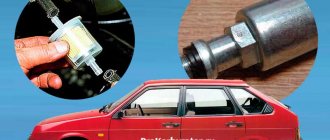
Even taking into account that, by design, the distributor rotor is located in a casing, one should not exclude the possibility of water getting inside due to a number of circumstances. Very often, a couple of drops of water are enough for the distributor to start working intermittently. It follows that first of all it is necessary to check the parts of the ignition system for dryness. This is due to the fact that the main function of the distributor is to supply an electrical discharge to create a spark on the spark plugs.
The second reason for interruptions in the operation of the distributor is the formation of oxide on the rotor, which, while rotating, interacts in turn with the terminals of the wires through which an electric charge is supplied to the spark plugs. Due to poor contact, the amount of charge supplied is reduced, which leads to interruptions in the spark supply in the combustion chamber and, consequently, to instability of the power unit. The simplest solution to the problem is to clean the distributor rotor with a solvent or with a sharp object, which will improve contact.
Sometimes when the engine is running, it feels like it is choking at certain speeds, or, on the contrary, it is stalling. Quite often, this problem is a consequence of improper adjustment of the ignition system. In this case, you should not engage in amateur activities, since it is quite difficult to set all the settings correctly. Therefore, it is advisable to seek help from specialists.
Advantages of BSZ
The task of the ignition system is to provide the ignition spark with sufficient energy at the right moment to ignite the fuel mixture. The more accurately this process is performed, the greater the engine's power and efficiency. Correctly set ignition allows you to increase engine power, reduce fuel consumption and emissions of harmful substances.
In recent years and decades, these goals have become increasingly relevant. The contact ignition system could not cope with the demands placed on it. The maximum transmitted energy required to ignite the working mixture could not be increased, although this was necessary for engines with high compression and power, the rotation speed of which became increasingly higher.
In addition, due to constant wear of the contacts, it is not possible to ensure exact compliance with the specified ignition moment. This caused interruptions in engine operation, increased fuel consumption and emissions of harmful substances into the atmosphere.
Thanks to the development of electronics, it was possible to initiate the ignition process without contact, thereby solving wear and maintenance problems. In this case, the specified ignition timing is precisely maintained throughout almost the entire service life.
First of all, this is achieved thanks to inductive signal formation (contactless transistor ignition system with energy storage in inductance) and signal formation by a Hall sensor (TSZ-h).
Because both of these systems are economical and relatively inexpensive, they are still used today on some small engines.
The main advantages of a contactless ignition system:
- no wear or maintenance,
- constant ignition moment,
- absence of contact bounce and, as a consequence, the possibility of increasing the rotation speed,
- regulation of energy storage and limitation of primary current,
- higher secondary voltage of the ignition system
- DC switch off.
Hall Sensor.
The main component of the VAZ-2110 distributor is the Hall sensor. The Hall sensor works as follows. If a current is passed through a semiconductor located in a magnetic field, then an emf will appear on the edges perpendicular to the current and magnetic flux, which disappears in the absence of magnetic flux. In the distributor, the sensor is located on a movable plate and has two parts separated by a slot.
On one side of the slot there is a semiconductor with a signal amplifier and voltage stabilizer, and on the other there is a permanent magnet creating a magnetic field. A curtain with 4 slots and attached to the distributor shaft passes through the sensor slot. When the shaft rotates, the curtain rotates. When the shutter slot is located in the sensor slot, its semiconductor enters the magnetic field of a permanent magnet and an EMF appears on it, which passes through the amplifier and opens the power transistor of the sensor. When a shutter tooth passes by the sensor, the latter isolates the permanent magnet from the semiconductor, which leads to shunting of the magnetic field and the EMF on the semiconductor disappears, which leads to the closure of the transistor and the loss of voltage at the control terminal of the sensor.
Maintenance of contact type distributor
In order to repair the distributor yourself, you need to understand its structure and the purpose of all its parts. The operating algorithm of the mechanical distributor is as follows:
- The rotating roller periodically presses the cam onto the spring-loaded movable contact, as a result of which the low voltage circuit is broken.
In fact, 2 electrical circuits pass through the distributor - low and high voltage. The first is periodically broken by the contact group, the second is switched to the combustion chambers of different cylinders.
Now it’s worth considering the functions of the small parts that make up the distributor:
- a coupling mounted on the roller (under the housing) protects internal elements from the ingress of motor lubricant from the power unit;
- the octane corrector wheel, located on the housing boss, is intended for manual adjustment of the spark advance angle;
An important point should be noted: a manual octane corrector is found only on older versions of R-125 distributors. Subsequently, the design changed - instead of a wheel, an automatic vacuum corrector appeared with a membrane operating from engine vacuum.
The chamber of the new octane corrector is connected by a tube to the carburetor, the rod is connected to the movable plate where the breaker contacts are located. The magnitude of the vacuum and the amplitude of the membrane operation depend on the opening angle of the throttle valves, that is, on the current load on the power unit.
A little about the operation of the centrifugal regulator located on the upper horizontal platform. The mechanism consists of a central lever and two weights with springs. When the shaft spins to high speeds, the weights move apart under the influence of centrifugal forces and turn the lever. The interruption of the circuit and the formation of a discharge begins earlier.
Typical faults
Problems with the ignition distributor manifest themselves in one of two ways:
- The engine is unstable - it vibrates, “troits”, and periodically stalls. Sharply pressing the gas pedal causes a pop in the carburetor and a deep dip, the acceleration dynamics and engine power are lost.
- The power unit does not start, although sometimes it “picks up”. Possible shots into the muffler or air filter.
In the second case, the fault is easier to detect. The list of reasons leading to complete failure is relatively small:
- the capacitor or resistor located in the slider has become unusable;
- break in the low voltage wire running inside the housing;
- the cover of the distributor, where the high-voltage wires from the spark plugs are connected, is cracked;
- the plastic slider has failed - a rotor with a movable contact, screwed to the upper support platform and closing the centrifugal regulator;
- The main shaft jammed and broke.
A fracture of the shaft leads to complete failure of the VAZ 2106 engine. Moreover, a fragment with splines remains inside the drive gear, as happened on my “six”. How to get out of the situation while on the road? I removed the distributor, prepared a piece of cold weld mixture and stuck it to a long screwdriver. Then he lowered the end of the tool into the hole, pressed it against the fragment and waited for the chemical composition to harden. All that remains is to carefully remove the screwdriver with a piece of the shaft stuck to the “cold welding”.
There are many more reasons for unstable operation, so they are more difficult to diagnose:
- breakdown of the cover insulation, abrasion of its electrodes or central carbon contact;
- the working surfaces of the breaker contacts are severely burnt or clogged;
- the bearing on which the support plate with the contact group rotates has worn out and become loose;
- the springs of the centrifugal mechanism have stretched;
- the diaphragm of the automatic octane corrector has failed;
- Water has entered the housing.
The resistor and capacitor are checked using a tester; the broken insulation of the cover and slider is detected without any instruments. Burnt contacts are clearly visible to the naked eye, as are stretched weight springs. Diagnostic methods are described in more detail in the following sections of the publication.
Tools and preparation for disassembly
To repair a VAZ 2106 distributor yourself, you need to prepare a simple set of tools:
- 2 flat screwdrivers with a narrow slot - regular and short;
- a set of small open-end wrenches measuring 5-13 mm;
- pliers, round nose pliers;
- technical tweezers;
- probe 0.35 mm;
- hammer and thin metal attachment;
- flat file, fine sandpaper;
- rags.
If you plan to completely disassemble the distributor, it is recommended to stock up on aerosol lubricant such as WD-40. It will help displace excess moisture and make it easier to unscrew small threaded connections.
During the repair process, you may need additional equipment and materials - a multimeter, a bench vice, pliers with pointed jaws, motor oil, and so on. There is no need to create special conditions to carry out the work; the distributor can be repaired in a regular garage or in an open area.
To avoid problems with setting the ignition during assembly, it is recommended that before removing the element, fix the position of the slider according to the instructions:
- Unclip the clamps and remove the cover, move it to the side along with the wires.
To dismantle the distributor, you need to disconnect the vacuum tube from the membrane block, disconnect the coil wire and unscrew the only fastening nut with a 13 mm wrench.
Problems with the lid and slider
The part is made of durable dielectric plastic; in the upper part there are terminals - 1 central and 4 side. High-voltage wires are connected to the sockets from the outside; from the inside, the terminals are in contact with a rotating slider. The central electrode is a spring-loaded carbon rod in contact with the brass rotor pad.
A high-potential pulse from the coil is applied to the central electrode, passes through the slider contact pad and resistor, then goes to the desired cylinder through the side terminal and armor wire.
To identify problems with the cover, it is not necessary to remove the distributor:
- Using a screwdriver, unscrew the 2 steel clamps and remove the part.
- Disconnect all cables by pulling them out of their sockets.
- Carefully examine the cover body for cracks. If any are found, the part will definitely change.
- Examine the condition of the internal terminals, wipe off graphite dust from the walls. Pads that are too worn may have poor contact with the runner and burn. Cleaning will help temporarily, it is better to change the spare part.
- The spring-loaded “coal” in the center should move freely in the socket; cracks and chips are unacceptable.
Don't be afraid to mix up high-voltage cables when disconnecting. On the top of the cover there are cylinder numbers, which are easy to navigate.
An insulation breakdown between two contacts is diagnosed as follows:
- Unscrew any spark plug (or take a spare one), remove the cover and disconnect all armor wires except the central one.
- Attach the spark plug to the ground of the car and use the second wire to connect it to the first side electrode on the cover.
- Turn the starter. If a spark appears at the spark plug electrodes, there is a breakdown between the side and main terminals. Repeat the operation on all 4 contacts.
Not knowing such subtleties, I went to the nearest auto store and bought a new cover with the condition of return. Carefully swapped parts and started the engine. If the idle speed leveled out, I left the spare part on the car, otherwise I returned it to the seller.
The slider malfunctions are similar - abrasion of contact pads, cracks and breakdown of the insulating material. In addition, a resistor is installed between the rotor contacts, which often fails. If the element burns out, the high-voltage circuit is broken and a spark is not supplied to the spark plugs. If black marks are detected on the surface of a part, its diagnostics is necessary.
Important note: when the slider becomes unusable, there is no spark on all spark plugs. An insulation breakdown is diagnosed using a high-voltage cable coming from the coil. Pull the end of the wire out of the cover, bring it to the central contact pad of the slider and turn the crankshaft with the starter. A discharge appears, which means the insulation is broken.
It's easy to check the resistor - measure the resistance between the terminals with a multimeter. A value of 5 to 6 kOhm is considered normal; if the value is more or less, replace the resistance.
Video: how to check the functionality of the slider
Troubleshooting Contact Group Problems
Since a spark jumps between the contact surfaces when opening, the working planes gradually wear out. As a rule, a protrusion is formed on the movable terminal, and a depression is formed on the static terminal. As a result, the surfaces do not fit well, the spark discharge weakens, and the motor begins to “trouble.”
A part with minor wear is restored by cleaning:
- Remove the distributor cap without disconnecting the cables.
- Using a screwdriver, push the contacts apart and insert a flat file between them. The task is to remove the build-up of the moving terminal and level the static terminal as much as possible.
- After cleaning with a file and fine sandpaper, wipe the group with a rag or blow with a compressor.
In stores you can find spare parts with modernized contacts - holes are made in the center of the working surfaces. There are no depressions or growths on them.
If the terminals are worn to the limit, it is better to change the group. Sometimes the surfaces are deformed to such an extent that it is impossible to adjust the gap - the feeler gauge is inserted between the bump and the recess, leaving too much clearance at the edges.
The operation is performed directly on the car, without dismantling the distributor itself:
- Disconnect and remove the cover with wires. There is no need to turn the starter or adjust the timing marks.
- Use a short screwdriver to loosen the screw securing the wire and disconnect the terminal.
- Unscrew the 2 screws holding the part to the metal plate and remove the breaker.
Installing the contacts is not difficult - screw the new group with screws and connect the wire. Next - adjust the gap to 0.3-0.4 mm, performed using a feeler gauge. You need to turn the starter a little so that the cam presses on the plate, then adjust the gap and fix the element with the adjusting screw.
If the working surfaces burn too quickly, it is worth checking the capacitor. Perhaps it has dried out and is not performing its function well. The second option is a low quality product, where the opening surfaces are offset or made of ordinary metal.
Bearing replacement
In distributors, a roller bearing is used for the correct operation of the octane corrector. The element is combined with a horizontal platform where the contact group is attached. A rod coming from the vacuum membrane is attached to the protrusion of this platform. When the vacuum from the carburetor begins to move the diaphragm, the rod rotates the platform along with the contacts, adjusting the moment of sparking.
During operation, play occurs on the bearing, which increases with wear. The pad, together with the contact group, begins to dangle, opening occurs spontaneously, and with a small gap. As a result, the VAZ 2106 engine operates very unstable in any mode, power is lost, and gasoline consumption increases. The bearing is not repaired, only replaced.
The play of the bearing assembly is determined visually. It is enough to open the distributor cover and move the contact breaker up and down with your hand.
Replacement is performed in this order:
- Remove the distributor from the car by disconnecting the coil wire and unscrewing the fastening nut with a 13 mm wrench. Don't forget to prepare for dismantling - turn the slider and make chalk marks as described above.
- Dismantle the contact group by unscrewing 3 screws - two are fastening, the third holds the terminal.
- Using a hammer and a thin tool, knock out the locking rod from the oil deflector clutch. Remove the last one from the shaft without losing the second washer.
Installation of the new element is carried out in the reverse order. Before installing the inside of the distributor, it is advisable to thoroughly clean it. If rust has formed on the roller, remove it with sandpaper and lubricate the clean surface with engine oil. When you insert the shaft into the housing sleeve, do not forget to adjust the contacts according to the feeler gauge.
When installing the distributor, maintain the original position of the body and runner. Start the engine, loosen the nut securing the element and turn the housing to achieve the most stable operation. Tighten the fastening and check the “six” while driving.
Video: how to correctly change a bearing without marking
Other faults
When the engine categorically refuses to start, you should check the functionality of the capacitor. The technique is simple: put an assistant behind the wheel, remove the distributor cap and give the command to rotate the starter. If a barely noticeable spark jumps between the contacts or is not observed at all, feel free to buy and install a new capacitor - the old one can no longer provide the required discharge energy.
Any experienced driver who operates a “six” with a mechanical distributor carries a spare capacitor and contacts. These spare parts cost pennies, but the car won’t run without them. I was convinced of this from personal experience when I had to look for a capacitor in an open field - a passing Zhiguli driver helped me and gave me his own spare part.
Owners of a VAZ 2106 with a contact distributor are also plagued by other minor troubles:
- The springs holding the weights of the centrifugal corrector are stretched. Small dips and jerks appear when the car accelerates.
- Similar symptoms are observed in case of critical wear of the vacuum diaphragm.
- Sometimes the car stalls for no apparent reason, as if the main ignition wire had been pulled out, but then it starts and runs normally. The problem lies in the internal wiring, which has broken and periodically breaks the power circuit.
It is not necessary to change stretched springs. Unscrew the 2 screws securing the slider and, using pliers, bend the brackets where the springs are attached. A torn membrane cannot be repaired - you need to remove the assembly and install a new one. Diagnostics is simple: disconnect the vacuum tube from the carburetor and draw air through it with your mouth. A working diaphragm will begin to rotate the plate with contacts through traction.
Video: complete disassembly of the ignition distributor VAZ 2101—2107
Repair and restoration of distributors of Japanese engines.
Distributor, also known as distributor, also known as ignition distributor, also known as ignition module.
In Japanese gasoline engine control systems, this is a technologically complex part that includes an electronic camshaft sensor, an electronic switch and a high-voltage ignition coil. The distributor is made as a single unit, it has its pros and cons. Unfortunately, the distributor is also sold as a single unit - this is a big, fat minus, because Currently, the cost of an “original” distributor at a dealer reaches 21,000-24,000 rubles.
Signs of distributor malfunction: Loss of engine power during acceleration; Unstable (“tweaking”) operation at idle; The engine is difficult to start and stalls when warming up; Popping noises in the intake or exhaust manifold during sudden acceleration; Engine computer memory contains a “misfire” error (loss of sparking) when scanning vehicles after 1996
Attention! You may be mistaken about the malfunction of your distributor. Similar symptoms are caused by other faulty components and components of the car. It would be more economically feasible for you to conduct electronic diagnostics and testing of the car’s ignition system
Contact us by phone: +7 495 9958674, +7 963 9777356 (Yuri), +7 495 7787546 (Alexander) or see the “contacts” page. You will receive maximum information, free consultation, and useful tips. The main reasons for distributor failure: Dirty engine injectors (look at the injectors); Old or “broken” spark plugs due to low-quality gasoline; Old, damaged or dirty high-voltage wires; “Lighting up” a car from a donor car with a faulty battery charging system; Dirty or cracked distributor cap; Oxidized, dirty battery terminals can also cause damage to the distributor. Malfunction of the generator and battery charging system.
Which distributor elements fail more often? According to our accumulated statistics - a switch and an ignition coil, and the probability of failure of both elements is the same - 50/50%. Repair of a distributor consists of replacing all its electronic components. Since the distributor body is quite reliable, we offer you the exchange of your faulty distributor for a restored one from our exchange stock. All distributors have been fully tested and tested on a special stand. We provide a guarantee on refurbished distributors. The components that we use when repairing distributors are only from original manufacturers, therefore reliable. When exchanging or repairing, we will definitely advise you so that you can avoid such troubles in the future. Services for dismantling, installing distributors, preventive cleaning of injectors and other related work can also be obtained from our “PAT auto” service center. In many stores, non-original Chinese-made distributors for Chrysler CIRRUS and Dodge STRATUS models with Mitsubishi 2.5L engines have appeared on sale. According to reviews from our clients and from our own experience, these “products,” unfortunately, do not justify their price (about 12,000 rubles). Upon careful examination, it turned out that the electronics of the switches are made of “consumer goods”, and the electrical insulation of the ignition coils is very weak. Our opinion is that such “miracle spare parts” are not intended for full and long-term work on these beautiful cars! In addition, they are usually not returnable to stores!
Attention! To help the diagnostician. We offer you reference books and other technical literature. You will have useful information with which you will be able to determine the causes of malfunctions and errors in the operation of components and assemblies of your car. Contents in Russian. Format - electronic books. OBDII codes Jeep GRAND CHEROKEE WJ 4.0L 1999-00
download demo >>>OBDII codes automatic transmission Chrysler 41TE (A604) 2001 download demo >>>OBDII codes automatic transmission Chrysler 41TE (A604) 2004 download demo >>>
We offer you reference books and other technical literature. You will have useful information with which you will be able to determine the causes of malfunctions and errors in the operation of components and assemblies of your car. Contents in Russian. Format - electronic books. OBDII codes Jeep GRAND CHEROKEE WJ 4.0L 1999-00. download demo >>>OBDII codes automatic transmission Chrysler 41TE (A604) 2001 download demo >>>OBDII codes automatic transmission Chrysler 41TE (A604) 2004 download demo >>>
PS Don't buy Chinese fakes.
The distributor is the most important component of the starting system
Periodic repair of the distributor on domestic classic cars causes disapproving comments from car owners. This unit, as is known, is mounted on carburetor power plants.
Distributor as the most important element of the starting system
Whatever one may say, the main goal of a car owner who has taken up a distributor is to ensure a good and quick start of the engine. The car starting system is a kind of starter, which must remain in perfect condition under any circumstances.
The distributor is one of the invaluable elements of the system. It is effective in the general design concept of a car with a carburetor type of ignition. For this reason, it is extremely important to know how to diagnose faults and “treat” them.
Malfunction of the contact distributor.
Malfunction of the distributor during contact ignition is due to a change in the gap in the contacts or their contamination. The operation of a contact distributor, in contrast to a non-contact distributor, is greatly influenced by the condition of the contacts, which must be checked after 10,000 km. Distributor malfunctions include wear of the shaft cams and the stop of the contacts sliding along them, wear of the bushings in which the shaft rotates, destruction of the bearing of the movable contact plate, weakening of the contact spring, jamming of the contacts on the axis, burning, erosion or contamination of the contacts.
All these faults lead to a change in the gap or a violation of contact between the contacts. As a consequence, loss of engine power, engine idling stops, throttle response decreases, jerking is possible when the gas pedal is sharply pressed.
In case of significant wear or destruction of the bearing of the movable contact plate, critical wear of the bushings, breakage of the negative shunt, a violation of the contact of the contact pair lever and the contact itself leads to popping noises in the intake manifold and muffler. This is also possible if the radio interference resistor located in the distributor runner burns out.
Distributor cover
Adjusting the distributor cover does not necessarily imply removing the entire element. The same can be said if you need to replace the slider on the distributor.
Here are the instructions to follow in this case:
- All high voltage wiring is disconnected from the distributor.
- The cover is removed (on some cars it is held in place by latches) by moving upwards.
- Carefully inspects for penetration.
Distributor cover
Note. A broken lid is an irreparable defect. Identified by the presence of a dark and thin stripe.
- If the cover is not broken, then it is checked for the central contact or ember falling out (this also happens quite often). If it falls out, then a new one is installed.
- Be sure to check the slider, which also requires replacement if the fuse has melted and there are traces of rust, burning, etc.
- You also need to remove the dust shield from the cover in order to remove the LV terminal, move apart the holder clamping tabs and free the wires. All this is done in order to dismantle the sensor plate.
- It is also recommended to check the retaining ring.
- Also diagnose the condition of the support plate bushing, which should not show any signs of wear.
- Check the spring ring pressing the clutch retaining pin. If the seal has lost its former properties and is completely worn out, replace it immediately.
Adjustment methods
In general, system adjustment is carried out in three stages. The first includes adjusting the angle of the closed state of the contacts. Keep in mind that it depends directly on the size of the gap in the contacts of the distributor. The second stage includes setting the angle at which the ignition advance occurs, and the third stage allows you to check and correct the results obtained
It is necessary to pay special attention to the fact that all results must be clarified directly during the ride.
Adjustment will be needed if you use a classic or transistor ignition system in your car. In order to get started, you will first need to remove the cover covering the ignition distributor of the VAZ 2106. If your VAZ 2106 has a classic system installed, then before you begin the adjustment process, clean all the supplied contacts and check the care with which they fit to each other.
If you notice any deviations, carefully put the system in order by bending the necessary places in the contacts. Next, turn the crankshaft so that the maximum permissible distance is formed between the contacts of the VAZ 2106 distributor. Then unscrew the screw that secures the group; it is located on the bearing plate. And insert the probe, the thickness of which is 0.5 mm. Move the contacts so that it can move with little force.
Maintenance of ignition distributor- distributor VAZ
01-CLASSIC.
Replacing
cams, runner, condenser.
Once you think you have achieved the optimal result, tighten the screw to secure the position. To find out whether you have spread the contacts correctly, place a slightly thicker probe between them. If it does not pass between the contacts, you managed to do a good job.
To rotate the crankshaft, use a special wrench. If you don't have one, start moving the car slowly with fourth gear engaged. Of course, this will require some effort, because using a starter to carry out such work becomes almost impossible. This is due to the fact that it will be quite problematic to find the optimal rotation angle.
Proceed to directly measure the angle. Remove the high voltage wire from the distributor cover and connect it to the car. Next, using the ignition coil and the 12V bulb attached to it, attach to the wire that runs directly from the distributor to the coil.
If the installation was completed correctly, when you turn on the ignition, the light will start to light, and as soon as you open the contacts it will go out. Then start rotating the engine crankshaft so that it moves clockwise. This work must be carried out until the light goes out. Remember the position in which the slider is located and mark it somewhere for yourself.
Operating principle of the ignition system
We replace the VAZ 2114 heater radiator with our own hands, instructions and nuances.
The process of burning the mixture in the cylinder takes some time. If the mixture ignites while the piston is at TDC, then it will burn after the piston passes TDC, catching up with it, that is, during the expansion stroke of the combustion chamber and exhaust gases. This will create insufficient pressure on the piston, as a result of which efficiency will be noticeably reduced and fuel consumption will increase (ignition is delayed).
When the mixture is ignited long before the piston passes TDC, a significant part of the energy will be spent on overcoming the pressure by the piston during the process of explosive combustion of the mixture. In this case, detonation occurs (early ignition). In addition, if the VAZ ignition is set incorrectly, the engine will overheat due to the increased absorption by the cylinder walls of the heat released during combustion of the mixture.
That is why the optimal ignition timing is considered to be one at which the mixture ignites shortly before the piston passes TDC, so that the combustion of the mixture coincides as much as possible in time with the piston passing TDC. In this case, the VAZ ignition timing provides the best operating mode.
In order to control the ignition of the VAZ 2109, divisions are applied in the clutch housing hatch shaft, and a mark is installed on the flywheel. When the point on the flywheel coincides with the central mark in the hatch, the pistons in the first and fourth cylinders are set to top dead center (TDC).
The way to control the VAZ ignition installation “on the move” is as follows: moving at a speed of 40-50 km/h on a flat section of the road with fourth gear engaged, you need to press the gas pedal to the floor. If, while accelerating, a slight detonation is heard, which disappears almost immediately, the ignition is set correctly. The absence of detonation manifestations indicates late ignition. Excessive detonation is a sign of early ignition of the combustible mixture.
Electronic ignition device
The electronic ignition circuit of the VAZ 2101, as well as the VAZ 2105, 2106, 2107 or 2109, includes a distributor with a contactless electronic sensor and a steel screen, a switch, a coil with an open magnetic circuit, spark plugs with high-voltage wires and a set of connecting wires.
The advantages of installing electronic ignition on all VAZ classics, no matter whether it is 2106 or 2107, are obvious. Practicality, stable operation, more reliable (powerful) spark generation and high-quality combustion of the mixture, durability, no problems with the contact group, easier engine starting - this is not a complete list
It must also be said about the virtually non-existent ignition breakdowns, improved car dynamics, and a slight but significant reduction in fuel consumption when using a contactless system.
The disadvantages include the rather high price of the VAZ electronic ignition and the possible failure of the Hall sensor. Well, okay, the sensor is easy to replace even on the road. Anyway, let's get started.
Contactless ignition system BSZ
Installing contactless ignition is a really necessary thing. You will feel the difference! Two different contactless dispensers are available for Moskvich. They differ in sensors: ATE 2 with Hall, SOATE with induction. ATE 2 costs
1300 rub. Its kit includes a distributor, a coil, a commutator and a harness. It is installed on the RR 147 drive, if the RR 118, then you need to buy a drive as well. Don't forget to buy new silicone high-voltage wires.
The commutator is attached next to the coil. After installing all this on the car, do not forget to increase the spark gap of the spark plugs to approximately 0.8 mm.
Adapter for distributor from VAZ-2108 for Moskvich
The VAZ-2108 distributor can be installed using an adapter. This BSZ has been successfully operated for two years on two cars: M-412 (1.8 l.) and M 2141(2) (1.7 l.).
As a unit that transmits torque, a modified shaft from the old Moskvich drive and a shank with a pin from the original distributor are used, rotating in ball bearing No. 6203 and two starter copper-graphite bushings, the inner diameter of which, after pressing, expands to a diameter of 13 mm.
Since the inner diameter of the bearing and the diameter of the shaft are different sizes, an intermediate sleeve is pre-pressed onto the shaft.
The adapter flange is milled, as can be seen in the picture, holes are drilled and threads are cut for the screws.
ATTENTION! The adapter is designed to drive a new type of distributor, with a crimp clamp
Ignition distributor
An ignition distributor-distributor (jarg: distributor, from the French trembleur - vibrator, interrupter) is a mechanism that determines the moment of formation of high-voltage pulses in the ignition system and (or) for distributing electric ignition across the cylinders of carburetor and injection gasoline internal combustion engines.
Diesel, compression, glow, and also engines with a glow head have a different principle of ignition of the fuel-air mixture and they do not need a distributor-distributor.
In its classic form, the device includes a low voltage current breaker, a high voltage current distributor, centrifugal and vacuum ignition timing regulators.
The breaker contacts at a certain moment open the primary circuit of the ignition coil winding, which causes the induction of a high voltage current in its secondary winding.
A capacitor is connected parallel to the contacts to reduce sparking.
The vacuum regulator (built into the housing) changes the ignition timing depending on the load on the engine, which is proportional to the vacuum behind the throttle valve.
The vacuum regulator is connected to the throttle body (intake manifold) by a tube.
The centrifugal regulator (built into the housing) changes the ignition timing according to changes in the crankshaft speed.
An octane corrector installed on the breaker body allows you to manually adjust the ignition timing.
High-voltage voltage from the secondary winding of the ignition coil is supplied through a high-voltage wire to the central contact of the distributor cap.
Through a contact angle (a brush installed in the distributor cover), high voltage is supplied to the slider (rotor with a current-carrying plate)
When the rotating slider passes by the side electrical contacts (according to the number of cylinders), high voltage current is supplied through high-voltage wires to the spark plugs of the corresponding cylinders.
The current carrying plate does not mechanically touch the side contacts of the cover; a spark jumps through the gap.
The more modern contactless ignition system does not have a breaker.
It is replaced by a device for generating master pulses based on the Hall effect to generate a spark by an ignition control unit (switch).
Optical or magnetic sensors can also be used.
Some injection engines with an ignition distributor do not contain a centrifugal and (or) vacuum regulator for correcting the ignition timing.
In them, this function is assigned to the electronic engine control unit.
In modern injection engines, the breaker is not used at all: it is replaced by one or more controlled ignition coils, or coils directly on each spark plug.
For example, Oka cars have a Hall sensor and a two-spark ignition coil, but there is no distributor.
VAZ 2109 Oil in the distributor video - Self-repair of cars
DIY VAZ 2109 repair
A part called a “distributor” performs the function of ignition distribution and has a direct impact on the stability of the functioning of the automobile engine. The main task that this product is designed to solve is the regulation of spark formation depending on the load, number of revolutions and other engine operating parameters, and subsequent correct distribution the resulting spark on all cylinders.
Distributor - its design and purpose
The specified product is an element of the ignition system that solves a complex of problems:
- Adjustment of the signal level (electrical), its control, as well as subsequent transmission to the reel-to-reel switch;
- Distribution in the required sequence of the resulting spark to the spark plugs, which is set by the ignition strokes;
Today, 2 types of ignition systems are used in car designs: contact and non-contact. There are other technical solutions, but they are used on models, the number of which is negligible. The distributors installed in them differ in design very slightly and are almost identical in basic characteristics. Therefore, having realized that oil is flowing from under the distributor of the VAZ 2109, you can carry out work to eliminate the identified malfunction using the same methods.
Review of SZ on famous UAZs
What is the connection diagram for electronic or contactless ignition on a UAZ 417, how to convert contact ignition to contactless? Why does the coil heat up and how to adjust and adjust the advance angle? First, let’s look at the main points regarding the action and types of SZ.
Operating principle of SZ
Contact system diagram
The ignition system, or rather its correct setting, plays a big role in the operation and starting of a car engine. With correct adjustment, the combustible mixture will burn correctly in the power unit as a result of the supply of charge through the spark plugs. A spark plug is placed on each cylinder of the UAZ engine, each of which is turned on in a certain order, in turn, delivering a discharge to the cylinder after a certain time. It must be taken into account that any SZ makes it possible not only to deliver the required discharge, but also determines its strength.
Due to its technical characteristics, the car’s battery cannot produce the voltage and current required to ignite the mixture. This is due to the fact that the battery can only produce a current of a certain strength. And thanks to the correct operation of the system, the current value increases significantly, which allows you to successfully ignite the air-fuel mixture.
The operating principle of the system consists of several stages:
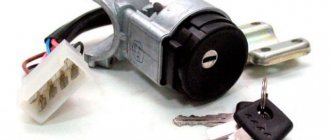
- First, the driver inserts the key into the ignition and turns it, electrical energy is stored in a coil.
- Then the coil converts the low-voltage voltage in the on-board network of 12 volts into high-voltage. As a result, the voltage value increases to 30 thousand V.
- After this, the discharge is distributed and supplied to one or another spark plug.
- The candle itself produces a spark that ignites the mixture.
Diagram of the UAZ contactless system
What types of SZ are there?
Domestic UAZ vehicles can use one of three ignition systems; let’s look at each of them in detail:
- Contact view. This type of SZ is outdated, however, it is used on most machines. In such a system, the principle of operation is to issue a certain impulse that is formed in a distributor - a distribution device. The contact system is considered one of the simplest in terms of design, which is an advantage, since if a malfunction occurs, the car owner will be able to independently check and repair the system. In addition, prices for structural parts of the contact system are usually affordable, which is good news. The contact SZ includes a coil, a switchgear, a breaker, a capacitor and spark plugs.
- Non-contact type, also called transistor type. Compared to the contact system, the contactless system has more advantages. The resulting spark has a higher power, which is achieved due to the formation of high voltage in the secondary winding of the coil. Also, contactless systems are equipped with an electromagnetic device, which makes it possible to achieve more stable operation of the engine. Ultimately, if the UAZ power unit is configured correctly, then by using a contactless system you can not only increase its power, but also achieve fuel savings, albeit insignificant. Also, such systems are easier to maintain. One of the main nuances in terms of maintenance is the need to periodically lubricate the distributor drive - at least every 10 thousand kilometers. One of the main disadvantages is the difficulty of repair. In practice, repairing a contactless SZ will be problematic, since diagnosing the system will require equipment that is usually available at a service station.
- The ignition system can also be electronic. This option is currently considered one of the most progressive and expensive; it is installed mainly on new cars. Compared with contact and non-contact systems, the electronic system has a more complex structure. The main advantage of this system is that, if necessary, the process of adjusting the ignition angle will be much easier. In addition, there are no contacts in the electronic system that are susceptible to oxidation. It should also be noted that in practice, the combustible mixture in the cylinders of a power unit with an electronic system almost always burns completely. But despite all the advantages, electronic repair systems also have their disadvantages, which relate to device repair. It is almost impossible to repair such an SZ with your own hands, since to perform this task, again, you will need equipment (video published by Nail Poroshin).
Expert recommendations on how to configure correctly
So, how to set the advance angle yourself in order to achieve proper operation of the UAZ engine:
- First of all, you must lock your car in one place by pulling the parking brake lever. Rotate the crankshaft so that the piston of cylinder 1 reaches TDC (top point). In this case, you need to ensure that the hole on the crankshaft pulley coincides with the mark marked on the timing gear cover.
- After this, remove the cover from the distribution mechanism. After dismantling, you will be able to see the slider, which is located inside the cover itself, opposite the contact. If there is no slider, you should turn the crankshaft 180 degrees again, and then set the octane corrector to 0. Using a wrench, you will need to screw the pointer to the distribution mechanism housing so that it aligns with the middle mark. When these steps are completed, the fastening bolt with which the plates are attached to the distributor body must be loosened slightly.
- Then, holding the slider in one place with a finger to prevent it from rotating, you need to carefully rotate the housing itself, this will allow you to remove possible backlash in the drive. The housing must be rotated until you achieve alignment of the sharp end of the stator mechanism petal with the red mark located on the rotor device. After this, the plate itself must be secured to the body using the appropriate bolt.
- Once you have completed these steps, you need to replace the controller cover and check the high voltage cables. You need to make sure that these wires are installed in the correct sequence, taking into account the firing order of the cylinders. When you manage to correctly adjust the lead angle, you need to make sure that the entire procedure was performed correctly.
- To diagnose the correctness of the actions performed, you need to start the engine of your UAZ and wait about 5-10 minutes until the power unit warms up. The operating temperature of the engine is about 90 degrees; you can wait until the internal combustion engine warms up to 80 degrees. Then you need to drive onto a flat road and accelerate the car to 40 km/h, after which you should sharply press the gas. At this moment, the car will accelerate and if, when the speed increases to 60 km/h, a short-term detonation (metallic knock) is heard from under the hood, then this indicates that all actions were performed correctly. If the detonation is too long, the system will need to be adjusted. To do this, the housing of the distribution mechanism will need to be turned one notch or half, and it must be turned counterclockwise. If the diagnostics showed that there is no knocking of the “fingers” at all, then the advance angle should be increased. To do this, the mechanism should be turned in the opposite direction.
Photo gallery “How to adjust correctly”
Important nuances when bulkheading
Overhauling the ignition distributor is necessary for various reasons. As a rule, during the operation of the car, its owner notices slight shaking of the engine at idle. After replacing the spark plugs and putting the carburetor in order, he realizes that the reason is different, because the problem could not be eliminated. And then the armored wires, the ignition and, finally, the distributor itself come into question.
If its slider moves freely in the working area without stopping in the extreme position, then the motor will twitch. And here a knowledgeable car enthusiast will sort out the distributor on his own, saving a considerable amount of money on services at a service station.
Distributor bulkhead
It is important to wash all metal elements of the distributor in gasoline or kerosene. Submit the moving part for inspection; if there is uneven rotation and there is no preload of the weight springs, then during reassembly you should try to select a specific, correct location for the bearing. You should know that the manual advises changing the position of the bearing every 25 thousand km. Obviously, this is prescribed solely for one purpose - to eliminate problems with its operation. You can also do this: bend the spring ears on the CTR weights of the regulator, selecting XX of the small spring. That is, the distributor cam returns to its original position. Just remember to bend the springs with pliers or pliers.
The distributor shaft should also be inspected carefully. If there is no play, but the cam shows signs of wear, that's okay. Lubrication will help solve everything.
A couple more important tips for bulkheading:
- The spring should ensure that the weight adheres to XX, i.e., not create advance. To do this, you will need to bend the small spring strut.
- At the same time, for similar purposes, the post of the large spring should also be bent, but to the position of the half-maximum stroke of the mini-spring.
About the drive mechanism
To transmit torque to the distributor shaft on the “six”, a helical gear is used, rotated by a timing chain (in common parlance – “hog”). Since the element is located horizontally and the distributor roller is vertical, there is an intermediary between them - the so-called fungus with oblique teeth and internal slots. This gear simultaneously turns 2 shafts - the oil pump and the distributor.
Both transmission links - the “hog” and the “fungus” - are designed for a long service life and are replaced during engine overhauls. The first part is removed after disassembling the timing chain drive, the second is pulled out through the upper hole in the cylinder block.
The VAZ 2106 distributor, equipped with a contact breaker, is a rather complex unit consisting of many small parts. Hence the unreliability of operation and constant failures of the spark generation system. The non-contact version of the distributor creates problems much less frequently, but in terms of performance characteristics it still falls short of modern ignition modules, which have no moving parts.
Source