Replacing the VAZ 2109 starter (2108, 2115, Kalina)
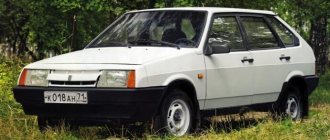
This article will discuss replacing the starter on a Kalina car. But due to the similar design of the engines, it is perfect for other cars of the VAZ family (2109, 2108, 2115, etc.).
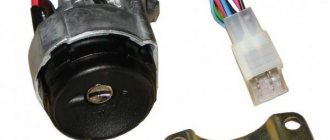
Initially, on my car produced in 2007 (1118 1.6 8kl), a starter manufactured by BATE 2109-3708010-01 was installed. After 80,000 kilometers, it began to show itself and periodically refused to work - I turn the key, and in response there is silence, nothing clicks, nothing spins. But after applying physical force - tapping it a little with a key - it came to life and started working again.
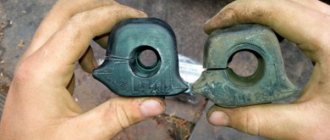
An autopsy showed that the brushes were almost completely worn out, 90 percent. In this case, you could simply replace them with new ones, but I did not like the design of the starter itself. The permanent magnets are not glued to the body, installing them in place is sheer fun, there is no gearbox. And it was precisely because of the last reason that I decided to replace the starter with a new one - with a gearbox. In my opinion, a starter with a gearbox should turn the engine better in winter, because it was very difficult for the old one to do this.
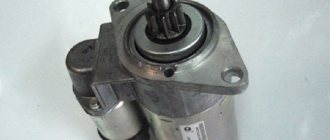
I bought a starter from ATEK 2108-000.
In order to remove the old starter you will have to remove the air filter.
Now you have excellent access to the starter itself. You need to disconnect two wires from the solenoid relay - one thin and one thick (constant + from the battery).
The starter is attached to the engine with three nuts, one of which is located at the bottom. It will be the most difficult to unscrew.
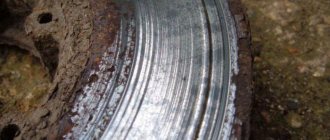
A bushing is pressed into the engine housing, which it is advisable to replace with a new one. I didn't do this because I thought it was still in pretty good condition. But getting it out is very problematic.
It is also advisable to clean everything from dirt. Lubricate the tip of the axle and the bendex gear a little. Now you can begin installing the new starter. And don't forget to connect all the wires in their places.
Before proceeding with the actual dismantling of the starter, it is imperative to disconnect the wire from the “-” terminal of the battery. At the same time, the procedure for removing the starter is not at all complicated, but rather inconvenient. It is best to carry out this work in a pit.
Work order:
1. The block with the wire is disconnected from the traction starter relay terminal.
2. Unscrew the fastening nut and remove the drive from the contact bolt of the traction relay.
3. The fastening bolts are unscrewed and the crankcase protection is removed.
4. At the bottom of the engine compartment there are two nuts that secure the starter - they need to be unscrewed.
5. At the top of the engine compartment, you need to unscrew another nut, with which the starter is attached.
6. The starter is removed from the VAZ car.
Perhaps that's all. The starter is installed based on this sequence of work only in reverse order.
Replacing the starter on a VAZ 2109 video bonus
The starter on a VAZ 2109 car is removed to replace or repair it. To carry out the work, prepare a standard set of tools, turn off the power to the car, and then drive it onto an inspection hole or overpass so that it is convenient to remove the lower engine protection. Perform the following sequence of actions:
First of all, it is necessary to disconnect all wires from the traction relay. Remove the block with wires from the relay connector, then unscrew the nuts and remove the high-voltage supply wire from the battery.
- Now you need to remove the engine crankcase protection; to do this, unscrew all the screws securing it around the perimeter and remove it.
- After that, immediately unscrew the two nuts securing the starter to the block from below.
Next, unscrew another nut from the top in the engine compartment and remove the starter.
At this point, the repair work to remove the starter on the VAZ 2109 car has been completed. Disassemble it and then repair it or completely replace it. Perform installation in reverse order. You must first lubricate the Bendix, namely its gear. Also carefully clean the traction relay terminals with sandpaper, since if they are heavily oxidized, a significant voltage drop in the circuit may occur and, as a result, the starter will not start well.
https://youtube.com/watch?v=DRhN3pF9UOE
Sources
- https://car-hobby.ru/zamena-startera-vaz-2109-2108-2115-kalina.html
- https://avtogury.ru/tyuning-dvigatelya/zamena-startera-na-vaz-21099-2109-2108-svoimi-rukami.html
- https://zubilovaz.ru/vaz-2109-kak-snyat-starter
vtulka_0.jpg
How can you get it out yourself? If you were able to notice that the starter sometimes cranks your power unit with tension when the battery is fully charged, then the culprit for the phenomenon is the armature, which touches the stator. A small problem is enough for the starter shaft to become slightly misaligned: the narrow gap disappears completely. But sometimes the reason lies in severe wear of the bearing (front). You can sleep peacefully for a day: this problem can be quickly solved. To eliminate it, you need to prepare a tap of suitable size, find a drill chuck, take a long bolt and an old bushing, a jar of nuts and a box of nails. Now it’s worth disconnecting the battery, the starter, and then removing it from the “coat,” that is, removing the wiring. Happened? Proceed to unscrew the lower bolt of the device and remove the remaining fasteners from the starter.
We take the sword and install it in the chuck of a hand drill: let's try to make a thread in the sleeve
Carefully! Carry out the following actions at low speeds. A shooter is like a girl: the object is fragile
Excessive force or slight misalignment can break it. God forbid this happens: you have to fork out money for a new product. Although you can carry out resuscitation using a long threaded bolt, turning out new grooves. Once they are ready, you need to insert the nails so that their tips protrude no more than a centimeter above the end.
It turned out to be a real masterpiece of futurism! We mount it into the bushing, perform manipulations, trying to pull out the fragment, while doing everything smoothly, without distortions. As soon as we succeed in cutting the revolutions, we pull out the tap, then insert a bolt of a suitable size and pull the sleeve out. This operation can be performed several times. The starter likes to be capricious due to the misalignment of the shaft, so after some time it will again be difficult to hold the bushing. What to do? Definitely don’t wipe the sweat from your face, finish repairing the VAZ 2109 starter, repeating monotonous actions. Get ready for a shopping trip. While you are enjoying the smell of iron, your significant other will buy a magazine where they will read an article about the history of the VAZ 2109 brand and regret that they purchased a non-domestic unit at a lower price.
Replacing the starter yourself
The starter is an important element of the electrical equipment of a car. Failure of this unit leads to the inability to start the engine, as well as to breakdowns of other components of the electrical circuit.
Therefore, the repair or replacement of this car part must be approached responsibly. In the event of a breakdown, the ideal option is to replace the starter with a new one that matches the quality of the original.
This will guarantee that the part will last a long time in the absence of other electrical problems in the car.
Starter disconnection process
The standard location of this element of electrical equipment in most vehicles is at the bottom of the engine. To make it convenient to remove it, you need to drive onto an inspection hole (or overpass). It is impossible to get the starter from above.
The inconvenient location is the only difficulty in the dismantling process. All basic operations are performed quite simply. No specific tools or special professional knowledge are required.
The starter must be removed with the ignition off and proceed in the following sequence:
- First you need to disconnect the battery ground terminal (removable);
- For convenient operation, remove the battery together with the holder;
- Next, you need to remove the protection at the bottom of the engine (if installed), which opens free access to the starter;
- Unscrew the clamp of the set of suitable wires;
- Unscrew and remove the wire holder from the relay;
- Unscrew the mounting bolts;
- Remove the completely free unit from below the car.
Now the starter can be repaired or replaced, which is done in the reverse order.
Starter installation sequence
All operations at this stage should be carried out carefully and carefully in accordance with the sequence given below.
To correctly install an element of electrical equipment in its rightful place, you need to do the following:
- Before installation, you must carefully inspect the starter, become familiar with its configuration, check the build quality and the presence of a guide bushing;
- The starter must be placed at the bottom of the vehicle in its place and first screwed with a long bolt, and then screw in the remaining mounting bolts and tighten;
- Install the wire terminals and tighten the nuts tightly;
- Install and secure the wiring harness holder;
- Screw on the battery support;
- Place the battery in its usual place;
- Connect the battery terminals, close it with the protective cover;
- Check the functionality of the electrical system and install the engine splash guard.
By performing these operations you can successfully install the starter, but the process can be easily simplified by following certain steps. For example, it is more convenient to work on a carburetor engine with the air filter removed. When the engine is an injector, it is better to first turn off the extension of the pipe, and it will be more convenient to perform all operations.
Removing the starter from the car.
- Battery disconnection.
- Removing the warm air intake pipe.
- Disconnecting and removing the starter shield. Use wrenches “10” and “13”.
- Using a “13” wrench, you need to unscrew the bolts securing the starter to the flywheel block. There are only 3 of them. It is especially inconvenient to unscrew the bottom bolt. It is necessary to use the inspection hole, so experienced drivers use only the two upper bolts.
- Next, by rocking the starter housing and moving it forward, you need to pull it out of the clutch plate.
- The wire of the solenoid relay is removed from the block.
Using a key set to “13”, unscrew the nut securing the cable to the positive pole of the battery.
- When all the wires are disconnected, remove the starter, moving it towards the car's radiator.
Checking and installing a VAZ starter on a car.
After removal, you need to wipe the starter with a rag to remove dirt. The solenoid relay is removed. Electrical parameters, integrity of insulating covers, and absence of traces of mechanical damage to the housing are checked. If necessary, the starter housing is disassembled. The absence of increased gaps on the front and rear bushings and the condition of the overrunning clutch are checked. It is also necessary to check the parameters of the armature and stator winding. The condition of the brushes is being inspected. If damage is detected, damaged parts are replaced. If there is serious damage, it is better to contact a specialized workshop. After repair, the starter is installed in the reverse order of removal.
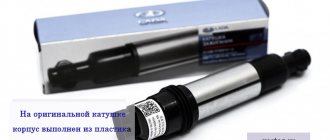
A very common cause of starter malfunction on a VAZ 2107 is the failure of the solenoid relay. And the main symptoms of this malfunction are that when you turn the ignition key, a click is heard, but the starter never starts to turn.
Replacing this part is quite simple, but the first step will be to completely remove the entire device from the car. Read more about this in the article: how to replace the starter on a VAZ 2107.
Once the device is removed, we only need:
- One flat screwdriver
- 10mm wrench or ratchet socket
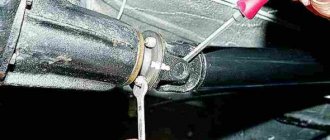
So, the first thing you need to do is unscrew the terminal securing nut, as shown in the photo below:
Then bend the terminal to the side so that in the future it does not interfere with removal:
Next, take a screwdriver and unscrew the two bolts. with which the retractor is actually attached to the starter itself:
And after that, you can safely remove the relay by turning it slightly in the desired direction, finding a comfortable position so that the rod disengages:
After this, we will need a new solenoid relay, the price of which for a VAZ 2107 is about 450 rubles in most stores in the country. The installation is carried out in the reverse order and there will be nothing complicated in this process either.
Removing the starter on a VAZ 2105 car is carried out for its repair, in order to replace failed elements, as well as when performing other work in which its presence will interfere with the progress of their work. Prepare a standard set of tools. Turn off the power to the car by disconnecting the negative terminal from the battery; on a car with an injection engine, remove the additional mudguard. Then do the following sequence of actions:
- Using a ten key, unscrew the lower bolt securing the starter shield.
- Next, unscrew the three nuts securing the starter itself to the clutch housing and move it forward on the studs.
- Now you need to remove the air filter housing in the case of a carburetor engine. If an injection system is used, then dismantle the two extensions of the inlet pipeline.
- Remove the starter shield. To do this, use a thirteen socket wrench to unscrew the second nut securing it. Then carefully remove it from its place.
- Also, using a thirteen key, unscrew and disconnect the positive wire connecting it to the battery from the solenoid relay.
- Disconnect the remaining wires from the solenoid relay.
- Then carefully remove the starter from the engine compartment.
At this point, the repair work to remove the starter on the VAZ 2105 car has been completed. Make the necessary repairs, then install in the reverse order.
Sources
- https://vazkorch.ru/dvigatel/zamena-startera-na-vaz-2105-2106-2107.html
- https://zarulemvaz.ru/zamena-vtyagivayushhego-rele-startera-na-vaz-2107/
- https://remont-vaz2106.ru/vaz-2105-snyatie-i-ustanovka-startera
Replacing the starter on VAZ 2108, VAZ 2109, VAZ 21099
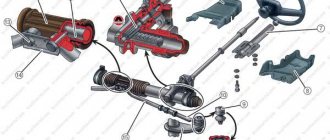
Welcome! The starter - it is only needed to start the car, then when the engine is running it is already turned off (its bendix with the gear goes back and thereby disengages from the flywheel), now we will explain everything to you, if you don’t understand, you already know that is a flywheel? This is a part that is installed at the end of the crankshaft (it is fixed directly at the tip), the flywheel spins along its axis if you start the car’s engine (the crankshaft also spins with it, and thanks to it, the flywheel spins if the crankshaft stands still, then you can’t move the flywheel in any way), and the starter is inserted with its front part (Mask) inside this very flywheel and when you start to start the engine of the car, the bendix with the gear engages in the flywheel standing still (There the starter gear comes into contact with the teeth flywheel), after entering the starter, current flows and the starter gear begins to rotate (gear rotation speed is 250 crankshaft revolutions per minute, respectively 4 revolutions per second), thereby (the starter gear engages with the flywheel) and the flywheel also begins to rotate, Well, together with the flywheel, the crankshaft rotates thanks to which the car’s engine starts, and when you remove your hand from the ignition key, it is pulled back with the help of a spring and thereby the bendix at the starter also returns to its place (the gear disengages with the flywheel), and this is how the car starts.
Note! Front-wheel drive cars are much more convenient to repair than classic ones, so replacing a starter in Samara doesn’t require a lot of tools or time (In classics, to remove the starter, you need to disassemble the engine a little because you can’t get to it, since it’s in very low convenient place), stock up on the most important thing: Wrenches and an inspection hole in order to crawl under the bottom of the car!
Where is the starter located? On cars of the Samara or Samara 2 family (It makes no difference), the starter is located in the same place, if you look from the top of the car, the first thing you will need to find is the battery (It is shown with a red arrow in the small photo), then by looking deeper into the engine compartment you can see the starter itself (it is indicated by a white arrow), the easiest way is to change it and look at it from the bottom of the car, that is, drive the car into the inspection hole and look at the starter from there (a large photo was taken from the bottom of the car) it will be inserted into the engine.
When should you replace the starter? When he stops starting the car, for example, you turn the ignition key and it clicks (You will immediately understand this when you encounter this problem), or you also turn the ignition key, the bendix does not engage and the starter idles (In this case, there will be a sound like if the starter spins, but the engine won’t start), well, another case is when the starter spins but very, very poorly (Slowly), here either your battery is dead, charge it in this case, or the bushings on the starter are damaged disrepair and the shaft has shifted in this case, replace the bushings with new ones or the starter itself, if you do not have the money to buy a new unit, but have a little time, you can remove the starter, disassemble it and change all the faulty parts in it, more details about For information on how to disassemble and reassemble the starter, read the article: “Repairing a starter on a car”, by the way, it says about replacing these bushings.
Removing and connecting a new starter
In absolutely any of the cases described above, you will be faced with the need to take a closer look at the device. It should be noted that with the release of the VAZ 2109, the question of how to remove the starter became more easily resolved, because in this model the arrangement of components under the hood is much simpler. So, you will need socket and socket wrenches and an inspection hole. Now, regardless of whether it is necessary to replace only the bushings or the entire VAZ 2109 starter, it must be removed. First of all, all the wires of the traction relay are disconnected, after which the block is dismantled. Don't forget to remove the high voltage wire from the battery.
The next step is to dismantle the engine crankcase protection; to do this, simply unscrew the mounting bolts. Then the approach to the mechanism of interest to us is cleared. To remove it, you need to unscrew three nuts - two on the block and one in the engine compartment. The connection diagram for the new VAZ 2109 starter is the same, only it is in the reverse order, so it will not cause any difficulties.
How does a traction relay work?
To understand for yourself the reasons why the starter solenoid relay does not work, to understand for yourself how the entire mechanism works.
The principle of operation of the starter retractor relay is as follows. The starter coil receives power from the battery. At the same time, a magnetic field is created in it, which acts on the armature.
The armature begins to move, compressing the return spring, and engages the bendix, which in turn is connected to the splines of the flywheel crown.
After the contact elements close, the retractor winding stops receiving power, but the armature remains inside thanks to the magnetic field of the holding coil.
After the engine starts, the holding coil loses power and, under the action of the return spring, the armature returns to its original position. In this case, the bendix disengages.
A few words about the nine starter
Before we learn how to use the repair kit for the starter we are interested in, let's figure out what this mechanism is. It is a simple electric motor with four poles and brushes, which is attached to the flywheel ring gear. The following starter models were installed on “nines” of different years of production: 29.3708; 5712.3708; 423.3708.
Any of them operates on a mixed excitation principle and has a traction relay with two windings. The differences between these starters lie in the design of the commutator device and the drive. Thus, the model 423 mechanism has a cylindrical type commutator, the 29 model has an end-mounted one, and the 5712 starter has a planetary gearbox installed in the drive. Their repair kit is absolutely identical, as well as their malfunctions.
You can install the starter relay on the VAZ 2110 yourself
Those people who have a VAZ 2110 have certainly encountered a situation where the starter did not turn after the key was turned, and some clicks are heard, which indicate that the retractor relay is working. In such a situation, the question immediately arises: where is the VAZ 2110 starter relay located and how to find it faster. This question is also relevant when tuning a VAZ 2111.
But we have interesting news for you: the VAZ 2110 simply does not have a starter relay. There is a solenoid relay, to which the positive contact is supplied from the ignition switch. The relay is installed on the starter, its size is 2 times smaller than that of the starter, and it is round in shape.
Next, we will highlight some popular malfunctions that usually arise in the VAZ 2110, related to the VAZ 2110 starter relay and the starter; by the way, a lot of things are used in the VAZ 2115, so by tuning this car, many problems can be avoided.
What negatively affects the performance of the starter
As a rule, problems with the starter occur in winter. At subzero temperatures, it has to experience extremely high loads. If the device is old, it simply refuses to function, which is not surprising, because it takes a large current load, which is equal to 450 amperes. This current value causes certain common starter failures, which include burning of contacts on the relay of the described device. In this case, we are talking about melting the wires that are connected to the stator motor and the “plus” of the battery.
Starter replacement and installation procedure
It is worth familiarizing yourself with the process of removing the device in advance. This will avoid difficulties during repairs. It is also advisable to find out in advance where the starter is located.
Otherwise, various difficult situations may arise. The removal process includes the main steps:
- the terminals from the car battery are disconnected and the contact wires from the starter itself are disconnected;
- Next you need to unscrew the special nut that holds the block with the wires;
- it is necessary to dismantle the crankcase protection - if there is one at all (without this it is simply impossible to remove the starter);
- the lower part of the starter is equipped with two nuts that need to be unscrewed;
- then the starter is simply moved towards the wheel and removed from its seat.
After dismantling, it will be possible to carefully inspect the Bendix splines and carry out troubleshooting. Installation is carried out in reverse order
It is only important to lubricate all threaded connections with graphite lubricant. She will not let the carving turn sour over time
Removal
Well, the check showed that the starter needs to be repaired. Therefore, the first thing we do is dismantle it.
- Secure the car stationary by turning on the handbrake and placing stoppers under the wheels.
- Move the negative terminal from the battery to the side. This will deprive your car of power.
- Disconnect the wire connector from the starter solenoid relay terminal.
- Unscrew the fastening nut from the relay contact bolt and remove the wire.
- If there is a crankcase guard, remove it. Here all the bolts are simply unscrewed.
- The 2 starter fixing nuts are unscrewed from the bottom of the engine compartment. But the third one is more conveniently removed from inside the engine compartment.
- Having removed the fasteners and disconnected the wiring, you can safely remove your starter from the clutch housing.
Before starting work, be sure to clean the device from accumulated dirt so that it does not get inside the structure and reduce all repair efforts to nothing.
Do-it-yourself starter repair in a VAZ 2108
The starter of the VAZ 2108 car is the most frequently broken part
Therefore, it is important to be able to repair and replace it yourself, without resorting to the services of car services, it will be much cheaper. This simple step is easy to do by following the detailed instructions. The main task of the starter is to convert mechanical energy into electrical energy in sufficient quantity to start the engine
The main task of the starter is to convert mechanical energy into electrical energy in sufficient quantity to start the engine.
Starter VAZ 2108
Long-term operation of the starter is contraindicated, but car enthusiasts do this a lot, especially in low temperatures in winter. This use is one of the most common causes of VAZ 2108 starter failure.
The most common breakdowns are:
- The relay does not work and the armature does not turn;
- Low armature rotation speed;
- The crankshaft does not rotate;
- The starter continues to operate even though the engine has already started.
All these problems require repair. To carry out repair work, you will need to remove, check and disassemble the starter of the VAZ 2108.
How to remove the starter?
- Place the VAZ 2108 car on an inspection hole, overpass or on a jack;
- Place the gearbox in neutral;
- Remove the shield;
- Pull the hose out of the air collector;
- Remove the starter.
How to check the strater?
In order to check the windings you will need a multimeter.
- Place the part on its end, with the leads of the windings pointing upward;
- One probe of the device must be applied to the positive terminal, the other to the starter bolts;
- We check whether the starter turns or not;
- If it turns poorly, it means the starter is not working;
- If the starter is working well, you need to check the relay;
- To test the relay, pass a voltage of 12 V to the terminal, apply the minus to the body;
- If the ohmmeter does not show voltage surges on the scale, then the relay needs to be repaired or replaced. The VAZ 2108 relay needs to be disassembled only if it requires repairs.
Check the surface of the commutator and the armature, clean them of dirt with a cloth soaked in alcohol. There is no need to use acetone or other strong solvents for this purpose. The core and cage also need to be wiped dry and treated with a small amount of silicone grease.
How to disassemble the starter?
Prepare a free work surface and a set of tools. Inspect the VAZ 2108 starter carefully before you start disassembling it. Mark the wires so as not to mix them up during assembly.
Anchor VAZ 2108
- Using a 10mm wrench, unscrew the two stud nuts;
- Remove the starter and armature from the studs;
- Remove the center gear from the armature shaft;
- Unscrew the two screws of the back cover;
- Remove the back cover;
- Remove the brushes;
- Remove the anchor;
- Remove the adjusting washer from the armature axle;
- Remove the armature shaft support;
- Remove the drive planetary gears;
- Remove the drive;
- Separate the support from the lever;
- Place the end part of the ring gear on a block of wood;
- Place the 13 key on the restrictor ring according to the instructions;
- Use a hammer to compress the locking ring;
- Remove the locking ring;
- Remove the drive gear travel limiting ring;
- Remove the drive assembly;
- Unclench the retaining ring with pliers;
- Take it off;
- Remove the washer and drive shaft support;
- Remove the planetary gear ring gear from the drive shaft;
- Inspect the commutator and armature windings (there should be no traces of charring);
- Scratches on the commutator must be treated with fine-grained sandpaper;
- If the anchor is badly burned or worn out, it must be replaced with a new one;
- The shaft neck also needs to be treated with fine-grained sandpaper if scoring or enveloping of bearing materials is detected;
- Carry out a control measurement of the armature winding with an ohmmeter to detect short circuits;
- Check the brushes for wear, replace if necessary;
- Reassemble according to the instructions, but in reverse order;
- Before installing the brush holders, you need to remove all the springs and push the brushes into the guides.
This instruction will enable both beginners and experienced car enthusiasts to save money on starter repair and replacement services.
Is it worth converting the carburetor to an injector?
Not many VAZ 2109 drivers decide to convert a carburetor engine, and such fears are undoubtedly reasonable.
- Firstly, it is impossible to say with one hundred percent certainty that an injection engine is more economical. If it's about environmental performance, then you might want to think about it. However, for this purpose, instead of an injector, you can use one of the vortex aerodynamic devices, for example, Ecovortex or Ecotop. In addition, such a system can be installed in a matter of minutes.
- Secondly, replacing a carburetor is quite expensive. The cost of all the parts, and there are about 50 of them, can be approximately 500 USD. e. or more.
- In addition, if you are not confident in your skills, it is better to leave the job to professionals. If you have never encountered even minor repairs to a VAZ 2109 engine, then perhaps you should look for other ways to solve the problem.
However, if you decide to make the switch, please read the following recommendations carefully.
Basic starter failures
The starter ensures the engine starts. It creates crankshaft torque at the required speed for the degree of compression and combustion of the combustible mixture. If the starter starts to work intermittently, you need to find out the reason for this behavior.
If the starter does not want to turn or does it slowly, pay attention to the electrical circuit and battery:
- The battery is not charged;
- contacts are poorly secured;
- poor contact and broken wire from the solenoid relay terminal;
- damaged wire between battery and starter;
- mismatch of oil in the crankcase in terms of viscosity;
- The ignition switch contact group is not functioning.
If the starter does not work or simply does not turn on,
this could be: a relay malfunction, a short circuit in the winding of the starter itself.
If the starter armature rotates, but the starter cannot crank the crankshaft
this is: slipping of the freewheel or tight running of the screw thread drive.
There are times when the starter does not turn off after starting.
The reasons may be: drives jamming on the armature shaft, jamming in the ignition switch, bearing wear. Such breakdowns can be corrected by replacing damaged parts.
If you notice that the starter has started to make noise.
This could be: the drive gear is out of mesh, the fastening or the starter poles are loose.
The starter is subject to heavy loads, since it has to rotate a large flywheel and drive the engine piston group. Therefore, you should treat it carefully and carry out diagnostics to avoid breakdowns.
Removal
Well, the check showed that the starter needs to be repaired. Therefore, the first thing we do is dismantle it.
- Secure the car stationary by turning on the handbrake and placing stoppers under the wheels.
- Move the negative terminal from the battery to the side. This will deprive your car of power.
- Disconnect the wire connector from the starter solenoid relay terminal.
- Unscrew the fastening nut from the relay contact bolt and remove the wire.
- If there is a crankcase guard, remove it. Here all the bolts are simply unscrewed.
- The 2 starter fixing nuts are unscrewed from the bottom of the engine compartment. But the third one is more conveniently removed from inside the engine compartment.
- Having removed the fasteners and disconnected the wiring, you can safely remove your starter from the clutch housing.
Before starting work, be sure to clean the device from accumulated dirt so that it does not get inside the structure and reduce all repair efforts to nothing.
Rare situations
They happen noticeably less frequently than those we described above. But under no circumstances should we exclude them.
After reviewing the situations below, compare them with the behavior of your starter and a car that has stopped turning or clicks but does not turn.
- With an injection engine at a frosty temperature of about -20 degrees Celsius, all devices function. This indicates that the battery is fully charged. At the same time, for some reason the starter refuses to turn. Your actions:
- If there are no clicks when you try to start the engine, check the condition of the fuse, wiring and solenoid relay;
- If there is a clicking noise, the most likely source of the problem is the solenoid relay. It must be replaced.
- The engine started normally throughout the day, but in the evening it suddenly stopped working normally. When you turn the key in the ignition switch, there is only a click, but the starter does not turn. When you try to start the engine several times in a row, several clicks are heard. Your actions: Charge the battery;
- Crimp, strip and tighten the contacts on the starter and battery;
- If the first two points do not produce results, check the battery itself. To do this, the wire closes its contacts. If the battery is working properly, a spark will appear that melts the wire;
- Connect the plus from the battery directly to the solenoid relay. If the starter is silent, replace the starter.
car battery
- During the day the car started without problems. But after being idle for several minutes, attempts to start the car fail. When you turn the key, the relay is activated, but the starter stubbornly refuses to turn. By closing the two bolts of the solenoid relay, everything started. We reached our destination, stopped, and turned off the engine. When I try to start again, the same situation occurs. Just locking the bolts no longer works. Your actions:
- Disassemble the starter housing;
- Check the condition of the brushes. There is a high probability that they have been completely erased. Hence this effect;
- Replace the brushes with new ones. This is cheaper than completely replacing the unit.
https://youtube.com/watch?v=dc-7XAXjy5o
- The starter doesn't turn over. When you try to close it, only noise arises, like when a drill is working. The engine shows no signs of life. But it was possible to start it from the pushrod without any problems. Your actions:
- Make sure your starter is working properly;
- If everything is fine with it, go to the mounting block and check the fuses;
- Also examine the condition of the ignition switch. It is possible that the problem is with him;
- Do not forget to check the wiring for breaks and short circuits;
- Check the status of the contacts. It’s not uncommon that minus does not reach the starter relay only for the banal reason of oxidation or burnt wire.
Having understood the reasons for the failure of the starter, you can bring the device back to life on your own. Don't rush to throw away your old starter and buy a new one. The practice of VAZ 2109 owners shows that partial repairs, and sometimes even simple cleaning of the device, make it possible to restore the functionality of one of the main elements of the ignition system for a long time.
Loading …
Features of the design and repair of the VAZ-2114 starter
In this short article we will try to understand in as much detail as possible how the starter is repaired on a VAZ-2114. This is a device that allows you to start the engine. A starter is an electric motor that spins the engine crankshaft. Due to its design, it engages with the crankshaft gear only after turning the ignition key. But what if suddenly nothing happens when you turn the key? This is exactly what we will look into.
Design
Where the starter is installed on the VAZ-2114, there are several more elements - an air filter, a thermostat, etc. Therefore, in order to gain free access to all components of the launch system, you will have to remove some parts. The starter design consists of the following components:
- Back cover.
- Bronze bushings.
- Copper-graphite brushes.
- Armature with winding (rotor).
- Stator with windings.
- Bendix - overrunning clutch, fork and gear.
- Gear starters have a planetary mechanism.
- Front cover.
- Solenoid relay.
Next, we proceed to describe the operation of the mechanism.
How does a starter work?
On VAZ-2114 cars, starters with a planetary gearbox are most often installed. They allow you to significantly increase the power applied to the flywheel crown. And the most important thing is that this design allows the use of a low power electric motor. The work occurs according to the following algorithm:
- When you turn the ignition key, voltage is supplied to the relay.
- The contacts are closed and voltage is applied to the solenoid relay.
- Under the influence of a magnetic field, the core is retracted and the power contacts are closed.
- In parallel with this, the gear on the bendix moves along the axis and is brought into engagement with the flywheel ring.
- Voltage is supplied to the windings of the electric motor, the rotor begins to rotate.
- And if there are no malfunctions, the car engine starts.
But it also happens that the VAZ-2114 does not start, but the starter turns. In this case, the breakdown must be looked for in the ignition system, timing drive, and fuel supply.
Typical breakdowns
If the starter on a VAZ-2114 does not turn, then the following faults may be present:
- The brushes are worn out.
- The battery is low.
- Broken armature or stator winding.
- Failure of the solenoid relay means destruction of the windings.
Please note that if the bendix and overrunning clutch break down, the starter will continue to turn, but there will be no engagement with the ring
Often the reason that the starter turns weakly is a bad mass or low battery charge. In this case, you will need to replace the bronze bushings and the wire that connects the gearbox and the negative terminal of the battery
Please note that the starter winding power circuit is not protected by a fuse.
Therefore, it is extremely important to timely replace brushes and clean the slats. This will avoid the occurrence of a short circuit, which will lead to inevitable breakdown of the starter.
This will avoid the occurrence of a short circuit, which will lead to inevitable breakdown of the starter.
How to remove the unit?
In order to repair the VAZ-2114 starter, you will need to dismantle it. To do this, just perform the following manipulations:
- Disconnect the wire from the negative terminal of the battery. If this is not done, a short circuit may occur.
- To free access to the starter, remove the air purification filter housing.
- Now, using a key set to “13”, you need to unscrew the nut that secures the power wire to the solenoid relay.
- The thin wire also needs to be removed.
- Using the same wrench, unscrew the three nuts that secure the housing to the clutch housing.
- Remove the unit.
Now you can begin repairing the VAZ-2114 starter. To perform it efficiently, you will have to completely disassemble the mechanism.
Carrying out major repairs
The most vulnerable component in the entire device is the graphite brushes. The fact is that during operation of the mechanism they rub against the lamellas and heat up due to the current flowing through them. But there are many more nuances that should be taken into account during repairs. Here is a list of works:
- Replacing brushes is mandatory when carrying out repairs.
- Cleaning the lamellas on the rotor is mandatory. If they are destroyed, you will have to install a new rotor.
- Replacing the bronze bushing on the rear cover of the starter.
- Replacing the bendix is not necessary, but it is advisable to do so.
- Installing a new bushing in the internal combustion engine block (second rotor support point).