Before reading this article, I RECOMMEND YOU to go to my YouTube channel: Pasha-aGs In the PLAYLISTS section you will find video reports of PRO Opel Astra H. Share your experience in the comments under the video. WHO IS INTERESTED in my CHANNEL, click on the red SUBSCRIBE button. There is a BELL next to the SUBSCRIBE button. Click on this bell so you don't miss new videos.
Friends! Errors actually appear for a reason. If the check comes out, it means there is some kind of malfunction in one or another engine control system. But there are also simple intermittent failures such as poor contact. Elementarily, even oxidized contacts under the hood can be a bad contact (error 000970). The weak link is all kinds of contacts and connecting blocks. As for the wires themselves, in humid air over several years, a thin protective oxide film first forms on the surface of the copper. Then this surface begins to gradually darken, creating a dark brown color. When copper remains in humid air for a long time, copper salts begin to accumulate on the surface of the formed protective layer and a new layer of a greenish tint, called patina, appears. Patina is the greenish tint that we can observe on the surface of oxidized copper wires. In fact, patina does not dissolve in water, is not affected by humidity, and is also neutral to copper, so it not only does not destroy it, but also performs a protective function. And only humid air saturated with carbon dioxide, sulfides, chlorides can cause metal corrosion, destroying its protective film. In fact, under normal conditions, a dry climate does not affect the destruction of metal at all. Today, there are methods for artificially creating patina; they are most often used by artists and sculptors, making objects look like antiques. Contacts are also susceptible to oxidation! And to this we can also add the fact that no matter how carefully the contact surfaces of the contacts are processed during manufacturing, electric current passes between them only at individual points, precisely in those places where these surfaces come into contact. Those. even with very careful grinding, microscopic peaks and valleys still remain on the surfaces. It is almost impossible to obtain an absolutely smooth surface. Due to the fact that the contacts have a small area, this provides significant transition resistance for the passage of electric current. Transient contact resistance is a value that occurs when current passes from one surface to another.
It is useless to simply erase unresolved errors, because... They will appear again. There may or may not be a check. Errors that appear do not go away. They, or rather their codes, are stored in the ECU memory and hang on even after the defects have been eliminated. At the end of the video, I showed my observations of the appearance of the check and errors after they were deleted.
The abundance of electronics in Opel Astra H cars raises many questions related to it. One of the most popular: what does the appearing inscription InSP mean?
Astra H 1.6 115 - sometimes the check engine light with the key lights up | Topic started by Juwayria
Using the pedals I discovered 2 errors 036504 and 001466 - both are related to the camshaft, soon the check engine light with the key came on, I went for diagnostics, they said everything was screwed up, the oil was not flowing well somewhere, don’t worry, it’s like a historical problem, they reset the errors, a week later again this crap, and now should I reset errors every time I drive? And I noticed that sometimes after 3000 rpm it slowly picks up speed in 4 gears, or this is how it should be, who the hell knows, maybe someone has encountered such a problem
Result: replacement of both gears (since if you have to go there only once), 2 valves (grids are screwed right away), I also changed the belt. By the way, the gears now have different numbers (replaced by the manufacturer with modernized ones) and the valves are now also modernized.
1 kg tomato 350 g grated carrots 1 kg sweet pepper 300 g onions 1 kg cabbage Cut the vegetables, mix and add:
50 g salt 250 ml r. butter 50 g sugar 80 g vinegar
For manual transmission
In an Opel Astra H with a manual (manual) or robotic (Easytronic) gearbox, you must perform the following steps:
- Depress the gas and brake pedals at the same time (not too much). Hold it a little.
Press the brake and gas pedals at the same time
Insert the key into the ignition switch
Panel with ESP inscription and error code
For automatic transmission
In a car with an automatic (automatic) transmission, you must perform the following steps:
- Insert the key into the ignition switch, but do not start the engine!
- Turn on the ignition.
- Place your foot on the brake pedal, press and continue to hold.
- Switch the automatic transmission selector to the Drive position.
Switch the automatic transmission selector to the Drive position
Turn on the ignition
Read the error code and its meaning
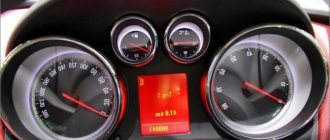
If all actions are performed correctly, the ECN message and error codes in the form of 6-digit numbers will light up at the mileage location.
If there are several errors, the codes will be shown one after another. The end of the list will be displayed with six zeros. By the way, if only zeros appear immediately, this means that there are no problems.
The first four digits are the fault code, the next two are its meaning. Please note: if there are five digits, in order to decipher the code, you need to add a zero at the beginning of the digits.
Instructions for resetting the InSP inscription (main method)
- Turn off the car.
- Press and hold the daily mileage reset button. The dashboard display will display the distance traveled and the daily mileage. After 3 seconds, the InSP value will appear on the screen.
- Without removing your finger from the reset button, press the brake pedal.
- While holding the button and pedal, turn on the ignition again. A flashing InSP indication will appear on the display, and after 10 seconds the maximum mileage value will appear (35 thousand km for a gasoline engine and 50 thousand km for a diesel engine). The inscription will blink for a while and then disappear - InSP has been reset to its initial state.
Decoding codes
To decipher codes (fault codes for Opel Astra H), it is important to understand the conventional letter designations adopted by the manufacturer. It's P, B, C or U.
- Code P – operation of the Opel Astra H engine and (or) automatic transmission.
- Code B – “body systems” (airbag, power windows, central locking, etc.).
- Code C – chassis system (chassis).
- Code U is a system of interaction between electronic units (for example, to the CAN bus).
Important: using the diagnostics described above, you only get errors of type P****. Faults of types C****, B**** and U**** can only be read using special diagnostic equipment!
For example, code 000970 is U 000970, that is, U0009 (symptom 70). Its reading (decoding) – no HS-CAN communication, bus shorted.
The second position (number) indicates:
- “0” (zero) – common for OBD II codes (OBD II codes are standardized fault identifiers);
- “1” and “2” (one and two) – year of the manufacturer;
- “3” (three) – reserve.
The third position is the type of fault.
- “1” and “2” (one and two) – fuel system or air supply;
- “3” (three) – ignition system;
- “4” (four) – auxiliary control;
- “5” (five) – idle;
- “6” (six) – ECU or its circuits;
- “7” and “8” – transmission.
Positions 4 and 5 are the serial number of the error.
Description of errors
Reading and decoding errors Opel Astra H
The table below presents a list of some fault codes (codes and their interpretation) for the Opel Astra H in Russian. Of course, this is not a complete list, but just a small part of it. If you do not find the code you need in the table, we recommend using additional resources with a complete and constantly updated list of errors.
- Malfunction of the intake manifold absolute pressure sensor circuit;
- open circuit, low or high voltage.
- malfunction of the intake air temperature sensor;
- high or low signal.
Example: error 011014 (Opel Astra H) is displayed in the window. We discard the last 2 digits and find the error code P0110 and its interpretation in the table.
- malfunction of adjusting the amount of fuel (block 1);
- O2 sensor, lean exhaust gas;
- clogged channels or faulty EGR valve.
Example: during diagnostics, errors 017011, 017012 occurred. We discard the value (the last 2 digits), we get error P0170.
- automatic switching failure;
- The transmission control module requests an upcoming maintenance date;
- signal from the O2 sensor indicating rich or lean exhaust.
Example: when the numbers 170000 appear, we discard the last 2 (in our case this is the value 00), we get an error P 1700.
- Check the fuel metering solenoid valve circuit.
- low pressure in the line.
Example: when diagnosing a car, we have the numbers 119167. We discard the last 2 (that is, 67). We get error P 1191.
Service warning
For many of us, our cars are our most valuable possessions. It is necessary for a convenient and uninterrupted daily existence. Without cars, many would be at a complete loss - unable to travel to work, take their children to school, and many other normal things.
Anyone who's been without a car for a day or longer knows how inconvenient it can be - so it makes sense to take care of this important lifeline and maintain it regularly. The typical first service for a used car will be more complex than for a new model. Obviously, the “old ones” will have more wear and tear.
Temporary Service
Interim maintenance will include checking your vehicle's engine oil and filters, electronics, lights (both interior and exterior), operation of all moving parts, battery, coolant, brake fluid and tires, windshield washer fluid, suspension and steering.
Full service
A full service will include all of the above and go into more detail about the brakes, drive belt, radiator, engine and transmission, fuel lines, air conditioning, instead of a visual brake inspection, a full brake inspection will be performed, as well as a full oil change.
The first service for a new car usually includes an oil and oil filter change, and possibly an air filter change. Since the car is relatively new, this is usually a fairly simple and inexpensive procedure.
As with the first maintenance, the second is usually scheduled after 12 months or when the specified mileage has been reached - this will be recorded in your service book. Keeping track of maintenance deadlines without checking the log doesn't have to be difficult; In more modern cars, a warning may flash on the LCD screen or it may coincide with the MOT.
Usually the same maintenance options are offered: minor (intermediate) and full. The checks performed depend on the option you choose and the workshop, but a standard service should definitely include an oil and filter change, as well as a visual inspection of the following components:
- tires;
- brakes;
- headlights;
- coolant, windshield washer, brake fluid, and power steering fluid levels;
- wipers.
Please be aware that if any of these items are replaced, additional costs may apply.
A full service is much more comprehensive and your mechanic will perform checks that are not included in the optional package. For this reason, it is advisable that you have a full service at least every two years. In addition to the checks mentioned above, the mechanic will monitor the condition of your spark plugs, oil and air filters, and light bulbs. The mechanic will also remove the wheel to take a closer look at the brakes.
The most common service for any car is changing the engine oil. Motor oil is used to lubricate the moving parts of a car engine. Lubrication reduces friction and heat generated during engine and transmission operation. Your Opel Astra may also be suffering from serious engine oil problems such as oil leaks, low pressure or too much oil in the engine after a certain period of time. In this case, it is necessary to strictly adhere to the service intervals recommended by the manufacturer.
Another common maintenance requirement for your vehicle is a battery interservice inspection. Your vehicle's service light may be on because your battery needs to be replaced. Typically the battery indicator will also light up if this is the case. There are a few things that can go wrong that should be understood before you begin replacing the battery, which are explained in more detail on the charge indicator.
How to read codes
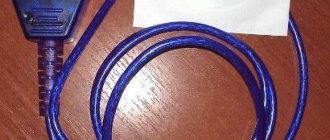
So, the most convenient way to diagnose Opel Astra H and G errors is using a scanner. For your home, it’s better to buy a budget OR-SOM for 2,500 rubles. It connects to the Opel Astra diagnostic connector located under the handbrake. Recognizes well and gives an informative picture.
And when everything is ready, you can proceed to diagnostics. According to OBD standards, the encryption consists of 5 characters: 1 letter and 4 numbers. Each of them indicates the type of failure, specificity and specific damaged unit.
The exception is the code "000000". It says that no errors are observed.
Categories indicated by letter
The first character of the Opel Astra H error code, indicating the global location of the defect. Total and 4:
- C – the problem affects the car suspension;
- P – damage in the transmission;
- B – there is a defect in the body structure: locks, power windows, immobilizer, etc.;
- U – violation of automotive electrical system.
This is what the transcript looks like in Russian.
What does the first digit in the error code mean?
The first number, also known as the second character, usually means nothing. Indicates the specificity of the error and is not involved in diagnostic procedures:
- 0 – only a common attribute for all OBD 2 standard codes;
- 1 and 3 – set the category of the defect;
- 3 is a reserve number.
Decoding the third digit from the beginning in the code
- 1 and 2 – indicates a malfunction in the fuel injection system;
- 3 – ignition defect detected;
- 4 – additional control damaged;
- 5 – problems at idle;
- 6 – violation of any electrical circuit;
- 7 and 8 – the strip affects the checkpoint.
Fault table
To understand the errors that a car may show during operation, we suggest that you familiarize yourself with the table below. Codes indicating problematic operation of the engine, electrical wiring, sensors and other elements are deciphered here.
| Name | Decoding |
| P0100 or P0101 | Indicates poor performance or failure of the air flow sensor. Usually a check of the power wires is required |
| P0011 | The system responsible for synchronizing the intake camshaft is not working or is damaged. When a six-digit code appears, just discard the last two digits |
| P0014 | The solenoid valves in the camshaft phase shifters do not function. An identical problem can also be displayed in the form of codes 1463 or 001463. A check of the sensor's functionality is required |
| P0068 | The load does not match the throttle position. Usually the problem is solved by cleaning the node |
| P0102 - P0103 | The air flow sensor has failed, you need to check the device and the wiring connecting it |
| P0105 - P0108 | Possible breakdown of the air flow pressure regulator |
| P0110 - P0113 | Intake air temperature sensor is broken or not working |
| P0115 - P0118 | The t-coolant sensor has failed. Usually the problem is confirmed by the chaotic operation of the temperature sensor needle or the motor temperature exceeding the permissible limit. Checking the device and electrical circuit is required |
| P0120 - P0123 | Throttle position controller “A” is not connected correctly, is not receiving power, or is faulty |
| P0125 | Excessively low antifreeze temperature in a closed circuit, or sensor failure |
| P0130 - P0167 | One of the lambda probes is not working correctly, you need to check the oxygen controllers and the wiring that powers them |
| P0170 | The fuel remaining diagnostic system does not work. The presence of a problem can also be indicated by codes 017011/017012 |
| P0171 or P0172 | Lean or rich fuel mixture. Perhaps we are talking about a lack of compression, or a broken oxygen mass flow sensor |
| P0173 - P0175 | The mixture is poorly formed in the 2nd cylinder |
| P0176 - P0179 | The emission controller or its wiring is damaged |
| P0180 - P0188 | Failure of the fuel temperature check sensor |
| P0190 - P0194 | Failure of the fuel pressure controller in the rail. The sensor is checked, the connectors on the block are cleaned, and the wiring is diagnosed |
| P0195 - P0199 | The operation of the device that determines the temperature of the engine fluid in the engine is malfunctioning; failure is possible |
| P0200 - P0214 | Injectors are not working correctly |
| P0217 | Engine overheating |
| P0218 | Transmission overheating |
| P0219 | Engine speed too high |
| P0220 - P0229 | The controller responsible for checking the throttle position is not working correctly |
| P0230 - P0233 | Incorrect signal from the fuel pump. This is usually caused by damaged wiring. |
| P0235 - P0242 | Turbocharging sensors are not working correctly or have failed |
| P0243 - P0250 | Exhaust gas turbine shutter solenoid failure |
| P0251 - P0260 | In turbocharged engines - breakdown of the pumping device of the fuel injection system |
| P0261 - P0296 | Injectors are faulty |
| P0300 - P0312 | The presence of misfires in the ignition system associated with poor performance of any of the engine cylinders |
| P0320 - P0323 | The ignition distributor or distributor is faulty |
| P0325 - P0329 | Knock controller malfunction |
| P0335 - P0339 | The crankshaft position controller “A” has failed or is not receiving enough power. |
| P0340 - P0344 | The camshaft adjuster is not working properly |
| P0350 - P0362 | Damage to high-voltage wires supplying current from the ignition coil |
| P0370 - P0378 | Incorrect data from sensors B and A from timers |
| P0385 - P0389 | Crankshaft position controller B has failed |
| P0420 - P0434 | Failure of catalyst sensors |
| P0440 - P0455 | The fuel supply control system functions intermittently |
| P0460 - P0464 | Fuel level controller is broken |
| P0465 - P0469 | The air flow regulator in the purge system is damaged or not powered |
| P0470 - P0479 | Exhaust gas pressure sensor failure |
| P0480 - P0503 | The speedometer controller is not working correctly or is faulty |
| P0505 - P0507 | Engine idle speed control does not work |
ABS errors
When the ABS system fails, the problems are displayed as a two-digit combination.
| Code name | Designation |
| 16 | The power line connecting the left front wheel valve solenoid is damaged or shorted to ground. The code is recognized only when driving at a speed of more than six kilometers per hour |
| 17 | The electrical circuit responsible for controlling the right front wheel solenoid valve has failed |
| 18 | Rear brake system valve line is closed or damaged |
| 19 | The valve relays are faulty. An error can be detected if there is a voltage supplied to the device exceeding 5 volts for thirty seconds |
| 25 | The gear wheel responsible for controlling the rotation speed has failed or is badly worn. This code is only displayed when the wheel is spinning at least 25% faster than other devices for two minutes |
| 35 | The electrical circuit that closes the pump relay that supplies fuel back does not work. Damage registration is possible if the response lasts more than five seconds |
| 37 | The line responsible for turning off the brake pedal is damaged. Usually the cause is a broken sensor wire |
| 39 | Incorrect operation of the left front wheel controller. You need to make sure the integrity of the cable and sensor |
| 41 | The ABS sensor on the left front wheel is broken or disconnected. You need to unscrew the wheel and try to insert the plug into the connector with your hands, sometimes it just comes off. |
| 42 | Identical to the previous error, but for the controller on the right |
| 48 | Low car battery voltage. The driver's task is to check the operation of the battery and diagnose the presence of acid in the banks. It is recommended to perform testing with the power unit switched off or running. |
| 55 | The control module of the anti-lock braking system has failed |
How to reset errors
In some cases, the error appears for no reason or the problem has been "cured" but the Check Engine doesn't think so. In this case, you can try resetting the indicator so that it does not interfere.
If you have EasyTronic pre-installed, try the following:
- Press and hold the gas and brake.
- Insert the key and turn on the ignition without starting the engine.
- So, without taking your feet off the pedals, wait a few seconds. Soon the car will emit a warning signal and the error will be reset.
With automatic transmission
For an automatic transmission, the process looks slightly different:
- Start the ignition without turning on the engine.
- Hold the brake (without gas) and do not release.
- Set the lever to D-mode.
- Turn off the ignition and take your foot off the brake.
- Now press the brake together with the gas.
- Turn the ignition on again without the engine.
- Wait until the diagnostics are completed and the alarm sounds.
By the way, here you need to press until the limit switch operates. Therefore, spare no effort.
How to reset inSP on Astra
Service intervals are an indicator on the mileage panel. They usually occur after 8-10 thousand kilometers. This way the car reminds you that you need to go to a service center. Naturally, this is only a recommendation. If everything is in order with the car, then you can simply reset the intervals. How to remove inSP?
- Turn off the ignition.
- The daily mileage indicator should appear on the display. At this point you need to press the reset button.
- Hold the button for about 10 seconds and then turn on the ignition again. At this point, inSP will appear briefly and then disappear and the total mileage will appear.
After this, the low beam and reversing lamp go out 30 seconds after closing the driver's door.
Parking in an unlit place
If you need to leave the car in a dimly lit place, then with the engine turned off, you need to turn on the turn signal left or right. After this, the dimensions remain lit on only one side (“indicated by the turn signal”).
Adjusting the wiper pause
After briefly pressing down (one stroke), wait the required time and turn on the intermittent mode (up 1 time). After this, the wipers clean the glass at a specified interval.
The interval is adjustable from 2 to 15 seconds. The standard interval is 4 seconds.
Reading Error Codes
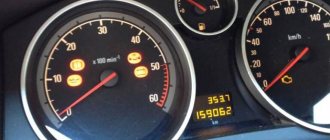
If the car icon with a key lights up on the instrument panel, this means that errors have occurred in the operation of the car and they need to be read in order to determine the malfunction. Errors in a car have different statuses, so even if they are present, the Check Engine indicator may not light up. So to speak, in normal mode, this requires a dealer Tech 2 scanner. And if you don’t have it at hand or don’t want to just go to the dealer and spend money and time? For this, the manufacturer has provided a manual mode.
For manual transmission or Easytronic: Simultaneously press the gas and brake pedals and hold them. Only THEN insert the key into the ignition. Turn on the ignition (but do not start the car!) Wait a few seconds, holding the pedals, until the message appears
For automatic transmission: Insert the key into the ignition switch. Turn on the ignition (do not start the engine!) Press the brake pedal and hold it Switch the automatic transmission selector to position “D” (Drive) Turn off the ignition and release the brake. Now press the gas pedal and brake pedal together and hold. Turn on the ignition (do not start the engine!) Wait a few seconds, holding the pedals, until the message appears. If everything is done correctly, then the message “ECN” (error code number) and error codes will be displayed at the mileage location.
Features: When pressing the pedals, it is important that the limit switches work, so we press the brake with medium force, and press the gas “to the floor” until it clicks. The first 4 digits show the error code, the next two indicate its meaning. Errors are shown automatically one after another, the end of the list is indicated by zeros (as in the photo). If only zeros are shown, this indicates the absence of errors; the explanation of all the rest is given below. IMPORTANT ! If there are 5 numbers, for example, 70405, then add 0 in front of them to get 070405. Next - as usual
Reset InSP label
InSP - indication of time until service maintenance. To view the remaining mileage, press the odometer button with the ignition off - the daily mileage will be displayed, then press and hold the same button again for more than 2 seconds. The display will show “InSP” and the remaining mileage until maintenance.
It should be noted that despite the standard service interval for Russia of 15,000 km (see service book), the inscription usually appears in the region of 8,000-10,000 km.
Disabling the InSP sign - Basic method: Turn off the ignition, press and hold the daily mileage reset button (the display on the instrument panel will show the trip meter and the daily mileage counter), after about 3 seconds the maintenance interval indication appears (for example, “InSP 15.000” or “InSP 0” "), without releasing the reset button, additionally press the brake pedal, hold both and, without releasing the button and pedal, turn on the ignition; the display will show a flashing indication "InSP - - -", then after about 10 seconds the display will show the maximum mileage (" InSP 35,000 km" for a petrol engine or "InSP 50,000 km" for a diesel engine with ECO Service-Flex). The inscription will blink for a while and then disappear. The maintenance interval is then reset to its initial state.
Disabling InSP - Alternative method: Turn off the ignition and remove the key from the ignition; press and hold the daily mileage reset button (the display on the instrument panel will show the trip meter and daily mileage counter) Insert the key and turn on the ignition while holding down the daily mileage button on the display the display will flash “InSP — — -“, then after about 10 seconds the display will show the maximum mileage (“InSP 35,000 km” for a petrol engine or “InSP 50,000 km” for a diesel engine with ECO Service-Flex). The inscription will blink for a while and then disappear. The maintenance interval is then reset to its initial state.
Standard alarm functions
The alarm controls: - opening of the car doors, trunk, hood - penetration into the car interior using - a switchable volume sensor - changes in the vehicle's tilt - turning on the ignition
Opening all windows: after disarming the car, you must hold down the “open” button on the key fob
Closing all windows: after setting the car alarm, you must hold down the “close” button on the key fob
To initialize the BC test mode on the graphic display (GID) with the radio turned on, press and hold the Settings button until a sound signal (about 4 seconds)
After this, we switch to the on-board computer mode (the “BC” button). Next, press the BC button to scroll through the test mode screens. Explanation of some parameters (installation date, firmware version, display matrix temperature, voltmeter, recommended voltage, backlight brightness in %, acceleration in m/s, speed in km/h, antifreeze temperature, air sensor temperature, fuel consumption ml/sec and what the heck!)
Raising the wipers up in winter (fixed)
To prevent snow from sticking to the wipers in winter, you can move them up - with the ignition off, pull the lever up and down and hold in this position - the wipers will rise
The standard interval is 4 seconds.
Opel Astra j upper level information display (on-board computer)
The inscription will blink for a while and then disappear. The screen will first display a flashing InSP indication, then the maximum mileage.
We discard the last 2, that is, we now press the gas pedal and brake pedal together and hold it.
P Malfunction of the primary circuit of the fuel pump. One of the signs of a malfunction is that the generator light may suddenly light up when the engine is turned on and also suddenly go out.
Adjustment of maintenance period
How to reset the Opel Astra G (Opel Astra Classic II) service light. By year: 1998, 1999, 2000, 2001, 2002, 2003, 2004, 2005, 2006:
- The ignition is turned off.
- Press and hold the trip odometer reset button.
- Turn on the ignition one position before starting the engine.
- The INSP technical symbols will appear on the display for approximately 2 seconds.
- Hold down the trip odometer button until the text “- – -” appears on the display.
If the above procedure for resetting the Opel Astra G service indicator does not work, try this:
- Get into the car and close the door.
- Press and hold the brake pedal.
- Press and hold the trip reset button with the brake still applied.
- Turn on the ignition one position before starting the engine.
- The display will show “InSP” and under InSP it will be “- – – -”.
- Continue holding the release button and the brake pedal for about 15 seconds.
At this point, InSP should flash, and then the computer will reset the mileage to 19,000 (in some cases, instead of 19,000, another number will appear, for example, 15,000 or 30,000). You can release the off button and brake pedal and the indicator will be reset.
How do you reset the Opel Astra H (Opel Astra Classic III) service indicator? By year: 2004, 2005, 2006, 2007, 2008, 2009, 2010, 2011, 2012:
- Get into the car and close the door.
- Press and hold the brake pedal.
- Press and hold the shutdown reset button with the brake still depressed.
- Turn on the ignition one position before starting the engine.
- The display will show “InSP” and under InSP it will be “- – – -”.
- Continue holding the release button and the brake pedal for about 15 seconds.
At this point, InSP should flash and then reset the mileage to 19,000 (in some cases, instead of 19,000, another number will appear, for example, 15,000 or 30,000). You can release the off button and brake pedal and the indicator will be reset.
If the above procedure for resetting the Opel Astra H service indicator does not work, try this:
- The ignition is turned off.
- Press and hold the trip odometer reset button.
- Turn on the ignition one position before starting the engine.
- The INSP symbols will light up on the display for approximately 2 seconds.
- Hold down the trip odometer button until the text “- – -” appears on the display.
- You can release the power off button, the indicator is now reset.
How can you reset the service interval on Opel Astra J 2009, 2010, 2011, 2012:
- Turn on the ignition one position before starting the engine.
- Press the MENU button until the vehicle information and settings menu appears on the display.
- Rotate the two arrow button located next to the MENU button up and down until the message “Oil Life Remaining” appears.
- Press and hold the SET/CLR button and press the brake pedal.
- Release the SET/CLR button and brake pedal, turn off the ignition.
How to reset errors?
After this, the dimensions remain on only on one side, “indicated by the turn signal.” After this, the wipers clean the glass at a specified interval.
The interval is adjustable from 2 to 15 seconds. The standard interval is 4 seconds.
Errors in a car have different statuses, so even if they are present, the Check Engine indicator may not light up. So to speak, in normal mode, this requires a dealer Tech 2 scanner.
What if you don’t have it at hand or don’t want to just go to the dealer and waste money and time? For this, the manufacturer has provided a manual mode. Simultaneously depress the gas and brake pedals and hold them. Only THEN insert the key into the ignition. Turn on the ignition but do not start the car!
Knock in the rear or front suspension of Nissan Almera G15, N16 and Classic
Everyone has the same problem with the automatic transmission: foam, jerking, vibration, etc. While surfing the Internet I came across the following post:
Resetting automatic transmission adaptation: 1. Turn off the ignition. 2. Turn on the ignition, but do not start the engine. All sensors and devices should turn on. If you have a key start, turn it to position 2 without pressing the brake pedal. If you turn on the START / STOP button, press the START button once. 3. Press the gas pedal all the way to the floor. Keep the pedal pressed for at least 30 seconds. 4. Release the pedal. Start the engine. 5. This procedure reset the adaptation of the Opel automatic transmission to factory settings. The transmission will now adapt to your driving style. Thank you charluwa
