Today we will get acquainted with the stove and its structure on a VAZ 2110 car.
As you know, the heating system has a direct impact on the level of comfort. If in summer there is no special need for interior heating, then in autumn and winter it is problematic to imagine traveling without it. Theoretically, you can drive, but lower temperatures are unlikely to benefit your health.
Dismantling the heater
Device
Periodic malfunctions in the operation of the heating system for the VAZ 2110 are an ordinary and common thing. Therefore, the owners of this model from the Russian automaker have to dig around in their own garage every now and then or send the car for repairs to specialists from service stations.
Heater circuit diagram
To understand exactly how to carry out repair and preventative measures, you first need to familiarize yourself with the diagram of the stove and its components.
Element
Peculiarities
A fan is mounted on it. Both elements contribute to the injection of heated air into the cabin
The entire operation of the heating system is based on this component. Remove the radiator and the heater will not work. Interestingly, the new model stove does not have a valve that shut off the flow of coolant through the radiator. Older devices have a faucet. The faucet was removed in order to avoid leaks, which were common on old stoves. Plus, they got rid of the tap for faster and more efficient heating of the interior. Although many owners of new tens do not agree with this decision, therefore, during repairs, they install a faucet on the stove
In total, the stove has three of them. The first is responsible for air intake recirculation, the second is for opening and closing the heater duct, and the third is intended for control and is considered the most important
This element is responsible for the speed of blowing hot air into the cabin.
All elements, including additional valves, shields, fittings, are combined into a single unit. It, enclosed in a housing, is located in the engine compartment near the dashboard.
Air ducts
Air ducts are another block of the heating system. They come from the stove and perform several different functions at once:
- The interior is ventilated through central nozzles;
- Distribute the air through an appropriate distributor that supplies heat or air for ventilation;
- Another pair of air ducts serve to heat the rear row of seats;
- The system, which includes five nozzles at once, warms the feet;
- A pair of side air ducts take over the functions of heating the glass and partially heat the interior. This makes heating more efficient;
- A pair of nozzles are used for ventilation.
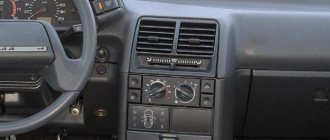
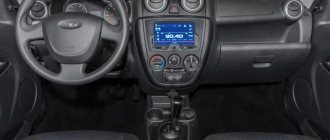
Electronic stove control
This electronic control unit operates directly from the passenger compartment. It consists of two main elements.
- Pen. Using the controller knob, the user sets the required temperature, which the stove then generates. Control is carried out by turning the knob in one direction or another, depending on what degree of heating you require at the moment.
- Temperature sensor. It is responsible for activating the stove when the temperature drops by more than 2 degrees compared to the value set on the controller. The sensor is equipped with a micro motor. When the handle is in position A, the micromotor in the stove block turns on, the damper is activated, thereby causing proper heating.
Control block
Before starting repairs of the entire stove, it is strongly recommended to check the condition of the sensor. You can find it near the heater lamp on the ceiling of the car. The device cannot be repaired. Replacement only.
Design Features
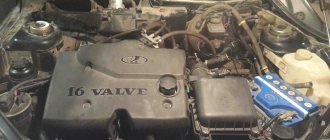
For the VAZ 2110, it is possible to install two types of stoves - new and old. Regardless of the engine used (injection or carburetor), there are no fundamental differences in the designs of the stoves.
But what is the difference between the new and old type stoves? Let's try to figure it out.
- Radiator design. This is the main difference between the devices. Therefore, when replacing a radiator from an old one to a new one, be sure to take into account the installation nuances;
- The controller knob on stoves is slightly different. Old-style heaters have a main problem - they have been discontinued. They cannot be an analogue for 4 and 5 position controllers, which began to be equipped with dozens of them in the fall of 2003;
- The micro-gear motors for the stoves are different, starting in September of the same 2003. The difference lies in the shaft position sensors (resistors). Therefore, when making repairs, make sure that the devices are truly interchangeable and that you bought old-style resistors for your old stove, not new ones. Otherwise the gearmotor will not work.
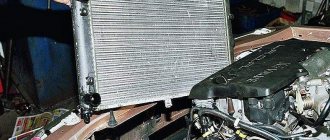
Which radiator is better: copper or aluminum cooling radiator
Before replacing the cooling radiator, it is necessary to choose the right high-quality analogue. Today you can buy a VAZ 2110 radiator made of aluminum or copper, the part is offered from various manufacturers.
- An aluminum radiator is lighter in weight and more affordable. At the same time, the thermal conductivity of such a solution is lower, and there is also a higher tendency to corrosion. In any case, if we consider the aluminum radiator of the VAZ 2110, the price will be 25-30% lower than for copper radiators.
- A copper radiator is more durable and better resists corrosion, which increases the service life of this element.
Copper also conducts heat better, which improves the performance of the engine cooling system. The main disadvantage of copper radiators is their higher cost and fewer available options on the market.
As for popular manufacturers and costs, the 2110 Kraft radiator will be the most affordable. You can also opt for Luzar or DAAZ. It is important to understand that the price of a VAZ 2110 radiator should not be the main deciding factor. The first place should be the quality of the product and full compliance with the engine, taking into account the displacement.
Repair
As we have already noted, the design of stoves on dozens with carburetor and injection engines has practically no differences. Therefore, the repair instructions below are suitable for owners of a VAZ 2110 with both types of power units.
If you are planning to overhaul your old-style stove, we recommend starting with the purchase of a radiator. Use copper as it is more efficient and helps the heater work better.
To carry out repairs correctly, strictly follow the points presented in our instructions and rely on video materials.
- There is a plug on the engine block through which coolant is drained into any container. If you plan to use the same antifreeze or antifreeze again, choose clean containers.
- Next you need to move the frill forward. This process will take quite a long time, so be patient.
- Next, you need to remove the windshield wipers and get rid of as much as possible of everything that could interfere with the repair process.
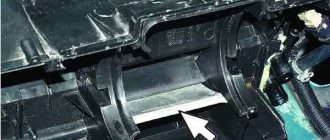
- Remove the body of your stove. It is divided into two parts, which is important to know in advance. The front part of the stove body is removed directly along with the fan.
- After this comes the stage of dismantling the cabin filter. Check its current status. If the filter is dirty, this is an excellent reason to replace it.
- The next stage involves removing the second part of the housing.
- Loosen the clamps used on the hoses a little. This will allow you to easily remove the hoses.
- Having applied some effort, you can now finally remove the radiator from its seat.
Car heating system design
The design of the heating system on the "ten"
Where is the VAZ heater control unit, heater tap, micromotor gearbox and other design elements of the old and new design, how to turn the heater on and off? First, let's talk about the device. As practice shows, owners of “ten” cars usually repair heating systems and other inoperative components of the car on their own.
Therefore, first you need to consider the design of the stove; below is a description of the main elements of the old and new-style systems:
- The VAZ 2110 stove is controlled by an electric motor. The VAZ 2110 heater fan is installed on the latter. These components are designed to pump hot air flow into the car interior.
- The next element of the circuit is the radiator, on which, in principle, the entire operation of the heating system is based. Without it, the operation of the unit will be impossible. It should be noted that the stove valve on the new model version is missing - it was dismantled in order to prevent possible leaks that often happened on old systems. In addition, removing the tap allowed the interior to be heated more quickly and efficiently. However, many “ten” owners today do not agree with such an engineering solution. Therefore, often, when tuning and modifying the VAZ 2110 stove with their own hands, “VAZ drivers” install the faucet back on their car.
- The stove on the VAZ is equipped with three dampers. One of them is responsible for air intake recirculation, the second ensures the opening and closing of the heating duct, and the third is necessary for controlling the system.
- The additional resistor of the VAZ 2110 heater (resistance) is essentially a regulator responsible for changing the speed of air flow inside the car.
Heating unit for VAZ 2110
As for secondary elements, such as valves, fittings, rheostat, shields, they are combined into one unit, installed in the body and located in the engine compartment. It can be found next to the control panel.
An equally important block of the heating system on any stove, including the VAZ 2110, are the air ducts that come from the unit and perform the following tasks:
- ventilation of the vehicle interior;
- air flow distribution via switch and distribution device;
- two air ducts serve as heating for the rear seats;
- five air ducts perform the function of heating the feet;
- On the sides there are air ducts designed to heat the windows and interior;
- Several more elements are designed for interior ventilation.
Air Ducts and Heater Controls
The electronic control system for the VAZ stove is located directly in the car’s interior and consists of several components:
- The switch itself. Using the knob, you can switch and set the desired temperature. The switch is adjusted by turning the knob to the right or left in accordance with the needs of the motorist.
- Temperature regulator. This element is designed to automatically turn on the heating system if the air temperature in the cabin drops by more than two degrees compared to the set parameter. The heater motor begins to function to heat the interior to the desired temperature, and the regulator itself is equipped with a micromotor. When the switch is set to position A, the micromotor is automatically activated, the damper is turned on, as a result of which the interior begins to heat up.
Operating principle of the stove
As for the operating principle, it is partially described above. As you know, a temperature controller is installed on the stream, designed to send information about the temperature, after which the heating system control unit activates the operation of the stove gear motor. The latter is responsible for opening or closing the damper, which is responsible for supplying air flow into the cabin. Further adjustment of the flow is carried out when the controller detects a change in temperature (video author - Fire Screen - Live).
Typical faults
Below are the main malfunctions of heating systems:
- When the heating is turned on, hot air blows. In this case, there may be many reasons. It is necessary to diagnose the heater motor, gear motor, temperature controller on the ceiling, and the ACS controller. In some cases, the problem lies in the radiator, which, due to incorrect operation, cannot warm up the air flow that passes through it.
- Often the cause of incorrect operation of the heating system is dampers that are unable to open or close well. Since the damper is made of plastic, it tends to deform over time; in this case, installing a metal damper will solve the problem. To understand the condition of this element, you simply need to dismantle the deflector. Turn on the heating and try turning the controls - if the damper does not respond to your actions at all, then you need to look for the problem further.
- Fan failure can be determined by the absence of characteristic noise. But if there is no noise, the problem may be a failed fuse or oxidized wiring contacts. In order to get to the fan, you need to dismantle the so-called apron.
- In the engine compartment there is a radiator for the heating system, next to the fan. To remove the radiator, the fan will also need to be removed. If the radiator begins to leak, you will be able to see puddles of coolant under the floor mats; sometimes this problem is caused by bad clamps. One way or another, it is necessary to determine the location of the leak and solve the problem to restore the system's functionality.
- Many owners of "ten" are faced with such a problem as the lack of backlight on the heater control panel. Car enthusiasts associate the lack of lighting with stove malfunctions, but this is completely wrong. If there is no backlight, this may only be due to the wiring (video author - Aleks B).
Choosing engine crankcase protection for a VAZ 2110
Nowadays, you can purchase sump and crankcase protection for a VAZ 2110 at any domestic auto parts store. It costs up to 2,500 thousand rubles. But you need to think about which one to choose.
| Type of protection | Peculiarities |
| Aluminum alloy guard | You can buy aluminum protection for the VAZ 2110. Its advantage is its light weight. It usually fits on standard tens of mounts and installing it is not difficult. It is simple and reliable. |
| Steel protection with powder paint | You can purchase and install steel protection. According to technical characteristics, it is more reliable, but it has more weight. For example, Kamaz makes protection four millimeters thick. Of course, it is very reliable, but when braking, the car begins to “nod off” even more and sags more when driving on a dirt road. Accordingly, the grinding of the bottom of the car on the ground is heard more often. Therefore, it is better to take steel protection with a thickness of 2 mm, and make sure that it has stiffening ribs. This is the optimal combination of weight and strength. |
Consequences of a bottom impact
An impact with the bottom can damage the oil pan. The problem is that there is a breather in the pan of the car, which has an oil intake pipe. And this tube is located a few centimeters from the bottom of the crankcase, not far from the drain hole. When you hit a hard surface, the crankcase will immediately dent. It all depends on how deep it is. If the dent is deep, then there is a very high probability of damage to the suction tube. If it breaks above the oil level, lubricant will stop flowing into the engine. You understand what consequences this will lead to. In this case, it is better to turn off the engine immediately.
If the dent is large
To check the serviceability of the breather, start the engine. At the same time, if the oil pressure check does not go out, then the engine must be turned off immediately. Then add a little oil and start the engine again. If after starting the pressure light does not go out and you see leaking oil under the car, most likely you will have to change the breather. In this case, we turn off the unit and call a friend or acquaintance so that he can tow the car to a car service center or home. You can use a tow truck service.
We find out whether the breather is damaged or not
If the light goes out during startup, then you can slowly drive home or to a car service center. In this case, it is better not to give the car high speeds, since the breather tube may be damaged. In this case, there may not be enough oil to lubricate the engine. By the way, the old system, when the instrument panel showed the oil pressure in the system, was more advanced.
By looking at the oil pressure, it was possible to more clearly determine the damage to the breather. The modern system is structured differently. If the control light on the instrument panel is on, it means no oil is entering the engine at all, and if it doesn’t light up, then everything is fine. This is where the catch lies. Oil may enter the engine, but not in sufficient quantities and we will never know about it. There will be increased wear on the piston group. In this case, after arriving home or at a car service center, you need to remove the engine pan and inspect the breather.
If the breather is not damaged, then we correct the dent on the pallet and put it back. If the breather is damaged, replace it with a new one. When installing the crankcase, you need to buy a new gasket, since the old one is most likely unusable. Complete sealing is required. This is a very important point. If the gasket sucks in air, the pressure in the engine will be insufficient, which can lead to failure of the components and mechanisms of the machine.
DIY repair
Regardless of whether you have an injection “ten” or a carburetor, the repair procedure is carried out according to the same principle. If you decide to tune the system by adding new lighting, then the console will have to be disassembled. To provide improved illumination, it will be necessary to install diode bulbs instead of conventional lamps.
As for repairs, if it is necessary to replace the radiator, it is best to use a copper device, since it is more effective in itself:
- First, the antifreeze must be drained from the system through a special plug on the engine block.
- Then you need to move the frill forward - this step may take some time.
- Then you should dismantle the windshield wipers, as well as other elements that may interfere with the repair.
- After these steps, the housing of the heating system is removed - it is divided into 2 parts, the front one is dismantled with the fan itself.
- Next, you should remove the cabin filter element and check its condition. If you see that the filter is very dirty, then it should be changed.
- Then the second part of the heater housing is dismantled.
- Now you need to loosen the clamps on the pipes, after which you can remove the lines themselves.
- The last step is to remove the radiator and replace it with a new one. Subsequently, all steps must be repeated in reverse order for assembly.
Sorry, there are no surveys available at this time.
Do-it-yourself replacement of a VAZ 2110 engine mount
So, having decided that replacing the engine mounts is inevitable (either one or several, for example, replacing the rear engine mount), you need to prepare the car and tools for repair work (drive the car into a pit or onto a lift, have a set of keys, jacks, etc.).
In the case of an 8 valve engine:
- First, use a 13mm wrench to unscrew the alternator belt tensioner bolt and remove the belt;
- A jack is placed under the engine, a wooden beam or a thick board is placed on the top of the jack;
- Next, the engine is raised with a jack so as to relieve the support;
- Then, using a 15mm wrench, unscrew the central nut securing the right airbag;
- Then, using a 13mm wrench, unscrew the bolts securing the pillow to the bracket
- Next, from below in the area of the right arch, using a 17 key, you need to unscrew 3 bolts (the bracket is attached to the spar);
- Now the bracket can be removed and the engine mount can be replaced by tightening all the bolts back after installation.
- Upon completion, the jack at the bottom moves under the box, which raises the gearbox;
- Now, using a 15 wrench, unscrew the central nut securing the pillow on the left;
- Afterwards, you can unscrew the 2 bolts securing the support with a 13 key, and the support itself is removed;
- Next, a new support is installed and reassembled;
- Having completed the stage, you need to go down under the car, then unscrew a couple of 17 nuts (attach the pillow to the body);
- After this, unscrew two more nuts securing the element to the gearbox and remove the rear support;
- All that remains is to use a 19mm wrench to unscrew the nut that secures the cushion to the bracket, then remove the old cushion and install the new element;
- Reassembly completes the process; at this point, the replacement of the VAZ 2110 engine mounts can be considered completed;
Let us also add that for VAZ engines with 16 valves, both the process of removing and replacing the side airbags itself is no different from the process discussed above. When it comes to replacing the front lower airbag, you need to work from below.
First, use a 15mm wrench to unscrew the bolt that secures the front lower support rod to the cross member of the car's front suspension. Afterwards, the nut of the bolt that attaches the support to the engine bracket is unscrewed, and the bolt itself is removed.
To unscrew the bolt, you will need two 15mm wrenches. Now the support can be removed and only the pad or the weight of the entire element can be changed. Now we can proceed to reverse assembly.
The overall process of replacing the pillows is completed by unscrewing the fastening bolt of the upper front support to the body with a 17mm wrench. The bolt nut can be held by hand.
Then the bolt and nut are removed, after which, using a 15mm wrench, the bolt securing the front upper support to the power unit bracket is unscrewed (the bolt and nut are also removed). Next, the support is removed, the cushion or the entire assembly is changed, and reassembly is performed.
- As you can see, the VAZ 2110 16-valve engine mount changes almost exactly the same as on an 8-valve internal combustion engine. The only difference is that there are more supports themselves, and the rear support is changed from below (in the bottom area). At the same time, with the right approach, there are still no special difficulties; it is quite possible to change the cushions on this type of internal combustion engine with your own hands in the conditions of an ordinary garage.
Having installed new VAZ engine mounts (engine mounts for 2110, 2112 and other similar models), you should start the engine to check. If the pillows or supports are of high quality, and the replacement itself is carried out correctly, normally there will be practically no vibrations.
Replacing the right damper support
Before changing the right engine mount of a VAZ 2110 car following the video example, you should install wheel chocks and also disconnect the negative terminal from the battery. The further process is carried out according to the following scheme:
- Loosen the generator fasteners with a 13mm wrench and remove the belt drive.
- Loosen the tensioner bolt.
- Jack up the right side of the car.
- Using a 15mm wrench, unscrew the nut securing the support.
- Using a 13mm wrench, unscrew the two bolts securing the support to the bracket.
- Using a 17mm socket, unscrew the three bolts securing the bracket to the right side member.
- Remove the bracket and install the new support in the reverse order.
Replacing the left damper support
The procedure for changing the engine damper on the left side of the car is performed in the following order:
- Remove the car crankcase protection.
- Place a jack under the car in the area of the gearbox, place a wooden beam and lift the car, removing the load from the support.
- Using a 15mm socket and a wrench, unscrew the support pin fasteners.
- Release the support stop.
- Lower the jack slightly to freely remove the support pin.
- Using a 13mm socket, remove the fasteners of the engine support to the body.
- Pull the support towards the motor.
- Remove the lower support stop and install the new part in the reverse order.
Replacing the rear damper mount
Reading how to change the rear engine mounts on a VAZ 2110 and watching the video is half the battle. It is important to strictly adhere to the order of repair work:
- Remove the engine crankcase protection.
- Using a 17mm socket, unscrew the two nuts securing the support to the car body.
- Using two 19mm wrenches, unscrew the two bolts securing the gearbox and remove the support.
- Clamp the removed bracket in a vice and use a 19mm wrench to unscrew the bolt securing the support.
- Remove the bolt and install a new rubber support in the bracket.
- Assembly of the unit is performed in the reverse order while maintaining the perpendicularity of the mating planes.
Based on practical experience, it can be argued that the process of replacing the damper supports of the power unit on the “ten” is not particularly difficult. Usually, after repair, vibrations disappear, but if everything remains unchanged, then the solution to the problem may lie in a different plane. It makes sense then to look for a problem in the suspension or in the CV joint components.
Video “Instructions for dismantling the heater radiator on a VAZ 2110”
How to replace the heater radiator on a domestic “ten” at home, see the video below (the author of the video is NlCKRUS).
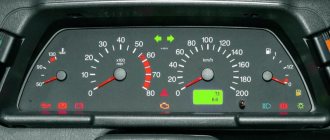
On the VAZ 10th family, which includes the VAZ 2110-2112 models, the designers used an electronically controlled interior heating system, thanks to which the temperature set by the driver is maintained automatically.
On the VAZ-2110, instead of a manual heater control mechanism with a cable drive of the main elements - the coolant shut-off valve and dampers, an automatic heater control system (AHC) controller with a temperature sensor and a gearmotor that regulates the position of the dampers are used.
In such a stove, the valve for shutting off the antifreeze supply is no longer used, and the adjustment of the heater operating mode - “heating” or “ventilation” - is carried out by a central damper, which directs the air flow through the radiator or bypassing it.
When to change the radiator?
Radiator radiator leak - the malfunction is indisputable, noticeable immediately, if not by traces of antifreeze under the car, or by a drop in the fluid level in the expansion tank.
The situation is much more complicated when there are no signs of leakage, and the radiator does not heat up even at high antifreeze temperatures. In this case, either a clogged or clogged radiator or several other reasons could be to blame for the drop in temperature:
- air clogging in the cooling system;
- broken thermostat;
- crack in the hot air distribution system;
- air leakage through leaky air ducts (this is the most severe disease of the entire tenth family);
- low level of antifreeze in the expansion tank.
Antifreeze leaks under the radiator are an obvious reason to look for a leak.
Heating system diagnostics
In a word, before buying a new radiator or removing the old one for repairs, you must carefully check the entire cooling system so as not to throw money away.
Speaking of money, it's a breeze - a gas station will require at least 2000 rubles to replace the radiator. Therefore, it is cheaper to do all the work on replacing the radiator yourself.
How malfunctions manifest themselves
The automatic temperature maintenance system used on the VAZ-2110 is more convenient in terms of control, since the automatic control system does everything independently, but is less reliable than a mechanical cable drive. Moreover, problems are caused by the electronic and electrical components of the stove - the controller, temperature sensor and micromotor gearbox, the central damper, which regulates the air supply to the cabin from the outside.
Problems with the operation of the VAZ-2110 heater related to the damper:
- lack of temperature control (only hot or cold air comes from the stove) regardless of the position of the handle on the controller;
- insufficient air heating (even when setting the handle to the maximum temperature);
- squeaks, knocks and extraneous noises after setting the temperature.
The cause of such problems is the central damper of the VAZ-2110 stove, which is adjusted by the controller through a gearbox. The design of the stove includes another damper - air distribution into zones. It is controlled using a handle mounted on the central air supply deflector into the cabin, so malfunctions with this part are rare.
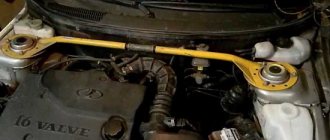
Design and purpose of tens engine mounts
Over the years, vast practical experience has been accumulated on the topic of how to change engine mounts on a VAZ 2110, and videos of repair processes can also be found in abundance. However, few people pay attention to the features of the part. And, it must be said, it is in vain, because such knowledge will help to accurately determine the source of vibration and purchase the necessary spare part for repair.
The main purpose of the engine support is to reduce the level of vibration transmitted from the power unit to the car body. The rubber-metal structure consists of a steel base with a thick rubber cushion. The device has proven itself well, since it is quite reliable and is worth the money.
The eight-valve Lada 2110 engines are attached to the body at three points: right, left and rear. The side supports connect the body to the engine block through through holes. The rear support is attached with two bolts to the gearbox, and two nuts to the body. The importance of this damper part is very significant - it prevents longitudinal vibrations of the internal combustion engine during braking and acceleration.
When should you change the power unit mounts on a VAZ 2110: signs and reasons
Before you change the engine mounts of a VAZ 2110 car and watch a video of this process, you need to study the signs that indicate a breakdown of the rubber-metal mounts. The main symptoms characterizing problems with damper units:
- Vibrations transmitted to the steering wheel and pedal unit when idling.
- Extraneous noise in the cabin when moving on an uneven surface.
- A characteristic knocking sound in the engine compartment during acceleration and braking.
When drawing conclusions after your observations, you should not confuse vibrations on the steering wheel during braking, which are associated with defects in the brake discs or pads. To be more convincing, you need to open the hood and inspect the power unit supports. If you place your palm on a running internal combustion engine, you can feel changes in its operation.
Many years of experience in operating the Lada 2110 allows us to assert that the reasons for the failure of damper cushions are the following factors:
- Deformation phenomena on the rubber support due to mechanical and temperature influences, as well as due to exhausted service life.
- Cracking and delamination of rubber from exposure to chemically active components.
- Loss of elasticity caused by temperature changes.
Premature failure of the damper support can be caused by the owner’s excessive enthusiasm for such extreme techniques as sudden starts and emergency braking. Suspension parts are already subject to serious stress while driving, and a sporty driving style further increases the risk of their failure.
Features of the design of the VAZ - 2110 stove damper
Note that VAZ-2110 of different years of manufacture uses heaters that differ in design:
1. Old-style stove damper
Old heaters use two central dampers, one of which blocks the flow of air into the cabin from the outside, and the second one redirects the air flow to the heater radiator or bypasses it. They are interconnected by drives and opened by a micromotor gearbox.
2. New sample
Tool
Everything you need to replace a radiator can be found in the garage of an ordinary car enthusiast. If there is a need to replace the stove radiator, you will need to buy some materials and spare parts:
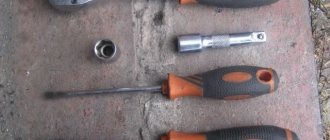
- a set of wrenches, preferably with a ratchet and extension;
- figured and flat screwdrivers;
- a set of four new clamps;
- about 4 liters of fresh antifreeze;
- new heater radiator of the sample before September 2003;
- bottle or canister for draining old antifreeze.
Additionally, water and a rag are needed to wash the removed parts, since they may contain old antifreeze, dirt, dust, etc. When working with plastic elements, you need to be careful not to break the latches and fastening points of the screws.
Causes of malfunctions
Depending on the design of the stove, the damper may cause a disruption in the efficient operation of the heater for the following reasons:
- deformation;
- wear of seals;
- deterioration or damage to control levers and rods;
- skew.
Deformation is a problem with old-style heaters. The first dampers of the VAZ-2110 stove were equipped with plastic elements that bent under the influence of temperature. Because of this, even when completely closed, cold air from outside leaks in and mixes with the heated air, and the efficiency of the stove decreases. Subsequently, the designers replaced the plastic flaps with aluminum ones and the problem with deformation disappeared.
To ensure tightness, the dampers have seals that reduce air leakage. Initially, foam rubber seals were used, which quickly wore out and became damaged. Later, foam rubber was replaced with rubber, but this only extended the service life of the seal; over time, the rubber ages, cracks and collapses.
On old-style stoves, rods and levers may break. On new heaters, there is another problem - wear on the edges of the square end of the gearbox, with which it is inserted into the groove made in the damper axis. As a result, the limit switch bypasses the groove, and the heater damper jams, although the gearmotor operates. The misalignment occurs due to the displacement of the damper axis in the mounting holes of the housing. Because of this, the damper warps and jams when opening.
Diagnosis of the problem
If the reason why the VAZ-2110 stove does not work is the damper, it is not difficult to identify it. To do this, disassemble the central deflector, turn on the ignition and rotate the temperature setting knob to its extreme positions. In a working stove, the central damper will not knock and will completely open and close the air supply channel.
If the heater damper does not move or stops in a position that does not completely block the air passage, it may be stuck. You can verify this by pushing the valve with your hand or a long rod. If after this the damper returns to its normal position, then this is the reason why it is jammed. Through the mounting hole of the deflector, you can assess the condition of the damper and its seals. If the damper is deformed, its bend is clearly visible.
Repair and restoration of the stove damper
The deformed heater damper of the VAZ-2110 cannot be repaired; it only needs to be replaced. In this case, it is better to purchase a replacement metal part that is not so susceptible to temperature effects.
Whatever heater is installed on the VAZ-2110, to carry out repair work, the heater must be completely disassembled. In this case, the process of dismantling and disassembling depends on the design of the stove.
A positive aspect of the heater design on the VAZ - 2101 is its location - to get to it and the dampers you can from the engine compartment and you don’t have to remove the front panel.
Disassembling an old-style stove
For example, let's look at how to disassemble an old-style heater:
- Remove the terminal from the battery.
- We remove the windshield wipers, the seal, remove the air intake near the windshield (“jabot”) from the car, in the process you will need to disconnect the windshield washer nozzle tubes.
- We dismantle the insulation that separates the stove body from the engine compartment.
- We remove the gear motor.
- We divide the housing of the stove and air filter into two halves. To do this, unscrew the coupling bolts around the perimeter of the housings and remove the mounting brackets.
- Disconnect the fan power wires.
- Remove the outer half of the air filter and heater housing (along with the fan).
- We dismantle the inner part of the fan housing.
After this you will have access to the dampers. If you are only planning to repair or replace the heater dampers, there is no need to drain the antifreeze, since the heater radiator will remain in place and will not be removed.
Before removing the dampers, carefully inspect and remember their position and the way they are engaged. Further actions depend on the nature of the damage. Deformed damper parts cannot be repaired and only need to be replaced. As for damaged rods and levers, try to repair them or simply replace them. The damaged seal is replaced.
When assembling the stove, pay special attention to the engagement of the dampers. Do it as it was before disassembly, otherwise the dampers will not work correctly, which will affect the performance of the heater.
Disassembly and repair of a new type heater
The new model stoves are disassembled differently:
- disconnect the battery terminal, drain the antifreeze;
- dismantle the frill and insulation;
- disconnect the power wires of the fan and micromotor gearbox;
- unscrew the fasteners that secure the stove body to the body;
- disconnect the coolant supply pipes to the heater radiator;
- We remove the heater from the car along with the filter housing.
After this, we disassemble the stove body, dividing it into two halves, after first disconnecting the air filter housing and removing the mounting brackets. Next, we change or repair the damper, assemble the heater and install it on the car.
Note that the general algorithms of work are indicated above, but in reality, dismantling the stove is not so easy, since many fasteners are located in hard-to-reach places, sometimes you have to disconnect or remove elements that make it difficult or interfering with the removal of the unit.
Knocks in the engine
It is not uncommon for even ordinary knocking sounds in the engine to become the cause of its complete failure. Therefore, be careful if you suddenly hear extraneous knocking noises coming from under the hood.
A knock in the engine almost always indicates serious problems, so it is not recommended to get to the service center on your own. Call a tow truck or cling to someone with a rope to get to a service station or garage to determine the cause of the sounds.
The knocking noise can be caused by various components of the 8-valve and 16-valve engines installed on the VAZ 2110.
| Source of knocking | What you need to know |
| Main bearings | This is a dangerous type of knocking. You need to immediately stop the engine and tow it to the service station or garage. The knock is low-pitched and comes from the bottom of the crankcase. As the load increases or the speed increases, the noise increases; the knocking sound is often accompanied by a drop in oil pressure. |
| Connecting rod bearings | No less dangerous type of knock. You need to stop quickly. Get to the garage or car service only in tow. This sound is ringing, metallic, medium in tone, rhythmic. As the load on the engine increases, the knocking noise increases, but disappears completely when the spark plugs are turned off. |
| Piston pins | A less dangerous knocking option, in which you can get to the service center under your own power, but with minimal engine load. The sound is rhythmic, high-precision, and has a strong metallic tint. It comes from the engine in any operating mode, and intensifies with increasing loads. When I turn off the spark plugs, the sound goes away completely. |
| Worn pistons and cylinders | The knocking does not pose a danger to the engine. If the engine load is light, you can get to the service center or garage under your own power. The sound is similar to the clinking of clay dishes, and is especially audible on a cold engine. When the engine warms up the sound disappears |
| Valves | This is not a dangerous type of knocking in the engine, allowing you to get to the garage or car service station under your own power. Against the background of a dull noise, a metallic knock is heard, which is best heard at medium and low crankshaft speeds from the cylinder head above the valves. This type of knocking noise occurs due to a breakdown of the hydraulic compensators, which should be replaced to eliminate the problem. |
| Detonation knocks | Potentially dangerous to the engine if ignored and nothing is done. Sometimes they lead to the need for major engine repairs or replacement. If you do not delay repairs, knocking can be eliminated by simply replacing the knock sensor. Without overloading the engine, you can get to the garage or service station under your own power. The sound is ringing, metallic, and comes from the engine mainly when accelerating. The cause of knocking is a malfunction of the knock sensor, low-grade fuel and engine overload due to early upshift. It is necessary to replace the sensor and add additives to the fuel to remove carbon deposits inside the combustion chamber and on the valves |
Any knocking noise does not bode well, even if it is the sound from valves or worn pistons. Do not delay in eliminating the causes of noise, otherwise repairs will cost much more.
Removing a VAZ 2110 engine, step by step procedure:
1. First, you need to remove the battery from the car. 2. The next step is to remove the hood. 3. After this, remove the oil from the engine crankcase by unscrewing the drain plug, and remove the coolant from the cooling system by unscrewing the drain plugs of the cylinder block and radiator with the expansion tank cap removed. 4. Now you need to remove the air filter with the intake pipe hose, not forgetting to then close the carburetor on top with the technological cover. 5. Then we take and disconnect the exhaust pipe with the bracket from the engine, lower it slightly down so that the flange can come off the intake valve studs.
6. The next movement is enough to turn the throttle valve drive sector to the stop torque. 7. After this, you need to unscrew the two bolts securing the throttle valve drive rod bracket and move it to the side without disconnecting the rods from it, but so that it does not interfere with further work. 8. Next, having unscrewed the fastening nut, carefully remove the tip of the engine “mass” wire from the stud.
9. Finally, loosen the next two fastening nuts and remove the tips of the “mass” wires from the studs securing the rear cover of the cylinder head. 10. Carefully disconnect the block with wires from the coolant temperature sensor by slightly releasing the clamp.
11. Then gradually loosen the clamps and remove the radiator outlet hose from the thermostat and the radiator inlet hose from the cooling jacket pipe. 12. Now disconnect the wire from the coolant temperature indicator sensor.
13. Slightly loosen the clamp and remove the heater supply hose from the water cooling jacket pipe. 14. The next effort is to disconnect the block (No. 1 in the figure above) with the wires from the detonation sensor (No. 2 in the figure) (or remove the sensor, but to do this, unscrew the nut of its fastening and remove the sensor from the stud, but be sure to leave it on wiring harness).
15. Now it is important to disconnect the block with wires from the low-voltage terminal of the ignition module by pressing the latch holding it. 16. Then carefully disconnect the block with wires from terminal “D” of the generator, carefully move the rubber boot and unscrew the nut in order to then disconnect the wires from the contact bolt (terminal “B+”) of the generator.
17. Simply disconnect the block with wires from the adsorber by pressing the retaining plastic latch. 18. Now you need to remove the wire from the oil pressure warning lamp sensor.
19. Finally, loosen the clamp and disconnect the vacuum booster hose from the receiver fitting. 20. The next step is to disconnect the vacuum hose of the electro-pneumatic valve from the receiver fitting.
21. By pressing the retaining latch, carefully disconnect the block with wires from the idle air control valve installed on the throttle pipe. 22. Loosen the clamp and remove the canister purge hose from the throttle pipe fitting.
23. Now simply disconnect the block with wires from the throttle position sensor by pressing the latch. 24. Unscrew the fastening nuts, using a second wrench to control the hoses from twisting, then disconnect the fuel supply hoses “1” and drain hoses “2” from the fuel pipes (the fuel supply hose is marked with paint).
25. Be sure to pay your attention to such a detail that there are o-rings in the fuel pipes and it is necessary to remove the ring after disconnecting the hose and, if necessary (it is torn or slightly stretched), replace it. 26. Now remove the heater outlet hose from the water pump inlet pipe.
27. Squeeze the retaining plastic latch and disconnect the injector harness block. 28. Try to unfasten the clamp (cut if necessary) securing the wiring harness to the water pump supply pipe.
29. From the bottom of the car, carefully disconnect the block with wires from oil level sensor 1 in the engine crankcase (next to oil filter 2). 30. Take and disconnect the block with wires from the crankshaft position sensor.
31. Having gradually unscrewed the two bolts securing the cover, we remove two holders with wires from the front cover of the camshaft drive belt. 32. The next step is to remove the wiring harness from under the receiver.
33. Having pulled out the wiring harness from under the thermostat, it is important to finally make sure that all wires and hoses are disconnected from the engine. 34. Having loosened the bolt of the adsorber fastening clamp and, having removed it from the clamp, we remove the adsorber to the side (but without disconnecting the hoses from it) so that it does not become a serious obstacle when removing the engine.
35. Loosen the nut securing the gearbox housings, under which the eye is installed, then remove it from the stud. 36. It is necessary to accurately install the eye under the upper bolt of the VAZ 2110 ignition module.
37. Next, we hang the engine by carefully hooking the cable to two eyelets and pulling it tightly with a hoist or crane. 38. If there is no tap or hoist, it is important to additionally remove the washer reservoir.
39. After this, you should install a suitable board on the front fenders, placing soft pads under its ends so as not to disturb the paintwork. 40. Tie the removed VAZ 2110 engine tightly to it using the eye-rings installed on the cylinder head and gearbox, using cables or ropes that should be tightly stretched. 41. It is necessary to remove the gearbox.
42. Unscrew the two bolts securing the front suspension mount of the power unit. 43. Raise the engine up and secure it on strong, stable supports so that the engine does not touch the flywheel and generator drive pulley. 44. The process of installing the engine of a VAZ 2110 car occurs in the reverse order of the removal process, exactly according to the points indicated. After the repair has been carried out and the engine has been installed in its place, it is necessary to pour oil into the engine crankcase and coolant into the cooling system.