Why the rear lights of the VAZ-2114 do not light up and what to do
When driving at night or in fog, side lights are indispensable, especially if they are located at the rear. When moving or while parked, they show other motorists where your vehicle is. If the rear lights on a VAZ-2114 car do not light up, then it will not be difficult to do the repair yourself. To do this, just find out the reason and follow the instructions below, or watch the video.
Characteristics of side lights VAZ-2114
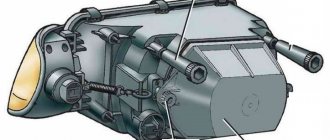
VAZ-2114 belongs to the Samara modification of the second generation. The side lights in them are located, in accordance with technical regulations, at the edge of the front and rear parts of the body, next to the turn signals. These lamps are included in the headlight units.
- Unlike the front side lights, the rear ones are painted red.
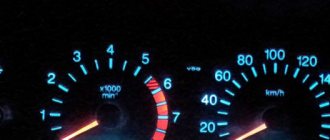
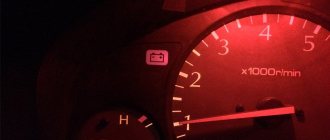
- The button to turn on these headlights is located in the exterior lighting control unit. It is located in the center of the dashboard above the on-board computer. If the dimensions are turned on, the green light on the switch lights up.
In the engine compartment under the hood of the car there is a mounting block with fuses. If your lights only on the left or right side do not work, then most likely one of the fuses has failed. The easiest way to notice a malfunction is element F10, since it is responsible not only for the operation of the right side of the side lights, but also for the warning lamp to perform its duties.
If the lights refuse to work on the left side, then fuse F11 must be replaced.
Why might the tail light not light up?
Not a single motorist is insured against faulty side lights. It is important to quickly understand what the reason is and carry out repairs. Most often one of the lamps fails, then we can assume the reason for the failure:
- she burned out;
- poor contact;
- breakdown in the wiring leading to this lamp.
The first occurs most often; in this case, it is enough to replace the failed lamp. If the lamp only works if you hit it, then there is a problem with the contacts (although physical impact does not always help). If during testing you find that the light bulb is intact, and there is no oxidation or carbon deposits in the socket, then you need to check the conductors.
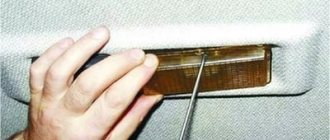
Replacing a damaged lamp in the rear headlight unit is carried out according to the instructions:
- turn off the lights and open the trunk;
- remove decorative upholstery;
- squeeze the latches and pull out the flashlight contact panel;
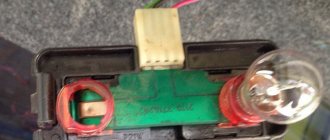
- click on the burnt out lamp and turn it counterclockwise;
- Check the light bulb on the tester and install a new one if necessary.
Assembling the lanterns is carried out in the reverse order. The lamp can also be replaced as an assembly. To do this, it is only important to purchase a high-quality version that is no different from the original. Car enthusiasts often recommend purchasing stock components or paying attention to. We recommend replacing the assembly if there is significant damage to the structure.
Often, taillight lamps do not immediately burn out or refuse to work, but indicate problems with a faint glow. First, clean the group of contacts located in the mounting block, and then, if the fault cannot be corrected, check the groups leading to each lamp.
What is especially important to control at the rear dimensions
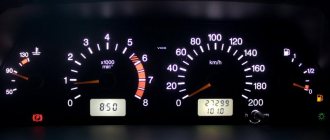
If the control light on the key does not light up, but the dimensions work, then first look at the panel wiring.
Remove the key block from the socket, then wipe the contacts with alcohol. If the dimensions on the right side do not work simultaneously with the warning lamp, then check the fuse. It is worth noting that they rarely fail, since the VAZ-2114 began to install wide options that have a reliable contact pad. If F10 or F11 still breaks down frequently, then it is necessary to check the mounting block; it may be faulty. If this unit is in working order, then check the entire electrical circuit. Sometimes constant failure of fuses indicates a short circuit in the wiring, which can lead to a car fire for no apparent reason.
Oxidation is the most common cause of headlight failure, so check your rear light units regularly. First of all, when repairing your car, test the lamps for integrity, and only then look for faults in other places. Many people believe that the probability of lamp failure is minimal, but this is not so - according to statistics, the reasons are often hidden precisely in them.
Troubleshooting steps
When the instrument panel on a VAZ2114 does not work, you need to determine the reasons for its failure, and, if necessary, remove the unit in order to check or replace light bulbs, fuses, or clean the contact board.
To perform this procedure, you will need screwdrivers, figured and regular, two keys 8 and 21. Next, perform the following steps:
- 3 self-tapping screws are unscrewed, the trim is removed, the protrusion that is located at the bottom, which is removed from the body bracket.
- Now the 5 screws in the right panel of the console are unscrewed and the screen is removed.
- After this, the negative terminal is removed from the battery, the wiring harness block is disconnected from the cigarette lighter.
- The handle is removed from the lever. The mounting of the electric fan of the heating unit is disconnected.
- Now we move on to unscrewing the bolts that secure the steering wheel block brackets. The light guide, lamp sockets, and the decorative panel insert are removed.
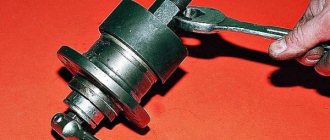
- You can remove the hydraulic corrector illumination lamp using a 21 cm wrench.
- At the last stage, the screws of the lower and upper rows are unscrewed and the instrument panel is completely removed.
If necessary, the light bulbs in the VAZ 2114 dashboard are replaced, and the failed ones are replaced with new ones. The presence of oxidized areas, which are rubbed with WD-40 liquid, is also checked, and the contacts are treated. If, for example, the battery charging lamp is dimly lit, then the reason for the poor connection of the lamp contacts with the board is the condition of the cartridges for carbon deposits; damaged ones are replaced with new ones.
Replacing light bulbs in the dashboard of a VAZ 2114
If the instrument panel is faulty, and all the parts, lighting, radio, show high performance, then the reason is in the fuse box, which needs to be checked and, if necessary, replaced.
You cannot replace the fuse box with home-made products or other units with increased current strength; this may result in damage to the electrical system, cause serious malfunctions in the system, and lead to a vehicle fire. To remove this unit, you need to use special plastic tweezers.
Why the side lights on VAZ 2114 and 2109 may not light up
Side lights are lights that tell other drivers on the road about the size of your vehicle. According to the rules, the driver is required to turn them on in a number of cases. In particular, when the street lights start to turn on and when stopping at the side of the road. This article provides information about why the lights on the VAZ 2109 do not light up. The material will be useful to owners of all generations of Lada Samara cars.
Possible causes of malfunction
1. The lamp is faulty. The most common reason why the rear lights on a VAZ 2114 do not light up is that the lamp in the lamp has burned out. This diagnostic sign is relevant if only one gauge does not work. In this case, it is enough to replace the burnt out lamp. 2. The fuse has blown In the case when several dimensions fail at the same time, the reason for this may be problems in the mounting block, to be more precise, in fuse F10. The breakdown of this fuse often leads to the fact that the dimensions of the VAZ 2114 do not light up. In this case, there may also be problems with the lighting of the interior and license plate lights, as well as the dashboard. 3. The contacts are faulty or oxidized. To exclude this cause, you will have to check the entire fuse box. In particular, you should carefully inspect the bus terminals leading to the fuse and relay box. It happens that they oxidize or become detached and therefore make poor contact. Here you will need to disconnect the contacts, clean them and connect them. If after this the rear lights of the VAZ 2114 or 2109 still do not light up or if there is a problem with the front lights, you will need to check the contacts on the headlight unit. Maybe the contacts have oxidized there. 4. The power button has stopped working. The reason why the rear lights of a VAZ 2114 or 2109 do not work may be a completely typical problem: a breakdown of the switch (button) itself. If everything is fine with the button, you should check whether the wire is oxidized. Otherwise, the contact will need to be cleaned. 5. The size fuse is on. If the fuse is constantly burning, it is possible that there is a poor contact in the fuse box or a wire is shorted somewhere. In this case, you should check it: connect a 12 Volt light bulb to its contact (via + and -). If the lamp lights up, it means there is a short circuit somewhere. To find it, you will have to turn off all devices operating in conjunction with this fuse one by one. To do this, you will have to check the wires going to the license plate illumination on the trunk roof. Usually these contacts are frayed and shorted. Another weak point, which is why the dimensions of the VAZ 2114 or 2109 do not work, may be in the cable located at the driver’s left foot on the back side of the wing under the mat. By disconnecting this cable, the license plate and interior lamp lighting are also disconnected. If after disconnecting the loop the lamp on the fuse goes out, it means there is a short circuit in this loop. In this case, you will need to inspect the entire wiring circuit in this node.
Checking the turn signal switch
Fixing a faulty turn signal switch is quite simple. Typically, depending on your specific model, accessing the switch's electrical connector is the most difficult task.
For this test, it is recommended to consult the vehicle repair manual for your specific model. You will need to identify the wires and the best way to access the electrical connector of the signal switch. Additionally, if your model has airbags, you may need to disable the system to prevent the bags from accidentally inflating.
Find the wiring diagram for the turn signal lights on your car model using the repair manual.
- Identify the wires that carry power from the flasher to the switch, and the wires that carry power from the switch to the turn signal lights. Check the color code of these wires and, if necessary, the terminal number on the turn signal switch electrical connector.
- Gain access to the turn switch electrical connector. You may have to remove the instrument panel or steering column cover to see the electrical connector.
- Find the wires you identified in step 2.
- Turn the ignition key to the on position, but do not start the engine.
- At the switch connector, locate the wire that supplies power to the turn signal switch.
- Connect the test light to a good ground under the dash - a metal bracket or bolt will provide a good ground.
- Press the switch to turn on the left turn signal.
- If the warning light does not blink, then there is a problem with the turn signal unit or an open or short circuit between the switch and the power source.
- The rear probe has a wire in the connector that supplies power to the left turn signal; the indicator light should flash. If the indicator light does not blink, the switch is faulty. Replace the switch.
- Rear probe wire that supplies power to the right turn signals; the control lamp should not light up. If the warning light comes on, replace the switch.
- Repeat the test, but this time press the switch so that the right turn indicators come on. The only difference in your results this time is that your indicator light should flash when reverse probing the terminal, which supplies power to the right turn signals but not the left turn signals. Otherwise you will need to replace the switch.
Dimensions do not work on VAZ 2114
According to these Rules of the Road, on any moving vehicle, including the VAZ-2114, the headlights must be turned on, along with which the side lights must also be turned on. In addition, they must be turned on when the car is stopped or parked on the road in the dark and in conditions of insufficient visibility. Therefore, they must always be in good working order.
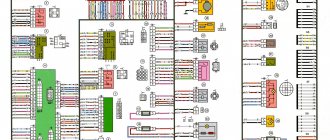
The electrical circuit of the side lights of the VAZ-2114 is not so complicated and, if desired, any self-respecting driver will be able to find a malfunction associated with the failure of its operation. To do this, you need to know that terminal No. 1 of the side light switch is always supplied with positive voltage from the battery, bypassing the ignition switch. If the side light switch key is in the on position, then electric current flows to two fuses F10 (7.5A) and F11 (7.5A), which respectively protect the electrical circuits of the left (F10) and right (F11) side lights. The further path of the current lies to relay K4 (lamp health monitoring relay), and then to the front and rear side lamps.
When only one of the side light bulbs does not light, then we check whether it has burnt out. If it burns out, then we replace it with a new one of similar power, but if it is intact, then we will have to look at the condition of the contacts of the cartridge in which it is inserted. In the rear lights, due to moisture getting into them, oxidation is possible, both of the tracks and the pads through which voltage is transmitted to the terminals of the side light lamp.
Another reason why the headlight lamp does not light up may be the lack of voltage at the corresponding terminals of the rear light blocks or headlight blocks. Then, using a tester, you will have to ring the corresponding wires:
- The right front marker does not light up (check the yellow wire from terminal No. 4 of the headlight to terminal No. 8, block X6 of the mounting block);
- The right rear light does not light up (check the yellow wire from the right rear light block to terminal No. 9, block X9 of the mounting block);
- the left front marker does not light up (check the yellow-black wire from terminal No. 4 of the headlight to terminal No. 10, block X6 of the mounting block);
- the left rear light does not light up (check the yellow-black wire from the right rear light block to terminal No. 17, block X9 of the mounting block);
If both lamps on the right or left side of the car stop working, then troubleshooting should begin by checking the corresponding fuses located in the mounting block under the hood of the VAZ-2114 car, since the simultaneous burnout of two dimensional lamps at once is unlikely. The blowing of fuse F10 is very easy to determine, since it will lead to the cessation of combustion of the backlight lamps of the instrument switches. Also, the reason for turning off the side lamps may be the failure of relay K4.
3 comments
When you press the brake pedal, the rear turn signals turn on. When you turn on the turn signals, the rear lights begin to switch and shine like garlands?
When connecting to the board in the chip (connector), the wires were not connected correctly. And the chip itself is apparently not original, but was attached by someone illiterately, despite the diagrams. You have the wire that is responsible for the turns - in place of the dimensions. It is easy to treat. You need to transfer the wires from the wiring to the chip. You need to find the ground on the rear stopper board (there is a green stripe on the board that runs under each light bulb socket); see which wire is connected through the chip and connect to the black wire from the rear wiring. Then we take the wire on the chip below and connect it in the following sequence: 1 wire in the chip with black (ground), 2 - blue (turn signal), 3 - red (stopak), 4 - yellow (marker)
On the right side, the dimensions do not light up, the fuses are intact, and the light bulbs are intact. Could it be K4?
DRL connection diagrams
Since DRL can be mounted at your discretion, there are many connection schemes that allow you to configure the optics in the most convenient way for the driver. Let's look at the most popular of them.
Option 1 (to speed sensors)
This connection of running lights through a relay, the diagram of which is shown below, is considered one of the simplest. In this case, the DRLs will turn on depending on the operation of the speed sensor. In order to implement this scheme, it is necessary to connect contacts K1.1 to the circuit section (into the wiring break) from the low beam switch button to contact 85. In this case, you can use any relay with an opening pair, but experts recommend using a product with a TC code.
If you want the dipped lights to work while the engine is on, rather than the side lights, then the contacts must be “paralleled.”
Option 2 (to the oil sensor)
Another scheme for connecting daytime running lights via a relay uses an oil sensor. You should immediately check that it is in good working order, since if the regulator provides incorrect information about the fluid pressure, then the operation of the entire system will be disrupted.
With this installation of DRLs, the lights will turn on when the engine starts, and will be turned off by the dimensions. As optics, you can also use low beam or fog lights.
Option 3
It will be a little more difficult to connect the DRLs so that they turn on when the engine starts and turn off when it stops. In this case, the running lights will turn on together with the low beam headlights. This will require two low-power diodes (for example, 1A + KD10), which must be connected in series. After this, wires about 400 mm long are soldered to the light bulbs and connected. Don't forget that they are polar.
At the next stage:
- Dismantle and disassemble the dashboard of the car and connect the “blank” to X1 (most often the yellow wire).
- Remove the button through which the optics will be turned on.
- Plug the other end of the wire into the connector.
- Reinstall the button and check its functionality.
Option 4 (connecting running lights from the generator)
To implement such a project, you can use one of three schemes.
The first one is suitable if only the handbrake and the engine are used.
The second scheme for connecting running lights from the generator will require the use of an additional resistor, which is responsible for turning off the daylight when the side lights or headlights are activated.
The third scheme will allow you to deactivate the running lights:
- When you raise the handbrake, during the start of the internal combustion engine or during the automatic start of the engine along with the alarm.
- When the lights are turned on (in this case, it is necessary that the headlights or fog lights operate normally).
Roughly speaking, this type of connection “cancels” the automatic start of the DRL simultaneously with the ignition of the generator.
Healthy! It is this scheme that is “working” when passing the GTO.
Before connecting the running lights from the generator, it is recommended to watch the video at the end of the article. The fact is that there is more than one or two ways to activate the DRL. However, the connection will be much easier if you purchased a ready-made set of running lights.
Option 5 (connection of a ready-made kit)
In order not to rack your brains over how to install running lights on a car yourself, the easiest way is to buy a ready-made control unit to automatically turn off and turn on the DRLs. To install this module you need:
- Connect the black wire to the negative of the battery, and the red wire to the positive.
- The orange wire (if included) must be connected to the headlights or low beam. If the wire is not connected, the lights will not deactivate when the low beam or side lights are turned on.
After installing the DRL using any of the schemes described above, it is necessary to check that the installed elements are working correctly. To do this, start the engine and see if the light on the control panel is functioning, if the running lights are activated, and so on.
We repair damage to the front and rear side lights on a VAZ 2114
Any car, according to today's standards of traffic regulations, must be equipped with a certain set of lights of various colors and sizes. This includes brake lights, low beam and high beam headlights. But the dimensions of the VAZ 2114 are of most interest:
- Front right and left;
- Likewise the rear ones.
Rear marker lights
Engineers positioned them so that they can be seen from any side, that is, from each side of the car. Their purpose is to notify drivers about the presence of a car in a particular place with constantly burning yellow lights. In addition, side lights must be turned on along with low beam headlights when driving according to today's traffic rules. Accordingly, their absence entails the imposition of a fine, so it is necessary to monitor the condition of the dimensions regularly, and repair breakdowns in a timely manner. Let's figure out why the dimensions of the VAZ 2114 do not work and how this issue can be resolved in any case.
Recommendations for repairing emergency lights and turn signals
Fixing any of the breakdowns described above does not require contacting a car service - you will do everything yourself.
If a fuse blows, replace it with a good one. If there is none, then install a temporary “bug” of several copper wires. The faulty relay is also pulled out and a new one is installed in its place.
Please note that problems with protective and electromagnetic devices often occur due to short circuits. For this reason, it is necessary to inspect all cables before replacing them.
In this case, a tester will speed up repairs. Having detected a breakdown, eliminate it by restoring the integrity of the wires and their insulation.
When replacing cables in the emergency signal and turn signal circuits, make sure that they do not rest on moving body parts. Additionally, it is advisable to use thermal tubes in these places - this will significantly increase reliability.
If the turn signal does not work because of the light bulb, then it will have to be changed. Disassemble the flashlight by first removing the negative terminal from the battery. Remove the burnt out element and install a working one in its place. Check functionality.
When only the turn signals do not function, be sure to inspect the switch that triggers them. Its diagnosis is carried out in the same way as emergency warning buttons. The faulty control unit is replaced with a new one. If the problem is only in oxidized contacts, then clean them. Use sandpaper.
For prevention, be sure to inspect all the pads available in the electrical network of the VAZ turn signals. This will allow you to promptly detect loose wires, loose connectors or abraded insulation. Perform routine repairs if necessary.
Why don't the side lights come on?
Side lights are lamps that let another car know about your dimensions. For example, stopping at the side of the road on the highway and turning off the ignition, the low beam goes out, but the dimensions remain. And according to traffic rules, for your information, parking on the side of the road is allowed only with the lights turned on.
In this article we will look at the main reasons why the lights on the VAZ 2114 do not light up. This article is suitable for all samar owners, both the first generation and the latest.
Lamp burned out
Initially, you should check the side light bulb, if your tail light does not light up or the right side light does not light up separately. Check the light bulb and install a working one. To learn how to replace the lamp, read Replacing side lights.
Fuse blown
But if 2 dimensions fail at the same time, then the front and rear left ones, and even the license plate illumination, then the problem lies in the mounting block. Namely, in fuse F10, which is responsible for the left dimensions, interior lighting, license plate lighting, and panel lighting. But keep in mind that fuse F10 is directly responsible for the left dimensions; if others do not work for you, then look for the corresponding fuse in the article Fuses.
TECHNICAL DEVICE
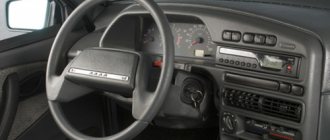
In some situations, it happens that the rear lights of a VAZ 2114 do not light up, in other cases only the front ones, but their structure and operating principle are identical. The side lights are located in the turn signal housing, while the front and rear lights find a place in the headlight housing in the same area. There is a special button for the side lights on the dashboard, which allows you to control them; next to it there are headlight switches and other lighting. When the driver touches this button and turns them on, at the same time the corresponding light on the dashboard lights up, which will not allow the driver to forget about the action taken.
The “dimensions” do not light up on the VAZ 2108, 2109, 21099
Let's look at how to quickly find the reason for the failure of the "dimensions" on VAZ 2108, 2109, 21099 cars. The side lights are part of the vehicle's external lighting system and its operation with non-functioning "dimensions" is difficult, especially at night. We are looking for the reason for the non-functioning dimensions, as is customary in such situations, from simple to complex.
Causes of the malfunction “the dimensions of the VAZ 2108, 2109, 21099 do not light up”
The side light bulb in the socket has burned out
One light bulb, or several at once, can suddenly burn out. In some cases, it may be impossible to visually identify a burnt-out light bulb. Therefore, we replace the burnt out one with a known good one. You can use a similar one from a nearby headlight.
The contacts in the side light bulb socket have oxidized.
We rotate the light bulb in the socket several times to remove the oxidized layer and restore contact. In the future, you can clean everything with sandpaper.
The contacts in the connecting blocks of the headlight or tail light unit have oxidized
We remove and put on the connecting blocks several times to remove the oxidized layer and restore contact. More radically, we remove the pads and clean the contacts.
No "mass"
The “negative” wires of the front headlights and rear lights with side lights on VAZ 2108, 2109, 21099 cars are attached to the car body. It is necessary to clean the mounting location to ensure good contact with ground. Usually the negative wire is the black wire from the headlight connection block, attached to the body next to the headlight or taillight.
Weight of the front headlight, place of attachment to the body of the VAZ 2108, 2109, 21099
Fuse blown
If fuse 10 (F11) is blown, the side lights of the right headlight and right rear light will not work. If fuse 9 (F10) is blown, the left headlight and left rear light of the vehicle will not work. We replace them with new ones, and then look for the cause of the burnout (possibly a short circuit somewhere).
Relay K4 is faulty (monitoring the health of the lamps)
A faulty K4 lamp control relay can be replaced with jumpers. We connect the holes for relay terminals 1-7-8, 9-10-11, 4-5. On some VAZ 2108, 2109, 21099 vehicles, jumpers are already installed instead of lamp health monitoring relays.
The tracks in the rear light circuit boards have crumbled
Visually inspect the tracks in the rear light circuit boards for shedding, rust, or burnout. If necessary, we check their integrity using a test lamp or tester. A faulty track can be repaired by soldering wire onto its frayed edges.
The pads in the mounting block have come off or the wire tips have oxidized.
It is necessary to check the secure fit of the connecting blocks in the fuse mounting block. For an electrical circuit of “dimensions” these are plugs Ш4 (Х4), Ш6 (Х6), Ш9 (Х9), Ш11 (х11). If necessary, the wire tips present in them should be cleaned from oxidation.
The external lighting switch on the instrument panel is faulty
You should remove the exterior lighting switch and connect the black and yellow-red wires together. The black current flows into the switch, and the yellow-red current flows out. If the lights light up, replace the switch with a new one. If not, we look for a fault in the electrical circuit further.
"Open" or short circuit in the wiring
It is necessary to check the presence of electric current on the external lighting switch (circuit from the ignition switch to the switch), fuses (circuit switch - mounting block) and on the lamp control relay (functionality of the mounting block).
Video
How to diagnose a faulty turn signal, see below:
Let's look at the main causes of the malfunction and how to eliminate them:
- If there is no turn indicator signal, then in 90% of cases you need to replace the electrical relay or check how the contacts are connected to it. The relay is indicated by the symbol K1. Possible depressurization and liquid ingress. If after replacing the relay with a new one, the malfunction remains, then you need to carefully inspect the fuses. Perhaps one of them has burned out and needs to be replaced; it is better to check the entire unit.
- Don't forget to check the quality of fuse F12, as well as how it functions with everyone. Check the functionality of the switch itself, there may well be a malfunction there.
- Sometimes the emergency warning button fails. If this is the case, we can easily replace it with another one that works normally.
- If the turn signal lamp does not turn on, check the functionality of the device. She could simply burn out.
- If it is impossible to turn off the turn signal, a simple action is taken: the switch is replaced.
- Frequent blinking indicates problems with the lamp; it is better to replace it. If after replacement the result is the same, then the contacts have probably deteriorated (oxidized) and need to be replaced or cleaned. Sometimes it is a matter of failure of the tracks on the block.
- Dim glow. There are several reasons for this phenomenon: a mismatch in the power of the lamp required for a given turn signal. In this case, it is enough to purchase a lamp with the required parameters and replace it.
- Atypical relay sounds. With such a malfunction, the turn signals do not turn on according to your wishes. In such a situation, as a rule, the electrical relay should be replaced. It would be ideal if you purchase an original car from the factory that matches the model, so you will achieve long-term good performance.
- If the right turn signal does not work, then you need to carefully examine the right headlight. Its electrical board often malfunctions due to oxidation, therefore, the supply of electric current is disrupted. As a result, problems are possible with both the relays and fuses, and accordingly the turn signals stop working.
Turn signals don't turn on
Sometimes it happens that the turn signals of the VAZ 2114 do not work.
This may be expressed by the following signs:
- The turn signals do not turn on.
- The turn signals do not turn off.
- The turn signals don't blink.
- The turn signals light up with minimal brightness.
In the first case, there may be several reasons (they are almost the same as in the case of problems with emergency lights):
- fuse is blown;
- power buttons are broken;
- contacts have oxidized;
- there was a break in the wiring;
- the relay has failed;
- light bulbs burned out.
Checking the electrical system of turn signals in these situations, as well as eliminating detected problems, should be carried out in the same way as repairing emergency lights (how exactly is described above).
If the turn signals, on the contrary, do not turn off, then there can only be one reason - burnt out switches. They should be replaced with new ones of a similar model.
Sometimes the turn signals may turn on, but remain solid instead of blinking. The reason for this is the incorrect operation of the relay (sometimes this also happens when a device intended for other cars is installed instead of the original relay). To eliminate the cause, it is enough to replace the relay with a new one.
In a situation where the turn signals are very dim, you should check the power of the lamps installed in them. If the lamps are suitable, then you need to clean the ground contact connected to the turn signals. This can be done with fine sandpaper or kerosene.