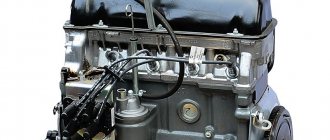
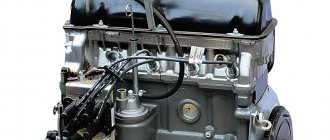
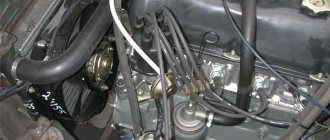
The VAZ “Seven” is the last classic Zhiguli model, produced from 1982 to 2012. Moreover, the injector and electronic ignition appeared on the VAZ 2107 already in the 90s, and all previous modifications came with a carburetor and a mechanical (contact) spark generation system. Since there are quite a few such cars running around the territory of the countries of the former USSR, the issue of switching to contactless ignition (abbreviated as BSZ) remains relevant for their owners. It can be solved without any problems, you just need to buy a set of new equipment and install it on the “seven” with your own hands, so as not to spend money on car service services.
What is electronic ignition
The term "electronic ignition" means the same as "contactless ignition". The BSZ unit is assembled from electronic (semiconductor) components, which is reflected in the name of the system. “Contactless” ignition is called because the closing and opening of the low-voltage circuit is carried out by an electronic switch by locking and unlocking the transistor, and not by the distributor contact. The electronic ignition system of the VAZ 2107 for the carburetor and injection versions is different. Perhaps this is the reason for the erroneous opinion that electronic and contactless ignition are different systems.
Let's look at the differences between contact and non-contact ignition
Advantages of contactless ignition:
- since there is no contact group in the distributor, sparking occurs clearly;
- long coil life;
- at medium engine speeds, BSZ creates a spark 4 times more powerful than contact ignition. This is especially useful if the spark plugs are dirty, as a spark will still be produced;
- performs its functions perfectly even in cold weather;
- if the voltage in the electrical network is low, then sparking will still occur;
- thanks to the powerful, stable spark of the candles, the fuel-air mixture ignites faster;
- if BSZ is installed, then fuel consumption decreases and engine power increases;
- improved vehicle acceleration dynamics;
- BSZ is easier to maintain because the device has no moving parts.
Low pressure
For what reasons does the car pull to the left and how to fix it? Why won't the VAZ-2107 (injector) start? Problems may be hidden in low fuel line pressure. For normal starting of an injection engine, at least 2.8 atmospheres are required. You can check this by disconnecting the supply tube from the ramp. Use a pressure gauge for this. Malfunctions with the pump may occur due to frequent overheating. But how does this happen if it is submersible? The fuel pump is killed by driving on an empty tank. If the light comes on, do not delay refilling. The cost of a pump for an injection “seven” is 3 times higher than for a carburetor.
Design and principle of operation of the BZ
Contactless or electronic ignition on the VAZ 2107 is installed on models with injection engines. Carburetor sevens were supplied from the factory with contact ignition systems, which have many disadvantages. If you plan to install a contactless ignition module, then before starting it won’t hurt to understand the issue of its design.
The ignition system is the mechanism by which a pulsed voltage is created to supply the spark plugs in order to promptly ignite the fuel-air mixture in the cylinders. The main disadvantage of contact SZ is that the contact groups require regular cleaning, replacement and adjustment. As soon as difficulties arose with igniting the combustible mixture, the car owner immediately knew where to look for the reasons.
With the advent of the BSZ, these difficulties automatically disappeared. To understand why, let’s look at the components of the mechanism:
- Electronic type switch with transistors.
- Double winding coil.
- A distributor or distributor equipped with a Hall sensor, a slider and a contact cover.
- Spark plugs with armored wires.
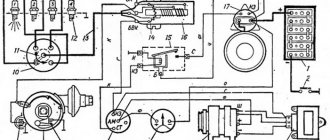
The BSZ diagram for the VAZ 2107 is shown in the photo below.
Ignition circuit for VAZ 2107
Based on this diagram, let's consider the principle of its operation:
- When you turn the ignition key, current is supplied to the primary winding of the coil, thereby creating a magnetic field.
- When the engine starts, power is supplied to the starter coil and the rotor begins to turn the crankshaft.
- In this case, the crankshaft rotates the distributor shaft, which is connected to the runner.
- As soon as the shaft with the slider rotates, this phenomenon is detected by the Hall sensor (along the protrusion on the shaft) and transmits the corresponding signal to the switch.
- When a signal arrives at the switch, the primary winding of the coil is de-energized (on the low-voltage side).
- A powerful discharge of about 25-30 kV is induced in the secondary (high-voltage) winding, transmitted to a moving contact located at the end of the distributor shaft.
- When the slider moves in a circle, it practically touches the contacts in the cover, a spark occurs between them, and a high voltage discharge is transmitted to each of the contacts in turn.
- This discharge flows through armored cables to the spark plug electrodes.
The mechanism in question received the name “contactless” due to the connection and disconnection of the circuit of the primary winding of the coil with a commutator due to the output transistor (without using contacts).
Operating principle of BSZ
Electronically controlled spark generation operates according to a fairly simple algorithm, which determines the reliability of such a circuit. When the driver turns the key in the ignition switch, a constant voltage from the on-board network is applied to the primary winding of the coil, causing a magnetic field to form around it. Then the system works like this:
- The starter turns the crankshaft and drives the distributor shaft along with the slider.
- The Hall sensor, which reacts to the passage of a metal mass nearby, registers the rotation of the shaft along the protrusion on it and sends a signal to the switch.
- The electronic unit, based on a signal from the sensor, turns off the voltage supply to the primary winding of the coil.
- At the moment the circuit breaks, a high voltage pulse (up to 24 kV) is formed in the secondary winding of the coil. It is directed along a thick wire to the moving contact of the distributor.
- The slider redirects the impulse to one of the fixed contacts built into the cover. From there, the voltage goes to the spark plug of the cylinder where the piston is at top dead center.
- At this moment, the fuel is already in a compressed state in the combustion chamber. When a spark jumps across the electrodes of the spark plug, it ignites.
- The runner rotates and transmits a spark to all cylinders according to the 1-3-4-2 scheme, after which the car engine starts and starts working.
Note. In old VAZ 2107 cars there was no switch, and the electrical circuit was broken mechanically - the shaft cam opened the contact group.
Outdated circuit with contact breaker
This is interesting: Diagnostics of injectors - how to check it yourself: step-by-step instructions
Pros and cons of the system
If you decide to install a carburetor-type BSZ on a VAZ 2107, then it is recommended that you first understand all the advantages and disadvantages of the device. The advantages of the mechanism under consideration include:
- The absence of contacts automatically eliminates the need for their maintenance. As a result, we have a more reliable system that does not require frequent maintenance.
- Stability of spark propagation through the cylinders, which is due to the absence of the breaking effect of the contacts using the cam method.
- A large discharge in the spark plug, the value of which reaches 25-30 kV, while in contact modules it does not exceed 12 kV. High voltage promotes a stronger spark and improved ignition of the fuel assembly, as well as its complete combustion.
- Simplified engine starting at low temperatures.
This system has much fewer disadvantages, and they consist in the impossibility of repairing the Hall sensor, which has a relatively short service life of up to 50 thousand km. In addition, such a system is more expensive, due to its design features.
What is included in the electronic (contactless) ignition kit for VAZ 2107
The contactless ignition system for VAZ includes:
- distributor;
- ignition coil;
- switch;
- set of wires
VAZ 2109: starter malfunctions - looking for reasons
Starter for VAZ 2109
A starter, without it you can’t start the car, which means you won’t go far. The success of the trip depends on its performance. Therefore, you need to figure out how to prevent its failure, or fix an existing breakdown. Let’s consider in more detail:
- Alarm Signals
- Malfunctions
Alarm Signals
The starter is the highest-loaded electrical consumer in a car. If, when starting the car, an extraneous sound, noise, crackling appears, or it becomes clear that changes have occurred in the operation of the starter, you must take action without delay. On the VAZ 2109, problems with the starter can be different, some of them can be eliminated with your own hands by reading , how to do it or by watching the video. Here is a small instruction on malfunctions.
Malfunctions
So:
- If the starter on a VAZ 2109 does not start, first you need to do a basic check
- Check if the battery is dead.
- Check the fuse in the fuse box for the starter.
- Check the relay responsible for the starter, it is located in the engine compartment (photo 2).
Changing the relay (Photo 2)
If, however, the starter does not work on the VAZ 2109 and the problem is different, you need to contact a specialist.
- On VAZ 2109 the starter barely turns
- you need to make sure that the battery charge is normal
- Is the alternator belt too tight?
Advice! If the problem is different, you need to contact a specialist; perhaps the starter bushings are worn out or another reason. More often on a VAZ 2109, the starter turns poorly due to wear of the front bushing installed in the engine crankcase.
- On a VAZ 2109, the starter sticks (by turning the key to the “engine start” mode, the starter is activated for 1-2 seconds, which is not enough to start the engine and stops)
- you need to make sure that the terminals on the battery are not heating up, and that the positive wire leading to the starter is not heating up. If it gets hot, it means there is a bad connection.
- The armature bushings may need to be replaced.
- On a VAZ 2109 the starter sticks, in other words on a VAZ 2109 the starter does not turn off (releasing the key after starting the engine, the starter continues to work)
- The additional starter relay (not the solenoid relay) may have failed.
- It is possible that the contacts (nickels) of the starter solenoid relay are sticking.
- Or there is a malfunction in the contact group of the ignition switch - the contacts have fused.
- On a VAZ 2109, the starter does not turn in the cold (the starter turns a little, but with a lot of tension, or does not turn at all)
- Most likely, in the cold, the chemical processes in the battery have stopped. You need to turn on the light for a few minutes; this will help accelerate the battery.
- Another option involves heating the battery in a warm room (do not make the temperature difference too large, for example, placing it in hot water)
- You can also start the car by throwing power from another car
- If the previous options did not help, the battery needs to be replaced.
- On a VAZ 2109, the starter does not turn, the relay clicks (when you hold the key in the “engine start” mode, the relay automatically turns on and off)
- Dead battery
This happens because there is enough battery charge for the solenoid relay to operate. When the contacts close, the starter consumes a lot of current, but this current is not enough for it to work. The voltage on the battery drops, and the solenoid relay returns to its original position. There is no more load, again there is enough current for the retractor to work. The actions are repeated. So:
- On a VAZ 2109 the starter does not turn on (the solenoid relay turned on, but the starter did not turn on)
- Starter brushes are worn out (photo 3)
- The starter may have burned out
- starter jammed
Advice! If the starter is burned out, sometimes it is more advisable to buy a new starter; the price of the starter varies from manufacturer to manufacturer.
The brushes are worn out and do not reach the anchor (photo 3)
- On VAZ 2109 the starter is cracking
- Flywheel teeth are broken or worn. (photo 4)
- The bendix (the mechanism that engages with the flywheel) is worn out.
This is where the starter is cracking (Photo 4)
Advice! One of the most common starter malfunctions is armature play. How to eliminate play in the VAZ 2109 starter armature. The sliding bushings need to be replaced. The greatest difficulty for some is replacing the front bushing located in the crankcase (photo 5). Namely, how to get this bushing?
Solutions
So:
- We select a suitable tap, screw it into the bushing and pull it out.
- Or cut the bushing with a sharp object (screwdriver, small chisel, etc.)
Bushing in the body (photo 5)
At first glance, there are a lot of starter malfunctions, but nothing is impossible. What is made by human hands can definitely be repaired, and with the necessary knowledge and skills, this can be done much faster and with better quality. Good repair.
What is needed to install BSZ on the seven
The first BSZ kits, which were installed on injection engines, had an unreliable switch that often failed. At the same time, there was a need to replace it until the manufacturers improved the system. As a result, the weakest part of the contactless ignition module is only the Hall sensor.
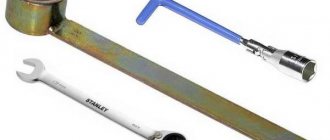
To install the BSZ on the seven, you need to first prepare not only a set of necessary equipment, but also tools. These tools include:
- Screwdriver Set.
- Open-end wrenches for “8”, “10”, and “13”.
- Pliers or pliers.
- Spark plug wrench for replacing spark plugs.
- A drill for drilling holes in the body, with the help of which the switch will be secured.
- Key set to “36” to rotate the crankshaft.
When all the tools are ready for modification, we begin work. It is worth noting that installation is not difficult and can be done independently at home.
How to choose contactless ignition on a VAZ 2107?
As a result of the fact that VAZ 2107 cars were equipped with different engines, the BSZ system must be installed taking into account the design of the distributor. For power units with volumes of 1.3 and 1.5-1.6 liters, different distributors are purchased. In 1.3-liter internal combustion engines, a unit with a shortened shaft is installed, while in other engines the pulley has the same length.
The BSZ system includes:
- Distribution unit. Its catalog number is 38.3706-01 for a 1.3 liter engine. For power units designed for 1.5 and 1.6 liters - marking 38.37061.
- High voltage coil. Its catalog number is 27.3705.
- System control module. Catalog number 36.3734 or 3620.3734.
- Set of connecting cables.
Switchgears for the VAZ 2107 and Niva VAZ 2121 models are similar in appearance, but they are different and are not interchangeable. “Nivovsky” mechanisms have different technical parameters and are not marked as such. If we talk about manufacturers, then products from SOATE have proven themselves on the positive side.
For proper operation of the BSZ, you will need new spark plugs - A-17DVR, they are not included in the package and must be purchased separately. For more efficient operation, it is recommended to install new high-voltage cables, especially if they have not been replaced for a long time.
The channel “ICE Theory” spoke in detail about the work of the BSZ and the features of choosing a system for classic models.
Necessary tool
To perform the work with the tool you will need the following:
- keys for 8, 10 and 13;
- crosshead screwdriver;
- two self-tapping screws;
- drill with a drill of the required diameter for self-tapping screws.
How to adjust the contactless ignition of a VAZ 2107 using a light bulb
All of the above methods are primitive and only allow you to approximately set the desired angle. To obtain the most accurate adjustment, continue with the adjustment using a regular 12V test light. This will allow you to determine the optimal lift angle.
Contactless ignition control
One of the lamp wires must be connected to the positive terminal of the ignition coil, and the other must be shorted to ground. Loosen the nut by 13 and, without moving the octane corrector, slowly rotate the distributor until the lamp goes out. Next, turn the switch clockwise until the light comes on. The moment this happens and there will be an optimal ignition timing for the VAZ 2107. Now the nut can be tightened. If the spark plugs are still flooded, you need to check the engine fuel system - carburetor. This needs to be adjusted. The reasons may also lie in other systems.
Instructions for installing a contactless system on the seven
Manipulations for converting the ignition system on a VAZ 2107 from contact to contactless are carried out according to the following principle:
- First, you should turn off the power to the car by disconnecting the minus terminal from the battery.
- Disconnect the armor wires from the spark plugs.
- The spark plugs are unscrewed, after which the crankshaft should be turned with a key set to “36”. This is done in order to set the piston of the 1st cylinder to TDC. To determine that the piston has reached top dead center, use a screwdriver. The notch on the crankshaft pulley must be on the cylinder block.
- The steel latches of the switchgear cover must be snapped off and then removed along with the wires.
- A mark must be placed on the engine valve cover next to the moving contact of the slider.
- All wires are disconnected from the distributor along with a thin tube connecting the device to the carburetor fitting.
- Using a wrench, you need to loosen and unscrew the nut, which is used to press the distributor skirt to the BC.
- The old distributor must be removed, and at the same time pay attention to the gasket so as not to lose it.
- The wires from the coil are disconnected, remembering their locations. The coil mount is unscrewed and the device is dismantled.
- The next step is to install the mounting block.
- Make holes to secure the switch.
- The cover is removed from the new distributor and the gasket is installed. The distributor must be placed in the mounting hole of the cylinder block, and this should be done so that the moving contact is located at the level with the top dead center, which is drawn on the valve cover (the slider should point in the same direction as on the old distributor).
- The distributor skirt is fixed.
- The coil is placed in place of the old device, and terminals with wires from the ignition switch, as well as the tachometer and switch are connected to it.
- The wire from the EB of the first contact must be connected to the coil terminal marked “K”.
- The wire from the fourth contact is connected to terminal “B”.
- The spark plugs are screwed into place, after which the armored wires and the wire suitable for the coil can be connected.
- At the final stage, all that remains is to attach the vacuum tube and proceed to the stage of adjusting the ignition.
This is interesting: Starter for VAZ: where is it located, how to remove, replacement instructions for a Niva car
At this point, the installation of electronic ignition on the VAZ 2107 is completed, and before testing the device, you will need to make preliminary adjustments.
Distributor
The sequence of work that must be performed in order to install a set of new parts on a VAZ 2107 does not make much difference. Therefore, we can start by replacing the distributor. Remove the distributor cover to access the slider. To simplify the task of further adjusting the BSZ, you should immediately perform some preparatory measures: installing the distributor slider in a position that will be easy to repeat when installing a new distributor; mark on the block opposite the middle mark on the distributor scale, which is used to adjust the ignition.
Using a 13mm wrench, completely unscrew the nut securing the distributor and then remove it. Disconnect the high voltage wire connecting the ignition coil and the distributor. We install a new non-contact sensor distributor, and you need to set the slider so that it matches the position of the old one. The body of the new distributor needs to be aligned according to the marks, the middle one opposite the one previously left on the engine body. We put on the distributor cover and a set of high voltage wires.
Coil
Next, you need to replace the ignition coil. Using a size 8 wrench, unscrew the nuts securing the wires to the coil contacts. Using a 10mm wrench, unscrew the mount of the coil to the body. Installing a new coil requires special attention - you should take into account the possible discrepancy between the locations of contacts “B” and “K”. For convenience, you can rotate the new electronic coil relative to the fastener, thereby placing the contacts in the same way as on the old one.
Having secured the coil, we connect old wires to its contacts (usually one blue, the other brown), and new ones, with connectors for connecting to the distributor and switch. They usually have the same colors as the standard ones. Typically, in a VAZ 2107, brown wires are connected to contact “K”, and blue wires are connected to “B”. It remains to connect the high-voltage wire that connects the coil and the distributor.
Switch
The last element in the circuit, the presence of which is required by a contactless electronic ignition system, is a switch. The ideal place in which it can be installed in a VAZ 2107 is between the washer reservoir and the left headlight. There is a flat area on which we will install the switch, with the radiator facing the body. Having leaned the switch, we mark the places for drilling holes in the body, through which we fasten it with self-tapping screws; in this case, you need to screw the black (neutral) wire from the connection block under one of the screws.
After completing all the work described above, you should once again carefully check the connection of the wires according to the circuit diagram. If everything is done correctly, you can try to start the engine. Usually there are no problems with this; all that remains is to adjust the ignition to ensure the most efficient operation of the engine.
Checking correct ignition
After completing the steps, it is necessary to check the operation of the ignition system.
To do this you need:
- start the car and drive off;
- Accelerate the car to 50 kilometers per hour, engage fourth gear and sharply press the accelerator pedal. Then, engine detonation will appear, which will decrease (and then disappear altogether) as the speed of the car increases.
There can be two types of problems:
- Engine detonation occurred, but did not disappear as the vehicle speed increased (it is assumed that the ignition was turned on earlier ). In this situation, the switchgear must be turned half or one division to the right.
- Detonation did not occur at all - ignition was delayed . To eliminate this problem, you need to turn the switchgear half or one division to the left .
As you can see, setting the ignition on the VAZ 2101 is quite simple. However, if difficulties or additional questions arise, it is better to contact certified car services for advice.
Illusory repair possibilities
It should be said right away that repairing throttle position sensors is extremely rare. Firstly, the part itself, even the most expensive one, costs only a few dollars, and it makes sense to spend the money. Secondly, in most cases it is simply impossible to make repairs, for example, to restore a worn-out base layer. However, in some models you can slightly shift the resistive tracks relative to the slider and thereby extend the life of the device.
So, there is a special screw on the sensors. With its help, the position of the tracks is fixed. If they are already worn out, then you should loosen this same screw, this will change the location of the slider a little, and you can be a little patient with replacing the device. But don't count on long-term respite. Naturally, we remember that the contactless sensor cannot be repaired. This completes the adjustment, repair and replacement of the throttle position sensor, now you can operate the car for several more years and not even think about such issues.
To check the supply voltage, disconnect the wire block from the sensor. Turn on the ignition and use a tester to measure the voltage between terminals “A” and “B” of the wire block. The supply voltage should be about 5V. To check the sensor, we connect the block of wires to it and, with the ignition on, measure the voltage (the wires of the block can be pierced with thin needles connected to the terminals of a voltmeter) between the sensor terminals “B” (“ground”) and “C” (slider) - it should not be more than 0.7V. Turning the plastic sector of the drive by hand, fully open the throttle valve and measure the voltage again - it should be more than 4V. Turning off the ignition, disconnect the wire block and connect an ohmmeter between terminals “C” and “A” (or “B”) of the sensor. Slowly turning the drive sector, we monitor the readings of the tester arrow. There should be no jumps in the needle throughout the entire working range. To replace the sensor, remove the throttle body from the receiver studs without disconnecting the coolant inlet and outlet hoses from it (see Removing the throttle body).
Using a Phillips screwdriver, unscrew the two screws securing the sensor to the throttle body...
...and remove the sensor.
The sensor is marked 2112-1148200
Remove the sealing foam ring installed under the sensor.
Install the sensor on the throttle body in reverse order. In this case, the damper must be in the closed position. The tightening torque for the sensor mounting screws is 2 N•m.
The VAZ 2107 throttle sensor, together with a mass air flow sensor and oxygen concentration control, acts as an element that controls the supply of fuel to the combustion chamber depending on the position of the throttle valve. As with any repair to replace electronic fuel injection sensors, they must be checked for functionality. To check, you will need a regular multimeter with the function of measuring resistance in the power circuit and a set of standard tools.
To check the throttle sensor:
- Disconnect the package with wires from the sensor.
- The connector body will be marked. Connect the ohmmeter leads to terminals “B” and “C”. We open the throttle valve; for a working sensor, the resistance will increase from 2.7 to 8.2 kOhm.
- Next, we switch the multimeter to voltmeter mode and connect its negative terminal to engine ground, turn on the ignition in the circuit, and the positive probe will turn on. For a working sensor, the voltage should be approximately equal to 5V, if absent or significantly different from the norm, there is a malfunction in the power circuit or in the computer. After measuring the voltage, turn off the ignition.
After confirming that the throttle sensor is not working and deciding to replace it, you must:
- To remove the sensor, use a Phillips screwdriver to unscrew the two screws securing it to the throttle body and remove it.
- There will be a foam gasket between the sensor and the housing.
At this point, the repair work to check and remove the VAZ 2107 throttle sensor is completed. The installation must be carried out with the damper closed, aligning the protrusion of the damper axis with the groove on the sensor body.
Sources
- https://carnovato.ru/proverka-regulirovka-datchika-polozhenija-drosselnoj-zaslonki/
- https://www.autofizik.ru/VAZ/VAZ-210721047/features-of-repair-of-a-VAZ-2107-20-with-engine-VAZ-2104/checking-and-replacing-position-sensor-d
- https://remont-vaz2106.ru/datchik-drosselnoj-zaslonki-vaz-2107
How to make adjustments
This process involves setting the ignition angle to the initial state. At VAZ this should be done as follows:
- The crankshaft pulley is installed.
- The distributor is installed.
- We start and warm up at a temperature that must be considered working.
- We try to start with a hot engine. If you perform this procedure at an early stage, the starter will not turn as it should.
This is interesting: Ball joint Nissan Almera Classic, N16 and G15: replacement, how to remove it and select it
After the VAZ 2107 contactless ignition has been installed, you should perform a test drive. In this case, it is recommended to pick up a speed of 30-40 kilometers per hour, and then engage the “fourth” gear. As soon as the gear has been engaged, it is necessary to give as much gas as possible. If the contactless ignition kit has been installed correctly, the driver will hear a small ringing sound after a few seconds. After this, the engine will begin to work as necessary, gradually gaining momentum. In the same case, if the ringing continues for more than three seconds, then you need to advance the ignition by turning the distributor. If there is no sound, this can be done a little earlier by turning the distributor.
How to be sure to perform the procedure correctly
Often, owners of “classic” VAZ cars who decide to independently install and adjust contactless ignition have certain questions regarding the implementation of this procedure. This is due to the lack of experience in this matter. That is why, before carrying out the procedure of dismantling the “native” system and then installing a contactless one, you should study the connection diagram for the contactless ignition. If you neglect this procedure, then most likely you will have difficulties even at the stage of dismantling the old system. In the worst situation, it may happen that certain technical components will simply be damaged and repairs will be quite expensive.
That is why, if you are not sure that the installation and configuration of contactless ignition can be done by you yourself, it is recommended to seek help from professional craftsmen who specialize in this issue. It is worth saying that today installation services for such systems are widespread and, as a rule, are provided at every service center. At the same time, it is also necessary to be extremely careful in this matter.
It is worth recognizing that “classic” VAZ cars are already outdated and the issue of installing an ignition system is being addressed less and less. Therefore, you may encounter a situation where a technician who has been working at a service station for a long time has never encountered this procedure before.
Please note that when searching for specialists, it is recommended to give preference to those who have experience and know how to correctly carry out the procedure so that the car works as it should. If the work is done correctly, you will immediately notice that the car begins to start without problems in the cold season, and gasoline consumption has been significantly reduced.
Installing contactless ignition is the most correct solution that will make the vehicle work better, as well as help save money on purchasing fuel for the car.
Damage diagnostics
How to understand that an injector needs to be replaced, checked or repaired? Even without sensors, you can understand that repair of fuel system elements is required if there are 1 of 2 main signs in models 2107, 21074:
- Unstable engine operation. Sometimes it may stall or have difficulty starting.
- A much less obvious sign is loss of power. This effect is noticeable if you mostly drive at medium speeds, but at high speeds it is very noticeable.
- The last sign is recorded only by sensors - the pressure inside the system increases.
The cause of such failures is clogged injectors; even diagnostics are not needed. Cleaning helps restore the engine to its original performance. If the problem has not been resolved after cleaning, it is worth checking the tubes and injectors for damage or breakdowns. In such cases, it is better not to start repairs, but simply replace the damaged parts with new ones.
Sometimes it is impossible to determine on your own where the damage is, and only then will diagnostics at service centers come in handy. A blockage can cause quite serious damage to the VAZ 2107 injector, as well as rupture of channels. The pressure that arises inside the system can easily destroy the most fragile parts. Here you won’t be able to fix the situation with your own hands, even if you have a complete diagram of the car at hand. There is only one conclusion - you need to devote a lot of time and attention to cleaning injectors and do it regularly.
Why is a strobe not used?
Most people who study the issue of installing electronic ignition on a “classic” think about why a strobe is not used when performing the action algorithm. In fact, the answer in this case is very simple. The fact is that the practical experience of service center specialists performing similar work does not imply the use of a strobe due to the regular stretching of the chain on the engine. Even if we are talking about a new target, after tightening it with the help of a tensioner, it is stretched in such a way that the points on the engine cannot coincide. As a result, it becomes impossible to achieve the most accurate alignment using a device such as a strobe.
Note that the process of replacing contact ignition with non-contact ignition in the VAZ-2107, which has an injection engine, is impossible. If a wiring harness from a newer car model was installed in the vehicle and the vehicle refuses to start, this indicates that the connectors for the EPHH and the switch were mixed up during the work. The fact is that in their design they are completely identical. As a result, in order to identify the problem, it is necessary to swap them.
Replacing the device
If the indicators do not correspond to the above values, the ignition coil is considered faulty. Such a device must be replaced with a working one, which can be purchased at almost any spare parts store. When purchasing the device, you must inspect it and check the availability of documents: technical passport and certificate.
Removing the ignition coil on a VAZ2107 car is carried out with the battery disconnected. Use a wrench to unscrew the nuts on the contact and mounting studs. The faulty device is removed. A spare part is installed in its place and secured and connected. Now you can connect the battery and start the engine.
Useful tips
- To ensure normal ignition operation, high-quality spark plugs should be installed. This is especially important when the car is running on gas.
- Poor quality wires often cause ignition malfunctions. It is better to use wires with silicone insulation, which has better dielectric characteristics and is more durable.
- Poor fixation of the wire block often causes failure of the switch. To avoid this, it is necessary to check the quality of the connector fit.
- On VAZ models older than 1994, when installing electronic ignition, the tachometer stops working. You can fix the problem by installing a 1.2 kOhm resistor or a capacitor in the circuit between the coil and the tachometer.
The only drawback of electronic ignition on a VAZ is its complete inoperability if the hall sensor breaks down. This is not a very common, but quite possible event. To completely protect yourself from this problem, you should buy a spare sensor and carry it with you.
Armored wires
High voltage wires serve to transmit pulse voltage from the ignition coil to the fixed contacts of the distributor cover, and from there to the central electrodes of the spark plugs. The VAZ 2107 has five such wires. Structurally, each of them consists of a conductive core, several layers of insulation (PVC or silicone) and tips.
The set consists of five wires: four transmit voltage to the spark plugs, and the fifth serves to supply it from the ignition coil to the distributor
Wire faults
Armored wires can have only three faults:
- breakdown of the insulating layer;
- breakage of the current-carrying conductor;
- core wear.
Failure of one or more high-voltage wires at the same time is accompanied by the following symptoms:
- “triple” of the motor;
- its difficult to start;
- drop in power unit power;
- increase in the amount of fuel consumed.
How to check high voltage wires
Checking armored wires consists of determining the integrity of their insulation and establishing the resistance of the current-carrying conductors. To assess the condition of the insulating layer, it is enough to remove the wires, clean them of dirt and inspect them by twisting and bending them in your hands. If during such a check it is discovered that at least one of them has cracks, severe abrasions, or traces of electrical breakdown, the entire set should be replaced.
Long-term operation of high-voltage wires leads to wear of the current-carrying core, as a result of which its resistance changes up or down. Naturally, this affects the magnitude of the transmitted voltage and spark energy.
The process for measuring wire resistance is as follows:
- Turn on the ohmmeter and set it to the range 0–20 kOhm.
- We connect the probes of the device to the ends of the current-carrying wire.
- We look at the ohmmeter readings. Serviceable wires, depending on the manufacturer and service life, can have a resistance in the range of 3.5–10 kOhm. If the indicators are different, we change the wires as a set.
The core resistance should be in the range of 3.5–10 kOhm
