Such work as replacing a ball joint on a VAZ 2110 and 2112 is familiar to all owners of this car. There are several reasons for this, the main one being the low reliability of this unit; the quality of components for domestic cars has always been not very high. Also, certain problems are caused by poor road surface; after all, the supports are unsprung, and all the vicissitudes of the road affect them first. Another reason why ball joints often have to be replaced is careless driving, which often occurs in young drivers. In any case, if you purchased such a car, then you should definitely know the features of replacing the support.
Replacing a ball joint on a VAZ 2110 and 2112 is a job that is quite feasible even for an inexperienced mechanic. There are no super complex elements or actions here, which allows you to carry out repairs in any garage. But, it is worth remembering that during the replacement process, problems may arise with the wheel alignment angles; therefore, after carrying out repairs, be sure to visit a service station and check the wheel alignment. This way you are guaranteed to avoid increased tire wear.
Features of the node
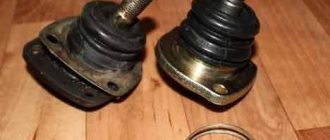
The function of the ball joint is to connect the wheel hub and the suspension arm. Thanks to this design, it is possible to significantly reduce the pressure on the lever when the car is moving. Structurally, this is a ball joint that performs the function of freely articulating suspension parts.
It is worth remembering that the ball joint is filled with lubricant from the inside. It is this moment that allows you to avoid rapid wear of the part. The support is attached to the lever using three bolts; this fastening allows the most optimal placement of the load on the part. The hinge ends with a threaded pin; it is to this that the hub eye is attached.
It is possible to add lubricant to the ball joint housing, this can significantly increase the service life of the part. But this work should be done in advance, without waiting for the active manifestation of the shortage. It is worth remembering that this malfunction can lead to an emergency.
Symptoms and causes of element wear
While driving, a worn ball joint manifests itself as follows:
- overcoming small bumps at medium or high speed, you will hear a dull knocking sound coming from the front suspension;
- with average wear, a knock may be heard on the steering wheel;
- In heavily worn bearings, the ball begins to wedge, causing a creaking sound when turning the steering wheel.
If you find one of these signs, you should contact a service station for diagnostics or check the functionality of the parts yourself and without a lift. The service life of ball joints on cars made in Russia, China and Korea is in the range of 20-50 thousand km. Higher quality parts of European and Japanese foreign cars can last up to 150 thousand kilometers. It is necessary to focus on these intervals when troubleshooting.
Contrary to popular belief, the behavior of a car with worn joints when driving on a flat road changes little. The deviation from a straight line and the lateral abrasion of the rubber are so small that an inexperienced driver will not notice the changes, unless the ball joint becomes completely loose. A clear sign is a distinct knocking sound.
Accelerated wear of joints occurs for the following reasons:
- Driving fast on bad roads. Due to constant shock loads and vibration, the plastic bushings of the elements break and the ball pin begins to dangle.
- Cracks and breakthroughs of anthers. Through them, road dirt gets between the rubbing parts - the ball and the plastic bushing. The latter is inferior in hardness to metal, so it wears out faster.
- Constant overload of the vehicle, causing the supports to experience increased load.
Diagnostics
It is important for the driver to be able to correctly assess the technical condition of the ball joints. There is some complexity here, some of the symptoms may indicate other suspension problems, so it is very important to carefully diagnose.
The first sign is a knocking sound, which is initially observed only when driving over bumps and uneven surfaces. If you do not pay attention to the suspension, then this knock will intensify, which will lead to almost continuous noise. But knocking is far from the most serious indicator; there are a number of signs by which such a problem can be diagnosed.
Another sign of problems with the ball joint is decreased controllability. This occurs due to a decrease in the reliability of the joint between the wheel and the lever. As a result, the wheel becomes less sensitive to steering input, and the driver experiences a slight “yaw” on the road. But, here it is worth remembering that a similar problem can occur with other problems with the steering and chassis.
Also, with high wear of the ball joints, the wheel alignment angles are violated. This leads to a tire problem. They wear out much faster, so if you notice increased wear on the rubber on your wheels
, then it is worth checking the condition of the ball joints.
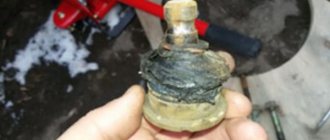
If there is any suspicion of a ball joint malfunction, it is important to conduct a detailed inspection of the part. Often the problem occurs due to damage to the anthers, in which case the problem will be visible visually. If the boot is damaged, then replacing the part is simply inevitable. If this part has no visual defects, it is worth checking for play
. To do this, we try to move the levers with a pry bar; if the ball joint is working properly, this will not work; if there is visible play, then you should think about repairing the suspension.
How to determine the malfunction?
There are several ways to determine the condition of the ball joints:
- With an assistant, we rock the car by pressing the front wings one by one. An uncharacteristic sound will come from the side where the balls are worn.
- Jack up the wheel and ask an assistant to press the brake pedal. We grab the wheel and try to swing it to the sides. When the wheel is locked, play is immediately felt.
- On the VAZ 2107 of the last years of production, holes appeared in the ball joints for diagnosing pin wear. To check the lower ball joint, insert the rod of a caliper into the hole as in the diagram below. If the depth is more than 11.8 mm, the support must be replaced.
- To check the upper ball joint you need a number of devices and special tools. Few people have this in their garage, so there is no point in describing this method. For those still interested, see the diagram below.
Selection of components
If you decide that you cannot do without replacing the ball joint, then you should pay special attention to the selection of components. An error in selection may lead to the need to quickly repeat the repair. At the same time, it is worth remembering that on average this part lasts 30-40 thousand kilometers.
The car manufacturer recommends purchasing components created at AvtoVAZ, as well as several factories that are part of the concern. But, in practice, these parts serve very little; it is rare to see “original” ball joints that can withstand more than 20,000 kilometers. Even when operating on smooth asphalt, which we practically don’t have.
Among the domestic manufacturers, ball joints produced by the Trek production association have proven themselves to be excellent. This company produces parts for sports suspension, which is why the service life on conventional cars is significantly longer than that of standard analogues.
Another good brand “ Pro-sport”
", this company produces a large number of components for a wide variety of makes and models of cars. Among all the variety, you can also find ball joints for the VAZ 2110 and 2112. At the same time, it is worth remembering that there are several different lines of components, they differ in price and endurance, take this into account when choosing.
4 BelMag
Ball "BelMag" belong to the budget category, which determines their great popularity in the Russian market. In addition, the quality of the products cannot but rejoice: ordinary ball joints will serve their owner for about 50,000 km, and a reinforced part (for the VAZ 2121 Niva) - 20 thousand more. In total, five different series are produced, designed for use in VAZ and GAZ cars. All products come with anti-friction lubricant, which is enough for the entire service life.
The owners are satisfied with their choice, and in the reviews they note such strengths of the balls as:
- No need to lubricate the support;
- Good safety margin and service life;
- More than affordable price;
- Anti-counterfeit protection.
What will you need?
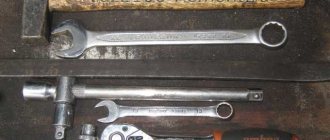
To carry out the replacement, you should prepare all the necessary tools in advance. This will allow the work to be completed in the shortest possible time, as well as to avoid a number of problems and difficulties in the process. So, to solve this problem you will need:
- Collar;
- A set of sockets; in the worst case, you can take spanners, but this will be less effective;
- Liquid key or WD-40;
- Special puller for ball joints;
- Graphite lubricant;
- Hammer.
Replacement process
Please note that replacement must be done on both sides. Before starting work, be sure to put the machine on the handbrake and secure it with wheel chocks. Choose a flat area for work. A few hours before repairs, fill all threaded connections with liquid wrench. The work is carried out in the following order:
- We hang the wheel on a jack, after which it is removed;
- Unscrew the nut that secures the support to the car pillar;
- Next, loosen the bolts securing the ball to the hub; do not completely unscrew them yet;
- After this, we press out the hinge using a puller. If it is not available, then we place a chisel between the lever and the eye of the hub, hammer it into this gap with blows of a hammer, gradually the support will move away;
- Unscrew the bolts completely;
- We install a new support. To do this, we put it in place and secure it with bolts to the hub;
- Next, insert the finger into the hole on the strut, and by tightening the nut, press the strut against the eye of the hub.
This completes the work; before installation, it is recommended to lubricate all threaded connections with graphite lubricant. After the repair, visit a service station and check the wheel alignment angles.
conclusions
. Domestic roads have a negative impact on the condition of the car's suspension. Therefore, replacing a ball joint on a VAZ 2110 and 2112 is a fairly regular job. But, it is not complicated, and with the right approach it will not take much time.
The design of each car has a suspension (the connecting link between the car body and the road surface), which contains such a part as a ball joint. A ball joint is a movable device that connects the wheel and the suspension arm and provides wheel control.
Main manufacturers
To make a quality purchase, it is better to purchase from the most rated manufacturers.
These include:
- "Belmag". The “Favorit” series is specially manufactured for the VAZ 2110.
- "Cedar". The body is solid forged. The rod is rolled with diamond rollers, which ensures high manufacturing precision. After this, a zinc coating is applied to the surface. The boot is made of rubber with high elastic characteristics.
- "Track". Often used in vases. The support is capable of traveling up to 60 thousand km.
The ball joint is
The ball joint is the joint that connects the wheel hub to the suspension arm. The main function of this device in the structural structure of the machine is to ensure that the wheel can move freely horizontally and prevent the wheel from moving vertically. Ball devices are installed not only on the wheel hubs, but also in the camber arms, in the steering linkages and in the gas stops of the hood mount.
Previously, ball joints were of the pin type. Its disadvantages were that it allowed the wheel to move only along one axis, which made such a car difficult to drive. In addition, it had to be lubricated often.
Examination
Since the ball joint is constantly under load (the weight of the car, pressure from the anti-roll bar and the front arm), to check the condition we will need to unload the car wheel, that is, hang it. Then we take the wheel with both hands by the top and bottom and try to swing it in opposite directions.
Let's listen to the knock
Not every knock indicates that the ball joint needs to be replaced. You should call an assistant and ask him to press the brake pedal - if the knocking noise disappears, it means that the play belongs to a worn wheel bearing.
Then we take a pry bar, insert it between the lever and the longitudinal rod - swing the lever in a vertical plane, listen to the knock, or put your free hand on the support cup and try to record small impacts.
Fix the gap between the finger and the liner
Ball joint design
The design of this type of movable connecting link is not that complicated.
- 1-body;
- 2-high-strength wear-resistant metal insert;
- 3-spherical “apple” part (takes the main loads);
- 4-ring retaining ring (retains the apple and high-strength insert);
- 5-conical tip (connecting element of the steering axle of the wheel and the sphere);
- 6-rubber boot (protects from dust and moisture), refractory grease under the boot;
- 7-thread of a conical rod (serves for a bolted connection with a rotary axle);
- 8-flange with holes for bolted connections, which is cast with 1 ball joint housing (used for mounting on the suspension arm).
Thanks to this design, which has a spherical part, the device can rotate in three planes. Unlike pivot-type ball joints, it does not require lubrication.
Classification of ball joints:
- Collapsible design.
- Not collapsible. Manufactured in cast form with a lever.
There is only one way to detect faults.
Depending on the quality of the roads on which the car is driven, the service life of the ball joints also depends. If you “hammer” it, that is, do not change it on time, especially if signs of malfunction appear, then this can lead to a breakdown on the road. There are times when the wheel falls off completely.
When to change the oil in a Lada Granta box (basic information and factory regulations)
According to the regulations, the oil in the gearbox of Lada cars needs to be changed once every 5 years or every 75 thousand km. And level control and topping up are done more often - every 15 thousand or once a year.
Owners of cars from “old” years of production are very lucky: they have a probe for control in the design of the box. It is screwed into the filling hole (see drawing).
With the transition to a new family of components, the design of the crankcase also changed. The volume of liquid became 2.2 instead of 3.3 liters. But we have the “old” version, and we need to focus on the number “3.3”.
By the way, the filling volume is 3.2 liters. The following oil will be filled from the factory:
- The first months of production: LUKOIL TM-4 (viscosity may vary) or ROSNEFT KINETIC 80W85. All this is semi-synthetic class GL-4;
- Since July 2012: TATNEFT TRANSLUX TM-4-12, 75W85 (GL-4).
The last of the three materials has a service interval of 150,000 km.
Ball joint malfunctions
We list all the signs of problems in the operation of this important device:
- There was a knocking sound when turning.
- There is a beating in the steering wheel (the steering wheel vibrates strongly).
- Uneven tread wear has appeared. This is due to the end runout of the wheel.
- The wheel alignment is loose or not done correctly. In this case, the rubber treads wear unevenly on only one side.
- Increased load on wheels. The steering wheel is harder to turn.
- During braking, the car deviates to the side. In this case, clicks may be heard in the suspension.
The listed symptoms of problems do not necessarily relate to problems with ball joints; it may be associated with other parts of the suspension assembly.
How to choose the right part
There are two types of such products: filled and with cermet bearings.
Filled options are best suited for front-wheel drive VAZ cars. They withstand heavy compressive loads. Metal-ceramic products are installed on the rear wheels and are characterized by high tensile strength.
The most popular manufacturers of supports for domestic cars are Za Rulem, Kedr, Trek and BelMag. HOLA, HI-DRIVE, Moog, FENOX and some other companies deserve trust.
How to check a ball joint yourself
Not everyone likes going to a service center and getting diagnostics done. To independently check, you need the following conditions and tools:
- A lift, inspection pit or overpass. It is possible from pits and lifts.
- Jack and wheel chocks (shoes). If there is no vehicle lifting device, a jack is required.
- Flat end mount. Such that it can be easily inserted between the steering axle and the ball itself.
- The support is the size from the crankcase protection to the ground.
- Set of wrenches.
- Ball joint remover or hammer and gasoline.
We always follow safety precautions. We do not carry out such repair work on soft ground.
There are several types of pendants. One of the common types is MacPherson strut suspension. In this type of suspension, ball joints are installed only at the bottom. There are also such suspension designs: double-wishbone, multi-link, adaptive, DE DION suspension, rear dependent suspension, rear semi-independent suspension, jeep and pickup truck suspensions, truck suspensions. If the suspension is double wishbone, then there will be a ball suspension on both the top and bottom.
How to change: step-by-step instructions
It's better to work in a pit.
- Use a jack to lift the front of the car from the problematic side.
- Unscrew the fastening nuts and remove the wheel.
- Unscrew the nut that secures the ball pin.
- Then remove the bolts located along the edges of the support - the fastening to the steering knuckle.
- Insert the puller and squeeze the finger out of the lever (see photo).
If you don’t have a puller, you can use a hammer (see photo).
- Ask a friend to carefully press the lower end of the lever with a pry bar.
- Remove the old part.
- They put a new one in its place and bolt it to the steering knuckle.
- Manually pointing your finger into the eyelet, ask a friend to slowly lower the lever.
- Secure the nut that secures the pin.
- Return the wheel to its place and lower the car.
The ball joint on modern Vases from 2108 to Granta also changes.
Video of replacement for VAZ 2110
The operation, which is often performed at a service station, can be done at home even by one car owner. But if you have a friend, the operation will take up to an hour, and the cost will be several times cheaper.
The design itself and the installation location of the ball joints imply the most severe operating conditions. Almost the entire load of the vehicle's mass falls on one small point in the form of a finger ball surface. And if you take into account the weight of luggage and passengers, overloads during aggressive driving and the disgusting quality of roads, it immediately becomes clear why this unit requires such close attention. Fortunately, on a VAZ 2110 car you can do the replacement yourself.
Video
This video shows in detail the design of the ball, what it is used for, etc.
Here you can clearly see how a ball joint works in motion.
How to diagnose the suspension yourself.
Diagnostics of steering tips and balls.
This video shows how to check the suspension.
Checking and replacing the ball joint on a FORD FOCUS 2 / FORD FOCUS 2 car.
Over time, every owner of a Lada Kalina car is faced with the need to change ball joints. This operation is quite accessible for independent execution. Read about in what cases it is necessary to change ball joints, and how to replace ball joints on Lada Kalina cars.
VAZ 2170 Checking the technical condition of the front suspension parts on the car
Lada Kalina Hatchback RED LABEL Logbook We are going through the suspension. Replacing daisies, silent blocks and grant crabs
All cars » VAZ 2170 (Priora) .
4.2.6 Checking the technical condition of the front suspension parts on the car
At each maintenance, in accordance with the manufacturer's requirements, check the condition of the front suspension elements, paying special attention to the absence of mechanical damage to the protective covers of the suspension ball joints.
| Note All checks and work should be carried out from below the vehicle, mounted on a lift or inspection ditch (with the front wheels hanging). |
Check the condition of the rubber-metal hinges, rubber cushions, suspension ball joints and the condition (settlement) of the upper supports of the telescopic suspension struts.
| Warning Check especially carefully for cracks or traces of contact with road obstacles or the body, deformation of the arms, braces, stabilizer bar and its struts, body front parts in the places where suspension units and parts are attached. |
Rubber-metal hinges and rubber cushions must be replaced in case of ruptures and one-sided bulging of rubber, as well as when their end surfaces are trimmed. The following are not allowed on rubber suspension parts: – signs of rubber aging; - mechanical damage. On rubber-metal hinges (silent blocks) the following are not allowed: – signs of aging, cracks, one-sided bulging of the rubber mass; – separation of the rubber mass from the reinforcement. Replace faulty parts.
| Rice. 4.2. Front suspension parts: 1 – anti-roll bar; 2 – telescopic stand; 3 – lower arm hinge; 4 – lower arm of the front suspension; 5 – front extension joint; 6 – lower arm extension; 7 – stabilizer bar; 8 – rear extension joint; 9 – ball joint of the lever; 10 – steering knuckle |
The location of the front suspension elements being tested is shown in Fig. 4.2.
| Helpful Hints When the front wheel is suspended, it is difficult to discern play in the wheel bearings and ball joints. Ask an assistant to press the brake pedal and if you feel play in this case, the ball joints are faulty. |
Inspect the following key areas on the underside of the vehicle.
| 1. Protective covers for ball joints. | 2. Rubber-metal joints for extending the rear lower arms... |
| 3. ...and the front ones. | 4. Rubber-metal joints of the anti-roll bar struts. |
| 5. Rubber-metal joints of the lower arms. | 6. Rubber arrays of stabilizer bar cushions on the body side member. |
7. Telescopic stands. Shock absorber fluid leaks and “sweating” are not allowed.
| Note To check the ball joints, place a support under the lower arm. |
Warning When working on a lift, be careful not to drop the car when lowering it onto the support.
8. To check the ball joints, insert a mounting blade between the lower arm and the steering knuckle and move its free end up and down. If you feel the fist moving relative to the lever, there is a gap in the support and it needs to be replaced. 9. Repeat the test for the hinges on the opposite side. Remove the support from under the car.
Signs of faulty ball joints on Lada Kalina
The front suspension of Lada Kalina cars is made according to the MacPherson scheme, in which the upper support is a shock-absorbing strut, the lower is a wishbone connected to the steering knuckle by means of one ball joint. This scheme is quite simple and reliable, however, this assembly contains several moving parts, so it can be difficult to reliably identify a faulty ball joint.
In general, the following signs indicate a malfunction of the ball joint:
- Knock from the front suspension when overcoming uneven roads at low speed;
- Increased effort on the steering wheel when turning;
- Creaking from the front suspension when turning the steering wheel;
- Uneven tire wear;
- Unstable trajectory of the car with a straight steering wheel.
These signs should be treated with caution, as they may indicate problems with the wheel bearing, shock absorber and fastening of suspension parts (levers). To diagnose, you can follow a few simple steps.
First, rock the car and listen to the sounds arising in the suspension - although this method helps to localize the cause of extraneous creaks and knocks, it, unfortunately, can provide little information to inexperienced car enthusiasts.
Secondly, you can check the ball for play by shaking the wheel with your hands, grasping it at the top and bottom points. In this case, you need an assistant to depress the brake pedal. There should be no noticeable play when the wheel rocks, although play may again indicate problems with the wheel bearing and suspension parts.
Finally, thirdly, you can check the ball joint for play tactilely. To do this, you need to place your palm directly on the support so as to simultaneously touch its body and finger. When rocking the wheel (which is best left to an assistant), you can clearly feel whether there is play in the ball joint and how big it is.
You should also pay attention to the condition of the protective rubber boot (boot) - you need to periodically inspect it for cracks and tears. Even a small crack will lead to squeezing out the lubricant and getting dirt inside the boot, and, as a result, to intense wear of the ball joint and a sharp reduction in its service life.
If a malfunction is suspected or a clear sign of failure is detected, the ball joint must be replaced as soon as possible.
Summary
It is not difficult to independently check the condition of the ball joint even if there is no overpass or lift. Timely diagnostics will allow you to avoid major troubles associated with malfunctioning ball joints in time.
Checking the upper ball
If there is play in the upper hinge on the support, then during the described check it will be clearly felt. You may also hear clicks or squeaks coming from the ball joint. However, often such a check is only suitable in case of significant wear; at the initial stage, such an algorithm may not produce results.
Therefore, it is better to use a jack to check. The algorithm will be the same, but the difference will be that you need to swing not only the upper part of the wheel, but also the lower and side ones. Specifically, you can grab the top of the wheel with one hand and the bottom with the other. Next, swing the wheel in a vertical plane. A similar check can be performed by grasping the left side of the wheel with one hand and the right side with the other. In this case, the wheel must be rocked in a horizontal plane. If there is play and “unhealthy” creaking sounds, then it is necessary to replace the support with a new one. These simple steps will help you check the ball joints without removing them and without a lift.
Choosing the right new ball joints
The chassis of Lada Kalina cars of both generations (models 1117, 1118, 1119, 2192 and 2194) is built on a complete base, which is for the most part unified with earlier and later cars of the Volzhsky Automobile Plant. In particular, all Kalinas are equipped with the same ball joints that were used on the Samara family (VAZ-2108, 2109, 21099) and Samara 2 (VAZ-2113, 2114 and 2115), Lada 110 (VAZ- 2110, 2111, 2112), as well as on the current Priora and Granta models.
Ball joints for these model series have the original catalog number 21100-2904192-82, the same supports complete with fasteners have the number 21100-2904192-86.
Moreover, today the market offers two modifications of ball joints - standard welded and reinforced stamped ones. Hinges differ in production technology and the thickness of the metal used, which affects their strength characteristics, durability and price, but their installation dimensions and characteristics are the same. Therefore, it’s up to you to decide which supports to buy for your car.
