Ignition system UAZ 469
To start the engine of any vehicle, it is necessary that the combustible mixture ignites at the right moment in the combustion chamber. Effective operation of the piston system is achieved by correctly setting all parameters. The UAZ 469 ignition system allows you to operate the vehicle regardless of climate, temperature, humidity and other external factors.
The ignition of the UAZ 469 ensures that all elements are in good working order and flawlessly perform their assigned functions. For UAZ 469, the ignition circuit consists of the following components:
- ignition coil UAZ 469;
- distributor;
- tourniquets;
- switch;
- candles.
Each individual component of the electrical circuit must not allow breakdown to the car body and current leakage.
The ignition of a UAZ 469 car includes the following elements:
- battery;
- mass button;
- voltage regulator relay;
- generator;
- ammeter;
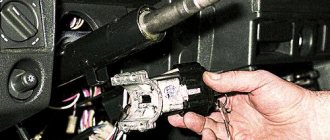
- ignition switch UAZ 469;
- breaker-distributor contacts;
- distributor;
- capacitor;
- ignition distributor-distributor cover;
- slider;
- spark plug;
- high voltage wire;
- additional resistance;
- additional starter relay;
- ignition coil;
- starter.
The ignition order of the UAZ 469 is strictly regulated; the spark occurs exactly in the specified sequence. An important point is not only the timeliness of the spark supply, but also its size. If the slightest interruption occurs, the entire chain is reconfigured.
A car battery is not designed to produce sufficient current and voltage required to ignite a combustible mixture. The charging current is only capable of spinning the engine flywheel for a short time. For stable operation of the engine, the entire ignition system of the vehicle must begin to fully function.
This important component of the machine is designed to significantly increase the power characteristics of the battery. Proper ignition, together with the battery, sends the spark plugs the sufficient volume and current required to reliably ignite the fuel mixture.
Ignition contact diagram with variator and Moskvich coil B-115
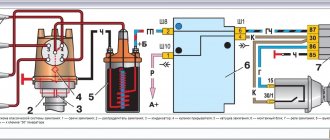
An ancient contact circuit for the ignition of the oldest UAZs, with a Moskvich B-115 coil and an additional resistance installed directly on the coil. The additional resistance terminal “to the starter relay” in some wiring options is connected to additional contacts on the ignition switch, and not to the starter relay. It also happens that it is connected not to the intermediate relay, but to the starter solenoid relay to a special terminal. Be careful. The meaning of this design solution is that at the moment the starter turns, “+12V” is supplied to the coil bypassing the additional resistance, which compensates for the voltage drop in the on-board network when the starter is operating and makes it easier to start the engine; in simple terms, the spark does not weaken.
Operating principle of the ignition system
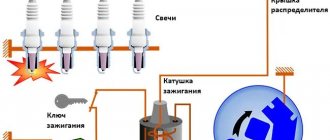
Ensuring and maintaining timely ignition of the air-fuel mixture for the efficient functioning of the internal combustion engine is the main task of ignition. This occurs in strict accordance with the established operating order of the engine cylinders. An ignition coil 16 is connected in series to the electrical circuit along with an additional resistance 14. It is automatically closed when the engine is started by the starter.
This significantly increases the breaking current of the primary circuit. Ignition coil 16 creates high-frequency pulses in the vehicle's on-board electrical system. High voltage flashes create a breakdown of the spark gap in the spark plugs 12, screwed into the top point of each cylinder, where the working fuel mixture is compressed.
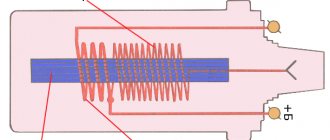
The coil consists of primary and secondary windings. The primary winding is wound on top of the secondary. Inside the coil there is a core and a ring magnetic circuit. Both of these elements are made of special electrical steel. Reliable sealing of the coil is carried out by a carbonite cover in a casing with a rubber gasket.
Transformer oil is poured into the casing for cooling. This material significantly increases the insulation of the windings and effectively removes heat from the coil body. To avoid damage to the coil and its overheating, it is not recommended to leave the ignition on in a car when the engine is not running.
Distributor 8 distributes high voltage pulses to all cylinders of the internal combustion engine strictly in the established sequence. The distributor or breaker-distributor is installed in a standard place to the left of the engine cylinder block. The mechanism is driven by the oil pump roller. The roller rotates counterclockwise from the lid side.
Generator wiring diagram
Elements of the G-250E1 alternator circuit, used on early machines:
- Brush.
- Contact ring.
- Excitation winding.
- Diode rectifier bridge.
- Heat sink plate.
- Stator windings.
Generator G250 with a power of 350 W
Generators with improved parameters installed on later UAZ 3151 vehicles are connected in a similar way.
How to set the ignition correctly
In order to set the ignition on the UAZ 469, you must adhere to the following recommendations:
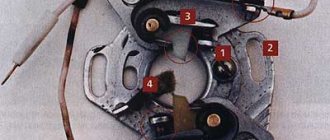
- Remove the distributor cover with the rotor. Check the size of the gap between the contacts. It can be adjusted. Between the contacts, separated as much as possible, there should be a gap of 0.35 - 0.45 mm. Adjustment is best done with a set of feeler gauges. Too small a gap produces a weak spark. If the gap is large, there may be no spark at all. Having made a normal gap, the rotor can be installed in its normal place.
- Using a spark plug wrench, unscrew the spark plug of the first cylinder. Close the candle hole with your finger. Using the starting handle, turn the crankshaft until the pin is pushed out by compressed air. This moment is called the beginning of the compression stroke of the first cylinder.
- Continue turning the crank until the hole on the pulley and the pin on the timing gear cover align. The rotor should be located opposite the internal contact of the cover, connected to the high-voltage wire from the spark plug of the first cylinder.
- Rotate the octane corrector plate together with the distributor so that the mark coincides with the middle mark on the scale of the plate.
- Lightly turn the timing mechanism housing counterclockwise. Scroll until the contacts of the distributor close.
- Connect the control light with socket. Connect one contact to the low voltage terminal of the distributor, the second to the ground of the machine. You can connect the warning lamp to the car body.
- Turn on the ignition and carefully turn the distributor clockwise. Rotate until the indicator light comes on, then stop rotating. It may be that the lamp does not light up. Repeat all steps from the very beginning.
- Tighten the distributor mounting bolt. Place the cover with the central wire in place. Check the adjustment starting from the first cylinder. The check is carried out counterclockwise.
Coil device
Underwater ignition on a jeep
The UAZ 469 ignition coil has a complex design:
- screw-in terminal with high voltage;
- voltage output;
- lid;
- contact spring;
- low voltage clamp;
- gasket for sealing;
- fastening bracket;
- magnetic circuits;
- contact plate;
- primary and secondary winding;
- insulation gaskets;
- frame;
- insulator;
- iron core;
- insulating mass;
- additional resistor and its insulator;
- screw and plate for fastening the resistor.
The distributor performs the function of distributing and interrupting the ignition of the UAZ 469. It has vacuum and centrifugal regulators. The centrifugal changes the ignition angle of the UAZ depending on the frequency with which the crankshaft or camshaft rotates.
BSZ spark plugs are a very important element. With their help, the working mixture in the combustion chamber in the cylinders ignites and gives a good spark so that the car starts quickly. Most often they use A12BS spark plugs, which cannot be disassembled, so in case of a malfunction you need to have new ones in stock that can be quickly and easily replaced.
Wires for high voltage are made from PVL-1 wire. They connect the coil to the distributor, and the distributor to the spark plugs. The spark plugs are attached to the central electrode using special tips with resistors.
Why turn on the ignition?
With the ignition set correctly:
- The engine operates efficiently, steadily and stably in all modes. Otherwise, the engine functions intermittently, knocking, and popping. Unstable engine operation causes many problems and reduces vehicle dynamics and speed characteristics.
- After correct ignition adjustment, starting a cold power unit is significantly improved.
- When the ignition is misregulated, fuel consumption increases. After adjustment it decreases significantly.
- Engine power also increases noticeably in a car after proper ignition adjustment.
What are the ignition systems on the UAZ 469
Contact ignition on UAZ 469
. Now it is recognized as obsolete. However, domestic manufacturers continue to use it. The system launches a pulse of a certain power. This impulse comes from the ignition distributor. The contact ignition circuit of the UAZ 469 is simple and uncomplicated. This is its advantage. The driver can fix any malfunction and make adjustments with his own hands. The prices of components are low.
Transistor or contactless ignition of UAZ 469
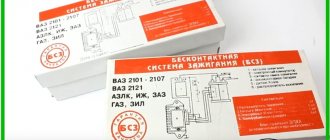
. Contactless ignition systems are installed on many types of vehicles. It has a number of advantages over the contact design. The spark produced by such a device is much more powerful. This occurs due to an increased level of electrical voltage in the secondary winding of the ignition coil. The transistor ignition system is equipped with an electromagnetic mechanism. It ensures stable, constant operation of the entire system, uninterruptedly transferring energy to components, parts, and mechanisms. Correctly configured ignition with an efficient internal combustion engine guarantees high power and significant fuel savings. Long-term reliable performance is ensured by compliance with the frequency of maintenance of the distributor drive. It must be lubricated and adjusted every 10,000 km. The difficulty of repair is a disadvantage of the contactless ignition system. It cannot be repaired independently, since this requires special diagnostic equipment, available only in service centers and service stations.
Electronic ignition on UAZ 469
. This type of ignition is the most technologically advanced, but at the same time expensive. Modern car models are equipped with similar devices. It has complex technology that provides not only high torque, but also a number of other engine indicators. Advantages: simple adjustment of the advance angle, no mandatory check of contacts for oxidation. In engines equipped with electronic spark protection, the fuel mixture burns 100%. Repairs must be carried out only at a service station.
Underwater ignition on UAZ 469
. This is a sealed ignition system, in which there is no fear of flooding with water, falling into deep holes, or driving in open areas during snow and rain. When the ignition is normal - contact or non-contact, 50% of the spark power is actually lost inside the distributor, between the cover and the runner. Let's find out why this happens.
There is a small gap between the electrical contacts, which are the distributor cap and the slider. To pass electrical energy through this space, most of the additional current is expended. With contact ignition, for these purposes, another part of the energy is spent on the functioning of the cam.
The underwater ignition is designed in such a way that the spark from the coil directly hits the spark plug. Carrying out this process, it does not lose its main power, except for the resistance of high-voltage wires. Here the loss of power is quite insignificant, so it can be ignored.
It is worth noting that on most foreign-made cars, a coil is placed separately on each cylinder, which is located immediately on the spark plug, and the loss is accordingly quite insignificant.
Source
Do-it-yourself wiring and electrical equipment repair
Main malfunctions of electrical equipment on the UAZ 469 and repair methods:
- If the battery is not charged, check the tension of the generator drive belt and the condition of the brushes. The problem may occur due to wear on the slip rings or the rotor touching the stator (bearing wear). The exact cause of the breakdown can only be determined after removing the generator and troubleshooting the components.
- An overcharged battery indicates a faulty voltage regulator that needs to be replaced.
- Noise when the generator operates is a sign of wear on the bearings or their seats on the covers. Worn and damaged parts require replacement.
- The absence of sparking in a contactless ignition system indicates breakdowns of the coil or cover, as well as incorrect adjustment of the advance angle. The switching device may be damaged. For repairs, it is necessary to replace broken components and adjust the timing of the spark.
- Burnt-out products must be replaced with parts with similar parameters. Periodically adjust the beams of headlights (as well as fog lights, if installed).
- A rattling sound when the horn operates occurs due to poor contact or cracks in the membrane. For repairs, you need to check the condition of the wiring and connection points. The damaged sound signal is replaced with a new one.
- If a short circuit is detected in the circuit, it is necessary to find out the cause of the malfunction. To do this, you will need to go through all the elements connected to this wire. Each consumer is disconnected from the network and separately tested for functionality. If the insulation on the wiring harnesses burns, they must be replaced.
- When replacing a section of wiring, it is necessary to ensure a reliable connection between the old and new sections. The fastest method is to twist the exposed areas, but this method does not provide reliable contact and long service life. A more reliable joint can be created by installing a special crimp sleeve. After installing the element, it is necessary to protect the exposed area with insulating tape. The third method of connection is soldering the wiring, which provides a strong joint, which in its characteristics is somewhat inferior to crimping.
Operating principle of the ignition system
Ensuring that the fuel-air mixture ignites at the correct time for efficient operation of an internal combustion engine is the primary task of ignition. This occurs in strict accordance with the predetermined operating sequence of the engine cylinders. The ignition coil 16 is connected in series with an additional resistor 14 in an electrical circuit. It closes automatically when the engine is started by the starter.
This leads to a significant increase in the breakdown current of the primary circuit. Ignition coil 16 generates high-frequency pulses in the vehicle's on-board electrical system. Flashes of high voltage interrupt the spark on the spark plugs 12, screwed into the top of each cylinder, where the working fuel mixture is compressed.
The coil consists of a primary winding and a secondary winding. The primary winding is wound onto the secondary. This is how the UAZ 469 ignition system works. Inside the coil there is a core and a ring magnetic circuit. Both of these components are made of special electrical steel. The reel is closed with a carbonite cover in a housing with a rubber seal.
Transformer oil is poured into the cover for cooling. This material significantly increases the winding insulation and effectively removes heat from the coil body. To avoid damage to the coil and overheating, it is not recommended to leave the ignition on when the engine is off.
Distributor 8 distributes high-voltage pulses to all cylinders of the internal combustion engine strictly sequentially. The distributor or breaker-distributor is installed in a standard location on the left side of the engine cylinder block. This mechanism is driven by the oil pump shaft. From the cover side, the shaft rotates counterclockwise.
What kind of ignition system is there for UAZ 469?
Contact ignition on the UAZ 469, which is now considered obsolete. However, domestic manufacturers still use it. The system delivers a pulse of a certain power. This pulse appears in the ignition distributor. The contact ignition circuit of the UAZ 469 is simple and straightforward. This is its advantage. The driver can fix any malfunction and make adjustments with his own hands. Prices for components are low.
Transistor or contactless ignition system in the UAZ 469. The contactless ignition system is installed on many types of cars. It has a number of advantages compared to the contact design. The spark created by such a device is much stronger. This occurs due to an increased level of electrical voltage in the secondary winding of the ignition coil. The transistor ignition system is equipped with an electromagnetic mechanism. It ensures stable, continuous operation of the entire system, smoothly transferring energy to components, parts and mechanisms. Correctly adjusted ignition with a working internal combustion engine guarantees high power and significant fuel savings. Long-lasting and reliable operation is ensured by following the drum motor's maintenance intervals. It should be lubricated and adjusted every 10,000 km. The disadvantage of a contactless ignition system is the difficulty of repair. It cannot be repaired yourself, since this requires specialized diagnostic equipment, available only at service centers and stations.
Electronic ignition system of the UAZ 469. This type of ignition is the most technologically advanced, but at the same time it is not cheap. Modern car models are equipped with such devices. It has advanced technology that provides not only high torque, but also a number of other engine parameters. Advantages: easy adjustment of the advance angle, no need to check contacts for oxidation. In engines equipped with electronic power take-off, the fuel mixture burns up to 100%. Repairs may only be carried out at a service station.
Underwater ignition on the UAZ 469 This is a sealed ignition system that is not afraid of being flooded with water, falling into deep holes, or driving in the open air during snow and rain. With normal ignition - contact or non-contact - 50% of the spark power is lost inside the barrel, between the cap and the guide. Let's find out why this happens.
There is a small space between the electrical contacts, which are the distributor cap and the guide. The flow of electricity in this space absorbs most of the additional current. In the case of contact ignition, an additional part of the energy is spent for this purpose due to the operation of the cam.
The underwater ignition is designed in such a way that the spark from the coil goes directly to the spark plug. During this process, it does not lose its main power, except for the resistance of the high-voltage wires. The power losses here are very small, so they can be neglected.
It is worth noting that in most foreign-made cars, a coil is installed separately for each cylinder, which is located directly on the spark plug, and the losses, accordingly, are quite insignificant.
FakeHeader
Comments 17
The wiring diagram does not correctly indicate the wires from the switch to the ignition coil. Additional resistance is installed if you use a 13.3734 commutator, otherwise the ignition coil or the commutator itself will heat up.
which wire should I remove?
there is 1 wire +, the second one comes from the capacitor, and you remove the third one!
Tell me, what is the additional resistance for? but it's not in your diagram
resistance is installed to make the engine start more logically, but I didn’t install it, and it starts just fine. As they say, half a kick. And they put it on the lawn (53), but I didn’t feel the difference.
I also installed the motor from the Volga, but the old commutator remained, the UAZ one removed the resistance and hooked it up according to your diagram, but for some reason the coil gets very hot
resistance is installed to make the engine start more logically, but I didn’t install it, and it starts just fine. As they say, half a kick. And they put it on the lawn (53), but I didn’t feel the difference.
I drove for about 15 minutes, the coil got very hot and after 10 minutes it didn’t start anymore, in the end I installed the original switch that was on the Volga, it started right away, but I didn’t have time to check the coil and whether it was heating up or not. couple, just whether the coil should heat up so much, what’s the matter, I can’t understand, I thought it might be due to resistance
Many UAZ owners know about the vagaries of classic ignition, which sometimes presents unpleasant moments. And often craftsmen find ways to modernize a problematic unit or an entire system. And one such method of improving the launch system with your own hands will be discussed in this publication.
In the photo, UAZ 31514 is a reliable all-terrain vehicle for many purposes.
Why turn on the ignition?
Connection diagram for ignition system components
In order to properly configure and adjust the engine cylinders on a UAZ-469 vehicle, you must have certain skills. We will talk about them later, but first we invite you to find out for what purposes it is necessary to correctly adjust contactless ignition and what this may entail. After connecting the key to the ignition switch, numerous components and mechanisms are activated, without which the operation of the engine is impossible.
So why set this parameter:
- The engine will operate optimally and stably in all modes. Otherwise, its operation will be unstable and cause inconvenience to drivers.
- Cold engine starting will be significantly improved. Of course, if you want trouble-free starting of the engine in thirty-degree frost, you must also fill the engine with the correct oil and check the suitability of the spark plugs.
- Fuel consumption is normalized, otherwise it may be increased.
- The drive power will be optimal, as indicated in the service book (the author of the video is the Smotri Vidik channel).
How to set the ignition correctly
To install the ignition in a UAZ 469 car, you must follow the following recommendations:
- Remove the drum cover with the rotor. Check the gap between the contacts. It can be adjusted. There should be a gap of 0.35 - 0.45 mm between the contacts at maximum expansion. It is best to make adjustments using a set of measuring sensors. Too small a gap produces a weak spark. If the gap is too large, there may be no spark at all. If the clearance is normal, the rotor can be installed in its normal position.
- Using a spark plug wrench, remove the spark plug of the first cylinder. Cover the spark plug hole with your finger. Use the crank to turn the crankshaft until compressed air pushes the pin out. This moment is called the beginning of the compression stroke of the first cylinder.
- Continue turning the crank until the hole on the pulley and the pin on the camshaft cover line up. The rotor should be located against the internal contact on the cover, connected to the high voltage wire from the spark plug of the first cylinder.
- Rotate the octane corrector plate together with the drum so that the mark coincides with the center mark on the scale of the plate.
- Turn the distributor body slightly counterclockwise. Turn until the drum contacts close.
- Connect the indicator light to the connector. Connect one terminal to the low voltage terminal of the tram circuit breaker and the other terminal to the machine ground. The indicator light can be connected to the car body.
- Turn on the ignition and carefully turn the drum clockwise. Turn until the indicator lights up, then stop turning. It may happen that the light bulb does not light up. Repeat all steps from the beginning.
- Tighten the distributor mounting screw. Place the cover in place, focusing on the center line. Check the adjustment starting with the first cylinder. The check is performed counterclockwise.
A guide to replacing a distributor with an oil pump drive
Before installing a new distributor with a drive, you need to weigh your strengths, since it is not recommended to make mistakes when performing work.
So, how to replace and install the distributor:
- Turn off the ignition and remove the distributor cover; the tips and high-voltage cables are connected to it.
- Then you need to disconnect the wire connected to the switch from the distribution mechanism. You also need to disconnect the pipe connected to the vacuum regulator.
- Taking a 13mm wrench, unscrew the two nuts securing the device and remove the mechanism along with the oil pump drive from the power unit.
- After completing these steps, you will be able to see the gasket located under the drive. If as a result of these actions the position of the crankshaft has not changed, then simply install a new mechanism, making sure that the slider is located opposite the mark. All actions are performed in reverse order. When the installation is completed, the advance angle is adjusted.
- If, as a result, the location of the shaft has changed, then before installation it is necessary to move the piston of cylinder 1 to top dead center. You need to ensure that the marks on the pulley align with the pointer on the motor itself.
electrical circuit in its simplest form
The good old UAZ-469 is one of the simplest cars. It looks like it was put together from a children's construction kit, there are no frills or decorations here. Instead of air conditioning, there is the ability to remove the soft roof, and instead of power packages, there is a complete absence of anything that could be controlled using the package. However, this car does have an electrical system. Although the same circuit diagram of the UAZ-469 ignition circuit is implemented in the simplest way.
Coil device
Underwater ignition in a jeep
The ignition coil in the UAZ 469 car has a complex design:
- high voltage screw output;
- output voltage;
- cover;
- contact spring;
- low voltage terminal;
- gasket for sealing;
- mounting bracket;
- magnetic cores;
- contact plate;
- primary winding and secondary winding;
- insulation gaskets;
- Body;
- insulator;
- iron core;
- insulating mass;
- resistor and its insulator;
- Screw and plate for fastening the resistor.
The distributor is designed to distribute and interrupt the ignition timing on a UAZ 469 vehicle. It has vacuum and centrifugal regulators. The centrifugal changes the ignition angle of the UAZ depending on the speed of rotation of the crankshaft or camshaft.
Spark plugs are a very important component. They are used to ignite the working mixture in the combustion chamber in the cylinders and provide a good spark to quickly start the car. The most common spark plugs are A12BS spark plugs, which cannot be disassembled, so in case of failure, you should have new ones in stock that can be quickly and easily replaced.
High-voltage wires are made of PVL-1 wire. They connect the coil to the distributor, and the distributor to the spark plugs. The plugs are attached to the central electrode using special terminals with resistors.
Differences between ignition systems
The main difference between the two systems is the timing of the spark:
- In classic ignition, this is done by a slider under the marker cover, which is in contact with the spark plug wire terminal. In this case, the high-voltage pulse is supplied as a rising pulse. It is, so to speak, lubricated, which reduces the spark strength at the spark plug electrodes.
- With contactless ignition, the switch generates a charge and releases it almost immediately after receiving a signal from the Hall sensor. This allows the spark plug to produce a stronger spark. Among domestic off-road vehicles, such a contactless ignition system is found on the Niva - see the VAZ 21213 wiring diagram.
Prevention measures
Basic measures to prevent electrical system malfunctions:
- Regularly check the condition of the wire tips installed on the battery terminals. Clean parts from oxides and dirt.
- Wipe the battery case from dust. If a serviceable battery is used, it is necessary to clean the ventilation ducts and bring the electrolyte density to normal. Periodically recharge the device from the charger.
- During long periods of inactivity, disconnect the battery using the standard disconnect switch.
- The wiring harness should not bend or rub against sharp edges of the body panels. If damage to the insulation is detected, restore the protection with insulating tape or replace the wiring section. Protect the bend points with special sleeves.
- If a fuse blows, determine the cause of the failure. It is prohibited to carry out repairs by installing reinforced elements designed for increased current.
- Monitor the condition of the starter by periodically cleaning the rubbing elements from dirt and lubricating them with Litol-24. Check the axial clearance of the rotor, which should be within 1 mm, and the tightness of the bolts securing the unit to the engine crankcase. Electrical contacts must be cleaned of carbon deposits using a file.
- Clean the distributor slider from dust and oil using a rag and clean gasoline. At the same time, lubricate the rotor bushing (a few drops are applied under the removed felt). High-voltage wires must be installed tightly in the seats. If moisture gets on the elements, wipe them with a clean and dry cloth.
- Do not overuse the emergency vibrator, which has a service life of about 30 hours. When switching on the backup ignition, deactivate the carburetor economizer.
- Check the fastening of devices in the instrument cluster, replacing burnt parts.
Spark plug gap. What should it be and what does it affect?
Although spark plugs are simple, they must be handled and used correctly. They should be properly cleaned, selected and replaced. However, even new versions can sometimes cause problems - the car may run unevenly, sometimes there are jerks during acceleration, as well as slight detonation. Many people immediately begin to look for the cause in the ignition system - of course, the spark plugs are new! However, the gap between the electrodes may be the culprit, just fix it and the engine will just start singing...
First a little definition.
The spark plug gap is the distance between the top and bottom electrodes for optimal performance and ignition of the fuel mixture. If this clearance deviates from the recommended specifications, the engine will run rough and you may experience jerking or knocking similar to your engine.
Simply put, if the gap differs from the norm set by the factory or dealer, then you can even half the engine and still not find the reason. It is especially strong in carburetor systems. But first, I suggest you start with the device and operating principle.
What to buy
In fact, you don’t need to buy much, and if you have a working distributor and reel, then the list of purchases will be minimal.
So, you need to buy:
- Hall Sensor;
- High-voltage wires (preferably silicone);
- Switch from VAZ 08.
Advice: If your UAZ is already many years old, then we recommend that in addition to the already indicated list, you buy a new distributor, a coil, and you will also need UAZ 31514 wiring with connectors for the switch.
The photo shows the minimum kit for old cars.
For reconfiguration and operation, you will also need a new UAZ 31514 wiring diagram, which is shown below in the photo, and which you can print for convenience.
For a new ignition - a new circuit
You can also make your ignition system more powerful by upgrading it with two kits at once:
- Two switches;
- Two Hall sensors;
- Two ignition coils.
With this approach, each subsystem will be responsible for sparking 2 cylinders at once:
- First and third;
- Second and fourth.
Most often, UAZ cars that take part in competitions or are used by professional fishermen and hunters are subjected to such serious modifications. The video below shows how an engine works with such a system.
Advice: if you use your UAZ 31514 in everyday life, not related to extreme sports, then it is enough to limit yourself to alterations with one set - it’s easier to maintain it. After all, domestic all-terrain vehicles use a proven UAZ wiring diagram.
