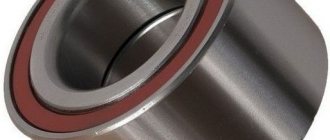
Replacing a Daewoo Nexia wheel bearing: how to understand that it is required
To find out whether the front wheel bearing of the Daewoo Nexia requires repair and replacement, you need to do the following:
- Raise the desired side with a jack;
- Hold the wheel with both hands and check the play.
If there is free play, the problem must be corrected. In the factory, everything is securely fixed with rings on both sides in the grooves of the body and therefore the hub must be stationary.
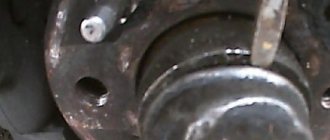
How to check a wheel bearing:
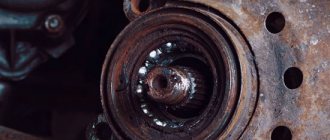
Front wheel noise:
Another sign of the need for replacement is that the hum disappears/appears when turning. For example, if the noise disappears for a short time when turning right, then the problem is on the left side, and vice versa.
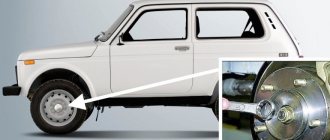
The same signs of malfunction are characteristic of the rear wheel bearings on the Daewoo Nexia.
It is important to know:
The presence of an ABS system is important: it makes checking the chassis geometry unnecessary, and if there is no ABS, then installation is a little more complicated, and diagnostics are a categorical condition. A number of factories producing such spare parts supplement their products with a set of tools (wrenches, nuts and lubricant) to facilitate work on cars with an ABS system. This approach saves the final adjustment of the chassis geometry.
Replacing the front wheel bearing
It is more convenient to carry out the work on an inspection ditch or overpass. Loosen the wheel mounting bolts.
Use a beard to straighten the front wheel hub bearing nut that is jammed in two places . We fix the car with the parking brake, engage first gear and place stops under the rear wheels.
Using a 32mm socket, unscrew the hub bearing nut...
...and remove the nut.
Prying up the washer with a screwdriver...
...let's take it off . We hang the front part of the car and remove the wheel (see “Replacing a wheel”). Remove the brake pad guide with the caliper and the brake disc (see “Removing parts of the front brake mechanism”). We disconnect the ball joint of the front suspension arm from the steering knuckle of the shock absorber strut (see “Removing the front suspension arm”) and remove the shank of the outer drive joint from the hole in the front hub (see “Removing the front wheel drives”). We install the finger of the ball joint of the lever in place (in the eye of the steering knuckle) and secure it with a nut. We use a soft metal drift against the end of the hub (on the inside of the steering knuckle).
Rotating the hub evenly, we strike through the drift into the end of the hub...
...and knock it out of the bearing.
We squeeze the locking ring with pliers...
...and remove it.
We install the bearing cup puller so that, on the inside of the steering knuckle, the puller bolt washer presses on the inner ring of the bearing...
...and the puller cup rested on the end of the steering knuckle from the outside.
Press the bearing into the puller cup.
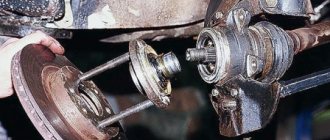
Cup puller with a pressed-out bearing Almost always, when pressing out a hub, the inner ring of the bearing remains on it, which is difficult to remove due to the tight fit on the hub. We clamp the hub in a vice.
By striking the chisel with a hammer, we move the bearing ring on the hub.
We insert two mounting blades into the resulting gap...
...and press the bearing ring . If necessary, we clean out the nicks on the hub with a needle file. Clean and lubricate the inner surface of the steering knuckle. When pressing in a new bearing...
...install the puller so that the washer of the puller bolt presses from the outside of the steering knuckle onto the outer ring of the bearing...
...and the puller cup rested on the end of the steering knuckle on its inner side . After pressing the bearing, install the retaining ring in place.
Install the hub into the bearing hole...
...and use a puller to press it in, resting it on the inside of the steering knuckle with a bolt through a washer onto the inner ring of the bearing . We carry out further assembly in reverse order. We tighten the bearing nut to the prescribed torque and be sure to lock it by jamming the collar.
Front wheel bearing Daewoo Nexia: numbers and sizes
The actual size of the front wheel bearing of the Daewoo Nexia depends on the type of wheel. Models before 2008 may have a 13th diameter, in which case the size will be 64*34*37.
For the 14th diameter, the wheel bearing has dimensions of 39*72*37 mm.
This information can also be obtained from dealers or managers of a certified service station. The numbers in the catalog cannot change, but new ones may appear, since the assortment is constantly updated.
Daewoo Nexia front wheel bearing number
Catalog numbers of major manufacturers:
| Manufacturer | Catalog number | A country |
| VAZ | 2108-15 | Russia |
| ZAZ | 1102-03. 90279331 / 94535247 / 09267-34003 / 09267-34001 / 94535249 / 94536117 / 94535249 / 95983139 / 94536117 /2108-3103020 | Russia |
| FAG, OPEL | 1603192 | Germany |
| OPEL | 90486458, 328104, OP-WB-11090 | France |
| VAUXHALL | 90486458 | Germany |
| GENERAL MOTORS | 90486458 | USA |
| PROFIT | DAC34640037 | Czech |
| JP GROUP | 08141200200 | Denmark |
| FEBI | 003270, 003271 | Germany |
| ILJIN | IJ111009, CX 080-A, 713644160, 03270, 201040, 111009, 012-A | Korea |
| OPTIMAL | 201032, 713644170 | Germany |
Price of front wheel bearing Daewoo Nexia
Products produced by the Volzhsky plant with the VPZ marking will cost from 450 rubles. (cat. no. 537708). Also a good manufacturer is FAG, a world leader in their manufacture (catalog no. 803646). They are about three times more expensive than domestic ones due to the higher quality materials and technologies used.
Bearing selection
Bearing selection should be taken seriously as it can affect movement and safety. Therefore, you should choose a part, first of all, based on quality, and only then focus on pricing policy.
Original
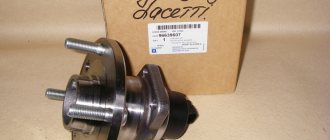
94535254 — original catalog number of the Daewoo wheel bearing for Nexia cars. The average cost is 2000 rubles per piece.
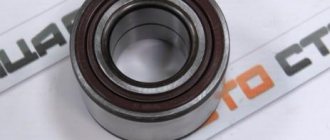
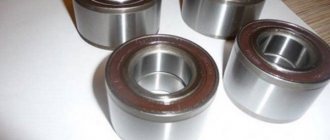
Wheel bearing.
Analogs
In addition to the original product, there are a number of analogues that can be used for installation on the Daewoo Nexia. Let's look at a table with examples of catalog numbers, manufacturers and prices:
| Manufacturer's name | vendor code | Cost in rubles |
| Febest | DAC3972-2RS | 1000 |
| Febi | 03189 | 1200 |
| SWAG | 40 90 3189 | 1300 |
| Sakura | 4108303 | 1300 |
| Iljin | IJ111011 | 1300 |
| Zekkert | RL-1407 | 1300 |
| Weber | BR 94535254 | 1300 |
| Mapco | 26544 | 1300 |
| Ruville | 5315 | 1300 |
| F.A.G. | 713 6446 70 | 1500 |
| SNR | R190.01 | 1500 |
| Nsk | 39BWD01JCA70 | 1500 |
| SKF | VKBA 3257 | 2000 |
| SKF | VKBA 3785 | 2000 |
| NTN | AU08476LXLL588 | 2000 |
| Koyo | DAC3972AW4CS49 | 2000 |
Reasons for failure:
- pollution;
- improper lubrication;
- corrosion;
- mechanical damage;
- too large (small) clearance in the bearing;
- temperature effect.
This list shows only the main reasons, but there are others. Often, the bearing on the front hub has to be replaced due to the fault of inexperienced service workers, a factory defect, or careless driving.
Roller bearing, device, advantages and disadvantages
Roller bearings are very susceptible to installation, which, if carried out incorrectly, can instantly damage the part. Beginners who do not know about this feature of roller wheel bearings are often deceived by unscrupulous service station workers who replace this element hastily and with poor quality.
Diagonal bearings can withstand heavy loads and have excellent wear resistance.
However, their operation, like roller bearings, depends on proper installation (tightening), otherwise they will fail prematurely.
Dismantling the hub
It should be noted that when replacing the front wheel bearing on a Daewoo Nexia, you have to install a new nut - the old one will become unusable in any case. It is also recommended to simultaneously check the condition of the ball joint and steering tip. If necessary, replacement must be made.
The hub removal procedure is as follows:
- First, loosen the bolts that secure the wheel. Then you need to flare and loosen the nut.
- Only after this can the wheel bolts be loosened and the side to be repaired lifted using a jack. Place the removed wheel under the bottom of the car so that if it falls, it will support the car.
- Unscrew the nut that is located on the steering end. Using a puller you can press it out without any problems. Without a puller, dismantling is problematic, so it is recommended to acquire this tool in advance.
- Move the tip away from the stand.
- Remove the two iron caps that protect the caliper bolts from contamination.
- Unscrew the bolts with a 10mm hex to release the caliper.
- Remove the caliper and hang it on a wire.
- Unscrew the nut that secures the ball joint.
- Using a puller and a hammer, you need to knock out the ball.
Tools for work
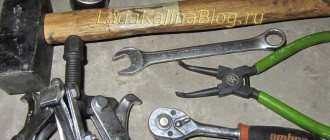
To replace the front wheel bearing on a Daewoo Nexia, you will need the following tools:
- Jack.
- Reliable supports - you can use both factory-made and home-made elements. Even strong beams will do.
- A set of keys.
- Wheel chocks. In the absence of such, you can use any suitable objects, for example, bricks.
- Balloon wrench.
- Circlip pliers.
- Pullers for ball and steering joints.
Also, when repairing the Nexia, you will need a hammer, drifts, and pliers. You may also need other tools that are not included in this list - it all depends on the specific conditions.
Manufacturers and partner numbers
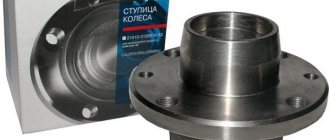
Bearing manufacturers and part numbers should also be mentioned. As for original spare parts, the steering knuckles and hub have the following numbers:
- SOHC motor: left 96187426, right 96187427.
- DOHC motor: left 96185191, right 96185192.
- SOHC motor – 94535121.
- DOHC engine – 94535122.
- SOHC motor – 94535246.
- DOHC engine – 94535254.
All these Daewoo Nexia spare parts can be purchased at any store. As for manufacturers, we can highlight the cheapest ones - RBI (Taiwan). Japanese manufacturers will be much higher quality (but also more expensive): NSK, NTN, Kouo, as well as the American Timken.
Replacement process
Despite the importance of the Daewoo Nexia wheel bearing, any driver who is confident in his abilities can replace it. To do this you will need to arm yourself with some tools:
- hammer;
- beard;
- circlip remover;
- bearing puller (or press);
- keys.
- Remove the front wheel.
Loosen the hub mounting nut - a large 32 nut in the central hole of the wheel rim. It is best to do this before lifting the car with a jack, since it will take sufficient force to rip it off.
Remove the tie rod end.
Loosen the wheel bolts, jack up the car and remove the wheel completely. Unscrew the hub securing nut completely.
We take out the ball joint.
We unscrew the nut securing the steering tip, and using a puller or crowbar, tear the tip from its seat.
We knock the axle shaft out of its seat.
Using a 10mm hex wrench, unscrew the two bolts securing the brake caliper, remove the caliper and secure it on some kind of stand or hang it on a wire so as not to break the brake hoses. Unscrew the nut securing the ball joint on the front drain knuckle, and use a puller or crowbar to disconnect the ball joint. After unscrewing the brake disc mounting bolt, remove it from the front strut knuckle.
Unscrew the fastening of the strut to the body.
We knock the CV joint axle shaft out of the hub and move it to the side. We unscrew the two bolts securing the strut at the top under the hood and remove the strut assembly for further work.
Remove the steering knuckle.
Using pullers, remove the hub bearing retaining rings.
Using a press, press out the hub and bearing.
Having installed the stand on stands (wooden blocks), we knock the hub out of the stand fist. To do this, you can use a head with a spacer of a suitable diameter.
Remove the retaining ring from the bearing.
Having unfolded the stand, we knock out the remaining bearing from the seat on the fist. If there is an outer race left on the hub, it can be removed using a grinder by filing down the race body, thereby weakening the metal. This must be done carefully so as not to damage the surface of the hub. We clean the seating surfaces on the knuckle and the hub. We press the new bearing into the seat on the knuckle. In order to install a new bearing without problems and a press, you need to warm up the strut cam to a high temperature, and, on the contrary, cool the bearing in the freezer or just outside in winter. In this case, it will literally go in by hand. All that remains is to control its shrinkage by pressing it with a hammer and the outer race of the old bearing.
As in the case of the fist, we will press the bearing out of the hub.
We install the outer retaining ring, and once again tap the bearing with a hammer and build the race until it rests against the retaining ring. After this, install the second retaining ring. We hammer the hub into place. You can use a wooden spacer for this. When hammering, make sure that the hub fits in smoothly and without distortion.
