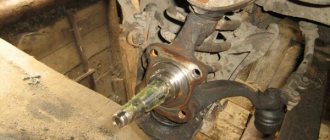
If you notice that the front wheel is a little loose, you should definitely eliminate the play. In many cases, the culprit for a loose wheel is the wheel bearing. The problem can be detected when driving onto a curb or other obstacle. At the same time, you will feel a certain “emptiness in the wheel.” Quite often, a problem with play can be solved by tightening the wheel bearing. On cars of the classic Zhiguli family, the work of tightening the bearings is extremely simple. In order to check the play in the bearings, it is necessary to jack up the wheel so that it comes off the ground. Then you should grab the top and bottom edges of the wheel and swing it. If the wheel dangles in a vertical plane (up and down), these are probably bearings. If the wheel dangles along a horizontal axis, pay attention to the ball joints. So, you have already decided for yourself that the bearings should be tightened. What will you need for this? - the bare minimum of tools: a 19mm wrench for unscrewing the wheel bolts and a 27mm socket - this is necessary for tightening the adjusting nut. You will also need two hammers. One is larger and the second is smaller. A new shim and a straight screwdriver will come in handy. Now about everything in detail and in order! The front wheel bearing is adjusted as follows. 1. At the very beginning of work, it is necessary to put the car on the handbrake and gear. Place shoes under the wheels. This is necessary so that when hanging the car does not jump off the jack. 2. The second step is to prepare a wrench for the wheel bolts. On classic Lada models, a 19mm wrench is used for this. It must have a head, do not try to remove the wheel with a spanner! Use this key to loosen the tension on the wheels - the car is still standing with its wheel on the ground. 3. After the wheel bolts are loosened, the wheel should be jacked up. Pay attention to the surface on which the jack rests. It should be smooth and firm. If the ground under the car is soft, you can use a board to support the jack. When the car's wheel leaves the ground, you should place a spare tire under the lower arm of the front suspension - just in case. What if the jack doesn't hold up - unlikely, but possible. 4. When the wheel is hung, and there is already a spare tire under the lower arm, you should unscrew all four bolts on the wheel and remove the wheel. You will see the brake disc, as well as the so-called “cap” of the hub. The cap must be removed. After all, it is under it that the adjusting nut is hidden. To remove the cap you will need a medium sized straight screwdriver and a hammer. Use a screwdriver to rest against the cap, and then knock it out with gentle blows. The blows should be light, and they should be applied along the entire circumference of the cap. 5. When you have already removed the cap, you will easily see the nut; it is the one that regulates the tightening of the wheel bearing. Pay special attention to the “Tunion” - the element onto which the nut is screwed. The trunnion has two recessed channels, they serve to lock the nut. The flange of a new nut is “driven” into these channels - this is how the locking is done. 6. The old nut should be unscrewed. In this case, in many cases it is necessary to clean the old trunnion channel from the nut elements. Pieces of the nut may have remained in the trunnion after the last locking. You can use a small screwdriver for cleaning. 7. The old nut is unscrewed. And you start tightening the new nut. It is at this moment that the front wheel bearing is being tightened. Under no circumstances should you tighten the nut with all your might! While tightening the nut, you should shake the wheel in a vertical plane and turn it. The wheel should not wobble, but it should also spin easily. If you tighten the adjusting nut too much, the bearings will be clamped and will probably fail very soon in this position. Too loose a tightening will cause the wheel to become loose. The tightening torque of the adjusting nut is the most important in the entire operation. It is the tightening that determines how long the bearing will last and how well it will perform its function. 8. To determine the tightening torque at which the wheel does not loosen and at the same time rotates easily, you should put a wheel rim with a tire on the hub and tighten it with two bolts. While tightening the adjusting nut, the wheel should be loosened and rotated. Determine the moment when the wheel is loose, then tighten the nut little by little. Tightening should stop as soon as the wheel stops loosening; there is no need to tighten the nut any further. The wheel should rotate easily, but there should be no wheel chatter. 9. When you find the optimal position of the nut, it will be necessary to lock it. Despite tightening the nut quite tightly, it may well become loose or, on the contrary, tighten over time. Therefore, special flanged nuts are used for locking. The collar is punched with a hammer, through a screwdriver, chisel or the back of a second hammer and pressed into the groove of the trunnion. It is better to carry out locking with the wheel lowered to the ground. The wheel, tightened with two bolts, should be lowered from the jack. In this case, the blows from the hammer will be transmitted to the bearings less strongly. 10. The nut cap that was previously removed should be cleaned of old grease and new grease should be hammered into it. 11. After locking, the car should be raised again, the disk and tire should be removed, and the hub cap should be carefully driven into place with a hammer. 12. Then you can put the disc back on, tighten the bolts, lower the wheel and tighten it. 13. When driving out on the road after work, pay special attention to the sounds in the car. Not a note should be heard from the bearing! If the bearing is humming, the adjusting nut should be loosened. In this case, you will need another nut to re-lock. The work described above can be done by the most ordinary car enthusiast. The front wheel bearing is tightened within one hour, you will also need the desire to solve the problem yourself.
Bearing condition diagnostics
Often, a faulty front wheel bearing manifests itself in the form of noise when the car is moving. You can verify the serviceability (or verify the malfunction) of the wheel bearings as follows:
- Place the car on a level surface, raise the handbrake lever;
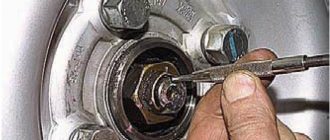
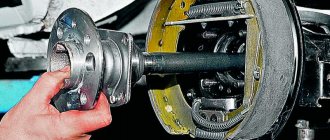
- install wheel chocks;
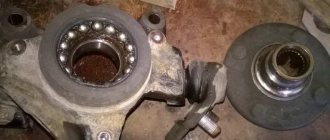
- raise the car by hanging the front wheel;
- install a stop under the lower ball;
- install a safety support under the body;
- lower the jack;
- shake the wheel with your hands, holding the top and bottom;
- spin the wheel.
If play is felt while the wheel is rocking, adjusting the bearing tightening can help. But usually, if a hum, grinding noise, knocking, or play in the bearing occurs, it is necessary to replace the VAZ 2107 wheel bearing.
Symptoms of a problem
The wheel bearing must always be in good condition. If the part becomes unusable, this can lead to an accident, since the malfunction is accompanied by large wheel play. As a result, the disc may be sheared off the wheel bolts. If such a situation occurs at high speed, a serious accident cannot be avoided. This indicates that the hub bearing needs periodic inspection, and if play is detected, it needs to be adjusted or replaced.
The main manifestations of a part malfunction are:
- Dry crunch. When a bearing breaks, a metallic crunching sound occurs while driving. It appears as a result of uneven rolling of the rollers due to damage to the separator. It is difficult to confuse this sound with any other.
- Vibration. If the element in question has severe wear, vibration appears, which is transmitted to both the body and the steering wheel. It indicates severe wear of the bearing cage, which can lead to seizure.
- The car pulls to the side. The problem is somewhat reminiscent of the case with incorrect wheel alignment adjustment, since the faulty element does not work correctly due to its parts being wedged.
When a bearing fails, extraneous noise, hum or crunching noise appears
Definition of failure
To determine the condition of the wheel bearing, you need to perform a few simple steps:
- Hang the front wheel on the desired side using a jack, not forgetting to put the car on the handbrake and install stops under the rear wheels.
- Place a support under the lower suspension arm and remove the car from the jack.
- Take the wheel with both hands (top and bottom) and perform movements from yourself to yourself, and no play or knocking should be felt.
- Spin the wheel. If the bearing has become unusable, a grinding noise, hum or other extraneous noise may appear.
To check the bearing, you need to hang and rock the front wheel
When carrying out work with a removed wheel, for safety reasons, it is recommended to place an additional support under the car body, which will protect you in case of a sudden fall of the car.
Adjusting the wheel bearing on a VAZ 2107
If the bearing is slightly worn, you can tighten the adjusting nut and eliminate the play. To do this you will need a jack, a wrench, pliers, a hammer and a screwdriver.
You can correctly tighten the front wheel bearing of a VAZ 2107 as follows:
- lift the car with a jack, hanging the wheel;
- Use a screwdriver and hammer to remove the protective plug from the hub bearing;
- tighten the adjusting nut so that the wheel stops rotating by hand;
- gradually loosen the nut until the wheel rotates freely, but does not play;
- bend the side of the nut with a chisel or screwdriver so that it cannot unscrew spontaneously;
- put the protective plug in place;
- lower and remove the jack.
If play and noise cannot be eliminated in this way, the bearing must be replaced.
What are axle shafts, why are they needed and how are they designed?
In rear-wheel drive cars, which the “seven” actually belongs to, the rear wheels are driving. It is they, rotating, that make the car move. The torque is transmitted to them from the gearbox through the drive (cardan) shaft, gearbox and axle shafts. There are only two axle shafts: one for each rear wheel. Their role is to transmit torque from the corresponding gear of the gearbox to the wheel rim.
Axle shaft design
The axle shaft is an all-metal shaft made of steel. At one end there is a flange for attaching the wheel disk, and at the other there are splines for engagement with the gearbox gear. If we consider the axle shaft assembly, then in addition to the shaft, its design also includes:
- oil deflector;
- sealing gasket;
- oil seal (cuff);
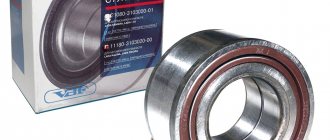
- bearing.
In addition to the shaft, the design of the axle shaft also includes an oil deflector, a gasket, an oil seal and a bearing.
Each of the axle shafts is installed in the corresponding (left or right) rear axle housing. An oil deflector with a gasket and an oil seal are used to prevent lubricant from leaking out of the casing. The bearing is designed to ensure uniform rotation of the axle shaft and distribute shock loads coming from the wheel to the rear axle of the vehicle.
1 — oil deflector; 2 - gasket; 3 - seal; 4 - oil seal; 5 - axle shaft; 6 - casing; 7 — bearing mounting plate; 8 — brake shield; 9 — bearing; 10 — fixing sleeve
Replacing a VAZ 2107 wheel bearing
- lift the car on a lift or “hang” the wheel using a jack;
- Unscrew the wheel mounting bolts;
- remove the wheel;
- unscrew the caliper mounting bolts;
- remove the brake caliper;
- pry up the protective cap of the hub with a screwdriver and remove it (sometimes you need to use a hammer for this);
- straighten the dented side of the hub nut, which prevents it from unscrewing spontaneously;
- unscrew and remove the washer nut;
- remove the hub from the car;
- pull out the bearing cage;
- remove the ring separating the outer and inner hub bearings;
- knock out the bearing races from the seat using an extension and a hammer;
- thoroughly clean the bearing installation area from old grease and dirt using rags and kerosene;
- press in the outer and inner bearing races
- thoroughly lubricate the internal separator;
- insert the internal separator;
- fill the inter-bearing space with lubricant by approximately 40%;
- insert the spacer ring;
- press in a new oil seal;
- install the hub on the axle;
- lubricate the external separator;
- insert external separator;
- install the external separator in place;
- put the washer in place and tighten the hub nut until it stops;
- achieve free rotation of the hub in the absence of play by smoothly unscrewing the nut;
- bend the side of the nut with a chisel or screwdriver, thereby preventing it from unscrewing;
- Reinstall the brake caliper and tighten the mounting nuts;
- install the protective cap;
- put the wheel in place and tighten the wheel bolts;
- lower the car.
Lada 2106 Akkerman71 › Logbook › Front suspension 2. Fixed hubs
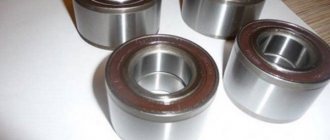
Hi all. Today there will be a little more letters) there is a little free time, you can press buttons). For the upcoming complete overhaul of the front suspension, I am collecting the necessary parts. One of the upgrades that the “patient” will undergo is non-adjustable hubs with one double-row bearing,
instead of two classic bearings, which from time to time need adjustment, without which wheel play appears and, as a result, control suffers, the wheels “walk” a little to the sides because of this, you have to steer the steering wheel, and they also absorb all these unnecessary beats ball joints and steering rods; excess loads damage them faster. There is a lot of information on the Internet about this and about installing non-adjustable bearings from a front-wheel drive family using adapter bushings on classic knuckles. The most common option is to install a 2108 rear hub with bearing dimensions of 60x30. Many people install and drive, but personally I don’t like this option. The bearing is not designed for heavy loads, since the main load comes from the engine and from the turning front wheels, so on the back of the 08 they made them smaller in size, so I didn’t consider this option at all. This whole thing is serious and I want to be completely calm and confident in the durability and, most importantly, the safety of all components and assemblies)). In second place is the installation of IZH Oda front hubs; a large front bearing 2108 with dimensions 64x37 is already installed in them. This option is already acceptable, in my opinion. The bearing is designed for installation “under the motor” and will run for a long time, which you won’t have to worry about. IzhOda hubs are installed either through adapter bushings, which is much simpler, or on modified classic knuckles, which is much more difficult to perform, since you still need to find a very good turner who will take on this and will not spoil anything the first time)) and with this they are just big problems)) I also refused this option, firstly, IzhOda is already a big rarity in our area, it takes a long time to look for hubs from them and used ones are used, this is not a new part, production will be present in any case. Therefore, I chose for myself the most reinforced third option with the largest possible size bearing and custom-made metal hubs. Bearing dimensions 72x37
installed on Moskvich 2141 and Renault Logan, compared to the front 2108 it is larger and looks preferable. The matter remained with the manufacture of hubs. From all the large factories with good machines, in our city (as elsewhere) only memories remain), everything was closed a long time ago, the equipment was cut into scrap metal, so I spent a long time looking for who and where to make it. As they say, “he who searches for a long time will always find”) I found someone who makes such hubs, even with adapter bushings,
source
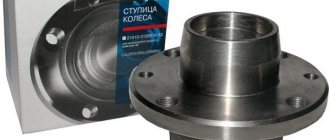
Repair of VAZ 2101, 2106, 2107 hub
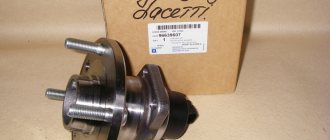
Maintenance-free front hubs on VAZ 2107 (bushing drawing)
This time we will talk about maintenance-free front hub bearings. Having changed 3 bearings over the winter (sometimes they didn’t last, sometimes they overtightened them, sometimes they fell apart during maintenance), I got tired of all this, surfing the Internet and DRIVE came across articles about maintenance-free bearings on the front. There are several options: 1. Buy a ready-made kit. There are people who sharpen hubs and axles for them. 2. hub with axle from Izh od (also suitable) - I couldn’t find it 3. Rear hub from 08 VAZ + bearing also rear and + adapter sleeve - that’s what you need and in terms of cost.
hub with bearing
Since I didn't look carefully at the bearings? and bought an extra stopper, but they were in the box. Next, we will need classic wheel nuts, 08 ones will not fit, and the ring that presses the bearing is also classic.
all assembled + bushings
made the bushings according to the drawings
3,1
The first time I did it according to the first one, I’ll say right away it was in vain, the size 22 was not the topic and during installation the bushing swelled while I was inserting it. but more on that later.
here is my modified drawing
So we collect all this and happily go to the garage (well, that’s how it was for me), we begin to take everything apart
Having unscrewed the nut and the caliper, I had the first problem: I bent the brake disc (I don’t know how, but I did, I realized this when I was putting everything back together after the second problem), so I knocked over the old hub with the dead bearings, we start assembling it and now it’s not a problem, there’s an error in size, no Well, it’s okay and you can knock it out, and in the end I put everything back in the car in the garage and we’re waiting for it to be re-sharpened...
this is how it was inflated due to the wrong size, after measuring the axle, I changed the dimensions
Finally, they machined the bushings for me, and I, happy, flew to the garage to finish it... Since everything was put back in place temporarily, we disassemble everything: we remove the caliper, peel off the brake disc, knock off the hub (I’ll tell you right away that everything came off quickly on the left side, but on the right I had to suffer.) When everything was removed and wiped clean of fuel oil and grease, we put it back together.
I figured it wasn't bad
We put the bushing on the axle, now everything is easy to install
now with the hub
Install the second part of the bushing
Well, a washer with a nut (the nut and washer are original - classic)
Now everything needs to be tightened. I pulled it with a ratchet and then, using a piece of a meter-long pipe, tightened it with force. I don't have a torque wrench, and I don't need one yet.
I almost forgot about the disks
Where does wheel bearing play come from?
Good afternoon dear friends! Today we’ll talk about a problem that may appear when diagnosing the front suspension - wheel bearing play .
Let's look at the main reasons for the occurrence of this backlash, whether it should exist at all, and if it should, then what is acceptable. What can it lead to if you start this problem and don’t pay attention to it, how can it be eliminated. We will also learn how to correctly adjust the hub bearing using the example of a VAZ 2107. How to do it yourself in the garage, and the dangers of incorrect adjustment. Plus, visual videos will help in analyzing this topic.
Should there be any play in the wheel bearing, what is allowed?
Yes, there should be some play. To be more precise, this is the thermal clearance of the bearing. It is needed so that when heated it can easily expand. As you know, while driving, wheel bearings experience heavy loads and get hot. Accordingly, the material expands. Without this clearance, wear will increase. The result is complete destruction of the separator and subsequent jamming.
In case of large backlash, destruction occurs. Yes, they won’t get very hot, they will have room for thermal expansion. But if they dangle in the clips, they will break. As a result, the bearing crumbles and impacts occur in the steering wheel when driving. They may disappear when braking.
Therefore, a small backlash must be present. On different models it varies between 0.02-0.08 mm. As the masters say - on the verge of muscle sensations. It can be measured with a special device or micrometer. But not everyone has it, and since the adjustment of the wheel bearing is carried out in a garage, we will rely on our eyes.
Another way to replace the wheel bearing
So, not even 2 years had passed since the bearing on one wheel began to hum, and on the second there was a slight crunching noise when braking. I will try to explain in detail but briefly and in pictures what and how. First, remove the wheel.
Removing the hub cap
We unscrew the caliper, not forgetting to bend the fixing plates of the bolts, highlighted in yellow (and by the way, be prepared to replace them, they often break)
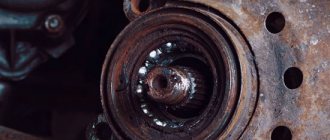
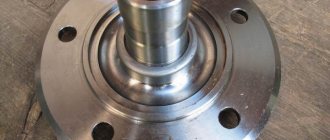
And remove the hub assembly. I dreamed without problems, although sometimes it gets stuck. It is better to knock it out through a block. In this photo, the working surface of the shaft is highlighted in yellow where the oil seal actually sits. I had a decent amount of wear in this place, as a result of which the oil seal quickly failed and water got inside during the season as a result and the bearing did not pass for a long time. By the way, this is also noticeable by the grease’s brownish color (presence of rust).
The axis is relative, the road is 700 - 800 rubles. So I take a new oil seal, remove the spring and cut it about a centimeter from the side where it is widely highlighted in yellow in the photo. I screw the spring into the spring and put it on the oil seal. I think with such an oil seal it will be enough for more mileage.
We pry out the old oil seal with a large screwdriver or a wrench, remove the spacer ring and pull out the inner seal.
And using a mandrel or an unnecessary shaft, we knock out the outer one on both sides.
We clean out the old grease and use the old wallpaper to hammer in the new one. We only knock out the old one back.
We place the inner spacer washer on both sides and carefully hammer in the oil seal.
And fill it with lubricant. The ABC says Litol 24 Front wheel bearings 0.4 l Front wheel hub cap 0.25 l.
We naturally wipe off the old grease from the axle and put on the hub, install the washer and tighten the nut with a little force.
We fasten the caliper without forgetting to bend the locking plates.
We put the cap on lightly to prevent debris from getting in and screw the wheel on. Since the nut is tightened with little effort, we turn the wheel 90 degrees in one direction or the other so that the rollers find their place. Then loosen the nut until the wheel spins freely. We lower the car to the ground and pump the wheel to see if there is any play, that is, we try to catch the moment so that the wheel rotates relatively freely and there is no play in the bearing.
I visited and, as it is written in the alphabet according to the tightening torque, to be honest, it’s complete crap. And we core the nut so that it doesn’t unscrew.
We hammer in the cap and tighten the wheel completely.
After a short break-in, we check again for the presence of play and, if necessary, make adjustments. In one bearing there were shells on rollers, on the other there was a scratch on both the outside of the mirror, apparently some piece of metal had hit it. shavings.
And the fastening of the hood pillar also broke, so we had to improvise. I cut out a metal plate, drilled holes and screwed it on.
I screwed the nuts from below in such a simple way
How to replace bearings
As in the case of diagnostics, we begin the repair by jacking up the car and removing the wheel. Further:
- unscrew the caliper and hang it so that it does not interfere;
- remove the nut cover on the hub;
- unscrew the nut with a 27 wrench;
- remove the washer;
- remove the hub with the attached brake disc;
- remove the small bearing separator;
- remove the oil seal;
- remove the large bearing separator;
- remove the clips with a puller or knock them out with a hammer and chisel;
- remove old grease from the hub and cap.
We perform assembly in reverse order.
- press in the bearing races;
- lubricate and install the inner bearing separator;
- install the oil seal;
- put the hub in place;
- lubricate the outer bearing separator and install it in place;
- install the pressure washer;
- tighten the nut;
- screw the caliper into place.
At this point, the replacement of the front wheel bearing of the VAZ 2107 is completed and all that remains is to adjust the tightening of the nut, this is done as I already described above.
Video on the topic: