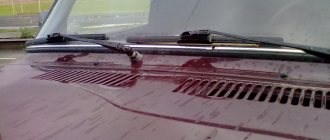
Lada Priora cars have two front wipers and one rear wiper. Every car enthusiast knows that their main task is to clean the glass from rain in the fall and from snow in the winter. However, devices do not always perform their function. Sometimes the car owner notices that they work slowly and poorly, function disgustingly in first gear, or do not move at all. There may be several reasons for this, each of them can be identified and eliminated at home. Today we’ll talk about why the wipers on the Lada Priora don’t work and what to do in such a situation.
When the relay is triggered, the electric motor does not start
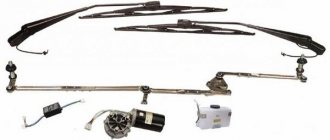
The cause of failure of the electric motor may be either a blown fuse or the motor itself. Fuses must be tested for functionality. If they are in working order, you need to inspect the trapezoid located under the hood; perhaps it has become deformed or a foreign object has gotten into it. In severe frost, again, you should check whether the blades are frozen to the windshield.
If the trapezoid is normal and the wiper blades move freely, you should definitely check the electric motor. To exclude other malfunctions, it should be removed from the car and connected directly to the battery. If it starts working, then it’s time to look for the cause in the electrical circuit.
Source
Freezing of devices
The problem of brush failure in winter is quite common. Often car enthusiasts start looking for a cat in a dark room, disassembling the system and trying to find a breakdown where there is none. In fact, the reason may lie in elementary things, namely freezing. This often happens in the following cases:
- when the car is left in the open air after using water wipers;
- when the car ends up in an unheated garage.
Therefore, before disassembling, first try to find out if everything is normal with your brushes. Are they frozen to the windshield or rear window? Folding up the wipers after parking the car will help prevent this.
Wipers do not work on VAZ 2110, 2111, 2112
Spring time has come and as luck would have it, it is at this time that most VAZ 2110 breakdowns related to the windshield wiper occur. And what’s most interesting is that, as always, in the heaviest rain, you have to repair your windshield wipers while standing in the middle of the roadway. But in fact, the reasons are generally quite common and can be listed below:
- The fuse for the windshield wiper of VAZ 2110, 2111 and 2112 has burned out
- The wiper switch relay has failed
- Poor contact at the connection point of the power plugs
- Failure of the motor or the windshield wiper trapezoid itself
Of course, it is necessary to solve the problem only after the true cause of the breakdown has been found.
- If the fuse is blown, then just replace it with a new one and everything will work again.
- The same can be said about the relay; replacing it with a new one can solve the problem.
- Check the contact at the connection point of the wiring harness block and, if necessary, lubricate the contacts
- Check the functionality of the trapezoid or motor mechanisms - replace faulty parts with new ones
As for the complexity of the actions performed, the simplest repair is replacing fuses or relays, which is also the cheapest. Of course, poor contact may not be considered a problem at all in this case. Regarding the malfunction of the windshield wiper trapezoid or the motor itself, things are becoming more serious here. In any case, if there are problems with any of the parts, you can always buy spare parts from a car disassembly.
The price of a new trapezoid manufactured by AvtoVAZ is at least 1000 rubles, and the motor is more than 2000 rubles. I think there is no need to explain that if one of these elements fails, you will have to fork out one of these amounts. Although, there is one alternative option - to buy these parts at a dismantling station. For example, a complete set of trapezoids assembled with motors for a VAZ 2110, 2111 or 2112 costs no more than 1,300 rubles, which is almost three times the price of a new mechanism.
Replacing the motor
Replacing the washer pump on a Lada Priora is quite simple, using the instructions below.
The first thing you need to do is prepare the necessary tool:
- Ratchet with 10mm and 13mm heads
- Open-end wrench 10mm
Process
For convenience, we remove the battery, this will make replacement work more convenient.
We unscrew the battery mount, then its seals and remove the battery.
We remove the chips from the washer motor (in this case there are two of them).
To diagnose the washer reservoir, it must be removed, and it is much more convenient to replace it with a removed reservoir. To do this, unscrew the two nuts securing the tank.
Other ways to solve the problem
But it’s not for nothing that a whole list of various problems that occur in addition to trapezoid malfunctions was presented. If there are no problems with it, but the wipers are still working slowly, it would not hurt to completely disassemble the system and check all its mechanisms for problems. Pick up a standard set of tools and go!
It is recommended to check in this order:
- First, inspect the electric motor, the winding of its wires, and the armature shaft. Look carefully for any damage. If you notice a scratch on a part that cannot be smoothed out with sandpaper, it would be best to completely replace the item.
- Check the condition of the brushes and springs. If parts lose proper elasticity, they should also be replaced.
- Find out how easily the brushes move in the holders. If you find any jams, you can use emery, but if there are too many chips or cracks, you should think about replacing parts.
- Check the condition of the collector. Any damage must be smoothed out with sandpaper, and carbon deposits must be removed with a special polishing paste.
- Find out the condition of the gearbox drive. There should be no chipped teeth or other irregularities on the gear. Sandpaper won't help here; you need to replace the gear.
After all the procedures, the mechanism should be assembled, starting with the engine. During assembly, it is better to thoroughly lubricate all parts. That's all, the repair work can be considered complete. If even this does not help you, you should think about replacing the entire system due to its malfunction.
parking lights
For example, the electrical circuit of a Lada Priora station wagon has the function of both automatic and manual activation of side lights. The activation itself occurs after turning the handle for the side lights and headlights on the dashboard. The contact is triggered and the lights turn on.
The circuit contains fuses that serve to protect against overvoltages and short circuits. Power is supplied to a lamp located on the dashboard. To adjust the brightness of the lights, a special regulator located on the lighting control module is used.
The headlight design of the Priora differs from other cars. The electrical circuit of the VAZ Priora contains a light sensor, as well as a lighting control unit. After turning on the ignition and the lighting control button, the electronic unit responsible for lighting control is activated.
If there is not enough light outside, the unit receives a signal from a sensor located on the windshield. There is also a rain sensor there. After receiving such a signal, the electronic control unit supplies power to the electromagnetic relay coil. Power is supplied to the headlights.
https://youtube.com/watch?v=5obgXdZbYxU
Mechanical reasons
In this case, the reasons may lie in the electrics, so carefully study the electrical circuit of the car and the connection of the wipers in particular. Let's look at the main symptoms of problems and find out what leads to this.
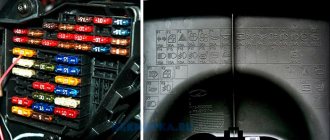
- When you turn on any mode, there is no click from the thermobimetallic fuse. If there is no response to your attempts to turn on the wipers, fuses F11 or F20 may have failed. You also need to make sure that the contacts have not been oxidized.
- If a click is heard, but there is no reaction, it means that the electrics are working properly, but the problem is with the mechanics. Here we return to the previous problem with brushes freezing. Alternative options are skewed drive rods or a wedge of gears.
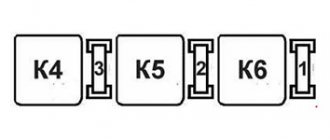
- Intermittent movement of brushes. The problem lies in relay K6 or K12. Simply replacing it is enough. Using the control unit, you can set the necessary program for relay K6.
- If the wipers do not go to the first position, there may be a program failure in the control unit or it has completely failed.
- If the engine of the device is running, the wipers twitch, but do not move completely, you will need to make sure that everything is fine with the crank mount.
It is also possible that the device’s motor may fail. You can check its performance using a standard multimeter or a 12-volt light bulb. It is recommended to ensure that the wiper switches are working properly. Perhaps the problem lies precisely there. If nothing helps at all, then perhaps the reason lies in the mounting block itself. Repairing it yourself is impossible, so you will have to turn to professionals. Also, the car enthusiast can install a new mounting block and solve the problem this way.
If you understand the Priora electrical circuit, you can solve both mechanical and electrical problems yourself. Contacting specialists is required in rare cases when nothing helps at all.
Have you encountered a problem with the operation of the windshield wiper blades of your Lada Priora? There may be several reasons for this malfunction. If you follow the instructions, the problem will be solved as soon as possible.
Check the condition of the windshield wiper blades; perhaps they are simply frozen to the windshield. In the mounting block, check the integrity of all fuses
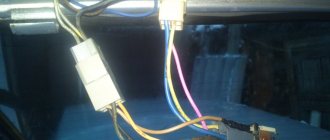
Pay special attention to the serviceability of the windshield wiper fuse (F11 at 10A). Check the wiper relay, which is located in place of K6 (the most convenient way is to replace it with a known working one). Clean the contacts on the upper connector of the mounting block and on the wiper motor connector. It is also possible that the wiring may be broken. Check the windshield wiper motor by applying +12V to it directly from the battery. Check the windshield wiper trapezoid
Maybe the nut from the gearbox that secures the rack has simply unscrewed. Or the rack is jammed due to rust. Check the electric motor fuse, which can be installed on the trapezoid bracket (a white wire goes in and out of it), or inside the motor. Check the serviceability of the steering column switches. In rare cases, it is necessary to change the assembly block.
It is also possible that the wiring may be broken. Check the windshield wiper motor by applying +12V to it directly from the battery. Check the windshield wiper trapezoid. Maybe the nut from the gearbox that secures the rack has simply unscrewed. Or the rack is jammed due to rust. Check the electric motor fuse, which can be installed on the trapezoid bracket (a white wire goes in and out of it), or inside the motor. Check the serviceability of the steering column switches. In rare cases, it is necessary to change the assembly block.
Help determine (participate in the survey) a list of the most common problems associated with the operation of Lada Priora windshield wipers. Timely inspection and maintenance will help you avoid further problems in the operation of your car. Improve weak points with your own hands.
Found an error? Select it and press Ctrl+Enter..
Types of wiper breakdowns
Windshield wiper failures can be divided into two types: electrical and mechanical. Each type of breakdown is complex in its own way and makes it difficult to repair in the field. In some cases, it is necessary to remove many parts to get to the source of the problem.
The most common wiper failures:
- Fuse blown;
- Windshield wiper motor winding burnout;
- Wiper switch malfunction;
- Burnt out wiper relay;
- Breakdown of wiper splines;
- Mechanism failure or jamming;
- Gearbox jamming;
What to do if the wipers on a Priora are slow
The performance of wipers depends on many factors. How to check the performance of windshield wipers? An aspect of proper operation is the ratio of timing to the number of strokes of the wiper blades.
If the principle of operation of the device is not violated, then the number of progressive double strokes must be at least 35, which, in turn, is prescribed in the rules of traffic malfunctions. If the wipers work slowly on a Priora, it is necessary to diagnose and eliminate the corresponding malfunction.
- Improper use of windshield wipers in winter is one of the reasons for slow operation
- A common cause of the windshield wipers working slowly on a Priora may be a malfunction of the motor, and in particular the brushes located in it.
There are quite a few reasons for this malfunction, but it is the incorrect use of windshield wipers in winter that can burn the blades. This happens as a result of strong resistance, namely when the windshield wipers are frozen to the windshield.
The situation with the intensity of wiper operation improves as the car engine warms up. If the cause of the breakdown is related precisely to this, then, regardless of the active operating position, the windshield wipers (1st or 2nd) will slowly creep up. In the opposite direction (backward) - a little faster. A problem of this kind can only be solved by replacing the device.
Reasons why wipers on Priora work slowly
Among other problems when Priora's wipers work slowly, we can highlight:
• increasing the resistance to movement of brushes in the hinges
Resistance affects not only the speed of operation of the wipers, but also the speed of demolition of the components of the device. The reason for the increase in resistance is the deposition of dirt on rubber and plastic seals and bushings.
It is also worth noting the gradual appearance of rust on the hinge axes. In some cases, rust deposits completely bring the device into a “stupor”. The solution to this problem is to dismantle the drive mechanism and then clean the hinge axes. If the bushings are worn out and do not guarantee tightness, then they also need to be replaced.
A more democratic and practical solution is to use UNISMA. After UNISMA has been sprayed onto the hinges, it is necessary to wait for a period of 20 minutes, then start the car and turn on the windshield wipers. This approach is not the final solution, but only a way to verify the functionality of the mechanism.
If the Lada wipers started working faster, then the mechanism is intact, but still needs to be dismantled to apply grease to the hinges. If after some time the Priora wipers work slowly, you need to take it to a service station to solve this problem.
• wiper motor
If we talk about the malfunction of the electric motor, then it is worth noting the lack of lubrication, which is so “sorry” by the manufacturers of electric motors. Due to this lack of lubrication, the bushings wear out, thereby compromising the integrity of the mechanism. Each electric motor has a rotating armature, which, when the bushings wear out, can touch the stator, causing the armature speed to be lower.
A decrease in armature speed, as a result of which the Priora's wipers work slowly, can occur as a result of oxidation of the collector. The solution to this problem is to sand the commutator with sandpaper. If even after this the wipers work slowly, the Priora needs to install a new driving mechanism.
Do-it-yourself troubleshooting
The main reasons for the lack of washer fluid can be eliminated with your own hands.
Cleaning the injectors
Their replacement and cleaning occurs in the same way and it begins with the removal of these parts, the process is as follows:
- open the hood;
- make sure that they have plastic plugs; if they are present, they must be carefully removed;
- take a flat-head screwdriver and open their spring fasteners to remove the injectors.
Installation of new parts occurs in the reverse order.
To wash the injectors and free them from dirt, you should prepare a special cleaning solution of non-chlorinated water and vinegar, taken in equal proportions. The mixture is mixed well and then poured into the tank. After which you need to press the washer lever, even if the water does not reach the glass, it’s okay. So that the components of the solution have time to break down all the contaminants, you need to leave it in the cleaning system for 2 hours, and then press the lever again. After the dirty solution flows out of the nozzles, rinse the hoses with distilled water.
Replacing the motor
It is quite difficult to repair the motor yourself, so most often it is simply replaced.
Installation of a new device is carried out as follows:
- remove all liquid remaining in the tank from the tank;
- disconnect the contact between the battery and the pump;
- if necessary, you can dismantle the tank, but if manipulations can be carried out with a fixed device, then you don’t have to do this;
- remove the electric pump from the tank and unscrew all the hoses going to it, but just remember their location so that after repair they can all be returned to the correct places;
- connect a new pump to the system;
- screw all the tubes;
- connect the battery to the motor;
- pour liquid into the reservoir.
Check the operation of the motor by pressing the washer lever; if you hear a whirring sound from the pump, then everything went well.
Priora generator brushes: how to replace them correctly and do it yourself
If the owner of the Priora notices that the charge from the battery is disappearing, first of all, he needs to check the condition of the generator brushes. Of course, at first the charge decreases insignificantly, but if the problem is not corrected in time, the charge will very soon disappear altogether. Replacing the brushes of the Priora generator, which are clearly worn out, will help correct this problem.
Important! The brush mechanism of the generator on the Priora cannot be repaired. If any breakdown occurs, only replacement along with brushes will be required.
Since this process is not so complicated, you can do everything yourself. You just need to take into account the recommendations of professionals.
What tools are needed for work?
Before changing the brushes on the generator, prepare the tools you will need for the job:
- flat screwdriver;
- wrench – it’s better if it’s an open-end wrench (size 13);
- car head with wrench (size 10).
Changing the generator brushes, process sequence
It is quite possible to replace the alternator brushes on a Priora that have worn out without removing it. But, according to experts in their field, the process is simplified if replacing the generator is preceded by removing it from its usual location.
Important! When carrying out any work on the generator (replacement, repair, etc.), be sure to disconnect the battery. After removing the generator on the Priora, replacement is carried out as follows:
After removing the generator on the Priora, replacement is carried out as follows:
- Use a screwdriver to remove the plastic cover, which is designed to protect the device. Having done this, you gain access to the brushes;
- disconnect the connecting plug from them;
- slowly unscrew both fasteners (they are located along the edges of the elements that are inspected);
- Take the above key and unscrew the locking bolt. Do this in the center of the element;
- Having unscrewed all the fasteners, remove the brushes, inspect them, assess their condition and replace them with new ones, connect the wires.
What are the signs that indicate that the generator brushes have become unusable?
The following external “signs” will help with this:
- if, upon examining this element, you find that its length is less than 5 mm, it certainly requires replacement;
- if the brushes are worn unevenly, this will also negatively affect the functioning of the generator, so they need to be replaced.
There is no need to skimp on buying new brushes. If you find a cheap option, it is highly doubtful that they will last long. It is more likely that such savings will lead to the need to re-replace the above-mentioned components.
Replacing the motor
Replacing the washer pump on a Lada Priora is quite simple, using the instructions below.
The first thing you need to do is prepare the necessary tool:
- Ratchet with 10mm and 13mm heads
- Open-end wrench 10mm
Process
For convenience, we remove the battery, this will make replacement work more convenient.
We unscrew the battery mount, then its seals and remove the battery.
We remove the chips from the washer motor (in this case there are two of them).
To diagnose the washer reservoir, it must be removed, and it is much more convenient to replace it with a removed reservoir. To do this, unscrew the two nuts securing the tank.
Source
Wipers work slowly - trapezoid repair
In a previous article I wrote about replacing the trapezoid and motor, and did this along with one necessary repair. Last night, when I turned on the wipers on my Kalina, I noticed that they practically did not move.
In short, they were barely crawling on the glass, although a couple of days ago everything was fine! At first I thought that the problem was in the wiper blades, but when I bent the arms a little, I realized that the blades had nothing to do with it.
It was decided to remove this entire structure from the car and see what was the matter.
So, the first thing you need to do is remove the Kalina wiper trapeze. Then, having disconnected it from the motor, try how easily its levers move by hand.
In my case, one side (the driver's wiper) moved normally, but the other side moved with such force that I was even surprised how the motor was even able to move this lever.
In order to solve the problem with the slow operation of the wipers, it is necessary to remove the shaft with the splines that is difficult to move. In general, to do all this, you will need:
- Pliers
- Penetrating lubricant
- Litol lubricant or similar
- Hammer
- Thin screwdriver
So, the first thing you need to do is use pliers or your hands, if possible, to remove the rubber band from the shaft, as shown clearly below:
Then use a thin screwdriver to pry up and remove the retaining ring, as shown in the photo:
And we take out all the washers that are mounted on the shaft, there are several of them:
To begin with, now you can simply try spraying penetrating lubricant on the shaft, perhaps it will penetrate inside the hole and help ease the movement:
If this does not help, as was the case in my case, then it is necessary to knock the shaft out of the seat of the trapezoid body. To do this, screw a nut onto the shaft thread and gently hit it with a hammer, thereby knocking it out:
As a result, we get the following picture:
As you can see, a strange coating has formed on it, which must be removed with fine sandpaper, as I did:
And lubricate the shaft with thick lubricant, I personally used lithol:
And after this has been done, you can insert the shaft back into the trapezoid body and try how easily it can move there. Personally, in my case, everything immediately went like clockwork. After installation, the wipers began to work perfectly, even better than in the last few months.
Replacing the windshield washer reservoir
If suddenly for some reason there is a need to replace the tank, it is very easy to do it yourself. No special skills or tools are required here. All work can be done with almost bare hands.
Before removing the windshield washer reservoir, be sure to disconnect the hose and power cables from the motor and level sensor. Then use a 10mm socket to remove the bolts that secure the reservoir to the slots. Now this part will come off easily if you pull it up.
Don't forget to remove the electric pumps from the tank. The sealing sleeve can be easily pryed with a screwdriver and removed from its seat. If this part is no longer flexible or has any damage, it should be replaced.
After this, you need to remove the level sensor from the tank. To do this, you must unscrew the plug and remove the sensor. Now all work is completely finished.
Where is it located and how to remove the wiper motor of the Lada Priora
If your car's windshield wiper refuses to work or moves slowly and stops, then you should change the wiper motor on your Priora. Alternatively, you can try to remove and disassemble the old motor, check the presence of lubricant in the gearbox, the condition of the armature and its winding, brushes, bushings. The removal of the windshield wiper motor is carried out together with the trapezoid. We dismantle the wiper arms and the hood seal. After removing the plastic plugs, remove the screws holding the frill. Do not forget about the expansion tank hose, which must be pulled out of the insulation by loosening the clamp. Having put the expansion tank and insulation aside, you can begin to dismantle the trapezoid with the motor. Disassembling the windshield wiper motor is not difficult. First you need to unscrew the gearbox mounting bolts. Then unscrew the screws securing the electric motor housing to the gearbox and remove everything together with the armature. You can begin to prevent and repair the windshield wiper motor of the Lada Priora. Assembly should be carried out in reverse order. If you decide to replace a faulty motor, the question immediately arises of which one to install.
When choosing a windshield wiper motor, you have several options to choose from:
- Buy an original one at an auto parts store;
- Buy a used one for analysis.
These are the most popular options. But where is the guarantee that after several thousand kilometers this motor will not have to be changed again? There is also a third option - find out which motors from other car brands can be installed on the Priora. The most suitable, as practice shows, are motors from Japanese cars. It is more advisable to install on your Priora a wiper motor from a Japanese car, which is distinguished by its quality and long service life. When choosing a Japanese motor, you need to be extremely careful, because not all models are similar in size and mounts. In most cases, the fasteners have to be overcooked. But it's worth it. The most important condition is that the ex length does not change. If installed from Priora, the splines will be erased during operation. And this is a replacement for the trapezoid.
Don’t be afraid that the Japanese motor has 4 contacts, while the motor from the Lada Priora has 5. The fifth contact is an additional “ground”. If the Japanese one does not have an additional “trick,” then the fifth contact should be screwed onto the body of the motor itself. See the contact designation diagram for both motors.
Removing and disassembling the windshield wiper motor
All the important parts of the rear windshield wiper are located under the trim. To remove it, I had to tinker, since it was attached to special holders, which are not so easy to remove without special tools. Fortunately, I had a nail puller at hand and it was perfect for removing these fasteners.
After unscrewing the rear wiper mount, I unscrewed the mount of the motor itself. I disconnected it from the block and took it home for inspection.
There appears to be no damage. Then he unscrewed the mount of the motor housing and pulled the structure out of it. The mechanism itself is covered in lubricant; there was plenty of it.
I looked at the gears, they were intact. Next, I examined the wires attached to the microcircuit. They had a raid. I thought this was probably the reason and decided to move them a little (in a good way, it would be better to resolder them), the “dust” flew off.
- That’s it, there’s nothing more to look at, I put the mechanism back together and went to connect the motor to the wiring block to see if it works or not.
I turn on the ignition and rear window wiper. That's it, the rear wiper is working. Hooray! I screwed everything into place and went for inspection.
How to choose wipers
Windshield wipers come in regular and frameless types. The first ones consist of a metal frame, are noisy and quickly become loose. Since the wipers on the Priora are not interchangeable, it is necessary to select them taking into account the length. For winter, there are special brushes that help combat icing. The VAZ Priora is equipped with frame windshield wipers at the factory. This type allows you to only replace the brushes if necessary, although frameless ones have better cleaning quality.
There are also hybrid wipers - the most expensive option. They borrowed rocker arms and supports from frame wipers, and a plastic body from the frameless type. This option is the most advanced and is distinguished by its durability. Replacing the tape in frameless and hybrid wipers requires certain skills, while anyone can change the rubber bands in conventional windshield wipers.
Let's sum it up
If reliable operation of the windshield wiper is your priority, you should pay attention to all possible ways that parts may fail. The knocking trapeze should attract your attention and in a certain way force you to examine the situation. Most likely, the knocking will lead to the fact that you will soon have to replace the device with a new one and buy high-quality replacement parts. But it is quite possible that you just need to get to the trapezoid and tighten the fastenings of its parts in order to eliminate the knocking and continue to operate the device perfectly.
High-quality work of wipers is necessary in any car, so you should immediately solve all problems that arise, taking into account their features and technical difficulties. Replacing the relay can be done in a garage, but it is better to change the trapezoid and wiper motor in a service center. This way, you can get the necessary capabilities for operating the machine without any problems and acquire the necessary performance qualities of peripheral devices. Have you ever encountered problems with your wipers?
Malfunctions of windshield wipers (wipers)
As you know, the working mechanism of the wipers was initially designed for a long service life. And breakdowns occur in parts, for the most part, due to the human factor - that is, improper operation.
Most often, wipers deteriorate in winter, when they freeze to the windshield, and the driver, being inattentive, turns on the glass cleaning mechanism. The load on wipers that are frozen turns out to be detrimental to the mechanism. And at the same time, both the motor itself and various mechanical parts can fail.
Since above we looked mainly at wipers of VAZ models, we will continue to do this using their example. So, on the “eight”, “nine”, “trinashka”, that is, hatchbacks, in addition to the main front wiper, a rear washer is also installed. But on the “99”, “tag” and other sedans it is not there.
Front windshield wipers have several operating modes: work with a pause (the same intermittent mode), work at low speed, work at high speed. In addition, there are two more modes: 3-fold cleansing and cleansing simultaneously with washer. As for the rear wiper, it has only one mode: in conjunction with the washer.
So, it is customary to distinguish between 6 main types of wiper malfunctions: they do not clean the glass well, they do not work after turning on one of the modes, broken blades, etc. More details can be found in the table below.
| Fault name | What to do 1 | What to do 2 | What to do 3 |
| Complete inoperability of the system (not a single mode works normally, you can’t hear the electric motor rotating) | Check the presence of 12 V voltage at terminal number 6, in the windshield wiper connector, as well as ground 4. It is also recommended to check all power circuits (fuses 4 and 5, switch, mounting block, ignition switch, etc. | Check how the mode switch itself functions (presence of 12 V control voltage at terminals 1 and 2 of the windshield wiper connector when switching modes). | Check the operation of the motor (removal and disassembly will be required). |
| Intermittent mode does not work (everything else works) | The main reason is a non-working relay. Replace and check how the new relay functions | It is possible that the reason is the mode switch. It is checked by replacing it with a known good one. | |
| The wiper blades do not stop in the down position, but stop anywhere (they can extend beyond the windshield) | The limit switch in the motor is broken or burnt out (it is impossible to replace, only the entire electric motor, although in some cases it is possible to fix and repair). | The position of the wipers is incorrectly adjusted (set them in the right place). | The drive shaft of the brush mechanism began to fail (disassemble and replace the failed parts). |
| The noise of the motor is heard, but the brushes do not move (the brushes stay in one place) | The drive shaft of the windshield wiper mechanism has worked (the splines are licked). It is necessary to replace or adjust the splined part of the electric motor. | The nut securing the mechanism rod to the electric motor shaft has become loose (tighten the nut thoroughly). | |
| The wipers do not work after turning on the windshield washer | Most likely, the steering column mode switch has deteriorated (replace with a known good one). | It is possible that the operation and serviceability of the mounting block has been disrupted (measure the voltage at terminals 9 and 18). | |
| Poor quality of glass cleaning | The wiper blades have lost their elasticity (replace them with new ones). | Oil or other lubricants have come into contact with the glass. For example, it could be oil from the muffler of the car in front, waxing at the car wash, contamination after polishing, and much more. |
As we see, you can fix the problem with the wipers yourself. However, if something doesn’t work out, we advise you to go to the service center without delay, so as not to aggravate the situation.
- Absolutely legal (Article 12.2);
- Hides from photo and video recording;
- Suitable for all cars;
- Works through the cigarette lighter connector;
- Does not cause interference to radios and cell phones.
Similar products from other companies
- Air filter Sintec (Sintek) SNF-2405-b for foreign cars Chevrolet Aveo (Chevrolet Aveo), Daewoo Kalos (Daewoo Kalos) engine 1.4/1.4l 16v/1.6 98 b
- Air filter Sintec (Sintek) SNF-3466-b for foreign car Hyundai (Hyundai) County/hd65/72 engine Euro-3 433 b
- Oil purification filter Sintec (Sintek) SNF-2101-NF-01-m for VAZ, for Moskvich, for UAZ 107 b
- Air filter Sintec (Sintek) SNF-lr001-b round for foreign car Renault Logan (Renault Logan) 148 b
- Air filter Sintec (Sintek) SNF-luxtr105p-b for GAZ low 183 b
- Oil purification filter Sintec (Sintek) SNF-75/3-m for VAZ LADA Largus (LADA Largus), for foreign car Renault Logan (Renault Logan) 112 b
- Air filter Sintec (Sintek) SNF-2110-v (EKO-102 for VAZ injection engine, LADA Kalina (Lada Kalina), LADA Priora (Lada Priora), for foreign car Audi (Audi) 94 b
- Air filter Sintec (Sintek) SNF-2101-v (EKO-101/1) for VAZ, for Moskvich, for ZAZ Tavria carburetor engine 62 b
- Air filter Sintec SNF-1019-b for foreign cars KIA Carens 2/3, Cerato, Shuma 1/2, Sorento 2.4 83 b
- Oil purification filter Sintec (Sintek) SNF-2105-NF-05-m for VAZ 2110-2115 injection engine 104 b
- Air filter Sintec (Sintek) SNF-2413-b for foreign cars Hyundai (Hyundai) i40/ix35, KIA Sportage (KIA Sportage) 3 121 b
- Air filter Sintec (Sintek) SNF-luxtr104р-b for GAZ high engine ZMZ 406, Steyr (Steyer) 560 209 b
- Oil purification filter Sintec (Sintek) SNF-3105-m for GAZ 3102 Volga engine injection, for GAZ 2705 GAZelle, Sobol 117 b
- Air filter Sintec SNF-1015-b for foreign cars Ford Tourneo, Transit 92/95, Volvo 440/460/480 98 b
- Air filter Sintec SNF-1266-b for foreign cars Opel Astra g/h, Zafira |/||, Saab 9-3, for VAZ, Niva Chevrolet 1.8 i 16v 84 b
- Air filter Sintec (Sintek) SNF-402-v 103/1 for GAZ carburetor engine 111 b
- Sintec oil filter SNF-5540-m for foreign car Hyundai County/hd65/72/78 d4al/db/dd 211 b
- Air filter Sintec (Sintek) SNF-lr003-b trapezoid for foreign car Renault Logan (Renault Logan) 165 b
- Air filter Sintec (Sintek) SNF-2409-b for foreign cars Hyundai (Hyundai) i-30, KIA Ceed (KIA Sid) 98 b
- Air filter Sintec (Sintek) SNF-lr002/1-b panel original for foreign car Renault Logan (Renault Logan) 162 b
Priora windshield wiper
405 Google+ This article discusses the features of the Priora windshield wiper system.
The Priora's windshield wiper is fundamentally the same as on other VAZ cars. It consists of a drive, trapezoid and windshield wipers. The drive is a gearmotor borrowed from the previous VAZ-2110 model. The main difference between the Priora windshield wiper is the use of a programmable wiper control unit in the electrical circuit, and also, depending on the configuration of the rain sensor. Let's look at the wiring diagram for windshield wipers.
The windshield wipers are powered through fuse F20, which is energized after the ignition switch unloading relay is turned on. The windshield wiper is controlled under the steering wheel switch, which has eight positions.
The rear wiper and washer are controlled and connected according to the classical scheme.
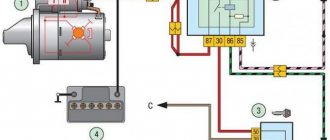
Let's take a closer look at the connection diagram for the Priora windshield wiper. At first glance, we see the absence of a windshield wiper and washer relay, characteristic of previous VAZ models.
In its place appeared two universal five-contact relays that operate in intermittent mode and return the windshield wipers to their original position after being turned off, and a programmable automatic control unit for the windshield wiper and lighting, which controls these relays.
In this case, the control unit receives a signal to turn on the windshield wiper and, through its circuit, connects the relay coils K6 and K12 with a minus, which leads to the closure of the contacts of both relays.
As a result of this, the high-speed excitation winding of the drive receives power and its armature begins to rotate, which leads to the switching of contacts in its gearbox and the appearance of a plus on the white wire in place of a minus. This wire connects the gearbox to the control unit to control the position of the gearbox and, accordingly, the wiper blades.
The power supply to the windshield wiper drive will continue until the polarity at pin 1 of the control unit changes, which will correspond to the extreme position of the windshield wiper blades. In this case, relay K12 will turn off, which will lead to disconnection of power from the supply wire of relay K6 and its connection to the minus. This will cause the drive motor and windshield wipers to stop.
The Priora windshield wiper operates in the second position, intermittent operation, the same as when turned on once. The control unit briefly turns on relay K6, and the frequency of its activation can be programmed.
To do this, you need to briefly move the switch to the first position before turning on the windshield wipers, and then after stopping it after some time to the second position. The time between stopping the wiper and switching to the second position will correspond to the delay time when operating in intermittent mode.
This time will be saved during subsequent starts. To change the frequency, you must repeat the installation procedures described above.
The question often arises: why is it necessary to connect the windshield wiper excitation windings to minus when turned off? The fact is that when the power is turned off, a residual magnetic field remains in the electric motor caused by self-induction currents, which leads to a slight continuation of the rotation of the windshield wiper armature.
In this case, its contacts may close again, and this will lead to re-supply of power to the windings and continued rotation of the armature. Therefore, the wiper will not stop.
When the field windings are short-circuited to ground, self-induction currents are not generated, and the electric motor stops immediately after switching off.
Below is a diagram of the Priora windshield wiper
“If you notice an error in the text, please select this place with the mouse and press CTRL+ENTER”avtolektron.ru 06/11/2013 “If the article was useful to you, share the link to it on social networks”
There is no intermittent wiper mode - we are looking for a relay
Often, along with the lack of intermittent mode, problems arise with returning the windshield wiper blade to its original position. In this case, the culprit of the situation is a burnt-out relay. At the same time, the mode of continuous strokes of the windshield wiper blade is present, as well as the mode of accelerated cleaning of the glass. These options for operating the windshield wiper are designed to bypass the relay; they are implemented directly from the handle for switching on the wiper operating modes. When a relay fails, you simply need to replace it by following this procedure:
- searching for the installation location of the relay in your car - again, forums, the car’s operating instructions or recommendations from specialists who repair your car will help;
- Next, the non-working relay should be removed from the installation location, the device number should be rewritten so as not to make a mistake when choosing a new electrical device to replace it;
- go to the store or order on the Internet an original production relay with the same catalog number to ensure normal operation of the wiper on the car;
- Having received the device in your hands, take a good look at it, make sure that this is exactly the element that was originally installed in your car at the factory;
- turn off the ignition, be sure to check that the wiper switch is in the “off” position and insert the relay into the slot from which the non-working device was removed;
- turn on the ignition and check the quality of the wipers, taking into account the new installed electrical part.
The operating modes of wipers on budget cars are often quite poor, so you can develop them by installing a relay from the same manufacturer, but with different parameters. For example, it is popular to install not a simple wiper relay on domestic cars in the basic configuration, but a special relay with adjustable brush response pause. This is a good option that can significantly improve the emotions of driving a car and make the driver’s job easier.
Fuses and other electrical connections
Not the last option for a problem in the wiper operation system is electrical connections and circuits. The first step is to check the fuses, which tend to fail and simply do not allow electric current to flow to the right place. Most cars have fuses under the hood; some models should be examined for a fuse box in the passenger compartment.
Broken wires can also be one of the possible problems. If, for example, after a garage service your wipers do not work, it is quite possible that the technicians cut the wires and did not fix the problem. You should trace the wiper circuit, if possible, but it is better to take the car to a normal station and order a proper repair of this problem.
Possible causes of wiper malfunction
A malfunction of the glass cleaner entails the risk of creating an emergency situation on the road during bad weather. Therefore, it is necessary to eliminate problems and their causes in a timely manner.
Wiring diagram for Gazelle wipers
Typical device problems are as follows:
- When turned on, the wipers do not work: the relay does not click, the electric motor does not work.
- The steering column switch does not work.
- The relay is activated, but the electric motor does not function.
- The relay and motor work, but the brushes do not move or move along the wrong path.
- Intermittent mode does not work.
- Slow work.
Why do the wipers turn on automatically when you turn on the ignition?
Don't know why the wipers turn on when you turn on the ignition, and you can't stop it? You can, of course, turn off the fuse and drive without wipers for a while, but the problem must be solved completely.
The classic way to solve the problem usually comes down to two options: disassemble the steering column switch and clean the inside, or install a toggle switch responsible for separately turning on the wipers. But in fact, there are much more effective solutions to this problem.
