In our short article we will talk about the VAZ-2110 fuel system (injector). Carburetor engines have long gone into oblivion. The manufacturer has not installed such motors since the early 2000s. Most of the “ten” and similar models (2112, 2111) are equipped with engines with a fuel injection system. It is more reliable, works stably, and most importantly, does not require frequent intervention from the driver. The engine will be able to operate without problems, but provided, of course, that all filters are changed in a timely manner. There is also a requirement for fuel - it is not recommended to use low-quality fuel.
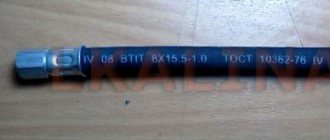
Fuel hoses VAZ 2110 injector 8 valves
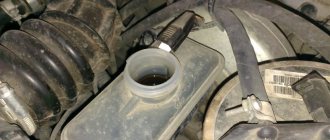
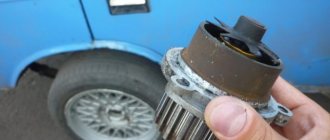
A possible sign of the need to replace the fuel supply hose to the fuel rail is the smell of gasoline in the cabin.
This hose begins to flow at the junction with the fuel supply line from the fuel tank (plastic tube). The location of this connection is below the battery near the partition of the engine compartment. Moreover, for many people the hose starts to leak in cold weather. I started to leak when my Kalina was 4 years old, in frosts of -25, and heavily, in copious drops. When the engine warms up, the leak in many Kalinovods disappears. It was the same for me. Since in such frost there is no point in getting under the hood yourself if there is no warm garage, and in such weather there are enough customers in the services, so I went. To be honest, it was scary, because I saw how quickly the cars were burning. Luckily there was a fire extinguisher in the trunk. When the temperature warmed up to -20, the leak disappeared when warming up.
This happens because in such frost the rubber rings in the seal become stiff, losing elasticity. When the engine warms up, they heat up, become elastic, expand, and stop leaking. This can also be caused by increased pressure in the engine power supply system - the pressure limiting valve (located in the gas tank) freezes. Since at -25 outside, the pressure in the fuel rail was somehow not ready to be measured, I couldn’t determine the reason for sure. Without waiting for the next frost, when it warms up, I decided to change the fuel hose.
The length of the original hose is 26 cm. After a long search, I found a hose of acceptable quality, but it turned out to be Chinese, and besides, it is 3 cm longer than the original - its length is 29 cm. The price is 350 rubles. For lack of anything better, I put it in. These extra 3 cm did not play a role. I was alarmed by the inscription on the hose - instead of GOST - TOAST. But I still didn’t “wash” the hose).
And I’ll immediately give you an example of what you shouldn’t put. The sealing rings of this hose are worse than those of the Chinese one. In addition, it is longer and thinner in diameter, which can lead to bending, etc. The braid of this hose is made of synthetic woven fiber
The fuel supply hose to the fuel rail from the Chevrolet Niva is also suitable, but it is almost 2 times longer. In my opinion, it’s better to just pull out the two O-rings from it and insert them into your original one if you can’t find the original one. This should only be done if it is not possible to buy an original one for Kalina. Since it is easier to change the entire hose.
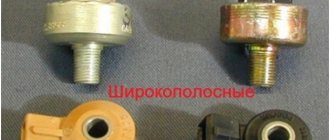
When replacing the hose, it is necessary to replace the O-ring on the fuel rail, which must also be purchased. It is highlighted in red in the photo. The other two rings are precisely the cause of gasoline leakage.
To remove the hose from the plastic high-pressure fuel supply line, it is necessary to relieve the pressure in the system. To do this, remove the plastic plug near the cigarette lighter (the one under which the ECU diagnostic connector is located) and pull out the fuel pump fuse (in the middle between the outermost ones).
Next, we start the engine and wait until it stalls (for the fuel to be completely exhausted). After this, turn the starter for about 3 seconds. Remove the air supply hose to the throttle assembly. Using a 10mm socket, unscrew the nut securing the clamping plate of the fuel supply tube holder and the canister purge solenoid valve tube and remove it. This holder is located under the battery tray. Next, remove the fuel supply hose to the fuel rail. To do this, first place a rag under it so that residual gasoline does not flow through the engine compartment. In the very top first photo you can see the metal locking bracket. We press it from ourselves (if you look at the photo) and remove the hose from the fuel line. Use a previously prepared rag to remove any remaining dripping gasoline. We unscrew the hose itself from the fuel rail, holding the tip of the hose with a 17 key. An O-ring should remain on the fuel rail when the hose is removed. We replace it immediately with a new one.
We put the new hose on the plastic tube of the fuel line until it is fixed with a metal bracket and screw it to the fuel rail. We screw the bracket back, insert the fuse, turn on the ground and check for leaks. If there is no leak, you can start the engine.
If someone decides to change only two o-rings in the hose, this must be done at a positive temperature so that the plastic is not fragile (there is a risk of breaking 2 plastic clips). Outer and inner diameter of 2 o-rings
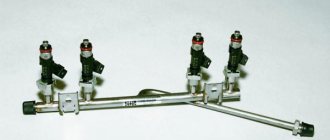
Fuel supply diagram for an engine with a fuel injection system
1 – nozzles; 2 – fitting plug for monitoring fuel pressure; 3 – injector ramp; 4 – bracket for fastening fuel pipes; 5 – fuel pressure regulator; 6 – adsorber with solenoid valve; 7 – hose for suction of gasoline vapors from the adsorber; 8 – throttle assembly; 9 – two-way valve; 10 – gravity valve; 11 – safety valve; 12 – separator; 13 – separator hose; 14 – fuel tank plug; 15 – filling pipe; 16 – filling pipe hose; 17 – fuel filter; 18 – fuel tank; 19 – electric fuel pump; 20 – fuel drain line; 21 – fuel supply line.
Fuel is supplied from a tank installed under the bottom in the rear seat area. The fuel tank is made of steel and consists of two stamped halves welded together. The filler neck is connected to the tank with a gas-resistant rubber hose secured with clamps. The plug is sealed.
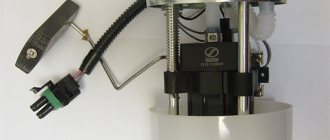
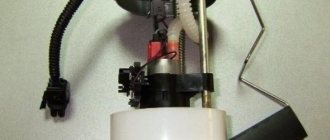
The fuel pump is electric, submersible, rotary, installed in the fuel tank. The developed pressure is at least 3 bar (300 kPa).
The fuel pump is turned on at the command of the injection system controller (with the ignition on) through a relay. To access the electrical connector of the pump, there is a hatch under the rear seat in the bottom of the car. From the pump, fuel under pressure is supplied through a flexible hose to the fine filter and then through steel fuel lines and rubber hoses to the fuel rail.
Design Features
The fuel system design includes the following components:
- The fuel supply system itself consists of a gas tank, a pump, a pressure regulator, gasoline filters, a ramp and injectors, as well as connecting tubes and hoses. In other words, these are the elements in which gasoline is found.
- The air supply system is those elements that allow oxygen to pass through. This is an air purification filter, a pipe, a throttle assembly, and a flow sensor. It is with the help of these elements that purified air is supplied to the fuel rail to form a mixture.
- And the last system allows you to catch gasoline vapors. This is an adsorber and connecting tubes. With their help, couples are destroyed.
The fuel supply system is needed to ensure the presence of the required amount of mixture in the ramp when operating in any mode.
Types and design of VAZ fuel hoses
All fuel hoses used on VAZ cars can be divided into two groups according to applicability:
- For models with carburetor engines;
- For models with engines with a fuel injection system (injectors).
Hoses of the first type are used in all VAZ Classic cars (2101 - 2107), as well as on some later ones (2108, 2109, early modifications of the Lada-110 family). These are ordinary reinforced rubber hoses that do not have special fasteners; they are fixed to the fittings using clamps. All hoses used in these cars are the same, differing only in length (from 400 to 1000 mm).
Hoses of the second type are installed on some early (21099, 2113 - 2115) and all current VAZ models, starting with Lada Kalina. These hoses come in a variety of designs, applicability and mounting types.
According to their purpose, fuel hoses for injection engines are divided into the following types:
- Fuel supply hose to the ramp;
- Hoses for draining fuel from the ramp (return hoses) - usually there are two of them, one is located on the ramp side, the other is on the tank side;
- Hoses for connecting the fuel filter - one from the tank to the filter, the second from the filter to the ramp;
- Filler hose;
- Hoses for connecting the adsorber (separator), in fact these are air hoses, but they belong to the fuel system.
Structurally, hoses are divided into three large categories:
- Hoses without fasteners;
- Hoses with connectors at both ends;
- Hoses with a connector at one end and a metal tube at the other.
As already mentioned, hoses of the first type are a traditional solution used on classic VAZ models. They are attached to fuel system parts and pipelines using clamps (or wire loops).
Hoses of the second type have a connector of one design or another at both ends. There are two main types of fasteners currently in use:
- “Nut” type fastener - at the end of the hose there is a metal tip with a union nut, which is screwed onto the mating threaded fitting;
- Quick-release fastener - at the end of the hose there is a fitting (female type) with a locking mechanism that allows you to quickly install or remove the hose from the mating fitting (male type).
Today, in VAZ cars, hoses with “Nut” type fasteners at both ends are used, as well as with “Nut” type fasteners at one end and with quick-release fasteners at the other end.
Quick-release fittings, in turn, come in two types:
- With a plastic latch - such fittings are usually square in shape, and to remove the hose you need to press the button on the side of the fitting;
- With a steel spring bracket - such fittings are usually round in shape; to remove the hose you need to press on the bracket.
Cleaning Priora injectors
There are two options for washing injectors: with and without removing them from the car. The removed injectors are washed on special stands using ultrasound, under the influence of which even the oldest contaminants disappear. Ordinary drivers do not have such stands, so below we will consider a more popular option for washing injectors without removing them from the Priora. Here's what you'll need for this:
- liter of special flushing fluid;
- two automobile nipples;
- automobile fuel filter;
- a pair of metal clamps;
- a meter piece of rubber hose with a diameter of 12 mm;
- drill with 13 mm drill bit;
- electric pump;
- two liter plastic bottle.
Flushing sequence
- The bottom and cap are drilled into the plastic bottle. This is done with a “13” drill. Automotive nipples are inserted into the holes.
Fuel system on a VAZ-2110 carburetor
From 1996 to 2000, carburetor engines were installed on the “tens”. In this series of cars, a diaphragm-type pump installed under the carburetor and driven by a camshaft (via an eccentric) was responsible for pumping fuel from the tank to the carburetor. A fuel filter is installed in front of the pump, and a carburetor after it.
A carburetor is a device that mixes incoming air and fuel depending on many factors (accelerator pedal position, speed, temperature, etc.). The finished fuel-air mixture enters the intake manifold and is ignited by spark plugs.
RDT VAZ 2110
Introduction
Fuel pressure in the injection system is one of the important criteria for stable engine operation. It is when any signs of vehicle malfunction appear that you should start by checking the fuel pressure. In the VAZ 2110, the pressure is regulated using an RTD, also known as a fuel pressure regulator. It is he who determines the required pressure and discharges the excess into the return line.
RTD affects most of the symptoms in the operation of the internal combustion engine, which will be discussed in this article. All possible malfunctions of the VAZ 2110 pressure regulator, its replacement and independent testing are described below in detail.
Important nuances
There are a few things to keep in mind when cleaning your injectors. Here they are:
- You cannot save on flushing fluid. The injector is a very important part of the engine. And it is extremely sensitive to the quality of the flushing fluid. The optimal choice for washing Priora injectors is a product from Wynns, developed specifically for injection engines. The cost of a liter bottle is 700 rubles; The plastic bottle must be removed carefully after washing the Priora injectors.
Replacing injectors is a long procedure. Nevertheless, it is quite within the power of a novice driver if he has at least a vague understanding of the structure of an injection engine. When cleaning the injectors, the situation is much simpler: you just need to be able to use a drill and know where the main fuel hose is located.
Fuel system on VAZ-2110 injector
The VAZ 2110 injector fuel system diagram is fundamentally different from the carburetor version described above. The fuel pump is located in the gas tank and pumps gasoline through the fuel filter directly into the rail. The ramp has a mechanical valve (fuel pressure regulator) that maintains a certain pressure. Next, the injectors are switched on, opening at the command of the engine control unit for a certain time, which depends on a number of factors.
Air is supplied through the air filter and throttle assembly. The throttle assembly consists of a throttle valve controlled by the gas pedal, as well as an idle speed regulator. The air is supplied directly to the intake manifold and mixed with the fuel sprayed by the injector.
The above-described power system is used on most VAZ engines. The fuel system of the VAZ 2110 8-valve injector is practically no different from the power supply circuit of a 16-valve engine.
Replacing brake pipes on VAZ 2110, VAZ 2111, VAZ 2112
Welcome! Brake pipes - unlike brake hoses, they do not crack over time, because the pipes are made of metal, and besides, they are not so easy to break (We are not talking about brake hoses at all, because they are easier to break and are more susceptible to deformation), that’s why tubes are used in a car, and hoses are only placed at the end, most often this occurs on the front wheels, because the wheels turn when the steering wheel is rotated and if tubes are installed instead of hoses, they will simply burst and you will be left without a braking system.
Note! Why do the tubes change at all? Most often this happens precisely during the replacement of brake hoses, because the tubes burst (namely their tips) and in this case you cannot do without replacement; in order to replace the tubes, you need to take: A set of all kinds of keys , as well as special Be sure to stock up on a brake bleeding wrench, a rubber bulb and everything you need to bleed your car’s brake system!
Summary:
Signs of malfunction of the VAZ-2110 power system
Considering the number of power system components, it is quite difficult to unambiguously determine the cause of the malfunction. But, if you know the main “symptoms” of a breakdown, then the process of finding the cause will speed up many times. So, we list the main signs of failure of power system components:
- The car stalls (does not start). Check the operation of the fuel pump by listening to the sound from under the rear seat (with the ignition on).
- The revolutions “float”. This may be due to a malfunction of the idle air control or fuel pressure regulator in the rail.
- The engine "troits". As a rule, the cause is faulty injectors.
The fuel system of the VAZ 2110 16-valve injector has exactly the same features as the 8-valve injector.
Signs and Symptoms of a Malfunctioning Fuel Pressure Regulator
- the engine stalls at idle;
- engine power is greatly reduced;
- when accelerating, it is not possible to achieve normal dynamics;
- the car reacts poorly to pressing the gas pedal;
- fuel consumption suddenly increases greatly;
- the amount of carbon dioxide emissions increases;
- the crankshaft rotation speed changes.
All these problems arise due to the fact that the regulator becomes clogged or completely clogged over time. Another common cause of failure is weakening of the spring, leading to a strong decrease in pressure. In the absence of normal pressure, fuel supply decreases, power decreases and controllability deteriorates. Such problems are especially common on Ladas - Kalina and Priora, as well as on cars of the 2110, 2112, 2114, 2115 series.
To check the part, you need to carefully inspect it itself, the vacuum hose and all connections. Any leaks found must be corrected. It is also recommended to check the membrane. Disconnect the tube that goes from the RTD to the receiver and shake it. If no gasoline comes out from inside and there is no strong odor, then the membrane is in order.
RTD in diesel engines
Diesel vehicles running on the Common Rail system are also equipped with a pressure regulator. It fits into the fuel rail or is located on the high pressure fuel pump housing. The principle of operation is approximately the same. A special valve diverts unused fuel into the return line, preventing excessive loading.
In diesel engines, the regulator has a slightly different structure than in gasoline engines. It consists of a solenoid and a rod, which rests against a ball to shut off the return line. The design protects the engine from hydraulic vibrations and, as a result, from rapid wear.
Replacement of fuel pipes VAZ 2112 1.5 16 cells. with your own hands.
To watch online, click on the video ⤵
Replacement of fuel and brake pipes VAZ 2114,2110-12. More details
We carry out the fuel pipe (return) for VAZ 2110 - 2112. Part 2 Read more
How to repair a fuel system pipe? More details
How to replace a gasoline filter with your own hands on a VAZ 2112 1.5 16 cl for dummies. More details
Replacement of fuel pipes (VAZ 2115) More details
Installation of the tank and fuel pipes. More details
replacement of fuel line VAZ 2110 Read more
removing the VAZ 16 valve ramp without removing the manifold Read more
Repair of the connection between the plastic fuel pipe and the fitting Read more
Cleaning and removing injectors VAZ 2110-12 1.5 16kl Read more
replacement of the power system with a newer one, without return, VAZ 2110-12 Read more
THE rarest part on a VAZ 2110. Replacement of the fuel line. More details
Replacing the fuel supply hose and TRW pads are the best in the world)))Part 2 Read more
Replacing the fuel filter on VAZ 2110, 2111 and 2112 injector Read more
Replacing the fuel filter on a VAZ-2112 (10.11.) Opening the old one Read more
Replacing fuel pipes (fuel lines) on an old-style Chevrolet Niva Read more
INJECTOR EXTENSIONS 12MM FOR FUEL RAIL 1.5 16V | REPLACING STEERING POLD SWITCHES FOR VAZ 2110 More details
Replacing brake pipes. Brake tube replacement Read more
Diagnostics and repair of VAZ (LADA) 16v FUEL SYSTEM Read more
Important nuances
There are a few things to keep in mind when cleaning your injectors. Here they are:
- You cannot save on flushing fluid. The injector is a very important part of the engine. And it is extremely sensitive to the quality of the flushing fluid. The optimal choice for washing Priora injectors is a product from Wynns, developed specifically for injection engines. The cost of a liter bottle is 700 rubles; The plastic bottle must be removed carefully after washing the Priora injectors.
Replacing injectors is a long procedure. Nevertheless, it is quite within the power of a novice driver if he has at least a vague understanding of the structure of an injection engine. When cleaning the injectors, the situation is much simpler: you just need to be able to use a drill and know where the main fuel hose is located.
Carburetor cars are slowly but surely becoming a thing of history. Float chambers and diffusers have been replaced by injectors and distributed fuel injection, the quality of which is controlled by the car’s on-board computer. On the one hand, injectors have made life much easier for motorists. On the other hand, even these reliable devices periodically fail. Fortunately, the driver can replace them with his own hands. The main thing is to know how it's done.
Replacing the fuel system of a VAZ 2110
We will talk about the transition from carburetor injection to injection. We will describe this process very briefly.
First of all, the carburetor lines are replaced with injection lines, as well as the gas tank is replaced. Next, the ignition coil, distributor and fuel pump are dismantled. The carburetor is dismantled along with the intake manifold, and in its place the injection manifold is installed along with a ramp and injectors. The next stage involves replacing the generator with a more powerful one, installing an electronic control unit and connecting all wires and sensors.
But everything is not so simple - in addition to all of the above, you will have to replace many more related parts (throttle cable, ignition module, sensors, air filter, etc.). For a deeper understanding of the replacement process, use a variety of photos and videos of repairs that can always be found on the Internet.