In November 2004, the first Lada Kalina model left the factory gates. For various reasons, she overcame a very long path to birth. The first information about the start of design work on the model appeared in 1993. The car belongs to the second group of the small class, has a roomy interior and a pleasant appearance.
All installed power units of this model have a toothed belt in the valve mechanism. In this article we will look at how to replace the timing belt of a Lada Kalina 16 valves.
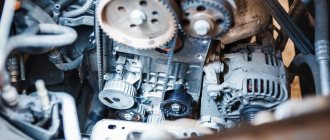
About engines
Depending on the configuration, one of four modifications of the power unit was installed on the car. Two of them had 8 valves in the cylinder head, two had 16 valves per engine. The cylinders are arranged in one row, the block is cast from cast iron. Three engines have a working volume equal to 1600 cm 3, one of them VAZ 11194 was made with an engine capacity of 1400 cm 3. This engine, just like the VAZ 21126 , has 4 valves per cylinder, that is, there will be 16 of them in the cylinder head Thanks to some modifications, the engines comply with Euro 3.4 standards.
Timing diagram
The engine with a displacement of 1400 cm3 was not produced for long, since the appearance of Kalina 2 was conceived only for power units with a displacement of 1600 cm3. Manufacturers guarantee a service life of engines of more than 200 thousand km. Both engines can be moderately boosted without significantly reducing their service life.
Are the valves bending?
This question worries many owners of Kalina and other VAZ cars with front-wheel drive. This is due to the fact that when there is a break in the valve drive or the teeth of the drive belt are cut, the pistons hit the valve heads. In the best case, the car gets bent valves, but bending connecting rods, damaged pistons, and burst valve guides are also possible. Such a malfunction will entail previously unforeseen costs for engine overhaul.
Don't let drivers be misled by the recesses in the piston heads; they do not save the engine from damage. In this case, only compliance with all recommendations of the engine manufacturers, the use of high-quality spare parts and other consumables, and timely replacement of worn parts can help.
Belt service life, signs and effects of wear
The manufacturer recommends replacing the belt drive after 50-60,000 km. But this regulation is not always accurate. In some cases, the belt may have to be changed a little earlier. This can be caused by both external reasons and the quality of the installed consumables. If we talk about external reasons, then this is, first of all, the use of the car under increased loads. If you often have to drive over potholes to your dacha, and if your car also carries a trailer, then you shouldn’t be surprised at the early wear of consumables. Premature wear is also greatly influenced by weather conditions and extreme driving. Many people like to drive around, which necessarily affects the condition of the belt drive. Separately, it should be said about working fluids getting on the belt, especially engine oil. It has the ability to corrode rubber, but the timing belt is made of it.
Therefore, it is very important to diagnose the condition of consumables. This must be done at least every 30,000 km. In this way, the resulting defects can be detected at an early stage. You can identify them yourself. Here are the most common signs of belt wear:
- delamination of the material has begun (usually this begins to occur after a long period of operation);
- cracks or bulges begin to appear on the surface;
- the ends are torn and individual threads stick out from them;
- The already mentioned engine oil was found on the surface of the belt.
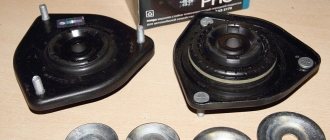
By the way, if the belt is covered with oil stains, this means that the sealing of the system is broken and the seals have begun to leak. In this case, they also need to be changed along with the belt. Gaskets also need to be replaced. If there is play on the tension roller, it should also be replaced with a new one.
If you do not diagnose the condition of the belt drive from time to time, it may end up breaking. The consequences of this will be very serious: the synchronization of the movement of the shafts will no longer be carried out, the valves will meet the pistons and bend. The remaining parts of the mechanism will also suffer some damage as a result. In short, after a broken belt drive, the car will have to undergo real serious repairs. Let's not bring it to this point, but change consumables as soon as the need arises.
Replacement procedure
The time for replacing worn parts in the timing belt is approaching, the driver thinks about the question of how to carry it out. Those who don’t want to get their hands dirty or have never had their car repaired prefer to turn to specialists. However, there are many owners who prefer to maintain or repair the car themselves. They are quite capable of this operation. You can do it in a garage or any suitable area. Work begins by opening the hood of the engine compartment, since most of the driver’s actions will take place in this place.
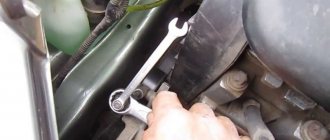
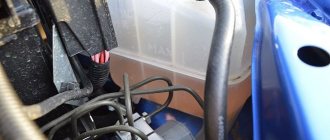
- First of all, remove the plastic cover covering the power unit. The windshield washer reservoir prevents the removal of the timing mechanism protection; it needs to be dismantled, especially since this does not cause any particular difficulty. Next, it is advisable to unscrew the spark plugs, having first removed the coils from them, this will make it easier to crank the engine in the future. The car is braked with a hand brake, stops are placed under the rear wheels, and the bolts of the right front wheel are removed. This side of the car is lifted with a jack, while not forgetting to place a stop under the car body, and the wheel is removed.
- When this is done, you can remove the upper protective cover of the timing mechanism, which is tightened with 5 screws.
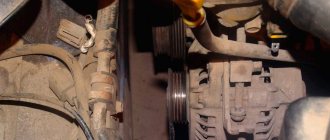
- The next step is to remove the generator set drive belt. Release the tension mechanism and remove the belt. Now you can begin to dismantle the lower protective cover of the timing drive, which is held in place by only two screws.
- Some mechanics also disconnect the alternator belt tensioner rod for ease of operation.
- Now the timing mechanism needs to be aligned to the marks by turning the crankshaft pulley.
To get to it you will have to remove the fender liner, then the engine protection. Removing the pulley is not so easy; the crankshaft must remain stationary. This can be done by placing a flat-head screwdriver between the teeth of the flywheel ring and the clutch housing, or engage fifth gear and press the brake pedal. The pulley is removed along with the washer, and the bolt is put in place. Rotate the motor shaft until all marks coincide.
- There are two camshafts installed in the cylinder head, the gears of which should have their marks strictly opposite the marks of the rear protective housing.
- The gear on the crankshaft also has a boss; it is installed opposite the oil pump housing mark.
- It is also necessary to remove the rubber plug and make sure that the mark on the flywheel is located in the required place.
- After this, proceed to removing the timing belt.
First, its tension is weakened; to do this, the bolts on the tensioner and guide roller are loosened with a “15” head, the belt is removed from the pulleys and pulled out of the engine compartment.
- The tension roller is removed from the cylinder block, since it is usually replaced with a new product.
After this, it is strictly forbidden to turn the crankshaft or camshafts.
- Before reassembling, carefully inspect all parts of the timing drive mechanism. Before installing the rollers, it is advisable to coat the threads on the screws with a special lubricant; the tensioner screw does not need to be tightened too much yet.
- Once again, carefully check the alignment of the timing marks of the timing drive mechanism.
- Install a new belt on the pulleys, making sure that there is no sagging in the belt branch between the camshaft gears. If everything worked out, start tensioning the belt. To do this, the tensioner roller is turned counterclockwise until the movable mark on the outer race coincides with the stationary roller body, where there is also a mark.
- Now you can tighten the screw securing it. Further assembly occurs in the reverse order of removal.
Why change the timing belt on a Priora
Why this belt is needed, most likely, does not need to be explained. In general, there is probably no need to explain why it should be changed, however, there are inquisitive minds who need a lot of information simply for general development. And with that, let's get started.
So, the belt drives the gas distribution mechanism, namely the camshaft. This, in turn, lifts the valves, which move towards the piston at the moment of the exhaust stroke. But they get into the saddle in time, so nothing bad happens. If the timing phases are disrupted, and it is precisely this disruption that occurs when the belt breaks, it may happen that the camshaft stands in one position when, for example, the intake valve in the first cylinder is open.
The moment the piston goes up, it will simply bend the valve. Repairing a domestic car in this case will cost about 15 thousand rubles, while for repairing a foreign car head you will have to pay from 30 thousand of our wooden ones. Therefore, it is imperative to monitor the belt, or better yet just the mileage. The factory regulates a gap of 70,000 kilometers for this unit. There are fellows who have driven more than a hundred, but the 127 engine bends the valves, just like it bends.
Which belt is better to buy?
The main supplier that supplies timing belts to Lada Kalina is the RTI plant from Balakovo. The quality of its products has been tested by many years of cooperation with the VAZ plant, and there is no doubt.
At the same time, imported components are also installed. Gates products have proven themselves well, guaranteeing a belt mileage of 200 thousand km or more. You can use the services of other well-known companies with global experience, the main thing is not to run into a well-disguised fake.
Tools for replacing the timing belt on Lada Priora
Let's start with the fact that to replace the timing belt on a Priora 16 valves you will have to stock up on a very specific set of tools. This is definitely a set of hexagons, a set of torx bits, and a set with a small 1/4-inch ratchet will not work, we’ll tell you why later. In addition, you will need a device for tensioning the roller, but the usual one from 2114 will not work, you need a slightly wider one. If you have enough strength, you can tighten the roller simply by leaning against it with a mounting tool; many people do this.
It is also necessary to clarify whether there are 16 valves on the Priora with or without air conditioning. If yes, then the belt needs to be longer. The belt is officially supplied with a length of 1125. However, most owners say that it is better to use 1115. This is due to the following. The fact is that initially the 16-valve 21127 was designed without air conditioning. Everything was simple. The pump is driven by the timing belt, the alternator belt is no longer responsible for anything. In general, it couldn’t be simpler. Crankshaft and generator with tensioner, without rollers.
The designers were faced with an almost unimaginable task - to install an air conditioning compressor, which they accomplished. Yes, not perfect, but we did it. And therefore, two additional pulleys appeared here - a compressor and a tension roller. The problem is that previously the contact patch of the generator pulley was about 120 degrees. After the introduction of the new scheme, it is approximately 30 degrees, because the tension roller pulls the belt and does not press it against the pulleys, as was the case, for example, on Kalina. By the way, many car owners later began installing these same brackets with a tensioner in order to dismantle this circuit.
Video
It’s rare that a car owner has not heard of the devastating consequences of a broken timing belt. The valves “fall” into the cylinders and break the pistons at top dead center. Sometimes, after this breakdown, the engine cannot be restored, or the repair involves such high costs that it is simply abandoned in favor of a contract engine. How often or after how many kilometers the timing belt needs to be changed, as well as how to evaluate its safe life, we will figure it out together with the specialists of the Auto-Master service.
Content: