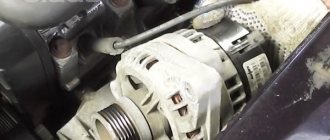
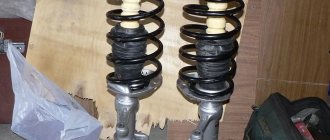
In a car, the starter is a very important component. It ensures that the engine starts by rotating the crankshaft for the first few revolutions. This is necessary to begin the process of ignition of the mixture in the chambers.
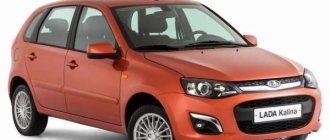
Today we will consider this unit applicable to the popular Russian model Lada Kalina. We'll tell you where it is and how to remove it.
Design
The Kalina starter is an electric machine operating on direct current, powered by a battery. During operation, the starter consumes a large amount of current and, if malfunctioning, can often discharge the battery.
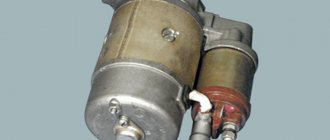
The main parts of the starter: armature, rotor, bendix, brushes, retractors. Failure of one of the elements leads to failure of the starter.
What if he doesn't come back
In fact, Bendix ensures long and trouble-free operation of the entire assembly. And if it weren’t for him, then at the moment when you turn off the starter (that is, the car starts), it does not disengage with the engine, which is called “does not return,” then the rotating engine shaft will simply break the starter itself. Which, by the way, sometimes happens when the Bendix malfunctions in the opposite way - that is, the accelerating clutch does not slip, but, on the contrary, sticks and continues to rotate the shaft together with the electric motor. That is, the bendix does not disengage.
And now we are talking about a malfunction when the bendix slips, slips, and it turns out that it works, but its clutch power with the engine is not enough to turn it over and start it. The thing is that heavy loads wear out the teeth of the ratchet gear over time, and the part fails.
It has already been said that this part - the accelerating clutch, popularly called Bendix - functions on the principle of a ratchet mechanism. And the cause of the malfunction, when the gear teeth do not grab and slip when rotating along their axis without achieving engagement, is in the vast majority of cases the banal wear of these very teeth. Indeed, in fact, at the time of operation, these same teeth experience a serious load, since they have to overcome the force of rotation of the heavy crankshaft of the engine, compression of its cylinders, and the like.
Over time, due to such loads, either:
- ratchet gear teeth;
- or (if it is not designed with gears, but with two rings with balls, a locking mechanism that works exclusively in one direction and return springs) the rings, balls wear out, or the spring breaks.
And such a malfunction leads to the fact that when the electric motor rotates, a characteristic malfunction occurs: lack of engagement of the starter with the engine.
Principle of operation
When voltage is applied to the starter by turning the key in the car's ignition switch, current flows simultaneously to the solenoid relay and the starter itself. The starter begins to rotate, and at this moment the solenoid relay moves the moving part of the bendix to the engine flywheel, thereby starting to rotate the engine by the crown on the flywheel, after which the engine starts, the ignition key is released, the current on the starter and solenoid relay disappears, thereby stopping the starter and moving the bendix away from the flywheel.
How to check it yourself
Without removing the starter from the car, you can only reliably check for poor contact and the fact that the retractor relay control circuit is faulty. If the starter does not respond to turning the key to the Start position, directly jumper the power terminals of the solenoid relay with a screwdriver. Triggering of the starter will indicate a malfunction in the control circuit or the traction relay itself.
If you know how to use a multimeter, in DC mode, check whether voltage comes to the control terminal after turning the ignition key to the Start position. If voltage is supplied, but the retractor does not operate (there is no characteristic click), the traction relay needs to be repaired or replaced.
Typical breakdowns
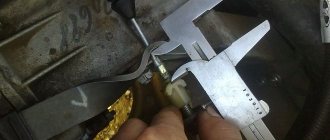
- Abrasion of brushes that wear out due to tight pressing against the rotating armature. The degree of wear can be assessed visually or using a caliper. It is enough to compare the thickness of new brushes with worn elements.
- Wear of collector plates. Brushes wear out much faster than armature contact plates, but even after several hundred thousand kilometers they can become unusable. The degree of wear is determined by the depth of the groove, which is formed from friction with the brushes. If the brushes do not fit tightly at the moment of rotation of the armature, a spark discharge may occur, causing burnout and further detachment of parts of the lamellas. Among other defects that arise due to runout and axial play of the armature shaft are ovality and displacement of the friction zone of the brushes.
- Violation of the insulation of the commutator contacts, leading to breakdown of the armature housing to ground; interturn closure.
- Wear of the bushings securing the armature shaft. Critical depletion of bronze or copper-graphite bushings leads to runout of the armature shaft, as a result of which copper-graphite brushes fail much faster, and uneven wear of the commutator is observed. Also, wear of the bushings can cause displacement of the armature plates, which leads to an interturn short circuit.
- Wear or incorrect selection of spacer washers that prevent axial play of the armature shaft.
- Burning of the contact plate of the solenoid relay. Winding burnout, turn-to-turn short circuit of the solenoid coil.
- Worn armature shaft gear.
- Peeling off the magnets from the starter housing.
- Breaking the terminal of the positive wire coming from the power terminal retracting to the brush. Sometimes the terminals become severely corroded due to their location in an aggressive environment.
Repair or replace
Operations that in most cases are limited to manual repair of the starter:
- replacing the brush assembly. We have already looked at how to replace starter brushes with your own hands, so we will not dwell on this;
- cleaning the working area of the collector with fine-grained sandpaper;
- lubrication of the planetary gearbox, armature shaft in the place where the retractor relay fork moves;
- complete cleaning of all parts from wear products of graphite brushes and commutator, dirt.
Many manufacturers do not provide for repair and maintenance of the solenoid relay, so to disassemble it, flare it. This can be done only for the purpose of cleaning the contact areas of the terminal bolts and plates with sandpaper or a file. If an inter-turn short circuit or a breakdown in the housing is detected, we recommend replacing it instead of doing it yourself. We also find the idea of repairing the commutator lamellas and rewinding the starter armature very dubious. For widespread starter models, such repairs are simply unprofitable, since it is often easier to find a working used part at a disassembly site or buy a new starter altogether.
Symptoms of a problem
The starter is not a very complex mechanism and has a small number of parts that fail. Most often, problems with the starter arise due to the following breakdowns:
- The contact brushes are worn out - this happens due to prolonged use of the starter on the car and most often occurs around 100,000 km. mileage This procedure can be easily corrected by replacing the brushes.
- Failure of the solenoid relay - the solenoid relay is one of the weakest parts of the starter and fails at different times, regardless of anything. With such a breakdown, the starter rotates, but does not engage the flywheel.
- Bendix failure - Bendix is a mechanism reminiscent of an overrunning clutch that rotates in one direction, but jams in the other.
- Broken stator or armature winding.
All reasons except a winding break are easily corrected by replacing the elements with new ones, but if a winding break occurs, it is better to replace the starter with a new one.
Let's sum it up
To ensure that the starter of the Lada Kalina does not fail, it needs to carry out maintenance, otherwise it will require replacement. Do not overheat the device by frequent attempts to start the motor. Holding the ignition key in the appropriate lock position for more than 5-7 seconds can also cause harm. After the 45,000th mileage of the LADA Kalina car, it is necessary to disassemble the unit, replacing the lubricant and cleaning the surface of the collector. In addition, external contacts require inspection and cleaning.
How to change the starter, and most importantly, how to repair the starter yourself - these are questions that VAZ owners often ask. Therefore, in this article we will tell you how to replace the starter on Kalina.
To replace and repair the starter , we place the car on a pit or on a lift.
- Open the hood. Remove the terminal from the battery.
- For ease of access, you need to remove the air filter housing. To do this, remove the connector from the air flow sensor.
- Loosen the corrugation clamp and remove it.
- Remove the antifreeze return hose from the mount.
- Using head No. 8, unscrew the two fastenings to the front frame of the car.
Discharged battery
Also, quite often a starter malfunction can be confused with a discharged battery. If the starter on your car does not rotate the engine, but only clicks of the solenoid relay are heard, then the battery is most likely discharged. The sound that the starter makes when the battery is discharged can be heard in the video.
How to remove and replace the starter assembly
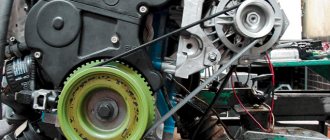
Replacing the starter on a Lada Kalina is done as quickly as replacing other parts that are “consumables”. At the same time, changing the cabin filter will be even more difficult. And the durability of the unit called “starter” is actually unlimited. Its drawing is given below:
Starter Lada Kalina-2
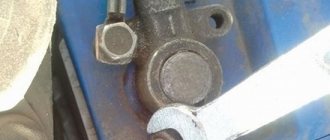
There are three mounting holes here that accept “M8” screws (you need a “13” key). Dismantling is carried out in the following order:
- Unscrew the nut “3” (a “13” wrench will do);
- Remove the terminal from the contact screw;
- The built-in relay plug is disconnected;
- Using a 13mm wrench, unscrew two or three fastening nuts.
All of the above actions are illustrated in the photo:
Installing a new starter is done in the reverse order. And we provide instructions for its repair in the video.
It is important to know: in order to avoid electrical injuries, the negative terminal of the battery is connected last. Before this, all parts and assemblies must be assembled, and protective covers must be installed in place.
How to start a car without a starter
If the starter on your car is faulty or the battery is dead, then the car can be started in other ways.
You can try to start the car from a tow, from a hill, etc. turning on the ignition and second gear, this method is relevant for both a dead battery and a broken starter. These manipulations can only be performed with a manual transmission.
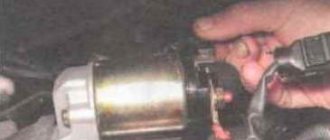
If the starter rotates but does not turn the engine, then the solenoid relay is most likely faulty. With such a malfunction, the engine can be started quite simply, just turn on the ignition and bridge the contacts on the solenoid relay, as shown in the picture, and the engine will start.
Prices for the original Lada Kalina starter can reach or even exceed 4,000 rubles. There are a large number of analogues on the market at prices starting from 2000 rubles, but the quality of such parts leaves much to be desired.
When is a starter check required?
During operation, the device may malfunction, and therefore the engine will be unable to start. The Lada Kalina car unit is characterized by the following signs of malfunction, suggesting the need for removal and diagnostics for the purpose of further repair or replacement:
- turning on the starter is accompanied by the shutdown of other devices operating at that time;
- when the device starts, reduced crankshaft speeds are observed, which is not enough to fully start the engine;
- turning the ignition key does not activate the starter;
- the unit shows signs of “viability”, but the motor flywheel does not rotate.
Next we will tell you how to remove and replace.
Replacement
To replace the starter, you need to prepare a special tool that will be needed during the work process.
Required tool:
- Screwdrivers, flat and Phillips;
- Ratchet with heads for “13” and “15” mm;
- Open-end wrenches for “10” and “13” mm;
Step-by-step replacement instructions
- We turn off the power from the solenoid relay; to do this, unscrew the power cable with a key and disconnect the connector.
- Using a ratchet and an extension, unscrew the bolts securing the starter to the gearbox housing.
We perform assembly in reverse order.
How to get rid of unnecessary details
Under the hood of the Kalina-2 it is easy to find an air filter module that prevents access to the unit we need. This module must be moved to the side, but first the air intake sleeve must be disconnected.
Black box – filter module
The sleeve itself, attached to the bottom of the module, is simply pulled in the “left” direction. The whole process looks like this:
Remove the sleeve from the pipe
Just in case, here is a drawing of the node in question:
Filter module design
The figure shows the connector installed on the top of the module. The plug from this connector is also first disconnected, but first, the negative terminal is removed from the battery. Why do this, we discussed earlier. It turns out that there will be three preparatory steps: disconnecting the battery terminal, removing the sleeve from the filter side, disconnecting the plug.
Theoretically, replacing the starter looks easier if the air duct sleeve is disconnected on both sides (on Kalina 2 it covers the caps of the mounting screws). This statement is illustrated by the figure:
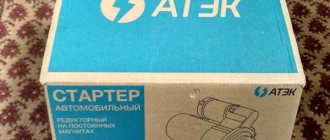
Starter for viburnum 8 valves which is better
This product completes the line of starters for VAZ, and we are pleased to announce that from now on we offer a full range of starters for VAZ and GAZ cars!
| LSt 0118 2111-3708010-10 (5702.3708-10, 5121.3708) |
for VAZ 2113-2115, 1117-1119 "Kalina" with 8-valve engine (reinforced gearbox)
Specifications:
Starter starting speed, rpm 2800 Crankshaft starting speed, rpm 200 Rated voltage, V 14.6 Rated power, kW 1.55
StartVOLT starters are superior to analogues in the number of successful engine starts and in reducing energy consumption by 30-50%!
Achieved by increasing the number of stator poles to 6 units: MAGNETIC5 technology
Unique design advantages of all StartVOLT starters:
Current collection brushes
• in current collection brushes, which are used in the starter, bronze-graphite is used as a material - a more durable and reliable material compared to graphite).
Gearbox
• the planetary mechanism is made entirely of metal (unlike analogues, which are made of plastic). • hardened steel with increased wear resistance is used, which directly affects the life of the starter. • the design of the planetary gearbox housing has been improved in order to reduce friction losses and improve the balancing of the gearbox-shaft pair.
Bendix
• heat-treated steel with increased wear resistance is used. • the overrunning clutch has an original design that ensures its increased wear resistance.
Solenoid relay
• by increasing the area of copper contacts, the reliability of the relay increases and power losses are reduced.
The design of StartVOLT starters is patented by the Federal Service for Intellectual Property, Patents and Trademarks of the Russian Federation (“ROSPATENT”) Utility model patent No. 102691 dated November 15, 2010. Recommended retail price – 2,700 rubles.
What is an engine starter
Any gasoline internal combustion engine is equipped with a part called a “starter”. This unit, that is, the starter, is a conventional electric motor. The voltage “+12 Volts” is supplied to it via one electrical cord. The body acts as the second wire.
A relay is mounted inside the starter, the contacts of which conduct the supply current. When you need to start the internal combustion engine, the contacts close. Let us immediately note: the voltage on the power wire always remains as long as the battery is charged. Therefore, before dismantling, be sure to remove the negative terminal from the battery.
If the battery is charged, but the starter does not turn, then first you need to check whether there is voltage at the contacts of the Ka-3 relay. This element is fixed in a single mounting block, and it is called: “Additional starter relay.”
Removal and disassembly of the starter
Many experienced motorists practice dismantling the starter on Kalina from under the car.
The following tools and devices will be needed for work:
- a set of keys in sizes 8, 10 and 13;
- heads 13 and 15;
- knob;
- several screwdrivers with different types of blades;
- hammer;
- vice;
- technical hair dryer;
- soldering iron;
- pliers;
- a drift made of soft metal or wood;
- current measuring device;
- lubricant;
- fine skin;
- metal plates.
The process of dismantling the device.
- Preliminary work. Place the car on the pit. De-energize the battery by disconnecting the terminals from the battery. Remove the air filter housing - it is held on by 2 10 M bolts.
- Preparing the starter. Remove the solenoid relay boot. Unscrew the nut of the wire going to the starter from the battery.
- Removing the node. Unscrew the starter clamps on the clutch dome - it is easier to remove the lower bolt under the car.
Installation should be done in reverse order.
Important point. The wire to the traction relay is connected not with a screw connection, but with a regular Soviet connector. This is a big drawback, since such a terminal is not protected from moisture in any way, and the wire itself is too short and strained. The consequence is that it constantly breaks off or oxidizes.
Disassembly and reassembly
In most cases, the starter is disassembled for cleaning or replacement:
- brushes;
- solenoid relay;
- Bendix.
Disassembly is done like this:
- the nut securing the lower bolt of the traction relay is unscrewed - the key is 13;
- remove the screws holding the relay block - a slotted screwdriver;
- the armature with the spring is removed from the front cover of the retractor relay;
- the tightening bolts are unscrewed, the electric motor housing is disconnected from the front cover - the key is 8;
- the armature is pulled out along with the brush holder and the back cover - the latter is held on by 2 screws;
- The brush holder is disassembled and the brushes are separated;
- the cover of the planetary gearbox is removed;
- 3 gears and a rubber plug are removed;
- the drive assembly located in the front cover is dismantled;
- the drive lever is removed by unclamping the eye on the support - the end part of the ring gear must be rested against a wooden block;
- the restrictive ring of the drive gear is compressed - a hammer and a wrench of 13;
- The locking ring can also be removed using a flat screwdriver;
- the limiting washer of the gear travel is dismantled;
- the overrunning clutch is pulled out;
- the limiters are removed from the groove on the shaft - first you need to knock the upper ring down using a head, a spanner and a hammer, and then pull out the lower wire washer with a screwdriver;
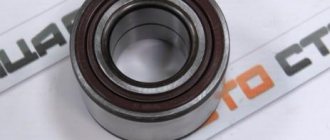
- the bearing is dismantled by inserting metal plates between the element itself and the rotor commutator - a vice acting as a support and a hammer are also used.
Next you need to carry out proper troubleshooting. First of all, inspect the anchor. You should check its winding and the external condition of the lamellas. Carefully treat areas with charred parts with fine grain sandpaper. If there are many traces of burning, the anchor will have to be replaced with a new one. Scratches and minor scratches are recommended to be sanded using the same sandpaper.
Advice. The surfaces of the lamellas can be effectively processed if you hold the anchor in an electric drill or screwdriver and run it with sandpaper at low speeds.
Using an ohmmeter, measure the core and windings for breakdown. Pay careful attention to the ends of the coil - they should not be torn from the lamellas or damaged. Windings with traces of burning or separated varnish insulation - urgently need to be replaced! If the technical cardboard inside the stator is wet, you need to dry it with a hairdryer.
You should also replace the brush holder assembly if there is wear on the holder, tension system or brushes. Be sure to clean the structure from old dirt - solvent helps in this matter. Brushes are considered normal if their size is within 6-7x13 mm. Installation of new elements into the holders may be complicated by the influence of the retaining springs.
Disassemble the solenoid relay and clean the nickels. You need a powerful soldering iron for large parts. The main difficulty of this operation is reassembly. It’s important to remember what was there and where. In some cases, nickels are turned backwards.
Video: replacement and repair of Kalina starter
| Maxim161 | In general, today I replaced my half-dead Pramo with the same one (I managed to buy a new one for only 2800). I had already forgotten that sound; I didn’t know that the crankshaft in my Kalina could spin so wildly. Now it really starts with half a kick (although the frosts have receded, but still). I never found a brush assembly for the previous starter, but now I have doubts about the integrity of the armature (after all, the windings were very darkened). And the guides of the positive brushes were slightly welded to the body... How, with such a short circuit, it managed to spin (and I wouldn’t say that it was completely rotten) remains a mystery to me. In general, to summarize, all the problems with starting and the burning smell after the start, and I have already written about these problems in more than one thread - it was all due to the starter. After all, he was twisting, the bastard, but until the last he made him not suspect himself... |
| IL37 | The brushes on the PRAMO starter were also worn out; I couldn’t find a brush unit for it in stores. I found information on d2 that the RAU brush assembly for 420 rubles is suitable. |
| T1000 | Can you tell me which parts need to be lubricated in the starter? Do I need to lubricate the satellite bushings, the epicycle bushing, and the cover bushing? |
| Balag | a) after a “manual” start, something “jammed” in the starter and it was able to turn over; b) the second time I put on the “trick” better (oh, doubtful). As I understand it, with a “dead” starter, only a “pusher” would help? Wouldn't a screwdriver have helped? The clicks were clearly under the hood. When nothing plowed. I just saw a girl off last night, and on the way I thought, “let me poke the ignition.” He sat down, left the door open and turned the key. And through the open door there are such loud clicks from the hood area. More precisely, with each attempt, 1 click. It somehow reminded me of when in the winter I drained the old battery to zero and tried to start it. At first it’s like “chaf-chaf-chaf”, and then there are clicks, but constant ones. But that was in winter, now there are no chafs - just a click. And one click. I don't know if this description will help. Now the battery is new. |
| Samoyed | The main reason for the starter “clicking” and not cranking is wear on the surface of the nickels in the starter solenoid relay; the nickel simply cannot close the circuit normally in order to supply voltage to the windings without loss. It is also necessary to check the contact at the battery terminals; this can be determined clearly if the interior light is turned on during startup. It goes out strongly when you turn the key to start - there is not enough power. If it fades just a little, the dimes are in the retractor. |
| Andrey710 | Remember - electrics is the science of contacts. I’ll explain how the power supply to the Kalina starter retractor is implemented. The voltage from the battery comes to the contact block of the ignition switch. By turning the ignition switch to the “Ignition on” position, we supply power to the ECU, which turns on relay K3 in the mounting block (this relay supplies power from the ignition switch to the retractor, and when the engine starts, the ECU turns off this relay, thereby preventing the starter twist!) By turning the key to the “Starter” position, power through the contacts of relay K3 should flow to the solenoid. This means where it may disappear or not connect. Check relay K3 in the MB (replace with another one, or replace it with a neighboring one exactly the same in the MB during the tests.) Check the integrity of the terminal block in the connector of the wire coming to the retractor (perhaps the terminal in the chip is soured or there is a broken wire or something else) Check the ignition switch itself. (Perhaps there is no contact at the heels of the Starter group!) |
Inspection and repair
If one of the conditions is not met, you can consider yourself lucky. Troubleshooting, in this case, comes down to unscrewing three screws. This will allow you to remove the faulty starter solenoid relay and install a new one. Despite the fact that the car engine now starts, disassembly must continue - repairing starters involves a full check of all components.
Brushes
First you need to arm yourself with a screwdriver and remove the back cover, which will make it possible to replace the starter brushes. Experts recommend doing this in any case, regardless of their condition. Otherwise, removing the starter will have to be repeated after some time. This argument, as a rule, discourages the desire to save from the last miser.
The starter brushes are located at the rear of the electric motor. Their connection diagram is designed in such a way that the failure of one causes the failure of the entire device. To remove the starter brushes, you need to unscrew their terminals and free them from the springs pressing on top. This will make it possible to remove the carbon elements.
Stator
At the next stage, the condition of the stator is assessed. You need to check it for breakdown with an ohmmeter. The device readings must be at least 10 kOhm. Otherwise, it must be replaced with a new one.
Here the following should immediately be noted: recently, the so-called gear starter has become increasingly common. It has a number of undoubted advantages. Compared to the classic one, it has a much smaller size and a higher starting speed, making the car easier to start.
A special feature of its design is permanent magnets instead of stator windings. This circuit itself is quite reliable, but at times the workmanship is poor. Sometimes the magnets come off, and in this case it is impossible to repair the starter yourself. Moreover, the consequences are so catastrophic that not every service will undertake to eliminate them. Most often, a new gear starter solves the problem.
Rotor
To get to the armature (rotor), you need to continue disassembling. To do this, the studs are untwisted, which tighten the two halves of the electric motor. Now you can disassemble the device completely, after first removing the retaining ring and washer on the axle.
It is necessary to carefully inspect the rotor. This and the starter retractor are the most common reasons why the engine will not start.
First of all, you should pay attention to the windings. If there are traces of burning and soot on them, the anchor must be changed
Repairing starters, of course, involves rewinding, but not in a garage.
Particular attention must be paid to the collector. A small amount of residue is allowed on it, but when it is excessive, the engine will not start due to the slow rotation of the crankshaft
Cleaning the manifold with sandpaper will eliminate the problem.
Do-it-yourself starter repair continues with inspection of the mechanical part
It is important to do this as efficiently as possible. Any missed fault can cause serious damage
Therefore, if necessary, the starter bushings are replaced with new ones.
Particular attention is paid to the freewheel. The starter bendix should rotate easily in one direction and lock in the other.
The gear should not have wear or nicks.
Original Lada Kalina starter and analogues
The first versions of the car were equipped with a KZATE starter with article number 21120-3708010-00.
This model of the starting device was fastened directly to the wall of the cylinder block with 3 bolts. Other starters are also suitable for the car:
- BATE 2109.3708010-01;
- KATEK 21120-3708045-00;
- PRAMO-ELECTRO 2110-3708010-81;
- Valeo 21901-3708051-00 for modification with 8 valves;
- Valeo 21902-3708056-00 for 16-valve version;
- Jatco 21902-3708135 for Kalina with automatic transmission.
Prices for devices vary between 3-4 thousand rubles. Foreign devices, such as Valeo, are somewhat better than domestic ones. But they cost an order of magnitude more. Analogues include products from Febi, Fenox, Glaser, Bremi.