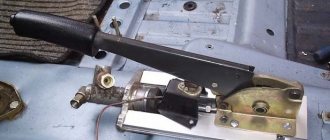
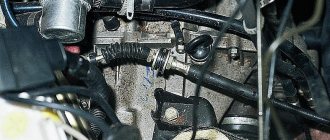
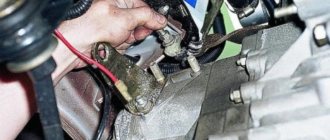
The drive cable in the clutch mechanism of the domestic Lada Kalina model plays a huge connecting role. By means of this element, the driver, when pressing the corresponding pedal, forcibly disconnects the driven disk from the rotating flywheel. A direct “participant” in the process of disengaging the clutch, transmitting the pressing force to the basket, is the release bearing.
Why did the manufacturer prefer a cable drive? In classic car models, the cable gave way to a hydraulic drive, when the clutch is released by acting on the fork by a system of hydraulic cylinders (main and working).
It is not uncommon for the cable to break, after which the car is no longer able to move, since changing gears becomes impossible. Only replacing the clutch cable will return the car to full functionality. The repair procedure itself does not cause difficulties, so it is accessible even to those novice owners who have embarked on the path of a motorist for the first time. And therefore, many people are interested in the question: how to change the cable?
When does the cable need to be replaced?
Of course, after the fact of its breakdown! However, this is not the only case, because experts recommend leaning towards this procedure if several wires are also broken in the tip. Another relevant advice is related to the need for this repair procedure when the plastic braiding of the cable has acquired visible through damage.
Please pay attention! The clutch cable in a Lada Kalina car can not only break, it is also prone to gradual stretching. As a result, there comes a time when it will not be possible to engage the gear. Situations are more rare if the car has been idle for a long time without moving. This can cause acidification of the cable inside the sheath.
Error p0504 Lada Granta
Wiring diagram of Lada Granta norm with description of elements
Granta sport review
conclusions
Replacing the clutch cable of a Lada Kalina is a rather labor-intensive operation and will require some knowledge in the design of the car. But, if you figure it out once, then in the future you can do everything with ease.
If you feel significant play in the clutch pedal, this may mean it is time to replace the cable. You can do this yourself without going to a car repair shop. A little theory. The clutch cable connects two units, namely the gearbox and the engine. The length of the cable is adjustable thanks to a ratchet mechanism. During vehicle operation, the disc linings gradually wear out and, as a result, the tension weakens. But there are times when the cable may break completely. Therefore, if you hear extraneous sounds when shifting gears or notice insufficient traction, or maybe the clutch pedal sinks to the floor, then you should inspect the clutch and replace the cable. Sometimes this part breaks at the most inopportune moment and this situation should be corrected promptly. To help you, we have prepared a detailed guide that even an inexperienced car owner can understand. So let's start the repair.
We use tools and spare parts:
- new clutch cable
- key for 8
- ruler
- flat screwdriver
- calipers
- rags
Dismantling the old cable
- First, we find the clutch drive pedal.
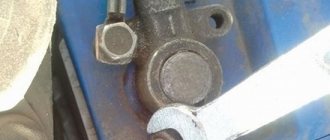
- We remove the stop from the cable sheath. The braid itself is attached to the pedal bracket. The manipulation is very simple. Using the “8” wrench, we simply unscrew the nut that secures the shell to the bracket. Having “defeated” the nut, we easily remove the stop from the stud.
- Now there is an approach directly to the finger. A stopper is held on it, which we remove using pliers (or a screwdriver). After dismantling the marked stopper, remove the clutch disc compensation unit (driven).
- We remove the plastic bushing located on the pedal drive finger. A visual inspection of its condition would be useful. If there are visible deformations, we replace it with a new product. Before installing the bushing, lubricate the pin surface with lithol.
- We proceed to removing the seal from the cable sheath.
In the interior of the Lada Kalina, the entire list of manipulations has been completed, so the next step will be dismantling the elements under the hood.
Let's proceed further
- On the transmission unit, pull the end of the cable towards you. It should come out of the landing hook without any effort.
- Now we unscrew the leash, which we remove from the tip.
- The final step is to pull the clutch cable out of the bracket on the transmission.
A special feature of the Lada Kalina model is its one-piece bracket, not a split one. Here you will need to remove the cable from the corresponding hole in the bracket towards the interior. The component we are looking at is now removed.
How to properly replace the clutch cable on a Lada Kalina
The clutch mechanism allows the transmission of torque from the power plant directly to the transmission. In many ways, the correct performance of this function depends on one, at first glance, insignificant element - this means the cable. It is this that allows you to change gears, start the engine, etc. We will tell you in this article what to do when the named part fails on the Lada Kalina.
Peculiarities
The cable installed in the VAZ model under consideration has a special ratcheting mechanism. It allows you to adjust the length of the pull. At the same time, the clutch in any car is used quite actively, which is why the friction linings of its discs wear out. As a result, the cable tension decreases.
The ratchet mechanism, in theory, provides protection against loosening. The trouble is that in practice this does not work very well, and periodically the traction element still has to be adjusted manually.
Reasons for failure
The first factor that accelerates wear of the clutch in general and the cable in particular is the high intensity of operation of the machine. If you drive it every day, then rest assured that our imperfect roads and difficult weather conditions will do everything possible to ensure that the car’s parts become unusable before the deadline.
The cable also breaks faster for drivers who are accustomed to driving aggressively - taking off sharply, braking at full speed, etc. Moreover, even Kalina, who rarely leaves the garage, is not protected from the trouble in question. Over time, the adjustment is disrupted and the traction is gradually weakened. Sometimes it just sours in the shell and stops moving.
When is replacement needed?
Of course, the cable will have to be changed in any case when it breaks. But it’s better not to let things get to this point - think about repairs when you notice that the tip has begun to become shaggy. Even a couple of broken wires seriously reduces the strength of the element. You should also consider replacement if the plastic shell wears down significantly.
It should be understood that the clutch cable installed in the Lada Kalina gradually stretches, even if the owner of the car drives it very carefully. Eventually it will become so loose that the driver will one day simply not be able to change gear.
The following signs indicate that there is something wrong with the cable:
If you have at least one of the above symptoms, you should think about a technical inspection and then, depending on the circumstances, replacement or adjustment.
Examination
To check the condition of the Kalina cable, you will have to remove the air filter. It is not necessary to touch any other elements or sensors. The inspection is carried out visually. Check for rust, partial breaks or other damage. If the wear is significant, then replacement cannot be avoided.
In the catalogs, the Kalina cable is assigned the article 1118-1602210. Its cost is relatively low - a good quality product will cost about 500 rubles.
What is required for dismantling
To remove the old cable and install a new one, you will need to prepare the following tools and consumables:
- 8 mm wrench;
- calipers;
- flat screwdriver;
- Litol-24 type lubricant;
- good cable.
Work order
Before replacement, Kalina must be installed on a level area. Additionally, its position is secured with a hand brake and under-wheel stoppers.
First, climb into the car interior and unscrew the nut holding the clutch cable sheath bracket to the pedal. This is done with an 8mm wrench.
Next, use a screwdriver to carefully pry the bracket located in the groove of the foot drive finger. It is springy and can fly away in an unknown direction as a result of careless actions, so be careful.
Then remove from the pedal the loop of the mechanism that regulates the length of the cable in automatic mode. Then remove the upper part of the element being replaced from the clutch retainer.
This completes some of the work carried out in the salon. Go to the engine compartment. Here:
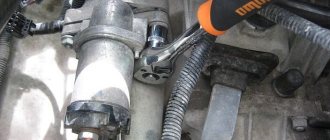
- pull the leash out of the clutch fork cavity - just drag it towards you;
- remove it from the cable end by turning counterclockwise;
- remove the rubber protective cover;
- remove the end of the shell from the bracket clamp located on the gearbox.
Now return to Kalina’s salon and first drag the cover onto yourself, and then the cable itself.
Installation
Before installing a new cable, be sure to check the condition of the plastic sleeve attached to the pedal pin. If it is very worn, then replacement is required. When everything is in order, then simply lubricate it with Lithol.
The cable on Kalina is installed like this:
- pass it through the hole in the front end (proceed from the interior side);
- install the sealing cover;
- attach the ratchet mechanism to the pedal;
- screw a leash onto the end of the cable (the one with the thread);
- insert the latter into the cut of the clutch fork.
Adjustment
On Kalina, this stage cannot be skipped - it is as important as the replacement itself described above. To adjust, you need to pull the cable by the threaded end all the way forward (the pedal spring should compress).
Fix this position and measure the distance between the end of the element and the clutch fork lever. If you don't have a caliper, use a regular ruler. The normal value is 2.7 cm.
If necessary, the gap is adjusted by rotating the leash. Moreover, after releasing the cable, the latter must lie on the fork as tightly as possible. Next, press and release the clutch 3-5 times - this activates the ratchet mechanism. After this, check what the pedal travel is - 14.6 cm is considered correct.
When the replacement is completed, the overall performance of the repaired unit and the vehicle itself is tested.
Installation of a new cable
We carry out the installation procedure following this algorithm. We start with manipulations in the salon.
- First of all, we thread the cable into the engine compartment.
- Now we install the body of the compensation mechanism, which serves to level out wear on the disc linings. We install the body itself on the finger and secure it with a locking bracket.
- We return the cable sheath seal to its place.
- In the engine compartment we pass the cable through the bracket, after which we install the guide sleeve.
- We screw the leash onto the lower tip of the component. Tightening should be done so as to provide the tip with a protrusion of approximately 1 mm.
- Now we pull the cable all the way. When this manipulation is completely completed, we measure the adjustment distance using a caliper. In optimal condition it should be 27 mm. When the measurements give a different value, we rotate the leash and achieve the specified indicator.
- We place a cable end in the groove on the clutch fork. Under the pressure of the spring, the leash will “climb” into the fork.
- By pressing the pedal several times, we check the unhindered functionality of the unit. We immediately control the adjustment gap (27 mm).
Causes of wear
Most often, a cable break occurs on those machines that are used in harsh conditions. Also, those cars that are in use every day are susceptible to this. However, a break can also happen on an ordinary, ordinary car, even if it has low mileage.
This cable wears out not only due to hard use, but also due to inept or aggressive driving. This especially happens to drivers who start at high speeds. One of the reasons for increased wear is the constant presence of your foot on the clutch pedal. As a result, the clutch slips and then fails.
Adjusting the pedal position
Having completed replacing the cable in LADA Kalina, it will be useful to adjust the pedal assembly. For this purpose, you will need to place the car on a level area. Now we measure the pedal stroke. We use a ruler. We apply it to the floor and the starting point of the pedal. We press and measure. The stroke should be no more than 150 mm. If the fact of excess is evident, then we adjust the position.
To make adjustments, move to the engine compartment. Here, at the junction of the fork and the cable, there are two adjusting nuts. We twist the first one (the locking one), after which we rotate the second one until the required stroke is achieved. Typically this value is 120-130 mm. Continuing to loosen the nut, we increase the free play, and do the opposite - we decrease it.
Setting up the clutch mechanism on Lada Kalina at home
Like all “basins”, Kalina is not at all flawless. Over its more than ten-year history, the model has been refined more than once, but it has not been possible to get rid of some problems. Among the “Kalinovodov” it is recognized that the torque transmission mechanism, due to its design features, is the weak link of the car. Despite all the modernization in this area, car enthusiasts have to periodically adjust the clutch.
Features of the VAZ 2112 clutch
The machine is equipped with a dry-type single-plate friction clutch with a central pressure spring. adjusting the clutch on Kalina any motorist must take into account that the control pedal is connected to the disc via a cable with a special ratcheting mechanism.
How does automatic cable tightening work?
As a result of intensive use, the friction linings of the disc gradually wear out. The ratcheting mechanism built into the drive design allows you to compensate for wear for a certain period of time - it gradually tightens the cable. During operation of the device, the fork rotates and the bushing spring is gradually compressed. As a result, the cable end clamps are compressed, after which the latter is released and tensions the cable.
The purpose of this design is to facilitate the maintenance process. According to the plans of VAZ engineers, the mechanism should save the owner from the need to make adjustments himself. But this is all only in theory, but in practice it turns out that you cannot do without adjusting the clutch.
When should adjustments be made?
Before adjusting the clutch on a Kalina car, you need to determine the moment when the automatic cable locking no longer functions. This is not difficult, especially since the machine itself signals problems:
- Loss of traction, friction clutch does not provide a reliable connection between the flywheel and the disk. The consequence of such a defect will be the loss of a significant part of the torque force.
- The clutch control pedal does not return to its initial position, which, in fact, is a consequence of the first point.
- Poor clutch disengagement - the pedal is not pressed all the way, which makes changing gears difficult.
The symptoms, however, are similar to those when clutch adjustment is needed on a VAZ 2107 , so experienced motorists can skip this unit and proceed directly to the test.
How to check the clutch?
To make sure that the mechanism needs to be adjusted, you should perform a number of basic checks:
- Press the pedal several times and release - any extraneous sounds are unacceptable. For better control, you can press with your hand, this way you can feel the pedal stroke more fully.
- Check the pedal for sticking; if it returns with noticeable twitching, then adjustment is necessary.
- Check the full travel of the pedal using a ruler or tape measure. Press and release the pedal several times, then measure the distance of its outer edge to the floor; if it is more than 146 mm, then the mechanism needs to be adjusted.
- Check the movement of the cable guide relative to the clutch release fork; the maximum distance between these elements is 27 mm.
- If the runout of the driven disk linings is more than 0.5 mm, adjustment is also required.
When performing checks, it is important that the car engine is turned off.
Without noise and dust: how to properly adjust the clutch on a Kalina station wagon yourself?
You should start working no earlier than the engine has completely cooled down. The setup method is simple and does not require a visit to a car service center, because you can do everything yourself. The step-by-step scheme for completing the work is as follows:
- Before adjusting the clutch drive on Kalina, you should open the engine compartment hood and remove the air filter.
- Visually assess the condition of the cable casing and replace it if damaged.
- Pull the tip toward you until the cable is fully tensioned. After this, check the distance between the fork and the leash with a caliper.
- If the measurements show more than 27 mm, then the distance is corrected by rotating the leader along the thread of the tip.
- Press and release the clutch pedal several times and repeat the measurements.
- If necessary, repeat the adjustment until the required standards are achieved.
The technology for setting up the clutch on Kalina is not as complicated as installing the VAZ 2110 clutch , therefore it is quite feasible in a garage environment without the involvement of specialists. And this fact pleases domestic motorists, because the clutch plays an important role in driving a car.
Experiment
- front wheels raised
- engaged first gear
- The speed was raised to 4500-5000 rpm
- use the brake to reduce the speed to 1500 rpm without releasing the gas pedal
Then we did the same thing, only with the clutch cable disconnected from the gearbox fork. The sound of "hrrrrr." "was no longer there. The sound recording contains noises: before the pause with the cable, after - without it.
Conclusion : the cable on the Lada Kalina car is a transmitter of vibrations from the transmission fork.
Diagnosis of clutch faults
Lada Kalina is equipped with a “dry” clutch with one disc and a central pressure spring. The disc is connected to the clutch pedal (CP) using a cable. The interaction is carried out using a cable, which is the weak point in the node. Adjustment is carried out using a ratchet mechanism, which is a rod with a thread and a control nut.
Clutch diagram for Lada Kalina
Over time, the linings on the disc wear out and become thinner. Wear largely depends on the driver's driving style. For those who like to tear it apart, the unit will not last long and will need to be repaired. Using a ratchet mechanism, insufficient thickness of the lining is eliminated by tightening the cable. This happens by turning the release fork, it forces the spring located in the bushing to compress. The spring acts on the tip clamps, releases it and, thus, tensions the cable.
Correct adjustment of cable length
Thanks to the ratchet mechanism, the length of the cable is automatically adjusted. But despite this, sometimes you have to adjust it manually.
There are obvious signs by which you can diagnose whether the clutch assembly needs to be adjusted, namely:
- problems when shifting gears;
- extraneous sounds when squeezing the PS: creaking, friction, clicks;
- the clutch does not disengage/engage completely;
- poor traction;
- jamming when moving the PS.
Peculiarities
The cable installed in the VAZ model under consideration has a special ratcheting mechanism. It allows you to adjust the length of the pull. At the same time, the clutch in any car is used quite actively, which is why the friction linings of its discs wear out. As a result, the cable tension decreases.
The ratchet mechanism, in theory, provides protection against loosening. The trouble is that in practice this does not work very well, and periodically the traction element still has to be adjusted manually.
Installation
Before installing a new cable, be sure to check the condition of the plastic sleeve attached to the pedal pin.
If it is very worn, then replacement is required. When everything is in order, then simply lubricate it with Lithol. The cable on Kalina is installed like this:
- pass it through the hole in the front end (proceed from the interior side);
- install the sealing cover;
- attach the ratchet mechanism to the pedal;
- screw a leash onto the end of the cable (the one with the thread);
- insert the latter into the cut of the clutch fork.
Adjustment
On Kalina, this stage cannot be skipped - it is as important as the replacement itself described above. To adjust, you need to pull the cable by the threaded end all the way forward (the pedal spring should compress).
Fix this position and measure the distance between the end of the element and the clutch fork lever. If you don't have a caliper, use a regular ruler. The normal value is 2.7 cm.
If necessary, the gap is adjusted by rotating the leash. Moreover, after releasing the cable, the latter must lie on the fork as tightly as possible. Next, press and release the clutch 3-5 times - this activates the ratchet mechanism. After this, check what the pedal travel is - 14.6 cm is considered correct.
