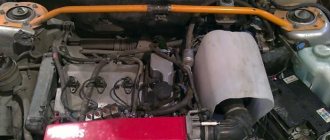
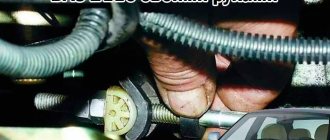
The clutch on the VAZ 2110 is a critical component in the transmission structure. Simply put, it is the clutch that is responsible for creating the smoothest possible transition of torque from the crankshaft to the gearbox, and also provides the ability to “softly” shift gears.
If any problems arise in the operation of this unit, immediate repair of its components or replacement of the clutch as a whole is necessary. Next, we will look at in what cases replacement is necessary, how to replace the VAZ 2110 clutch yourself, which kit is better to choose, etc.
Clutch VAZ-2110
Clutch VAZ-2110.
Despite the fact that the ten clutch is primitive, like a cart wheel, it must meet many parameters in order to flawlessly perform its functions - high-quality transmission and complete interruption of the transmission of torque from the engine to the gearbox.
In addition (and few people know this), two types of clutches :
- for cars with a carburetor or injection engine and a torque of 116 Nm ( 2110 and 2111 );
- for 1.6-liter engines with a torque of 128.3 Nm ( VAZ 2112 ).
You can distinguish a VAZ-2112 clutch by the hole in the slot of the petals and the damper springs.
Parameters and requirements
Each clutch set is required to transmit exactly this torque with at least a double reserve, which is why they are labeled differently - 243 and 270 Nm.
In addition, you should not discount the weight of the basket assembly, the weight of the driven disk and such an important factor (which our left foot will immediately feel) as the squeezing force.
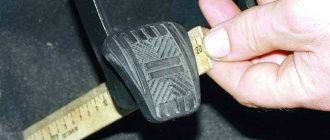
And another standard is moving the pressure plate . This parameter should be 7.9-8.1 mm . The thickness of the driven disk is also important, not only in the free state, but also under load. The manufacturer must measure it under a load of 3.4 thousand N. As you can see, not everything is so simple with such a simple kit. Now let's listen to the reviews and reports of the expert laboratory.
Dismantling the gearbox
The most important thing is to remove the gearbox. Therefore, it is best to carry out all work on an inspection hole or overpass - it’s really more convenient. Procedure:
- Remove the left wheel, unscrew the nuts from the ball joint and the tie rod end. You will need to move the box to the side; the drive on the left should come out without any problems.
- Loosen the nut securing the rocker and remove it from the gearbox shaft.
- Remove the starter, having first disconnected the battery and all wires from it.
- Unscrew the fastenings of the pillows holding the box. It is recommended to place a jack or reliable support under the gearbox housing before doing this.
- Disconnect the speedometer cable, disconnect the wires from the reverse sensor, as well as the ground bus.
- Unscrew the three bolts and nut that secure the gearbox housing to the engine block.
- Carefully move the box to the side; the right drive must be removed.
Choosing a clutch - articles and brands
From the factory, our car was equipped with kits with factory part number 2110-1601180 on the basket.
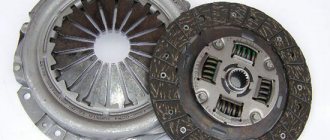
VIS clutch kit for VAZ 2110-12: basket, disc, release bearing.
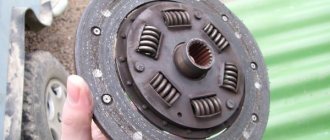
The driven disk must have part number 2110-1601130 . This kit is produced by the VAZInterService (VIS) plant, the external distinctive features are a diaphragm with 12 blades, one-piece smooth friction linings of the driven disk, the disk itself has 6 damper springs. The quality of the original kit is so-so. The high level of imbalance of the driven disk exceeds the permissible limit by almost twice. In addition, the VIS kit is quite heavy compared to its competitors.
This was also reflected in the preferences of the public - only 6-8% of users buy this kit for 2.8 - 3 thousand rubles.
Analogs
This is the most common choice of tens!
In addition to the Togliatti VIS plant, on the shelves you can find a lot of clutch kits from a variety of manufacturers, both domestic and foreign. Among the latter, a huge share is Chinese counterfeit. In principle, the list of the most popular manufacturers looks something like this:
- German clutch LuK (Lamellen und Kupplungsbau), driven disc 320 030810 , basket 2 D24 120 0252 10 .
- Their fellow countrymen, Sachs.
- Also the Germans FINWHALE and QML.
- Turkish companies Starco, Mapa, Kraft (article 2110 W3200C B2240 ).
- VALEO, France, article number 21102 - 21103 - 21108 - 2111 - 2112 826622.
- HOLA, Holland.
- MecArm and PILENGA from Italy.
- South Korean company FORTECH.
Domestic factories from Naberezhnye Chelny and Tyumen, as well as the local Nachalo brand, are also quite widely represented, but the quality of their clutches is difficult to compare with German, say, kits. And now a few words about how to choose a high-quality clutch on a VAZ-2110 without resorting to laboratory tests.
What you need to know
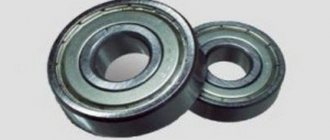
The release bearing is not the weakest link in the clutch system, but for some reason it is the one that causes problems and troubles.
coupling
Some car owners have gotten used to the whistle and simply ignore it. But this cannot continue for long, since untimely solution to the problem can lead to even more complex and expensive repairs. If the situation gets worse, then a simple replacement will not be enough for you.
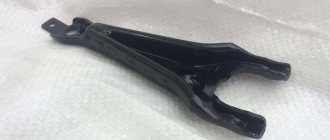
The clutch serves to act on the leaf spring of the clutch basket. It is also called diaphragm, so don't be confused if you hear this designation. Due to this impact, the driven disk is disconnected from the flywheel and the pressure plate of the basket. This disengages the clutch.
If the squeezer is faulty, this can lead to various consequences:
- The clutch fork will be damaged;
- The integrity of the clutch spring petals will be compromised;
- The guide bushings are deformed.
In order not to pay twice, or even three times, promptly react to the appearance of a whistle in the clutch and try to quickly take action.
Choosing a high-quality clutch for ten
For example, we have already decided on the brand. More precisely, with the price. Since the prices for all kits are different - from cheap domestic ones for 2500 rubles and ending with German clutches for 7-8 thousand.
However, no one is safe from counterfeiting, so we check each element of the kit visually upon purchase.
Driven clutch disc
The driven clutch disc from Valeo is a good combination of price and quality.
- First, we look at the surface of the friction linings - there should be no cracks or irregularities There can be no scuffing or roughness. Moreover, it is unacceptable for oil or other technical fluids to get on the friction clutch . It would seem that these are basic things, but manufacturers of counterfeit or very cheap spare parts are not able to comply with these conditions.
- Next we look at the splines. There should be no damage, scuffing is excluded.
- We pay special attention to the quality of the riveting. If you look closely, you can see that the shape is riveted. It is different for branded wheels and fake ones - the rivet should be uniform and not differ from rivet to rivet.
- We look at the damper springs, which should not have any play or displacement.
- In addition, pay attention to the markings - as a rule, they will be applied to the damper plate. It could be a hologram, a simple stamp or laser marking, but there must be something that says about the manufacturer.
Clutch basket
Here the selection criteria are the same.
LUK clutch basket – German quality for a Russian car.
- Initially, we inspect the quality of the rivets and plates. All rivets must be identical, there should be no backlash. All rivets must be laid without distortions or displacements of the axes; there should be no cracks or chips on the heads.
- The basket body itself is made by stamping, so we look at its quality - there should absolutely be no nicks, cuts, chips or scratches. There should be no burrs in the holes.
- The pressure plate itself deserves special attention . It is cast from cast iron, after which the working surface is polished. It is the mirror of the pressure plate that will tell a lot about the manufacturer - cavities, scratches, microcracks, unevenness, and radial scratches are excluded. If there are no defects, then the disc is made of high-quality cast iron and processed in accordance with technology and high-quality equipment.
Let's move on to withdrawal
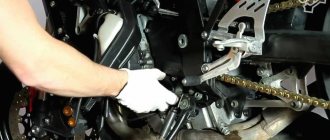
To remove clutch discs from a VAZ 2112, perform the following steps:
- We install our car on the inspection pit (or whatever you have instead - an overpass, a lift)
- We remove the gearbox from the car, first disconnect the wires from the battery
- Without this we cannot get to the clutch, let me briefly remind you of the procedure:
- Draining the oil from the gearbox
- Removing the starter
- Disconnect the block with wires from the speed sensor by squeezing the spring clips to do this.
- We unscrew the bolt that secures the bracket holding the ignition module, then the bolts (there are two of them) securing the top of the gearbox to the engine
- Disconnect the wiring block located at the bottom of the car from the reverse sensor
- We unscrew the bolt of the clamp securing the shift rod bracket and pull it off the hinge, sliding it back
- Removing the wheel drives
- Instead of one of them, be sure to insert a plug so that the differential does not fall apart
- The plug should be tied so that it does not accidentally fall out during the process of removing the gearbox.
- It will be enough to pull the right drive out of the box and move it to the side, fasten it to the body with wire so that it does not interfere
- Then unscrew the bottom nut securing the box to the motor (it is located on the motor side)
- You should be careful, because on car models with a gasoline injection system, a bracket supporting the intake pipe is attached under this nut; it must be removed
- You can loosen the top nut of this bracket if you can’t just remove it
- After unscrewing the three bolts, remove the lower cover of the clutch housing
- Then we unscrew the lower left bolt, which also secures the gearbox to the engine, and hang the engine using a board or hoist
- Unscrew the nut of the left engine mount from below
- Then two nuts that secure the rear cushion to the engine
- Unscrew the bolts securing the rear engine mount to the gearbox
- We insert a screwdriver into the gap between the clutch housing and the engine block, and slide the box away from the guide bushings
- It is necessary to hold it
- We move the box as far back as possible so that the rear cover passes over the brace coming from the front suspension (its input shaft comes out of the clutch)
- When the input shaft is not released from the clutch, push the engine to the side
- We lower the front end of the gearbox and pull it out from under the car (you need an assistant here), photo below
Installing a new element
When you have completed the entire range of dismantling work, you can move on to the final stage - installing a new component.
- The first thing to do is check the condition of the new clutch release bearing. For some reason, many car owners forget to make sure that the bearing that replaced the old one is actually in good working order. This is easy to check. Rotate the bearing, pull it in different directions. If there is no jamming during rotation, and there is also no play, then you bought a really serviceable, good release bearing.
- Insert the new part into the coupling. This must be done so that the protruding part of the inner ring is directed towards the coupling.
- After inserting the element, secure it using the holders.
- Before inserting the new release bearing onto the bushing (guide), do not forget to lubricate it with a grease. The layer of lubricant should be thin, do not overdo it.
- Secure the coupling and bearing using a spring lock.
- Place the gearbox and other dismantled elements in their rightful places.
- The entire repair process is completed by adjusting the clutch.
Replacing the release bearing yourself is not very difficult. The main problem is removing the gearbox. All other events cannot be called difficult. However, you will need to be careful, consistent and careful.
Do not ignore the most useful thing that you can need when repairing your favorite VAZ 2110 - the instruction manual. Literally everything a car owner needs to know is described in detail there. With its help, you can even perform complex repairs, the cost of which at a specialized service station would be prohibitive.
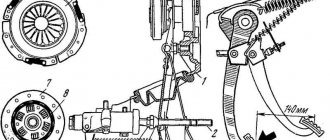
Main Clutch Parts
- The so-called "basket". This is the clutch drive disc. It is attached to the flywheel, and it is bolted to this part.
- Slave disk. Located inside the "basket". Provides interaction of the gearbox input shaft by engaging splines.
- The release bearing puts pressure on the basket, thereby separating both discs from each other.
- The clutch cable transmits the force generated by a person to the release bearing.
- Clutch pedal
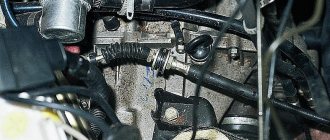
Unfortunately, the VAZ-2112 does not have a clutch hydraulic system. Therefore, it is necessary, without waiting for the cable to break, to change it in time.
Replacing the clutch cable
Purchasing spare parts will cost quite a round sum, and for work at a service station they will charge the same amount. Therefore, it is better to deal with this problem yourself, saving your money.
Changing the cable is not that difficult. The only difficulty is pulling it from under the hood into the cabin. The hole is small, not very convenient, but everything can be solved and is quite doable. It only takes 5 minutes to secure the cable to the fork and pedal. The whole process will take about half an hour.
Replacing a release bearing is quite labor-intensive work, and in order to avoid having to deal with this again, experts strongly recommend replacing all parts of the clutch with new ones. After carefully reading this material, you can replace worn parts yourself.
Source
Is noise a sign that replacement is needed?
Not really. If noise occurs, this does not mean that you should immediately replace the element. But it is strongly not recommended to delay repairs. Let's just say this is a signal for certain actions, which you will have some time to complete before the consequences become catastrophic.
In some cases, the noise occurs when the engine is started, and it persists until the car warms up, after which it disappears. In other cases, the noise returns every time you try to disengage the clutch.
The worst option is a grinding sound. This sound indicates that the element is rubbing against the leaf spring, and wear will form on the petals. If you are “lucky enough” to encounter such a situation, there is no time. Replacement needs to be done quickly.
By the way, there is no point in repairing it. Release bearings cannot be repaired, so the only solution is replacement.
