Welcome! Alternator belt - on cars of the tenth family it goes to only two pulleys, namely the generator pulley and the crankshaft pulley, thanks to it torque is transferred from the crankshaft to the generator, thanks to which when the car is running (When the crankshaft is spinning), the car is charged, the battery is charged, and also the current is supplied to the on-board network of the car (This is a tape recorder, windshield cleaning brushes, etc.), therefore, when the engine is started, the battery no longer makes sense to supply current to the on-board network (It makes sense when the generator can handle it won’t, that is, music plays loudly when the subbuffer is on and similar situations), thanks to which the battery does not run out and the voltage in the network is kept at one constant level.
Note! To replace the alternator belt, you will need a minimum of time and a minimum set of tools, which includes: Wrenches or, even better, if you have ring wrenches, then stock up on them, because they are much easier to use and the likelihood of breaking the nuts will be much less!
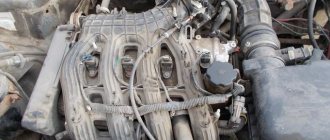
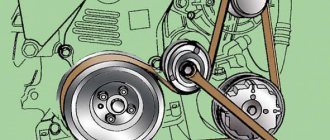
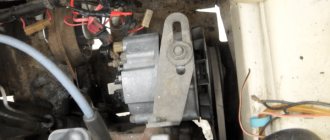
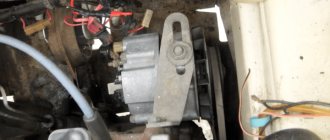
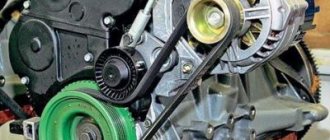
Where is the alternator belt located? As we have already said, it is placed on two pulleys, one pulley rotates (This is the crankshaft pulley) and due to this, the belt is also set in motion, thereby the second pulley also begins to rotate (Both pulleys, by the way, are indicated by arrows, the same crankshaft pulley is shown in red, and blue generator pulley), in general, for clarity, in the bottom photo the belt itself can be clearly seen, as well as the generator and the place where it is installed.
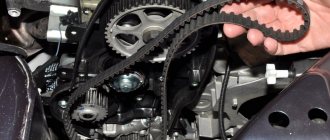
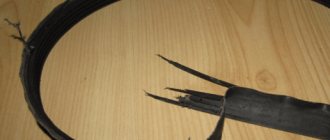
When should you change the alternator belt? From time to time it needs to be checked, to do this, of course, you will have to remove it, but it can be removed very easily and you will spend more than 5 minutes on the entire check, so when the belt is removed, begin the inspection, there should be no cracks or marks on it ruptures, in addition, the material of the generator belt itself should be rubber, and not rough (That is, there should be no signs of hardening of the rubber), and if you have a toothed one, then make sure that the teeth are not worn out and are in normal condition.
Alternator belt: choice of brand and length
When the alternator belt wears out quite strongly, many owners begin to think about which manufacturer to choose for the next replacement. We often come across reviews from VAZ 2110 owners who installed new belts and did not have time to drive even 5,000 km, after which they broke in half.
This is a clear sign of low-quality or even defective products, if the tension was normal and there were no external influences.
Motorists Council
As practice shows, many experienced VAZ 2110 drivers, who have been driving this particular model for many years now, carry an additional alternator belt with them in the trunk.
This is due to the fact that its breakdown can occur at the most inopportune moment. This node cannot be called the weakest point of the “ten”, but problems may arise with it. And it is better for you to be prepared for such a situation.
Otherwise, you will have to call a tow truck, go to the nearest service station, and pay a lot of money for the services of specialists. Although, if you have a spare alternator belt and a standard set of tools, if it breaks, you would spend literally a couple of tens of minutes and calmly continue driving with a new belt. Because the choice is always yours!
Selecting a belt manufacturer
Today, choosing a manufacturer of a particular spare part can be quite difficult due to the fairly wide selection. But if we look at the statistics of many car owners and service stations, we can conclude that the highest quality belts for driving auxiliary units are:
- BRT - Balakovo Rubber Equipment, often installed from the assembly line
- GATES - often also a factory option
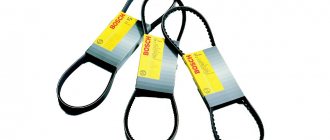
- Bosch - has a fairly wide range of products, including belts, and the quality is quite high
- LUZAR
- ANDYCAR
If we consider the most trouble-free belts, then according to statistics from surveys of motorists and service station technicians, we can conclude that the highest quality ones are produced by GATES and domestic BRT.
If you use another manufacturer, or want to leave your review, you can share it in the comments below.
Source
Selecting a belt manufacturer
Today, choosing a manufacturer of a particular spare part can be quite difficult due to the fairly wide selection. But if we look at the statistics of many car owners and service stations, we can conclude that the highest quality belts for driving auxiliary units are:
- BRT - Balakovo Rubber Equipment, often installed from the assembly line
- GATES - often also a factory option
- Bosch - has a fairly wide range of products, including belts, and the quality is quite high
- LUZAR
- ANDYCAR
If we consider the most trouble-free belts, then according to statistics from surveys of motorists and service station technicians, we can conclude that the highest quality ones are produced by GATES and domestic BRT.
If you use another manufacturer, or want to leave your review, you can share it in the comments below.
How to tension the alternator belt
If you hear a squeaking sound from under the hood when it rains, or simply when there is high humidity, then most likely the problem is in the tension of the alternator belt. The problem is fixed quite simply. You need to tighten the belt more. In this article we will look at how to do it yourself.
You don’t need much of a tool, you just need a ratchet and a couple of 10 and 13 sockets.
This instruction is suitable not only for the VAZ 2110 model, but also for the VAZ 2111, VAZ 2112, since the principle and design of the alternator belt tensioner are similar.
- First of all, we look for the generator under the hood. It is located on the left side under the hood when looking at the car from the front. I think there shouldn't be any problems with this.
- Now you need to loosen the top nut securing the generator.
- Now use the adjusting bolt to tighten the belt.
To tighten the belt, turn the adjusting bolt clockwise; to loosen it, turn the bolt counterclockwise.
Turn the adjusting bolt a couple of turns. Now you can check whether you have given enough tension. Tighten the generator mounting nut. Start the car and turn on the devices to the maximum: heater, lights, heated rear window. If at the same time no whistle appears, then you did everything correctly and the belt is tensioned to normal.
If a squeak does appear, turn the adjusting bolt a couple more turns. Just be careful not to overtighten the belt, as this is also not very good. When tightening the belt, a hum may occur. Where does he come from? It is very simple that the generator bearing is humming due to the fact that a lot of pressure is applied to it. If this happens to you, then turn the adjusting screw back to loosen the belt tension a little. The hum will have to disappear.
In order for you to more clearly understand how this is all done, below is a video on tensioning the VAZ 2110 generator belt.
___________________________________________________________________________
(votes: 1, average: 5.00 out of 5)
Performing tension
If there is no wear on the V-belt drive, but there is a whistle, first of all, check the tension level. We will not use complex terminology, but will simply advise you to press with some force on the belt in the middle.
If the tension is done correctly, then the belt will bend no more than 8 millimeters. If the deflection is greater, then the element will have to be tensioned, and if it practically does not deflect, the tension will have to be loosened.
The problem is not the whistling. Due to weak tension, the battery does not charge effectively, and the drive itself begins to wear out faster. Excessive tension can lead to damage to the alternator bearings and stretching of the belt.
Correct tension of the VAZ 2110 generator belt is performed as follows:
- Loosen the generator from the bottom and top. A nut is used for this;
- Turn the adjusting bolt and adjust the belt;
- If you want to increase the tension, the bolt is turned to the right. Thus, you move the generator away from the cylinder block;
- To loosen the tension, move in the opposite direction - to the left;
- Use a wrench to grab the fastening bolt and turn the crankshaft a couple of turns, then check the tension;
- If all is well, the tension is correct, the nut can be tightened back.
Alternator belt size for VAZ 2110 16 valves
- To the beginning of the forum
- Forum Rules
- Old design
- FAQ
- Search
- Users
Please tell me the number of the upper roller of the GENERATOR belt for VAZ 21124 2006.
I originally bought a 1125 and then changed it to a 1115 in the store and now I can't get it to tighten.
Please tell me the number of the upper roller of the GENERATOR belt for VAZ 21124 2006.
I originally bought a 1125 and then changed it to a 1115 in the store and now I can't get it to tighten.
Yes, I didn’t get it right. I bought 1125 and everything worked out.
I have this roller fastened with a bolt - I remove it, then, hooking the belt with the roller, insert the bolt and screw it on.
Do you think it will fit? There seems to be only a 2mm difference. Yes, and is sold as “Belt for generator 2110-12, 2170 Priora and air conditioning compressor GATES 6PK1113”
And who can tell me how to overcome the belt system? I just changed it to a new one, and it whistles again, I removed the tension roller - everything is normal, there is no play, it is lubricated, the tension is normal, what else could it be?
And on cars with Conder and Gear, the belt is about 1.5 m.
30tkm), then there is nowhere to pull. Yesterday I held RTI Balakovo 6K1115 in my hands, I want to try it. But why is there no letter “P” in the marking? Is this the belt for our cars?
I wanted to replace the alternator belt. I discovered that the right pillow has Torx E-10 nuts, although it should have been 13. on VAZ 211140?
Tell me, with such a cushion, one central bolt needs to be unscrewed and the engine raised to replace the alternator belt? Or is it a big hassle to unscrew the Torx head nuts? And do I need to remove the power steering pump pulley?
Source
Dimensions of alternator belts for VAZ table
Greetings, dear site visitors, If you are on this page, it means that you are interested in information on how to replace the VAZ 2110 alternator belt.
Be 100% sure that you have come exactly where you need to go. Here is a detailed illustrated guide to belt replacement. This article is not limited only to the VAZ 2110 model, but completely covers the entire tenth family, taking into account Priora and Kalina.
I will list the main points that will be discussed in this guide.
• Why does the alternator belt whistle?
• What are the sizes of VAZ 2110-2115 alternator belts used.
• Replacement of the VAZ 2110 alternator belt.
Dimensions
The sizes are different, and they are individual for each VAZ model.
If we talk specifically about the “ten”, then adhere to the following rules for choosing a belt size:
- In the absence of air conditioning and power steering, 742 millimeters is suitable;
- If the car is equipped with a hydraulic booster, then the size will be 1115 millimeters;
- If an air conditioner is also present, then the optimal size is 1125 millimeters.
Some craftsmen regularly use original belts from other AvtoVAZ models - Priora and Kalina - to replace them when repairing their "ten".
The VAZ 2110 alternator belt whistles, why?
Why does the belt whistle? There are several reasons: weak tension, moisture got into the V-belt connection (very rarely), drying out (destruction), and the generator wedge was leaking.
All of the above points can cause the belt to whistle.
Let's take a closer look at each of the reasons.
If the belt tension is weak, slipping occurs in the V-belt joint, this is especially noticeable when operating the car at night, when the lights are on. The generator produces more power, which means the load on the V-belt connection (belt, pulley) increases. Slipping is what causes the whistling sound.
Cars with installed power steering or air conditioning are very susceptible to this phenomenon. This is described in detail below in the section on belt tension.
The ingress of moisture often does not lead to a whistle, but rather to belt slipping. When slipping, the heat evaporates moisture and may whistle a little. This indicates that the belt needs to be tightened.
If the belt dries out, it means that destruction is underway. Cracks, scuffs appear on the belt, and pieces may even fall off; all these signs indicate that the belt needs to be changed urgently.
Why does the whistle occur?
There are several reasons why the characteristic whistle-like sound occurs.
- Weak tension. The element slips, and this happens most actively at night. The increased intensity of the whistle at night is explained by the fact that the generator additionally works for lighting.
- Gradually the component is destroyed. The belt can dry out, causing its structure to be disrupted and it literally crumbles into pieces. The first signs are cracks, and then whole pieces break off. When moving, the pulley hits and slipping begins. Only replacement is required here.
- Although moisture gets on the belt very rarely and evaporates almost immediately, the connection can still whistle. In this situation, tension is required.
- The generator itself jams.
Alternator belt dimensions VAZ 2110-215, Kalina, Priora
There are a lot of sizes of alternator belts, it seems that they made a separate belt for a specific model, but there are several sizes that are most often used and are suitable for all models of the tenth family.
Let's start, perhaps, with the general model of a wide multi-ribbed belt, which was installed on standard VAZ models and the first generators:
• VAZ 2108 – VAZ 2115 size – 698 mm.
Models without power steering and air conditioning:
• VAZ 2110 – VAZ 2112 size – 742 mm.
Next is the Kalina VAZ 1118 option:
• Without power steering and air conditioning Size – 882 mm.
• With air conditioning, size – 1005 mm.
VAZ 2110 – VAZ 2112, as well as VAZ 1118 (Kalina), VAZ 2170 (Priora) with power steering:
These are the most basic sizes that will definitely fit a particular brand.
Replacing the VAZ 2110 alternator belt
What we need for the replacement: a good set of tools, a jack (to raise the engine) and a new belt.
Before starting work, it is advisable to treat all threaded connections on the tensioner with WD-40 liquid to loosen everything, otherwise there is a possibility of breaking the bolts.
Loosen the generator belt. The complete process of removing the tensioner is described in the article “Replacing a VAZ 2110 generator”, I recommend that you read it. After you loosen the belt, it can be easily removed from the generator pulley, but to remove it completely, you need to remove the right boot on the car body.
By removing the protective boot, you can easily pull out the worn alternator belt.
Having purchased the required size belt in advance, we install it back. If you are standing near the right fender of the car, then the letters and numbers on the belt should be read from your side, and not upside down.
All that remains is to tighten the belt and put everything back together, but this will be a little lower, and now we will carry out the replacement on VAZ cars with power steering or air conditioning.
As it turned out, everything is not so simple here. When installing power steering or air conditioning on the engine, the generator was moved slightly upward and in order to replace the belt, it must be threaded through an additional engine support.
Why they did this is not clear, but there was more work.
Here the replacement process is almost the same, but you need to tinker around with the additional engine mount.
We need to unscrew and pull out the central bolt of the support, then lift the engine a little and thread a belt into the gap between the pillow and the engine support. This method is suitable for models with installed air conditioning, but if power steering is installed, the bolt will not come out completely and will rest against the pulley.
To remove the bolt, you need to remove the pulley or completely unscrew the additional support pad. By jacking up the engine a little and turning the mount, you can thread a new belt.
I don’t know which is easier, removing the pulley or unscrewing the support, both methods are very inconvenient, so the choice is yours.
Let's go back a little to the first option if an air conditioner is installed.
You can tinker and completely unscrew the support pad, or you can completely unscrew only the central bolt.
We install a mechanical support under the car body.
Now we need to place a jack under the engine and lift it a little. The photo below shows where to install the jack, and do not forget to place a wooden block - this will prevent deformation of the oil pan.
The engine should not be lifted too much, because it is possible to break off the exhaust manifold, which is rigidly fixed, or other mechanisms. You don't have to lift much to just get the belt through.
When you thread the belt, be careful, there is a locking washer installed on top of the pad, do not lose it.
After stretching the belt, install the bolt back and lower the engine. Reinstall the side boot and wheel. Now it's a stretch.
Replacement
We have already figured out how to tighten the alternator belt. But such measures are not always relevant. If the element is cracked, overstretched and no longer tensioned, then there is nothing left to do but replace it with a new one.
In fact, replacement cannot be called a complex procedure. Follow the instructions and everything will work out.
- Slightly loosen the bolt nut from the lower mounting of the car generator, as well as the tension nut.
- Loosen the tension of your belt further. You already know how to do this from the previous section, where we talked about tensioning the alternator belt.
- Move the generator towards the power unit, which will allow you to remove the belt from the crankshaft and generator pulleys.
- The next step is to install a new element. To do this, you will need a high-quality belt purchased from a trusted store. What exactly this part will be and what size it will be is not difficult to determine. But quality comes first.
- First, the belt is put on the crankshaft pulley.
- Now it goes to the generator pulley.
- At the last stage, you have to repeat the tension adjustment procedure. You already know very well how this procedure is carried out, so there should be no problems.
How to tighten the alternator belt on a VAZ 2110?
Adjustment is very simple. Using a 10mm wrench, tighten the bolt on the tensioner until, when you press your fingers on the belt between the pulleys, the deflection is approximately 6 - 10 mm. The pressing force is not great. If you have a special measuring ruler, then with a force of 10 kgf the deflection should be within the range of 10 - 15 mm.
On VAZ cars with power steering or air conditioning installed, the tension should be a little larger. When pressing with your fingers, the belt should bend by 5 mm. All this is done so that the belt does not slip, because the contact area between the belt and pulley is not large.
But you need to remember that you can’t overtighten either, because the generator bearings will quickly fail. Here's a design with a surprise.
That's probably all. We replaced the VAZ 2110 alternator belt.
Let's look at the main sizes of belts used on various VAZ vehicles.
V-belt (profile A) Used on “Classic”, Samara, Niva 710 mm cars – VAZ 2108-21099 with a carburetor engine and generator drive. Of the most common 715 BRT cat. number 2108-3701720-01RU,
