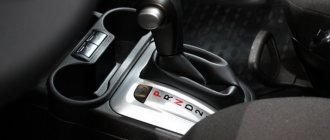
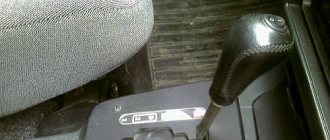
The VAZ 2110 is equipped with a mechanical, two-shaft, five forward gears and one rear gearbox. It is structurally combined with the differential and main gear. The service life of the VAZ 2110 gearbox and its performance directly depend on driving style and timely maintenance of the manual gearbox.
Frequent intense acceleration, incorrect shifting of the selector lever, untimely replacement of transmission oil, and the gearbox oil needs to be changed every 75,000 km , lowering its level can greatly reduce the service life of the gearbox. Removal of the VAZ 2110 gearbox and subsequent repair or replacement is carried out if faults are detected in the unit itself.
Gearbox 2110, how to install the gearbox after repair
The gearbox should be installed in the reverse order of removal. As you can see, the work is not easy and time-consuming, but it is quite possible to do it yourself, following exactly the instructions described above.
In order for the gearbox to serve for a long time, it is necessary to operate it correctly, in particular:
- Don't start with a slip.
- When changing gears, depress the clutch all the way.
- Shift gears sequentially.
- Change your oil promptly, using only one specific brand.
It is worth noting that when the first signs of a gearbox malfunction are detected, the breakdown should be diagnosed as quickly as possible and then repaired or replaced. It is not recommended to operate the vehicle if the gearbox is faulty.
Before removing the VAZ 2110 gearbox, it is necessary to determine that the unit has failed. You can understand the problems by the following characteristic symptoms:
- knocking noises are heard from the device;
- the noise increases when turning;
- the box vibrates;
- spontaneous switching off of gears occurs;
- changing gears has become difficult or impossible.
In any case, the question immediately arises of how to remove the VAZ 2110 box, because otherwise it will not be possible to accurately diagnose the unit.
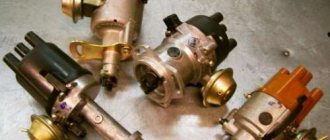
Malfunctions
Every car owner with experience begins to feel a malfunction in the car’s gearbox based on characteristic signs. Most gearbox breakdowns are associated with wear of rubbing parts, because they experience constant significant load while driving. However, such wear rarely reaches a critical state immediately. This is usually a gradual process, which is why a novice driver is always advised to learn to “listen” to the car. The sooner you notice a problem, diagnose it accurately and fix it, the less repair work will need to be done and the less it will cost.
Gearbox device
There are situations when removing the gearbox is not at all necessary; adjusting it is enough. The VAZ 2110 very often has problems with gear shifting, they get knocked out. To eliminate this problem, it is not at all necessary to remove the box; it is enough to adjust the gear selection drive mechanism. It is enough to make do with adjustment in the following cases:
- not so long ago, the input shaft bearing was replaced or any other repair was carried out where the gearbox was removed.
- Only one speed comes out.
- When the car is moving, the speed shifts poorly or completely jumps out.
To adjust the gearbox you need:
- Loosen the nut and bolt, which is located under the machine, tightening the clamp securing the box rod.
- Using a screwdriver, move the clamp and grooves of the rod apart. Set the rod to the neutral position.
- Remove the cover from the gearbox.
- In order to block reverse gear, you need to place a lever in the window of the bracket lining.
- Adjust the axial play in the rear direction and by turning to the left.
- Place the clamp in place and tighten it with a bolt.
DETAILS: Ford Explorer oil change Photo instructions on how to change the oil on Explorer 5
Examination
VAZ 2110 replacing box bearings
A possible malfunction can be considered a low oil level. At such moments, not only do the bearings stop functioning correctly, but every part of the gearbox begins to adhere poorly. If you do not fill in the required amount of oil or transmission fluid in time, the parts will quickly wear out. The car is installed above the inspection hole. A thorough inspection is carried out at the time of checking for oil leaks.
So:
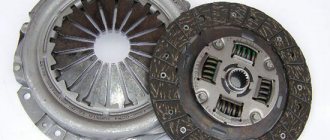
With the clutch depressed (see Repairing the VAZ 2110 clutch - we do it ourselves), you need to gradually shift all gears. Their accuracy of operation is checked at the time of switching on and off. If necessary, the gear shift mechanism is adjusted.
Replacing bearings in the box of a VAZ 2110 input shaft
- When the transmission lever is in neutral, the engine must be started. When you press the clutch pedal, you must try to hear the operation of the gearbox bearings. The characteristic sound of a breakdown appears the moment the pedal is released. As soon as you press, the sound disappears again. If the sound is loud, the bearings should be replaced.
- The operation of the gearbox is also checked while the vehicle is moving. It is necessary to accelerate the car, then slow braking. Gears shift up and then down. Here you should check the operation of the synchronizers and the clarity of the gear shift. There should be no extraneous sounds when the gearbox is operating. If the load increases, you must ensure that gears are not changed randomly.
Video about removing and replacing the gearbox on a VAZ-2112
To begin with, you should definitely decide whether you really want to remove the VAZ 2110 gearbox without the help of an experienced specialist. These works are quite complex, so we cannot do without the proper knowledge, skills and equipment.
If you still decide to get down to business on your own, then you should call a friend for help - for some actions one pair of hands will not be enough, and the work will be more fun. The tools we need are, first of all, wrenches and screwdrivers.
In addition, it is worth reading the instructions on how to change the box on a VAZ 2110. Don’t be too lazy to do this, because the process itself is quite complicated, so you can damage the device during dismantling work.
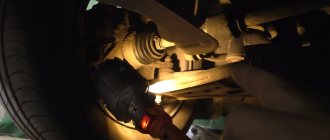
First, we drive the car into the pit. If you want to know how to remove a box on a VAZ 2110 without a pit, then everything happens exactly the same, but the work will be more difficult. After all, having straightened up to your full height, all movements are easier and more convenient. Next, install supports for the wheels. After making sure that the car is immobilized, we begin removing the VAZ 2110 gearbox.
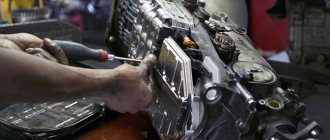
Disassembling the gearbox
In the situations described above, a simple gearbox adjustment will be sufficient. This is much better than repairing the VAZ 2110 gearbox, disassembling and assembling the gearbox.
Procedure for disassembling the gearbox:
- Remove the oil indicator from the gearbox. Unscrew the bolts that hold the clutch cable.
- Unscrew the bolts that hold the back cover. The lid is hermetically sealed, so when removing it, you can use a hammer.
- To prevent the shafts from turning while disassembling the gearbox, turn on the third or fourth speed. Then unscrew the bolt that secures the fifth gear.
- Remove the fifth gear and fork together.
- Afterwards, remove the gear from the secondary shaft and the fork. Then remove the plate that protects the bearings.
Below you can see a DIY video repairing a VAZ 2110 gearbox.
Having started repairing the VAZ 2110 gearbox, after all the steps described above, it is necessary to disassemble the crankcase and the operating mechanism. Let's get started:
- We unscrew the spring plugs that hold the gear rods. Once the plugs are unscrewed, the end balls will fall out of the holes. We do the same with the plug that holds the reverse gear. If the balls have not fallen out of the holes, you can get them out using a magnetic screwdriver.
- Next, we unscrew the bolts that secure the gearbox housing to the clutch housing. After the bolts are unscrewed, you can use a screwdriver to disconnect the crankcases.
- Next step. Unscrew the rod from the first and second gear fork.
- We do the same with gears third, fourth and fifth, respectively. To remove the rod, it must be removed together with the gear shift parts.
- You need to remove the axle from the reverse gear and, of course, the gear.
- Next, take out the differential and two shafts with gears. Unscrew the three bolts that secure the gear mechanism and remove it from the crankcase.
- Unscrew the rear lever bolt and remove the rod.
- If necessary, remove the bearings of the primary and secondary shafts with a separator.
DETAILS: Cold welding for metal instructions and application features
Dismantling of the VAZ 2110 gearbox has been completed.
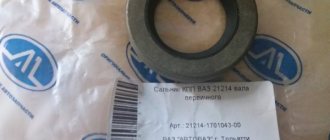
selection of differential bearing adjusting ring
Differential bearings must be mounted with a preload of 0.25 mm (for control 0.15-0.35 mm). The tension is ensured by selecting the thickness of the adjusting ring 13 (see Fig. 3-7), installed in the gearbox housing socket under the outer ring of the differential bearing.
Note. Select the thickness of the adjusting ring when replacing one of the following parts: differential box, differential bearing and clutch or gearbox housings.
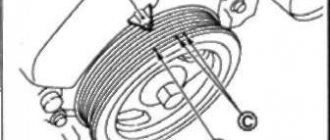
Determine the thickness of the adjusting ring using tool 67.7824.9517 in the following sequence: press the outer ring of the tapered roller bearing 3 together with the adjusting ring 4 (Fig. 3-24) into the gearbox housing;
Note. The installation ring 4 has a constant thickness of 1.25 mm.
Press the outer race of the other differential bearing into the clutch housing. At the same time, be careful not to mix up the outer rings of the differential bearings; install the differential into the gearbox housing and, covering it with the clutch housing, tighten at least three nuts, equidistant from each other, securing the gearbox housing to the clutch housing (tightening torque 24.5 Nm (2.5 kgcm)). Then turn the differential to self-install the bearings 2-3 turns; install support mandrel 2 on the differential box and secure indicator 1 with extension using a universal holder. Install the indicator leg on the support mandrel with a preload of 1 mm, and in this position fix the indicator and set its arrow to zero; move the differential from below and watch the indicator;
WARNING When measuring the axial movement of the differential, do not rotate it so as not to distort the measurement results.
Using the formula S = A + B + C, calculate the thickness of the adjusting ring of the differential bearings, where: S is the thickness of the adjusting ring;
A is the amount of axial movement of the differential; B - the amount of preload of the differential bearings; C is the thickness of the installation ring (constant value). Example.
The indicator reading when moving the differential is 1.00 mm. The preload of the differential bearings is 0.25 mm, the thickness of the mounting ring is 1.25 mm. S = 1.00+ 0.25+ 1.25 = 2.50 mm. After determining the thickness of the adjusting ring, disconnect the clutch housing and gearbox, remove the differential, press out the outer bearing ring from the gearbox housing using a puller 67.7801.9526 and install the selected adjusting ring instead of the adjusting ring 4. Press in the outer ring of the differential bearing using the mandrel 67.7853.9575 and install the differential into the gearbox housing and, covering it with the clutch housing, tighten the nuts securing the gearbox to the clutch housing. Check the moment of resistance to rotation of the differential with a dynamometer 02.7812.9501. To do this, pass the tip of the dynamometer through the hole in the differential box (for the wheel drive shaft) until it wraps around the pinion axis. Turn the dynamometer handle several turns clockwise and use the scale to determine the moment of resistance to turning. It should be: for new bearings 147-343 Ncm (15-35 kgf.cm), for run-in bearings at least 30 Ncm (3 kgf.cm).
Rice. 3-24. Scheme for selecting the thickness of the differential bearing adjusting ring: 1 - indicator; 2 - support mandrel; 3 — differential bearing; 4 — installation ring; 5 - mandrel
Something bad happened and a VAZ 2110 gearbox needed to be repaired. Unit repair is required when:
- It is difficult to switch gears off and on.
- automatic switching off of gears.
- noise occurs when shifting gears.
- transmission oil leak.
The reasons for the breakdown may be different, perhaps the oil was not changed in a timely manner or the mechanism has simply exhausted its resource.
How is a VAZ 2110 gearbox repaired? Do-it-yourself VAZ 2110 gearbox repair, video.
Pro tips, driver actions after gearbox repair
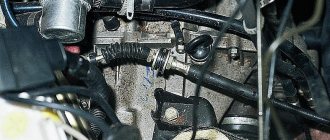
First of all, the starter and battery are removed. Then you should drain the oil from the device. Next we perform the following steps:
- First you have to disconnect the clutch cable. This should not cause any difficulties, because here it is enough to loosen the two nuts and then remove the cable;
- unscrew the fastening nuts, and then remove the cable from the box bracket;
- we compress the spring clips, after which we disconnect the wires from the speed sensor;
- Next, you should unscrew a couple of bolts, thanks to which the box is attached to the power unit;
- we are engaged in unscrewing the fastenings of the VAZ 2110 gearbox, which connects the box to the ignition;
- then the jet rod is removed (we unscrew the fastening bolts, loosen the clamp, and then pull the rod back);
- dismantle the left wheel drive (the right one can be left in place);
- then the bolts that are located on the steering knuckle, as well as in the lower right part of the box, are unscrewed. The bracket nut, clutch housing bolts and the left lower mounting bolt are also unscrewed;
- at this stage you can already get the power unit. It is important to secure it well so that it does not interfere with work and is not damaged;
- We dismantle the extreme fastenings;
- then we proceed to unscrew the two nuts of the rear engine mount;
- We begin to shift the gearbox from the guide bushings. Here it is worth holding it a little so that the unit does not fall;
- When we move the box as far as possible to the left, it will be possible to completely remove the device from the vehicle.