In order to get maximum performance from a car engine, among other things, the most efficient valve timing must be set. It is impossible to achieve this without making changes to the timing structure due to fairly large fluctuations in the camshaft position, within factory tolerances. A split camshaft gear or a sliding timing gear will help solve the problem.
With its help, you can adjust the operation of the engine in accordance with your preferences, setting the position of the camshaft relative to the crankshaft, with an accuracy of up to tenths of a degree, but without weakening the timing belt tension. The procedure itself is not particularly complicated and can be done with your own hands.
How to set it up correctly
What a split camshaft gear does and how to set it correctly - you can find out in this section.
Its setting is carried out using a dial indicator, which is used to shut off the valve system. The piston part must be moved upward. Adjustment actions are carried out to stretch and shift the amplitude value of the torque at average speed or, in a simple way, to achieve maximum values at the bottom of the torque. On different brands of cars, the settings may have slight differences. But it should be borne in mind that the actions follow similar scenarios.
How to configure
- On the pulley part of the camshaft, align the special marks on both parts of the gear (moving and fixed).
- Return the timing belt part to its place. Additionally, check the placement of all parts relative to the marks.
- Open the intake and exhaust valves to the single-phase position. They are located in the fourth cylinder. If their positions are not the same, you need to use a special screwdriver to lower the bolt on each part.
- Rotate the camshaft, making sure that the moving part of the gear remains in its original position.
Video on the topic:
Design, principle of operation and adjustment of the engine valve mechanism
On a VAZ 2114 car, the camshaft sensor is necessary for the normal functioning of the fuel injection system. It is also called a phase sensor. The reason is that it is he who shows the on-board computer what phase the gas distribution system is in (intake, exhaust). Thanks to this simple device, it is possible to achieve the most accurate supply of the air-fuel mixture into the combustion chambers. The optimal ratio of gasoline and air in the mixture, as well as the ignition timing, depends on how the sensor works. Let's take a closer look at the VAZ 2114 camshaft position sensor, learn about typical breakdowns and methods for correcting them.
Setting up a split gear on a VAZ-2101
Installation of an alarm system with a turbo timer
A new camshaft is installed. The valve overlap is set using the standard gear marks, then the pistons of the first and fourth cylinders are brought to top dead center, and the timing chain is put on. A bar with three dial-type indicators is installed, the legs of which rest on the rockers. For the first cylinder, it is necessary to alternately find the camshaft position corresponding to the closed position of the intake and exhaust valves, as well as the position corresponding to the piston being at TDC. After this, the indicators indicate the required overlap using a gear. It should be remembered that it matters at which point of the rocker the indicator leg rests, and also that the rocker has a gear ratio (if the camshaft is multi-lift)
The gear ratio is not taken into account only for equal lift and equal phase camshafts. In this case, it is enough to simply align the shaft so that both valves are equally open. The fixing bolts are tightened, after which the crankshaft must be turned one turn and checked for correct settings. After a test drive, you can adjust the camshaft position if necessary.
I like it I don't like it
Step-by-step process for replacing brake pads
After preparing all the tools, first measure the fluid level in the corresponding reservoir. The engine must be turned off. If the indicator is exceeded from the maximum, select some of the fluid so that nothing subsequently gets on the brake disc.
Raise the handbrake and place chocks under the wheels to prevent the car from rolling. Only now can you lift the car using a jack. Remove one wheel and clean the entire mechanism responsible for braking using a rag. If rust is visible, apply WD-40 for easy removal of the guides.
Unsplit the guides with thin-nose pliers
Place a drift in a convenient position and carefully knock out the guides (not completely) to the extent that the brake pads are freed
Remove the pressure springs from the pads. Now take pliers and use them to press the pistons into the cylinders. Once completed, you can remove the brake pad from the mechanism.
After dismantling the part, carry out an analytical inspection - determine the degree of production; if everything is normal, replacing it is a waste of time. The part can still continue to work out its service life, and the malfunction itself lies in a completely different functional unit of the car. If you determine the presence of wear, prepare a new pad for installation.
Take some grease and apply it to the guides. Be especially careful - the product should not come into contact with other functional components of the brake system.
To successfully install a new brake pad, all steps are performed in reverse order:
- Install the block.
- Install the springs.
- Reinstall the guides to secure the pad.
- Use thin-nose pliers to tighten the guides.
- Check that all mechanisms are secure, after which you can install the wheel.
- Lower the jack and remove the supports.
Once the procedure is complete, repeat the same with the other front wheel.
Once the pads are installed, start bleeding the brakes. To do this, simply press the corresponding pedal sharply several times. Then check the brake fluid level in the reservoir. If the level is lower than required, add the missing amount.
If you feel that you do not have enough experience to perform this work, contact a private workshop where a specialist will complete the work in a short time.
Replacement
- keys for 10, 13, 17;
- key for rotating the roller;
- flat screwdriver;
- wheel wrench;
- jack;
- a little engine oil to lubricate the tension roller.
What will the installation of forged pistons in the engine give?
1. Place the car on level ground and put it in gear.
2.Using a 10mm wrench, unscrew the bolts securing the timing case.
3. Loosen the generator belt tensioner using a 13mm wrench. Remove the belt.
4. We check the marks on the camshaft gear and the protrusion on the rear cover of the belt housing.
5.If they do not match, you need to turn the crankshaft until they match. This can be done by rotating the front wheel, jacking it up first, or turning the crankshaft with a 17mm wrench using the crankshaft pulley bolt (the gear must be engaged).
6.Behind the 4th cylinder on the clutch housing there is a rubber plug. We open it by prying it off with a screwdriver. Below it you can see the flywheel crown, which also has a mark. It should coincide with the triangular cut located on the crankcase to the left of the flywheel.
7.If they do not match, you need to loosen the tension roller, turn it to the left, thus loosening the belt, and remove it from the camshaft gear.
8.Using a 17mm wrench, turn the crankshaft as described above until all the marks match.
9.We immobilize the flywheel by locking it with a screwdriver in the hole where the plug was located.
10.Using a 17mm wrench, unscrew the bolt securing the generator pulley.
11.Behind it there is a crankshaft pulley onto which the belt to be replaced is placed.
Repair of brake caliper VAZ 2107
A damaged or deformed brake caliper on a VAZ 2107 needs to be replaced. Caliper repair involves replacing faulty brake wheel cylinders. In some cases, instead of replacing the cylinders, they can be repaired.
The procedure for replacing cylinders is as follows:
- clamp the caliper in a vice;
- Unscrew the fittings of the connecting tube with a 10 mm wrench;
- remove the tube connecting the working cylinders;
- Use a hammer to knock out the working cylinders from the guides, after pressing the lock with a screwdriver;
- remove the clamps and replace them with new cylinders (if they are missing);
- insert the cylinders into the guides;
- install the connecting tube and tighten the fittings.
Repair of working cylinders consists of replacing the rubber sealing rings on the pistons. The order of operations is as follows:
- remove the brake cylinder;
- remove the protective cap from the piston using a screwdriver;
- apply compressed air to the cylinder to push the piston out;
- remove the sealing ring by prying it off with a screwdriver;
- install a new ring;
- lubricate the cylinder, piston and ring with brake fluid;
- insert the piston into the brake cylinder.
Important: before installing new sealing rings and assembling the cylinders, you must make sure that the inner surface of the cylinder and the piston are free of damage, cavities, and deformations. Otherwise, replace the brake cylinder with a new one.
Video - Installation of gears on a VAZ 2108
To achieve an increase in power at certain speeds, you can do the following:
- Loosen the split gear bolts and turn the camshaft in the same direction that the crankshaft rotates. Thus, the valve timing shifts: the intake valve will open later and, accordingly, close later. This setting allows you to achieve increased engine thrust when operating at low or close to medium speeds.
- If you turn the camshaft against the movement of the crankshaft, it turns out that the valve will open earlier, which means that the combustion chamber will receive more mixture if the engine operates at higher speeds. Thus, you can greatly increase the engine power, but not the maximum speed.
- When making this adjustment, do not get too carried away with this process. The fact is that the operation of the camshaft is cyclical, which means that its rotation angle is too large and can completely destroy the engine. Adjustment is allowed in the range of 3 to 4 degrees around the circumference, which is equal to approximately half a gear tooth.
- If your car is equipped with a carburetor engine, then after each adjustment you must again set the ignition timing correctly. The fact is that the distributor of such engines has a mechanical connection with the camshaft, which means that its displacement necessarily leads to resetting the ignition system.
As for the 16-valve engine, there is nothing complicated here either, but the composition of the actions changes slightly:
- First, cylinders 1 and 4 are installed at top dead center, and after that it is necessary to put on the timing belt. Naturally, before this it is necessary to install new gears and make the same marks on them as the old ones.
- To adjust this time you will need a special indicator, which is made in the form of a clock. Each of them is installed on a special strip installed in the engine valve mechanism.
- When the piston is at top dead center, these indicators should show valve overlap. This value is displayed as numbers and must be equal to zero. If this does not happen, then the position of the camshafts is adjusted in accordance with the instructions above.
This principle also applies to the Zhiguli engine. To do this, they also set the bar and set cylinders 1 and 4 to their top dead center. After this, exactly the same adjustments occur.
This is why a VAZ split camshaft gear is needed. As you can see, any car enthusiast who has a basic understanding of the operating principle of an internal combustion engine can handle the installation of such a part.
Caliper jammed on the road: causes and symptoms
The caliper jams and fails due to overheating, dirt and moisture getting into it. There are also other provoking factors:
- Wear of the brake mechanism. This happens when the driver does not monitor the car parts and does not carry out timely diagnostic maintenance. The caliper becomes unusable and jams, often right on the road.
- Incorrect pad installation. When they are not parallel to the discs or in the wrong places due to an error during the repair, the brake mechanism jams.
- Lack of lubricant or incorrect selection. Typically, drivers try to save on lubrication, which is fraught with many problems. It is necessary to select a product that can reduce friction during the operation of parts and has cooling properties. High-quality lubrication should provide the mechanism with protection from exogenous adverse factors. Especially in winter, when the road is strewn with ice, snow, and stones.
When a caliper jams, it is accompanied by a number of characteristic symptoms:
- the discs become very hot, there is a burning smell in the cabin (these manifestations are typical for overheating of the brake mechanism parts);
- when you press the brake, the car pulls to the side (usually to the one where the jammed caliper is located);
- after releasing the brake pedal, a creaking sound is heard in the cabin - a sign of wear on a part of the brake system;
- brake fluid is heavily consumed;
- There are drops of oil visible on the wheel rim.
If the caliper jams on the road, the car may begin to brake on its own. This happens because the brake pads are in constant contact with the discs. As a result, the car will constantly brake, even when the driver does not touch the brake pedal. The pads will begin to deteriorate faster.
If even one of these phenomena is detected, it is important to take immediate measures - diagnose the brake system, level out the identified problems
Why install a split gear
There are two main reasons why it is advisable to replace the standard gear with a split gear.
First of all, during the manufacturing and assembly of parts at the VAZ plant, some deviations from the design dimensions are allowed. As a result, even in engines of the same series (for example, VAZ-2108 or VAZ-2112), the position of the camshaft relative to the crankshaft can fluctuate within 10 degrees (this corresponds to one tooth on a standard gear) both towards the earlier and towards the later ignition As a result, the power and dynamic characteristics of the power unit suffer.
In addition, installing a split gear is highly desirable when replacing standard camshafts with sports camshafts, with increased cam lift and a modified profile. Installing more efficient valve timing allows you to get an additional increase in power from 3 to 5 percent.
Tuning parts, popular and not so popular
We have arranged all the elements in order of increasing uselessness:
- Receiver with increased volume. After replacing the standard unit, there is an increase in output at medium and high speeds. But for the region of 1000-2500 rpm, it would be preferable to have a standard receiver.
Receiver with increased volume (shorter path)
Tuning throttle assembly
As for the exhaust tract, you can install a “4-2-1 spider” - it creates a vacuum in front of the valve that is not yet open... Torque and power are improved from this, the question is by how much.
Any “tuning” begins not with the engine, but with the selection of “gear ratios”... This advice is common, and it also applies to the VAZ-2108 and 2114 families.
Stories from our readers
“Fucking basin. "
Hi all! My name is Mikhail, now I’ll tell you a story about how I managed to exchange my two-wheeler for a 2010 Camry. It all started with the fact that I began to be wildly irritated by the breakdowns of the two-wheeler, it seemed like nothing serious was broken, but damn it, there were so many little things that really started to irritate me. This is where the idea arose that it was time to change the car to a foreign car. The choice fell on the melting Camry of the tenth years.
Yes, I had matured morally, but financially I just couldn’t handle it. I’ll say right away that I am against loans and taking a car, especially not a new one, on credit is unreasonable. My salary is 24k a month, so collecting 600-700 thousand is almost impossible for me. I started looking for different ways to make money on the Internet. You can’t imagine how many scams there are, what I haven’t tried: sports betting, network marketing, and even the volcano casino, where I successfully lost about 10 thousand ((The only direction in which it seemed to me that I could make money was currency trading on the stock exchange, they call it Forex. But when I started delving into it, I realized that it was very difficult for me. I continued to dig further and came across binary options. The essence is the same as in Forex, but it’s much easier to understand. I started reading forums, studying trading strategies. I tried it on a demo account, then opened a real account. To be honest, I didn’t manage to start earning money right away, until I understood all the mechanics of options, I lost about 3,000 rubles, but as it turned out, it was a precious experience. Now I earn 5-7 thousand rubles a day. I managed to get the car buy after half a year, but in my opinion this is a good result, and it’s not about the car, my life has changed, I naturally quit my job, I have more free time for myself and my family. You’ll laugh, but I work directly on the phone)) If If you want to change your life like me, then here’s what I advise you to do right now: 1. Register on the site 2. Practice on a Demo account (it’s free). 3. As soon as you get something on the Demo account, top up your REAL ACCOUNT and go to REAL MONEY! I also advise you to download the application to your phone, it’s much more convenient to work from your phone. Download here.
By moving the right gear clockwise and the left one counterclockwise, the overlap becomes larger than standard. This is to increase the torque at high speeds. Flaws:
- deterioration of low-end dynamics
- Fuel consumption increases at high speeds
- idle speed is less stable
- In winter, the engine warms up more slowly
Advantages
- fuel consumption at idle speed decreases (by approximately 0.1-0.2 l/100 km). Good for cities with traffic jams.
- good pickup at high speeds (from 3000 rpm to 6000 rpm), increase in power by about 4%.
By moving the right gear counterclockwise and the left gear clockwise, we reduce the overlap, which allows us to increase torque at low speeds. The pros and cons are reversed.
To summarize, we can say that using the settings of the split gears, you can shift the valve timing, changing the characteristics of the engine under certain conditions. Have you done this type of engine tuning? What adjustments do you recommend?
Let us remind you that adjustable gears are often installed together with sports camshafts and a zero-resistance filter. Taken together, such improvements provide a noticeable increase in power.
What is the best way to shift the valve timing?
We recommend watching:
- Intake camshaft VAZ 2112 16 valves
- Camshaft Lada Kalina 8 valves
- Valve timing diagram of a 4-stroke engine
- Sports camshaft for VAZ 2107 price
- How to set up a split gear
- Installing a split gear on a VAZ 2114
Installing the brake caliper
Installation of the brake caliper on the VAZ 2107 is carried out in the reverse order of its dismantling.
After installing the brake caliper, it is imperative to bleed the brake system, removing air from it. Until this operation is completed, operating the vehicle is strictly prohibited.
The left and right wheel calipers are slightly different, so you need to pay attention to this when purchasing new ones. After repairing and installing the VAZ 2107 brake caliper, it is necessary to check the brake system for fluid leaks and, if necessary, repair them
After repairing and installing the VAZ 2107 brake caliper, it is necessary to check the brake system for fluid leaks and, if necessary, repair them.
Phase shifters and their function
Most new engines are equipped with phase shifters, which make it possible to adjust the operation of the power unit based on the crankshaft speed. This is necessary in order to obtain maximum torque over a larger rpm range.
If you take any car manual, it will indicate such characteristics as engine power in horsepower and the maximum torque that the engine is capable of producing at certain crankshaft revolutions per minute.
Take, for example, the common Renault Logan model. The engine is capable of producing 170 horsepower at 6 thousand crankshaft revolutions. The maximum torque is 270 Nm at 3250 rpm. From these figures it is clear that the maximum torque can be achieved already at medium speeds. And the greatest power becomes available only after 6000 rpm. If such a motor is equipped with a phase shifter system, it will have a wider range in which the motor will produce the highest torque, and not the one that is included in the design by the manufacturer.
The split camshaft gear performs approximately the same functions as the phase shifter. This part has a similar design as the camshaft. It can rotate at certain angles forward or backward.
Vacuum brake booster
A rod connected to the amplifier is connected to the pedal. The design of the VAZ-2107 vacuum brake booster is quite interesting; it is shown in the figure:
The amplifier is a sealed container, internally divided into 2 chambers by means of a membrane. The chamber located closer to the pedal is called atmospheric, and the chamber separated from it by a membrane is called vacuum. The diaphragm itself is connected to the piston rod of the master cylinder.
The vacuum chamber is connected by a pipe to the intake manifold of the engine, where the vacuum comes from. The design also includes a follower valve controlled by the pedal rod, which does all the work.
When the pedal is released, this valve connects the chamber cavities through a channel, providing identical pressure. When the pedal is applied, the valve closes the channel connecting the chambers and opens the channel connecting the atmospheric chamber with the atmosphere. Since a vacuum is maintained in the second chamber, atmospheric pressure begins to put pressure on the membrane. Since it is connected to the piston rod of the master cylinder, due to the movement of the piston, fluid is displaced from the cylinder into the pipelines.
Briefly about the main thing
The technology for setting timing marks on a VAZ 2106 engine is performed with the chain removed. A sprocket mounted on the camshaft without a chain is fixed with a screwdriver and tightened with a wrench. After rotating the camshaft in the desired direction and combining the drilling with the boss on the bed, the gear is again immobilized with a suitable object and dismantled. Next, the new chain is installed.
Perfect alignment of the marks can only be achieved by using a split gear. However, this is not at all necessary to comply with. It is quite possible that the camshaft marks coincide and the crankshaft pulley moves a little forward.
Hello dear readers!
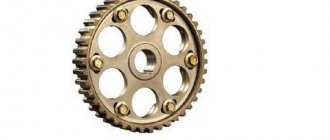
Today I will tell you about one very necessary timing part. Unfortunately, the manufacturer does not install this pulley on any domestic car, unlike foreign car manufacturers. We will talk about the Vernier pulley or, as the common people call it, a “split gear”. He came to us from the world of domestic motorsport.
Let's start with what it is needed for. Anyone who often assembles engines knows that in our country, on all cars, the timing belt is set “by marks” and has a tolerance of plus or minus one tooth. Therefore, there can be no question of proper engine operation. Of course, a specialist should adjust the timing belt, but unfortunately, these so-called specialists are accustomed to stupidly putting everything according to marks and many have never heard of this pulley. And in general, I adhere to this idea: “If you want the work done well, do it yourself.”
First of all, you need to know what kind of camshaft you are installing. And based on the model, you need to know the installation data (this is the opening phase of the intake valve before TDC, and the closing phase of the exhaust valve after TDC). Next we need a “crankshaft degree scale”. If it's not there, don't be upset. Using a compass and a protractor, create a template for the camshaft degree setting, highlighting the setting degrees in a different color. Carefully glue this template to the crankshaft pulley so that in the direction of rotation, first you have a selected sector of the template and its end is aligned with the TDC mark on the crankshaft pulley. Next, you need a valve lift indicator (no way without it). Having established the valve overlap, rotate the crankshaft against its rotation and catch the moment of opening of the INTAKE valve. Once you have caught this moment, loosen all the bolts on the split gear and align the beginning of your selected sector with the TDC mark on the block. In this case, the chain must be tensioned. After this, tighten all the bolts on the split gear. That's all. Your timing belt is adjusted accurately. This entire procedure must be performed on adjusted valves. Now one more control adjustment of the valves and off we go. The machine will work perfectly. If you are adjusting according to the exhaust valve, then the template is glued on the other side relative to the mark on the crankshaft pulley and the crankshaft must be rotated as it rotates, in general it is not difficult to figure out. With a conventional timing gear there will never be such a setting.
Methods for troubleshooting
Troubleshooting is not a complicated process and even novice car enthusiasts can do it (the author of the video is Avtoelektika VC).
First of all, you should check the integrity and condition of the wiring.
Using a multimeter, you need to test the wiring. Damaged or torn sections should be replaced intact or soldered. If there are traces of oxidation processes on the contacts, they need to be cleaned.
If the LEDs burn out, they need to be replaced in pairs. If the breaker fails, it must be replaced with a new one, as it cannot be repaired. Before replacing, turn off the vehicle's power by removing the negative terminal from the battery. Then disconnect the power wires from the breaker. Next, you need to loosen the lock nut and unscrew the main nut securing the switch to the bracket.
Sequence of operations for removing the camshaft gear:
- Unscrew bolt 3 and remove washers 4 and 2, securing gear 1 axially to the toe of the camshaft.
- Press the gear off the camshaft nose using a special puller (Fig. a and c).
The support flange 5 of the device is put on the camshaft until it stops against the gear. Pins 3, fixed in the flange, are threaded through the holes in the gear disk. At the free ends of the studs there is a cross member 2, into the threaded hole of which a thrust screw 1 is screwed. The thread-free end of this screw fits into the recess of the thrust sleeve 4. To reduce friction between the ends of the thrust screw and the sleeve, a hardened steel ball is installed. The bushing is held on the screw by a pin that fits into a ring groove at the end of the screw. By rotating the screw, bushing 4 is pressed against the center of the camshaft end and the gear is pressed off the shaft. - Remove the thrust flange 6, remove the key 5 and the thrust ring 7.
Install the gear on the camshaft in reverse order. In this case, it is necessary to additionally take into account the following:
- Carefully inspect thrust flange 6. If cracks or significant wear is detected (which may be accidental, since the flange is sulfinized), replace the flange with a new one.
- To press the camshaft gear onto the camshaft nose, use the tool shown in the figure.
The support flange 3, which has a rectangular cutout, is placed on the first cam of the camshaft and rests against the camshaft support journal. Studs 5, screwed into the flange, are threaded into the holes of the timing gear disk. The gear should face the block with the side that has the deeper recess. A cross member 2 is put on the studs 5, into the threaded hole of which a screw 1 is screwed. When this screw rotates, the pressure sleeve 4 feeds the gear onto the toe of the camshaft and, with further pressure, presses it onto the shaft. When pressing the gear, it is necessary to simultaneously center the thrust flange 6 on the thrust ring 7 to prevent damage to the edge of the flange hole by the protruding part of the key. Before pressing the gear, the camshaft nose must be lubricated with engine oil. - Tighten bolt 3 with a torque wrench to a torque of 5-6 kgm.
- Check the end runout of the gear in relation to the surface of the camshaft journals. It is allowed no more than 0.06 mm at a radius of 62 mm. This amount of runout ensures silent operation of the timing gears.
What to do with engine 11183?
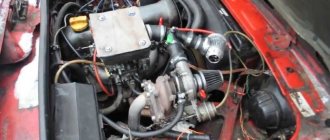
It is clear that a mandatory step in tuning the 11183 engine will be replacing the ECU. It’s simple: the standard M74 block cannot be flashed, but “January 7.2” is a good and time-tested solution. You will also have to abandon the “E-Gas” option, which means replacing the throttle assembly and receiver.
Everything I had to throw away
The intake tract parts were borrowed from the 2111 engine. A cable pedal was installed, and the engine began to look human.
Everything works well with the “January” controller, but standard firmware is not an option if the camshaft has been replaced. And it, in turn, has the following parameters:
- Release phase width – 104;
- Intake phase width – 109;
- The opening angle at the outlet is 272;
- Inlet opening angle – 268;
- Valve travel (exhaust/intake) – 9.5/10.1 mm.
After installing the new shaft, the motor became plug-in. However, on the 2114 hatchback, increasing power almost always comes with a compromise. In this case, we had to sacrifice reliability. What's improved:
- Maximum torque increased by 14 N*m;
- The power also increased – the limit of “90 horsepower” was passed.
By the way, any tuning leads to a decrease in durability. Make a choice.
An example of increasing the power of a VAZ-2114 engine
During the tuning, the 2111 (1.5 l) engine was modified.
- Boring of seats along the internal diameter, which is equivalent to enlarging the valve;
Valve seats, VAZ 2111 engine
New cylinder head elements
Tuning timing gear
Our new engine remains “not plug-in” - the valves do not reach the pistons. When tested on a bench (the sensors were turned off), the result was not impressive.
Installing the Split Gear
Why is a split camshaft gear needed and how necessary is its installation? This is needed for the following:
- When an engine is assembled on a conveyor belt in factories, a certain number of errors are allowed in any case. It is not possible to make a millimeter-accurate installation, and therefore manufacturers warn about this. Two cars of the same build and configuration may differ from each other in the crankshaft area by 10 degrees or 1 tooth of a split gear. These discrepancies are very important. The engine power directly depends on them. But this can be adjusted independently and this split camshaft gear will help with this.
- It is possible to install a special sporty camshaft. The motor must have more power in order to reach the required speed. Adjusting the outer part of this part will help add five percent to the turnover.
Main reasons for installing a split gear
Engine tuning specialists identify two reasons why many install this part. It is worth considering that a sports camshaft will not give anything unless a split camshaft gear is additionally installed (the VAZ will not go faster). During assembly work at the factory, the manufacturer often deviates from the data specified in the drawings. Therefore, the parameters of motors designed for one car model differ from the original ones. These errors are no more than ten degrees in each direction. Naturally, this affects the power characteristics of the motors. By installing a split gear, the car owner has the opportunity to adjust and optimize torque as needed.
Installing tuned camshafts allows you to significantly increase the torque of the power unit. VAZ split gear – another +5% to power characteristics. That's pretty good.
Installing a new belt
Then the question arises: how to install a timing belt on a VAZ 2110 8 valves. The work is carried out in the opposite order.
Installing the timing belt VAZ 2110 8 valves consists of the following steps:
The tension roller is being fixed. Attention is immediately drawn to the location of the key holes. They are heading outside. To install the timing belt VAZ 2110 8 valves, it must be put on the crankshaft pulley. The coolant pump and tension roller are included in the same system
It is important to understand: how to tighten the timing belt on a VAZ 2110. A screwdriver is used to carry out this work.
It must be installed between the pins that are screwed into the roller. The lever rotates the roller counterclockwise. The belt is then tensioned onto the pulley. Then the tension roller nut and the generator pulley bolt are returned to their place. Now the crankshaft rotates 2 turns clockwise. The crankshaft and camshaft marks are aligned. If the labels do not match, the entire operation is repeated.
Next you need to adjust the strap tension. The rotational movements of the crankshaft are carried out against the direction of movement clockwise. Normal tension is 1.5-2 kg. If there is no special device, then a manual method of checking is carried out. The free section of the belt is grasped with two fingers: the thumb and forefinger. The force should be enough to turn the belt at an angle of 90 degrees.
Knowing how to install a timing belt on a VAZ 2110 8 valve with your own hands, you still need to check the quality of the work done. To do this, start the engine and listen. There should be no extraneous noise. Their presence indicates a strong belt tension. To do this, the fastening of the roller is loosened, and the roller itself is rotated to the left by 10-15 degrees. The field of this system is fixed.
Nuances in installing a timing chain according to factory marks on a VAZ 2106: pitfalls
It is difficult to achieve a perfect combination of two pairs of characters. The main reason is to use components with the same dimensions along the edge of the border. By the way, even adjusting the VAZ 2106 carburetor with your own hands never follows the ideal scenario - additional recommendations from experienced craftsmen are almost always used.
Allowable elevation shifts
One of the unwritten standards allows for divergence of the star-shaped perforation and deflection of the camshaft bearing housing inside the half-blade in one direction or another. More precisely, the installation of the timing chain of the VAZ 2106 engine according to the marks is considered complete when the camshaft sprocket is placed accurately and the mark of the crankshaft pulley goes slightly forward. This guarantees stable traction throughout the entire speed range.
If the “distribution” asterisk is on the mark, and the “knee” pulley does not reach the TDC mark, the engine will operate stably only up to a speed of 100 km/h. After crossing the border, a loss of traction and an increase in fuel consumption are observed.
Extremes
A discrepancy between the marks of the frame and the camshaft sprocket by one tooth is unacceptable. This usually indicates critical chain elongation. When it’s new, you should inspect the seat for the key on the crankshaft - it can break, hence the excessive play.
Engines with significant mileage are often subject to random changes in the position of the sprocket PB during rotation of KB. This leads to:
- The teeth in the shaft coupling of the drive gear of the oil pump with the drive shaft (“mushroom” with “blank”) are sharpened.
- Rollback in the distributor.
- Ellipse of timing gears.
For your information. Using a split star helps achieve perfect mark placement. Installed to replace the standard camshaft gear.