Useful tips
Author: Anastasia Safonova12/29/201612/29/2016
The dashboard of the VAZ 2114 car displays data that allows the driver to monitor the condition of the car - fuel and engine oil levels, speed, revolutions and engine temperature. The panel must always be in good condition, which is the key to the accuracy of the data shown by the sensors and the absence of discomfort caused by non-functioning backlighting. Quite often, VAZ 2114 owners are faced with the problem of the dashboard backlight not working. The problem is resolved independently, without visiting car services or contacting specialists.
- Why do light bulbs fail?
- How to choose dashboard lamps
- How to replace light bulbs
Required Tools
- Replacing the backlight
- How to disassemble the dashboard
- Replacing backlight bulbs
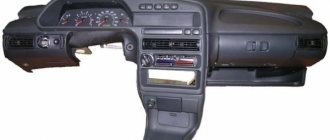
INSTRUMENT PANEL VAZ 2114
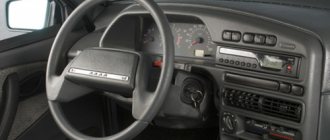
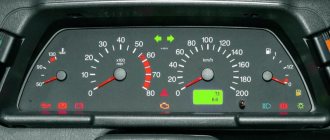
Cars of the Samara 2 family are equipped with a modern VAZ 2114 instrument panel, which is also called the “European panel”. The designers worked on it so that it allows for good forward visibility, a pleasant appearance, combines information content and ergonomics, and at the same time helps the driver cope with ordinary everyday needs. And they mostly succeeded. A block of instruments and sensors installed in front of the driver’s eyes, behind the steering wheel, provides him with the maximum possible amount of information:
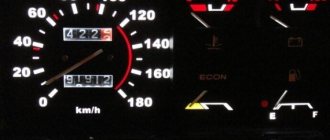
- In the central part there are two dial instruments, on the left there is an engine speed indicator, by which the driver determines what load the power plant is working with at a particular moment and, if necessary, corrects this process by switching speeds; in the window under the arrow there is a digital clock. On the right is a speedometer or an indicator of the current speed of the car, in the window under the arrow there are digital readings of the kilometers traveled for the entire period of operation of the car and for the last trip;
- In the upper part, between the dial instruments, there is a turn signal indicator lamp with green arrows pointing left and right;
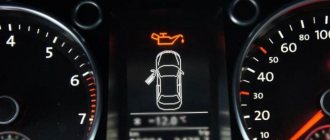
- In the lower central part there is a red “stop signal” triangle, and below it CHECK ENGINE is a red signal for engine emergency conditions according to information from the electronic on-board unit;
- In the left middle part of the instrument block there is a dial gauge for the engine temperature, or as it is called in the literature, a coolant temperature sensor, above it there is an icon that lights up when the engine overheats. Below it are icons for the throttle, oil pressure, handbrake and battery;
- In the right middle part there is a dial indicator for the presence of fuel in the fuel tank, above it is an icon for a fully filled tank, below it is an icon for the minimum amount of fuel in the tank, as well as icons for low beam, low brake fluid level and high beam.
Ergonomics is ensured by the convenient arrangement of instruments and information icons for visual perception of information, as well as keys, buttons and levers for manipulating them. A standard on-board computer is installed in the central part of the panel, usually a Gamma, Multitronics, Prestige or State computer. The location for its installation was chosen very well and with its help the driver receives expanded information about the state of the operating engine systems and vehicle components.
This information is reflected not only on the BC display, but is also transmitted through other control or information lamps and signs located on the instrument cluster and in other places on the dashboard. In addition, the on-board computer display displays other information, for example about the timing of the next inspection or maintenance.
The glove box, which can be closed, is conveniently located and has a backlight and a fairly large niche underneath it. The central beard also has a niche for storing something and an ashtray. The air duct outlets are quite well made, allowing for efficient glass blowing and preventing fogging.
During the operation of a car, problems constantly arise with malfunctions or failures in various systems. In order to get to some of them, it is necessary to remove the VAZ 2114 panel. Even to remove the instrument panel, you need to figure out how to remove the dashboard on the VAZ 2114 (instrument panel).
In addition, on the VAZ 2114 the panel must be removed completely if there is a need to repair air ducts and the stove, or the car owner wants to completely glue and seal the joints of the panel structure so that it does not creak.
Article: 62.3710
Order code: 023197
Designation - 62.3710 Name - instrument scale lighting switch
— cars: VAZ-2108, -2109 and mod. Features of use - design features: rotary, with rheostat and fuse.
— turning on and adjusting the lighting of the instrument scale; — number of positions: 2; — nominal voltage: 12 V; — rated load current: 1.2 A; — weight: 0.049 kg.
The main manufacturer is JSC LETZ
Information used: Avtokomplektatsiya LLC
- Passenger cars / VAZ / VAZ-21081 drawing
» href=»/catalog/vaz-3/legkovye_avtomobili-30/vaz_2108-18/pribory-211/#part30523″>Device rheostatInstruments and sensors / Instruments
- Passenger cars / VAZ / VAZ-210992 drawings
» href=»/catalog/vaz-3/legkovye_avtomobili-30/vaz_21099-79/pribory-206/#part38419″>Device rheostatInstruments and sensors / Instruments
- » href=»/catalog/vaz-3/legkovye_avtomobili-30/vaz_2131-73/pribory-266/#part66003″>Device rheostatInstruments and sensors / Instruments
- » href=»/catalog/vaz-3/legkovye_avtomobili-30/vaz_2113-648/vyklyuchateli__11__13__15_-155/#part1671059″>Device rheostatElectrical equipment / Switches (11, 13, 15)
- » href=»/catalog/uaz-5/legkovye_avtomobili-30/uaz_3160-80/pereklyuchateli__vyklyuchateli-161/#part190602″>Instrument panel light switch 62.3710 with rheostat assemblyElectrical equipment / Switches, switches
- » href=»/catalog/uaz-5/legkovye_avtomobili-30/uaz_31519-844/pereklyuchateli__vyklyuchateli-188/#part2235924″>Instrument panel light switch 62.3710 with rheostat assemblyElectrical equipment / Switches, switches
- » href=»/catalog/vaz-3/legkovye_avtomobili-30/lada_4x4_m-1456/pribory_i_podsvetka-198/#part3241966″>Instrument lighting switch with rheostatElectrical equipment / Instruments and lighting
- » href=»/catalog/vaz-3/legkovye_avtomobili-30/lada_4x4-1887/k310__pribory_i_podsvetka-220/#part4215694″>Device lighting switch with rheostatAccessories / K310. Instruments and lighting
- » href=»/catalog/vaz-3/legkovye_avtomobili-30/vaz_2109-9/pribory-206/#part34480″>Device rheostatInstruments and sensors / Instruments
- » href=»/catalog/vaz-3/legkovye_avtomobili-30/vaz_2115-65/pribory-179/#part54683″>Device rheostatInstruments and sensors / Instruments
- » href=»/catalog/vaz-3/legkovye_avtomobili-30/vaz_2114-647/vyklyuchateli__11__13__15_-155/#part1671059″>Device rheostatElectrical equipment / Switches (11, 13, 15)
- » href=»/catalog/vaz-3/legkovye_avtomobili-30/vaz_21213_214i-1240/pribory_i_podsvetka-272/#part2991466″>Device rheostatElectrical equipment / Instruments and lighting
- » href=»/catalog/uaz-5/legkovye_avtomobili-30/uaz_31519-439/pereklyuchateli__vyklyuchateli-175/#part1362248″>Instrument panel light switch 62.3710 with rheostat assemblyElectrical equipment / Switches, switches
- » href=»/catalog/vaz-3/legkovye_avtomobili-30/lada_4x4_urban-1885/k310__pribory_i_podsvetka-193/#part4208299″>Device lighting switch with rheostatAccessories / K310. Instruments and lighting
- » href=»/catalog/avtokran-42/spectehnika-42/ks_6973a-817/lektrooborudovanie_kc_6973a_80_000-48/#part2159459″>Electric motorElements of electrical equipment / Electrical equipment KC-6973A.80.000
Reasons for failure of dashboard lights
The dashboard lighting performs several important functions in parallel:
- control. The lamps light up when failures or malfunctions of individual components occur;
- informational. Notifies the driver in real time about the status of important vehicle systems;
- decorative In a dark interior, beautiful lighting on the instrument panel decorates and enlivens the front part of the cabin.
The main reason for the failure of light bulbs in the instrument panel is difficult operating conditions - heating, vibration, power surges. This significantly reduces the life of the lamps and causes a lot of problems:
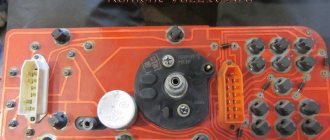
- burnout of filaments in halogen devices, burnout of current-carrying paths in LED lamps;
- broken wires or the appearance of an oxide film on the contacts;
- problems with the fuse box or contact board;
- somewhere shorted to ground.
Before you try to change the lamps, you should accurately determine the cause of the problems that have arisen, otherwise you will not be able to get the expected result
It is important to know the condition of the fuses and the condition of the wires. The insulation on them often frays and begins to short to ground.
It is necessary to inspect the wiring and replace problematic connections. In addition, you need to clean the contacts. The terminals oxidize and the ability to conduct current decreases. This applies not only to Ladas; such danger is a common “disease” of most cars.
Why did the instrument panel illumination disappear on the VAZ-2114: does it not work and does not light up?
Recently, it has become fashionable to install LED lighting for the VAZ dashboard with your own hands. However, not all car enthusiasts correctly connect it to the on-board network. This can cause the light to go out at the most inopportune moment. So, it’s worth checking the contacts of the entire backlight circuit.
There have been cases where, as a result of bumps, all the light bulbs burned out at once. In this case, you need to look for a breakdown in the wiring, you can get stuck like that again!
The same applies to standard incandescent light bulbs that come with the car from the factory. Thus, a break or burnout of one of the light elements can lead to the fact that the entire backlight stops working. If you run the tester through the entire circuit, you can easily find an open circuit.
The most unpleasant and hardest-to-test element of a car is the wiring.
So, a broken wire can cause the dashboard lights to stop receiving power and therefore not light up.
In order to eliminate the problem, you need to test all the wires with a multimeter. which are responsible for illuminating the car’s dashboard. So, any, even insignificant, wire that breaks can cause the light in the dashboard to go out.
Oxidized contacts in the mounting block.
Another cause of malfunction can be oxidized wire pads.
Accordingly, there will be no contact, and not only will the light in the instrument panel not light up, but the other indicators located here may also not work. To fix the problem, you will have to disconnect the wire block on the fuse block and the parting panel itself. After this, clean the contact group and connect everything back. If everything worked, then the reason was found.
Safety block
Another important element that can rarely fail is the mounting block.
Thus, burnout can occur directly in the branches of the block itself or in the mounting socket. To eliminate the malfunction, you will have to remove the part from the car and check it sequentially using a tester.
Many auto mechanics do diagnostics directly without removing the safety block. But only professionals can do this, but the average car enthusiast will have to remove the product. If, after all, the mounting block “died”, then the element will have to be replaced, since it is almost impossible to repair it.
Check the contact group of fuses for malfunction.
The board is damaged
Repair and diagnostic operations of the dashboard board.
The worst thing that can happen and what every car enthusiast fears is the burning of the dashboard, or rather the control board.
There is only one way out - replacement, but many car enthusiasts manage to resurrect such elements using a soldering iron. Although, as practice shows, in 50% of cases it does not last long.
The main reason for board burning is a short circuit. In this case, often the place where the wiring is connected and the most vulnerable point – the backlight – is on fire. If incandescent lamps are installed, they will be dark or black, but the LED backlight burns out in the places where the solder is connected to the board.
If the light in the dashboard goes out, it is recommended to contact a car service center, where everything will be fixed or replaced quickly and efficiently. The main reason can rightfully be considered a short circuit. and if the fuse fails, or the impulse passes before it burns out, then the consequences can be very diverse.
Experienced car enthusiast. I have an automotive education, namely: an engine repair mechanic. At the beginning of my career there was a VAZ-2107, then a BMW 5-series, a Toyota Supra and a right-hand drive MARK-2. Now the family has 2 cars: Peugeot 407 and Dodge Challenger 2016. I study each car from “A” to “Z”. I have a lot of experience and try to repair everything with my own hands.
Recommendations
Comments 107
Tell me, did you just put diode bulbs (blue) on the screens?
Maybe someone else will need this material for lighting: www.luxvaz.ru/vaz-2114/12…kv-pribornoy-paneli.html
Where did you connect the diode contacts?
Tell. I removed the film from the tidy screens, now the numbers are invisible. What can I replace, or what can I come up with?
Why did you take it off?
I read that they remove and turn over the polarizing film. There is a gradation of colors, it looks cool. I decided to try my hands out of nowhere.
hi guys, I want to install a lensed PTF and will there be problems with mussars in them?
There will be problems if it is in the head light. And nothing should happen with PTF)
Yes, everything is fine, as long as it’s regulated, otherwise it’s like a blast in the distance)
First experiments, and the photo is still unfinished
hi, I changed the backlight of the tidy, the backlight of the stove to 14 and go + from the stove to the ground, I touched all the lights of the tidy of the cigarette lighter stove went out, but when the ignition is on, the indicators on the tidy are on and all the buttons in the cabin and on the panel are on, what can you do?
backlight fuse look
Can anyone tell me what the problem is. Yesterday I changed the light bulbs in the dashboard (the backlight of the temperature sensor, the middle lamp and the lamp indicating the side lights were on) and literally an hour later they went out again, only in addition to the turn signal indication. I thought it was a fuse, but it turned out to be intact. Maybe the board is tired or the light bulbs are wrong. Maybe someone has encountered something similar and where to look for the root cause. I took the photo from the Internet, but mine is exactly the same, only in addition the indicator light does not light up.
How long did this procedure take?
SO WHEN YOU'RE ALL SLEEPED, WHERE DO YOU PUT THE WIRES?
How to remove the instrument panel from a VAZ 2115
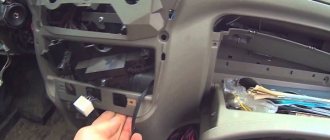
Since the instrument panels on the thirteenth, fourteenth and fifteenth models are the same, the procedure for dismantling the dashboard will be considered using the example of the VAZ 2115. But before you begin, you should stock up on everything you need.
Sequence of operations when removing the dashboard from a VAZ 2115
- Using a Phillips screwdriver, remove the screws that hold the left side of the console.
- After this, the lower edge of the sidewall is carefully removed from the bracket.
- The right side of the console is held on by five self-tapping screws, which are also unscrewed with a Phillips screwdriver. After this, the sidewall is carefully removed.
- Now the handles installed on the stove damper levers are removed. This is done manually.
- Next, remove the handle from the fan speed control. To remove it, just pull it towards you.
- Use a Phillips screwdriver to unscrew the screws holding the dashboard to the brackets. There are 4 such screws (2 to the left of the panel, 2 to the right).
- Another 4 self-tapping screws are located at the window of the instrument unit (2 under the window and 2 above it). They can also be unscrewed with a Phillips screwdriver.
- Above the instrument panel window, on the right, there is a small plug. It is pryed off with a flat screwdriver and removed. Under it there is another self-tapping screw, which can be unscrewed with a Phillips screwdriver.
- After removing all the screws, the instrument block cover is removed. To do this, just pull it forward a little.
- Behind the cover there are wires that are removed from the sockets manually.
- After disconnecting the wires, use a 13 mm wrench to unscrew the 2 bolts on the steering bracket.
- Next, using a size 8 wrench, unscrew the nuts on the lower bracket mount.
- After this, the control unit is carefully removed from the panel, allowing access to the fastening nuts on the dashboard cross members.
- Next, using a Phillips screwdriver, unscrew the last external screw holding the dashboard to the left cross member.
- After unscrewing the last screw, the dashboard is removed.
A few words about tuning the VAZ dashboard
If you want to somehow improve the appearance of the dashboard or make it functional, you can tune it.
The most common type of dashboard tuning is installing new lamps in the instrument lighting or installing additional lighting. Most often, lamps are replaced with lamps with a different color of luminous flux (for example, green or blue). The color selection should be such that it does not irritate the eyes, especially in the dark. Additional lighting is used mainly for the lower part of the panel at the feet. To do this, you can buy a ready-made set of LEDs and connect them to the car’s on-board network.
Another tuning method involves changing the appearance of the instrument scale. To do this, you can print ready-made solutions on a color printer, glue them to hard cardboard and install them instead of the old scale. It is worth considering that the lighting of the new scale may differ slightly from the factory one. Therefore, important criteria will be the color of the scale and the material to which it will be glued.
A car cigarette lighter is a device that is a “socket” for…
A more serious modernization involves changing the appearance of the panel itself. To do this, it can be painted or covered with new material. If you decide to cover the panel, then use only approved materials. Ordinary fabric and fur are prohibited, as they are flammable. The color of the upholstery should be chosen in accordance with the general background of the interior. A combination of two colors at once (for example, beige and brown) looks great.
If you decide to paint the panel a different color, it must be removed. After this, it is cleaned with sandpaper and degreased. First of all, a special sealant is applied, and then car paint. Do not use paint materials that are highly sensitive to high temperatures. If you paint the plastic with any other paint, then when the car is left in the sun for a long time, the paint will melt and simply come off. Another trouble may await you when washing the panel - ordinary paint tends to be washed off with ordinary water, or even better - with soap. Be prepared for the fact that at first the salon will smell like paint.
FakeHeader
Comments 84
Who can tell me, I changed the tidy to blue, how to make the arrows bright red, otherwise they are not visible at night
I borrowed scarlet nail polish from my wife and painted the arrows with a thin layer on all sides.
normal, 7000 on the tachometer 180 on the speedometer
