Good day) Finally got around to writing a blog entry on self-repairing headlights on a ninth-generation VAZ car. So, let’s get started! What do we need to repair the headlights, specifically replacing broken glass (as in my case) or simply replacing the ugly orange turn signals (personally, I don’t like them, it’s up to you to decide). I bought all the parts at a regular car store (Specifically at our EKB at the Bolshakova-8 March intersection, I don’t remember the name exactly, like “AvtoSport”, a little PR in honor of these guys, because I like their work with clients)
Initially, I wanted to paint the inside of the headlight matte black, but somehow, after evaluating my strength and time of work, I decided against it (I didn’t regret it). Well, to get the full style, I bought white turn signal repeaters (I remember that they cost 25 rubles). Next, we go to remove the old headlights
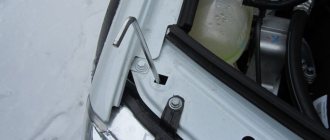
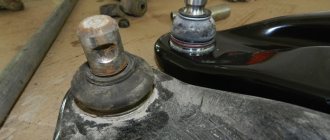
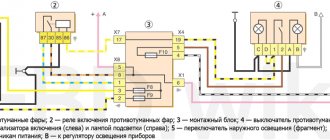
Hello, in this article you will learn how to independently remove the headlight on a VAZ 2108, 2109, 21099. The headlight is usually removed to replace its glass, when it interferes with body repairs or when a complete replacement of the headlight is required, for example, after a minor accident. For this procedure you will only need a 10mm socket with an extension. First of all, remove the terminals from the turn signal lamp, remove the common connector and remove the hydraulic corrector from the headlight
To disconnect the turn signal from the headlight, simply unscrew the 2 screws
Installing the front headlight on the VAZ 2108, 2109, 21099 occurs in the reverse order.
VAZ 2109 : replacing headlight glass on your own
the headlight glass on a VAZ 2109 is carried out quite often. Gear starter for VAZ 2106 - Duration: How to remove Torpedo from Golf 2 in VAZ 2101. The cause could be any little thing that gets inside the headlight, and then leads to damage to the entire glass. Replacing the glass in a VAZ 2109 is such an easy operation that any motorist can carry it out.
Replacement
Replacing glass on a VAZ 2109
When driving along the highway, a stone that bounces off the car in front hits the headlight. How to remove the instrument panel on the VAZ 2114 and 2115. To remove the instrument panel, you will need: an “8” key, a Phillips and flat-head screwdriver. Step-by-step instructions for replacing the clutch on a VAZ 2109 (2108, 21099, 2114, etc.) yourself. The glass is broken and needs to be replaced. This happens often because the road surface is made of asphalt concrete. Over time, it is knocked out, and the crushed stone is left without binding bitumen. The headlight glass also breaks down if it is not properly cared for. Today at VAZ Repair we’ll talk about how to remove the dashboard on a VAZ 2110 with your own hands. If the headlights are on, they should be wiped with a damp cloth or brush if necessary. But under no circumstances should you wipe heated glass that has not yet cooled down with snow or spray it with water.
Note: work on replacing headlight glass must be carried out indoors at a temperature of 20 0 C.
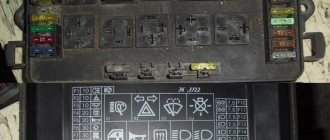
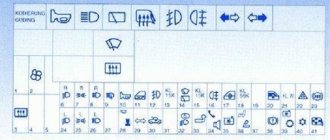
Engine and exhaust system
With the engine, everything is somehow ambiguous. And it seems that it has become an ordinary spare part and has ceased to be a numbered unit, but the engine model is entered in the title and the tax is paid according to its power. Therefore, when replacing a motor with another one, re-registration is required. But there is no such control, the traffic police don’t check the serial number - you can put whatever you want. Of course, if a VAZ 2108 arrives with a V16 engine, it will be noticeable to the naked eye, but if the engines are similar in appearance, hardly anyone will be able to tell the difference.
The engine can be legally installed if the car has a certified version with it from the manufacturer. For example, if you are the owner of a 41st Muscovite with a Ufa or VAZ engine, you can install a two-liter Renault F3R instead, since the plant produced such modifications. Otherwise, the traffic police will require you to obtain a certificate, which is quite expensive and difficult.
Self-installation of turbines and compressors is prohibited. But there is an interesting point: traffic police inspectors don’t know the engine compartment of the foreign automobile industry well, so they may not see the turbine. In common foreign cars it is more noticeable, but it can be passed off as a “noise reduction device” or “injector design.”
Aftermarket exhaust systems are illegal. Not long ago, during technical inspections they began to check the volume of the car, so owners of direct flow vehicles most likely will not receive a maintenance ticket. Although in our country this is a small problem.
Without removing the headlight
Replacing headlight glass on a VAZ 2109
In summer, this work can be done outside without removing the headlights:
- Choose an asphalt or concrete site, in a place where there is no wind.
- Water the area with water, this must be done in order to prevent the ingress of dust and sand during cleaning and applying glue.
- To perform the work, you must wear cotton gloves. This hand protection prevents injury when removing broken fragments.
Note. Remaining glass must be removed carefully.
- To make the work easier, try to gently hit the glass with a hammer.
- Clean off any remaining debris.
- Use a screwdriver to remove any remaining old glue around the perimeter of the headlight
- Moisten a rag with a solvent and degrease the reflector.
- Also wipe the inside surface of the glass with solvent.
- Afterwards, clean the place of the sticker in the headlight housing again (see Repairing a VAZ headlight with your own hands).
- Gradually, carefully squeeze the glue out of the tube.
- Apply a thin layer along the rim of the headlight, along the inner edge of the glass.
- Wait 3 minutes.
- After this, press the glass against the headlight, try to glue it in the middle.
Now let's talk more about the process itself.
- the headlights need to be dismantled and then disassembled;
- then you should remove the additional reflector for the turn signal;
- remove chrome from the lamp with fine sandpaper;
- apply primer.
The primer must dry well; this will require waiting at least an hour. Special paint must be applied to the headlight in 2-3 layers, otherwise the paint may simply peel off. After this, it will take time again for the paint to dry completely, this will take about one hour.
Once the paint has dried well, you can completely assemble the rear optics. You need to approach the application of sealant with special responsibility. The old sealant must be completely removed, then the tail light must be degreased and the new sealant must be applied directly. This must be done carefully, since if the sealant is applied incorrectly, the headlight may fog up, which can lead to serious consequences.
In general, tuning headlights is not a particularly complicated process, but if you are afraid of making any mistakes, of course, you can buy tuning devices. However, the tuning process itself is interesting; every car enthusiast would like to do everything himself, putting his soul into this matter.
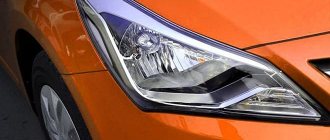
Changing the head light on a VAZ 21099 I want light.
The end of the headlights has come, the windows burst and dirty water got inside. We exchange the old for the new and the difference is obvious.
Note. If the glass is slightly larger, this gap is necessary for an expansion joint. Cooling system on VAZ 2109 and 21099. How to remove the front bumper on a VAZ 2114. How to remove the instrument panel (torpedo) on a VAZ 2114. Since when there are temperature changes, metal and glass operate in different ranges.
Replacing headlight glass on a VAZ 2109
With headlight removed
Replacing headlight glass on a VAZ 2109
For better quality work, the headlight must be removed. Its mounting is located in the engine compartment:
- Therefore, it is necessary to raise the hood and install a strut.
- The headlight is secured with four screws and nuts.
- Unscrew them with head No. 10.
- Pull the entire body towards you, if necessary, press a little on the front bumper.
- Disconnect the two power supply plugs.
- Remove the adjustment corrector, turn its head to the left, and pull it off the headlight.
It is advisable to carry out further work indoors at a temperature of 18 0 C. You must:
- Place the headlight on the table;
- Unscrew the turn signal housing;
- Remove the wiper travel limiters;
- You can use a knife to remove any remaining glass from the headlight housing;
- Thoroughly clean the glass seating areas from any remaining glue;
- Use a solvent to degrease the contacting surfaces of the headlight and glass.
Methods for restoring a mirror surface
Experienced drivers who want to save money on buying new expensive headlights have long tried many methods in an attempt to restore the reflective properties of the reflector. The real result is achieved by applying the following materials:
- metallized tape used in construction for gluing joints of foil insulation;
- self-adhesive films with a mirror coating like Oracal;
- aluminum foil with epoxy glue;
- special paint for reflectors.
Pasting reflective material
This restoration method allows the reflectors to return their mirror properties for another 1–2 years of operation. The specific period depends on the purchased material, the quality of the work and the power of the car light bulb.
The gluing technology is approximately the same for all of the listed materials - tape, foil and film. It is proposed to consider it using the example of metallized tape:
- Prepare a tool - scissors, a flat-head screwdriver, a stationery knife.
- When cutting strips of tape to the desired length, cover the flatter, larger areas first. Make sure that the material sticks tightly without air bubbles.
- Cut out the curly elements and glue the remaining areas. Avoid the formation of unevenness and folds.
Film and foil are applied in the same way, only the latter is attached to epoxy glue, which takes a long time to dry and set.
This option is well suited for reflectors with heavily damaged coating; restoration work will take approximately 1 hour. What is the disadvantage of this method: such a reflector in the headlight will heat up and begin to release chemical vapors from the adhesive base. Car enthusiasts have noticed that after 2–3 months, the glass of the light fixture loses its transparency due to the above-mentioned secretions.
The second disadvantage is the fragility of the mirror layer. When high-power lamps work, the foil quickly becomes cloudy and loses its reflective properties. Although, compared to the destroyed chrome coating, the headlight shines well.
Reflector painting
Painting headlights from the inside allows you to create a more reliable and durable reflective layer on a damaged reflector
Here it is important to choose high-quality aerosol paint in a can - the so-called white chrome. The application technology looks like this:
- Degrease the plastic part, dry it and apply the first layer of protective varnish (also sold in aerosol cans).
- Dry the element and apply mirror paint with light, gentle movements. Be sure to shake the can well before use.
- After taking a 5-10 minute break to dry, apply a second coat of paint.
- Dry the part completely (you can use an infrared heater).
Chrome plating paint lasts quite a long time, but achieving a perfectly mirror-like surface is very difficult. Therefore, garage craftsmen often practice a more labor-intensive but effective method - restoring the headlight reflector using aluminum powder:
- Black nail polish is applied to the grease-free surface of the reflector. Here the uniformity and quality of application of the composition plays an important role.
- Dry the part for 10 minutes.
- Grabbing aluminum powder (in common parlance - silver powder) with your finger, carefully rub it into the painted surface, especially in the corners.
The color of the surface changes as the aluminum powder is rubbed in. When there are no black spots left, wipe off the excess silver and polish the reflector with a cotton swab. This completes the restoration procedure.
You can also purchase a kit for chemical metallization of surfaces at auto stores and return your headlight to a real new mirror. But the use of such reagents is difficult in a garage; professional equipment is required - a spray gun and a mixing manifold. Application with hand sprayers will not give the expected result.