| Tuning Lada Priora headlights, on the one hand, can be like decorating a car, on the other hand, it can improve the headlights. The most correct way to improve lighting is to install bi-xenon lenses in the Priora. |
Fifth generation lenses (G5) are excellent for VAZ 2170 headlights. The price of such pleasure starts from 3000 rubles.
Adjusting the lights
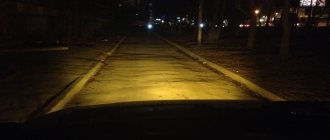
Properly adjusted headlights are the key to safe driving at night. Good road lighting helps you avoid an obstacle, a pothole, or an open hatch in time, notice a pedestrian in a timely manner, and avoid a collision with a vehicle parked incorrectly on the side of the road. Factory adjustment minimizes the harm caused by bright lights to oncoming drivers. After replacing lighting fixtures or body repairs, situations arise when they need to be adjusted. If you have the tools and a suitable place, it is not difficult to do it yourself. For adjustment you will need:
- flat surface (opposite a wall, garage or gate);
- five-meter tape measure;
- a sheet of thick paper that does not allow light to pass through;
- hex wrench.
A diagram is drawn on a vertical surface that acts as a screen. At the level of the center of the headlights, draw a horizontal line. We lay the parallel line 65 mm lower. We apply vertical marks opposite the centers of the right and left lamps, as well as in the middle, at an equal distance from them. We bring the car into equipped condition (there is no excess cargo, the tank is filled). We bring the tire pressure level to the nominal value. Further:
- We place the car 5 meters from the screen, the centers of the headlights are located opposite the corresponding vertical marks.
- We set the electric corrector drive for the lights to “0”, which corresponds to the minimum vehicle load.
- We load the driver's seat with a load of 75 kg and rock the car to install the suspension.
- Open the hood, turn on the low beam, and use paper to block the light from the right light fixture.
- Using the left headlight adjustment screw, using a hex wrench, adjust the horizontal border of the light to the bottom mark.
- We bring the bend of the light border to a vertical mark corresponding to the center of the lantern.
- We set the right headlight in the same way.
This completes the adjustment process.
How to install lenses in headlights with your own hands
Lens lights significantly improve low beam and high beam quality. Installation is possible both in standard headlights and in non-original ones. Having decided to install a lensed device yourself, you should sensibly assess your capabilities. Basic technical skills, dexterity, accuracy and knowledge of the design of car headlights will be required.
Preparatory processes
This part of the work is not difficult. It is important to follow the instructions for the car and perform all operations step by step:
- Prepare tools for work:
- a set of screwdrivers of various diameters, including slotted and Phillips;
- heating device (industrial hair dryer or conventional oven);
- standard pliers;
- protective gloves.
- Remove the headlight from the car.
- Remove accumulated dust and dirt.
- Heat the headlight with a hairdryer to about 300 degrees, which will soften the glue holding the body and glass together. It is necessary to warm up all the adhesive seams by passing a hairdryer several times along the contour. If using an oven, keep the headlight in it for about 5-7 minutes. The headlight itself and its components will not be damaged.
- Using a wide screwdriver, freely and effortlessly separate the case and glass, avoiding damage. Work with gloves.
- Remove the headlight reflector.
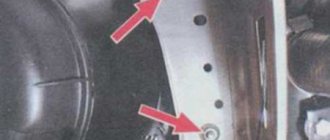
- Installing bi-halogen and bi-xenon lenses in headlights requires dismantling the metal fasteners of the reflector, which will allow you to adjust the range of light in the future.
Useful tips Connection diagrams Principles of operation of devices Main concepts Meters from Energomer Precautions Incandescent lamps Video instructions for the master Testing with a multimeter
Installation of LED DRLs
LEDs for replacing daytime running light bulbs must comply with GOST. They provide excellent light during daylight hours, and if connected correctly, light up when the ignition is turned on.
The connection is made through a five-pin relay; plastic corrugations can be used to insulate the wires. Each LED block will have a black and a red wire coming from it. It is advisable to connect the black one to the windshield wiper fuse F11 (20), and the red one to the left side light fuse F14(5).
The use of LED DRLs instead of factory ones after the first week will change the Priora owner’s view of his own car. Such a small part can cost about 500 rubles for two lights, but its appearance on the road will be noticeable to everyone.
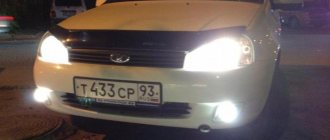
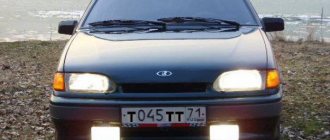
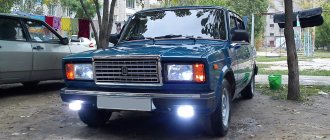
Tuning headlights and xenon on Lada Priora. DRL connection
Before purchasing these headlights, I wanted to install lenses in the reflector. But I accidentally found headlights on a Priora for these tunings, and they also have LED daytime running lights! The price is small: 5600 rubles for both headlights. Together with the headlights, I bought a xenon low beam kit for the Priora.
0:479
1:984
We install xenon lamps in the headlights of the Lada Priora. I had to file the edges of the holes for the light bulbs; due to the buildup of plastic, the light bulbs could not be inserted into the seats.
1:1309
2:1814
3:2319
I made holes for the wires in the protective rubber seals. Xenon is installed in the Priora headlight tuning, we install the headlights on the car.
4:754
5:1259
First you need to remove the bumper and standard headlights.
5:1359
6:1864
Using a flat-head screwdriver, we pull out the chips from the headlights, there is a slot in the chip into which a small flat-head screwdriver fits, insert the screwdriver and pull out the chip. If you just pull or pull, you can break or break the wire.
6:2294
7:504
If you removed the Prior headlights, installing them will not be a problem. We install tuning headlights priors
7:678
8:1183 8:1193
We connect the xenon ignition units to the light bulbs already installed in the headlights. We fix the ignition blocks under the bumper of the Priora. Xenon SHO-ME with a glow temperature of 5000K.
8:1491
9:1996
Both headlights are installed on the Priora, you need to connect daytime running lights (DRLs),
9:2138
10:504
11:1009
12:1514
We connect the DRLs to the Priora with our own hands.
12:1592
At the bottom of the headlight, two wires are routed through an elastic band—we will connect them. For this purpose, wires, a mortise fuse and a button for fog lights were purchased. I decided to connect without a relay, since the LEDs consume quite little, and there will not be much load on the circuit. I paralleled the wires from both headlights with each other, and pulled them into the cabin with a common pole and a minus. There was no desire to pile more wires on the battery terminals - there are already enough of them))
12:2432
13:504
We cut the fuse into the positive wire, and also extend the wires to the button in the center console.
13:698
14:1203
15:1708
16:2213
I screwed the minus wire to the bolt on the steering column, and the positive wire to a permanent plus in the block going to the ignition switch. Well, I collected everything accordingly.
16:278
17:783
I took a few photos of how the DRLs of the Priors look at night, I really like them, I can’t even tell now that it’s a Priora)) Thank you all for your attention and good luck to everyone on the roads!)))
17:1092
18:1597
19:2102
20:504
https://www.drive2.ru/r/lada/526407/logbook/
20:552 next article:
Smooth ignition of lamps in Lada Priora
About 3 years ago I installed a Master Light PC module from MASTERPRIOR. In short. This device included dimensions
21:1359
Rating 0.00 [0 Vote(s)]
23913
Danger
Such careful monitoring of bi-xenon owners is not only due to the fact that its installation for other purposes is dangerous. More and more often on the roads you can see cars with “collective farm” bi-xenon. Some people go to great lengths to install a new toy. They erase the actual headlight markings or use stickers. The lenses are scarring. And there are more and more of them. They drive according to the principle of “don’t care about people they meet.” But they don’t understand that in most cases they spit on themselves.
Where is the guarantee that a blinded driver in the oncoming lane will not turn the steering wheel towards your car? And the prospect of turning your car into a barbecue is also not the most rosy.
Headlight polishing
During travel, standard headlights are exposed to the mechanical influence of sand, gravel, dirty water from surrounding vehicles, the chemical influence of road reagents, and salt. The surface of the lighting fixtures acquires a yellow tint, becomes matte, and the intensity of the luminous flux decreases. At night, visibility and traffic safety deteriorate. Modern headlights are made of polycarbonate and plastic glass - to polish them you do not have to buy expensive diamond paste, comparable in cost to a new light fixture. A budget abrasive will help improve the situation. Required materials and tools:
- masking tape;
- fabric-based sandpaper (800, 1000, 2000, 4000);
- Sander;
- washing car shampoo;
- polish (for windshield);
- rags.
The polishing process is as follows:
- Wash the headlight using car shampoo and degrease if necessary.
- Dry thoroughly and cover the mating surfaces with masking tape to protect them from damage.
- Starting with a coarse abrasive (800), gradually move to a fine one (4000), using a fraction of each size for 2-3 minutes. After each stage, when switching to a finer grain, the surface to be treated is thoroughly washed.
- Before polishing, rinse and dry the surface.
- Using a foam pad and polishing agent, buff to a high shine.
During the grinding and polishing process, it is important not to overheat the surface being treated. To do this, you should not process one area for a long time, the movements of the grinder should be wave-like and progressive, and each fraction of the abrasive should be moistened.
If you don't have a sander, polishing can be done manually, but it will take more time and effort. To reduce the need for polishing, varnish or “armored” film is used to protect headlights from external influences.
Installing lensed headlights
Installing lenses will change the illumination - after the modification, there will be no standard optics left inside the unit. First of all, a reflector will appear that will redirect the light rays forward into the space in front of the car. Instead of standard light bulbs, optics with lenses are installed, which creates a spectacular glow.
This option is considered the most expensive, and the effect will be noticeable. Separately, you can change the color of the substrates if you can’t spend money on optics.
Painting headlights
Tuning the front and rear lights on a Priora is not limited to increasing the aperture ratio. They can be tinted. But this does not mean that you need to paint the glass - the light will simply become cloudy. The tinting effect is obtained due to a change in the color of the substrate. This is done using high temperature paint.
This is done in the following order:
- The entire block is removed and the backing is removed;
- Wipe off the chrome from the substrate (zero polish will help). Cover the substrate with two or three layers of primer and wait about an hour;
- Apply 4-5 layers of paint over the primer, wait for each layer to dry;
- Assemble the block lights, close all the cracks to prevent fogging;
- After painting, all that remains is to adjust them. The main thing is that the light is not too dim and does not cause inconvenience when driving.
Adjustment after any modification of the optics is performed as follows:
- Place the car at a distance of 5 m from a flat wall (for example, opposite the garage);
- Set the adjusting screws under the hood to “0”. Put a person of similar height behind the wheel;
- The headlights are adjusted one by one; while one is being adjusted, the second one is closed;
- The clear edge of the light should be 10 mm below the top edge of the headlight.
Adjustment is not a useless requirement of technical inspection standards. This must be done for comfortable driving at night - you won’t need to peer and look for obstacles on the road, they will be illuminated if adjusted correctly.
How does the lens work?
Actually, many people now have a question: how is the flow of light cut, due to which it is corrected horizontally and not “allowed” vertically?
If you disassemble the structure, it consists of a separate block. This is the headlight, the reflector and the lamp itself, be it xenon, halogen or LEDs. The lens itself focuses the light beam onto the road. Actually this is its main function.
In order to cut the beam of light vertically, special magnetic curtains are used, or there is automatic adjustment of the headlights; they lower to a safe angle in the presence of oncoming traffic.
Xenon Features
However, the installation of any xenon requires compliance with 3 important factors. The absence of one of them will make the installation of special lenses ineffective. So, the car must be equipped with:
- a headlamp with transparent rather than corrugated glass, because irregularities scatter the light beam, and the xenon beam is much more powerful than a regular halogen.
- headlight washer, because its use will prevent light from scattering in different directions;
- automatic headlight leveling, which ensures their coordinated operation.
Thanks to xenon lamps, driving a car will become safer and will allow you to promptly detect an obstacle and take the necessary measures. The radiation spectrum will become continuous, close to the solar one. In addition, adjusting the headlights will be much easier. A nice bonus is that if the car starts to “bounce” on uneven roads, the headlights do not go out or blink.
Purely tuning
What can I say – there is no limit to perfection (and beauty). Therefore, many motorists try to improve the appearance of their car. Headlights with lenses look much better and give the car a noble look.
As I wrote, many people install lenses on their cars, even on the halogen version of lamps. That is, there is no task here to somehow increase the luminous flux - just tuning. Although (in fairness) the lenses allow this light to be focused, making it more clearly directed to the desired areas of the road.
But often lenses are installed, tritely, with “angel eyes”, that is, an aesthetic appearance. THAT'S ALL! But lensed optics are not just “decorations”; there are very specific tasks that they solve.
Installing lenses yourself on a Hyundai Solaris car
Many owners of Hyundai Solaris cars complain about the poor light of standard halogen lamps; installing bi-xenon and lenses can improve the lighting, make it directional and bright. Getting to the headlights on a Solaris is not easy; in order to remove them, you have to dismantle a lot of parts. We remove the optics in the following sequence:
- we jack up the front wheels and remove them on both sides, the car can be left on supports (“traces”), such work is much easier to do on a car lift;
- dismantle both front fender liners, they will interfere with getting to the lower optics mounts;
- disconnect the upper and lower fasteners of the front bumper, move the plastic element to the side;
It is most convenient to use Abro sealant, which is sold in rolls, as glue; before gluing, you must thoroughly clean the body and reflector from dirt and remnants of old sealant.
To exit the wires, you will need to drill a hole and then seal it so that moisture and dirt do not enter the housing.
After assembling the headlights, we install all the parts in place, connect the wiring, and check the operation of the lensed optics. Lensed headlights are installed in approximately the same way on other popular cars, such as Ford Focus 2, Toyota RAV 4, Volkswagen Golf 5, Kia Rio 3, etc.
Expert opinion
It-Technology, Electrical power and electronics specialist
Ask questions to the “Specialist for modernization of energy generation systems”
How to independently install bi-xenon lenses in a headlight. We remove part of the braid from the power wires of the high beam lamp and connect the power wires of the moving curtain activator in parallel to them. Ask, I'm in touch!
What is the threat?
Let's assume that you are the owner of a car whose design requires the installation of xenon optics and you have one installed. This must be confirmed by a technical inspection report and included in the registration certificate. If you do not have such marks, then the first time you will most likely simply be given a fine. With the subsequent mandatory recommendation to register the fact of installation of such optics. Failure to implement and ignore this recommendation will result in more serious measures. Deprivation of rights for up to a year and in some cases even arrest for 15 days. Traffic police officers may equate this behavior with resistance. Don't rely on chance.
Recently, the police have been scrupulously updating their databases. If you live in a small town, there is even less hope. They will simply remember you. Don't expect that xenon on your headlights won't be noticed. The light of such optics is so noticeable that there is practically no chance of “slipping through”. And even if you were lucky for some time, it is worth remembering that any luck is not endless.
How to install angel eyes
Angel eyes on the Priora are LEDs that are installed inside the front unit, along the perimeter of the lenses and in the rear light. To do this you need to purchase:
- Electric wire of moon-white color. Type SH; diameter 2.6 mm;
- Receiver (Operating voltage – 12 Volts).
After everything is ready, you can begin active actions:
- Raise the hood, remove the battery (this will make it easier to work).
- Dismantle the block, remove the substrates.
- First secure the wires in place with tape (lightly) or clothespins - this is done to fix their position. Then fix them with epoxy resin.
- Wait for the resin to dry, secure the substrates and seal all the gaps with sealant so that the glass does not fog up. We carry out the installation.
Cilia
Tuning Priora headlights, for many, ends precisely at the “eyelashes”. These are ordinary covers that follow the shape of the top of the headlight and are painted in body color. They are sold ready-made in auto parts stores, but eyelashes can be made. They can be made from a piece of vinyl film, the shape of which will have to be changed in order to be applied to the headlight - this is done with a soap solution (in the same way as with applying tint). The trims from the store are attached to the body either with sealant or double-sided tape. Remember that eyelashes limit the height of the illuminated space. In addition to them, there are other worthy ideas for tuning the Lada Priora.
Content
Device
. Bi-xenon is a kind of integrated unit of a headlight, reflector and xenon lamp. Moreover, according to the instructions, all this must be installed in the headlight unit of the car. It differs from simple xenon by the presence of magnetic curtains that regulate the flow of light. Some kits do not use curtains. In them, using a toggle switch, you change the angle of the lamp itself. For its correct installation, the car must have a combined seat for high and low beams.
Why is it prohibited?
The installation of such kits is prohibited on vehicles whose design does not provide for this. This is due to the high risk of fire. After all, xenon is a high voltage source. Unfortunately, in our country the word law does not mean so much to young people. And not only for them. This is facilitated by the bi-xenon manufacturers and sellers themselves.
Contact any store. They will helpfully offer you stickers with false markings. These are used to hide the fact that the headlights of this car are designed strictly for halogen. And in online stores they generally tell you in plain text that a set of stickers comes in addition.