The controllability and ease of use of the VAZ 2107 directly depends on the suspension, in which the shock absorber is an important element. Each owner of this car should be able to identify damper faults, independently select and replace it.
- Purpose and design
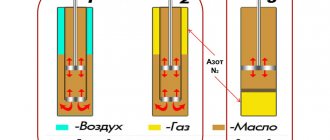
- What are there
Table: dimensions of the rear original dampers of the “seven”
- Oily
- Gas
- Gas-oil with constant hardness
- Gas-oil with variable hardness
- Video: types of shock absorbers and their differences
- Shock absorber malfunctions
Oil leaks
Video: identifying a faulty damper without removing it from the car
- Video: why the rear shock absorbers pull out
- Which ones to choose
Table: analogues of rear shock absorbers of VAZ 2107
- Video: pumping gas-oil shock absorbers
- Double
To change or not: how to check with your own hands
Shock absorber failures are quite easily diagnosed based on a number of signs, and the procedure for identifying the problem, as well as repairs, can be carried out by the car enthusiast himself. A malfunction may be indicated by:
- A specific knock that occurs when driving over uneven surfaces, as well as when loading the car (the car knocks especially clearly in the event of breakdowns of the rear shock absorbers of the VAZ 2107).
- Fluid leaks from the shock absorber on the body and rod, which can be easily detected by visual inspection.
- Body sway when driving in a turn, residual vibrations when the car sways in a parking lot.
- Increased vibrations while moving.
Rock the body with a couple of vigorous pushes and see how much vibration there is on each rack
The combination of these signs indicates that the shock absorber requires replacement. It should be said that it is recommended to change shock absorbers “in pairs” in order to avoid differences in characteristics between a new and worn shock absorber.
More information on how to check the performance of shock absorbers is described in this article.
Chassis of VAZ 2107
The chassis of the VAZ 2107 consists of two suspensions: on the front and rear axles. That is, each axis of the machine has its own set of mechanisms. An independent suspension is mounted on the front axle, and a dependent suspension is mounted on the rear axle, since the car is equipped with rear-wheel drive.
The operation of these components is designed to ensure smooth and soft running of the car. In addition, it is the suspension that is responsible for the integrity of the body while driving on uneven roads. Therefore, the performance of any element is very important - after all, the slightest inaccuracy in the function of any part can lead to serious damage.
Front suspension
The front suspension on the “seven” is completely independent. It includes:
- upper position lever;
- lower position lever;
- stabilizer unit responsible for the stability of the machine;
- small auxiliary parts.
Roughly speaking, it is the lever elements and the stabilizer that are the connecting passage between the wheel and the body shell. Each of the wheels of the front pair is mounted on a hub, which rotates easily and without friction on bearings. To ensure that the hub is held securely, a cap is placed on the outside of the wheel. However, this equipment allows the wheel to rotate only in two directions - forward and backward. Therefore, the front suspension necessarily includes both a ball joint and a steering knuckle, which help the wheel turn to the sides.
The ball joint in the design of the VAZ 2107 is responsible not only for turning, but also for minimizing vibration from the road. It is the ball that takes on all the impacts from the wheel falling into a hole or when hitting a road obstacle.
To prevent ground clearance from decreasing while driving, the suspension is equipped with a shock absorber. To adapt the “Seven” to Russian roads, the shock absorber is additionally equipped with a spring. The spring “winds” around the shock absorber, creating a single whole with it. The mechanism is installed strictly vertically to ensure maximum ground clearance in all driving conditions. This mechanism perfectly withstands all road troubles, while the body does not experience strong vibrations and shocks.
The front part of the chassis also includes a cross member. It is this part that connects all the suspension elements and brings them to work with the steering column.
Rear suspension
All elements of the rear suspension on the VAZ 2107 are mounted to the rear axle of the car. Just like the front axle, it connects a pair of wheels and allows them to rotate and turn.
The wheels of the rear pair are mounted on hubs. However, a significant difference from the front suspension design is the absence of rotary rotating mechanisms (cam and support). The rear wheels of the car are driven and completely repeat the movements of the front wheels.
On the reverse side of each hub, a brake cable is connected to the wheel. It is through the cable that you can block (stop) the rear wheels by simply lifting the handbrake in the cabin towards you.
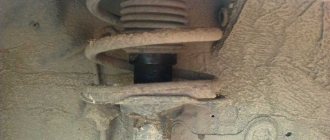
To protect against road impacts, the rear suspension is equipped with shock absorbers and separate springs. In this case, the shock absorbers do not stand straight vertically, as on the front part of the chassis, but are slightly inclined towards the rotation gearbox. However, the springs are strictly vertical.
Immediately under the springs on the inside of the axle there is a fastener for the longitudinal rod. A gearbox is located there, which ensures transmission of rotation from the gearbox to the rear wheels. To ensure that the gearbox maintains its functionality for as long as possible, AvtoVAZ designers assembled the rear suspension together with the driveshaft: while driving, they move synchronously.
↑ Rear suspension parts
1 — lower longitudinal rod; 2 — rubber bushing; 3 — bracket for fastening the lower longitudinal rod to the body; 4 — spacer sleeve; 5 — upper longitudinal rod; 6 - additional compression progress buffer; 7 - spring; 8 — upper spring cup; 9 — suspension compression stroke buffer; 10 — upper insulating gasket of the spring; 11 — shock absorber; 12 — lower insulating gasket of the spring; 13 - transverse rod.
Replacing front shock absorbers on VAZ-2108-099, 2110-2115
As for the VAZ-2108-099 cars, as well as the 2110 family, replacing their front shock absorbers is somewhat more complicated.
This is due to the fact that the shock absorber strut also acts as a steering knuckle.
But it is quite possible to replace shock absorbers yourself, although you will need more tools:
- Special socket wrench 22;
- Powerful flat screwdriver;
- Special key for holding the shock absorber rod;
- Keys for 19 (2 pcs.);
- Key to 27;
- Ball joint remover;
- Special ties for springs;
- Hammer;
- Wooden tip;
- WD-40;
- Marker.
On these cars, work begins in the engine compartment. But before this, the car is placed on the pit, and the side from which it is being made is jacked up and the wheel is removed.
Use a screwdriver to pry off the rubber plug securing the upper support. Then, using a 22mm spanner, unscrew the nut securing the rod, while it is held in place with its own special wrench.
At this point, work at the top stops and moves down.
Before disconnecting the strut from the hub, you first need to remove the tie rods.
To do this, you need to unscrew the tip fastening nut, and then use a puller to press the tip itself out of its seat in the rack.
To disconnect the strut from the hub, you need to unscrew the fastening nuts with 19mm wrenches and pull out the bolts.
But keep in mind that the top bolt is an adjustment bolt, so you need to mark its position before loosening it. During assembly, this will help to at least approximately determine the camber angle.
Often these bolts fit very tightly in the holes, so after unscrewing the nuts, they may need to be knocked out.
This is where a hammer with a wooden handle comes in handy so as not to damage the bolt threads.
Once the bolts are removed, it will be possible to lower the hub down and free the lower end of the strut. In this case, you need to monitor the tension of the brake pipe.
Having freed the bottom of the pillar, work again moves into the engine compartment.
The final step in removing the rack will be to unscrew the three fastening nuts using a 13 key on the upper support.
After this, it will be possible to remove the rack down.
But this is not the end of the work, since the shock absorber itself still needs to be removed from the strut.
This will require the use of spring ties. By placing them opposite each other on the spring, the spring is evenly compressed.
To remove the support and be able to remove the shock absorber, you need to hold the rod with a special wrench and unscrew the nut securing the cushion with a 27 wrench.
Next, the support, rod protective casing and bump stop are removed from the rod.
Then the shock absorber is removed from the strut.
A new one is placed in its place and the rack is assembled in the reverse order.
When installing the rack in place, it is important not to forget to align the marks on the adjusting bolt. After complete assembly, you will need to check the tightness of all connections again.
This element is replaced on the other side in the same way.
After complete assembly, you will need to check again the tightness of all connections. This element is replaced on the other side in the same way.
And then it is imperative to go to the nearest service station to perform a wheel alignment adjustment.
Sequence of action:
- we lift the VAZ 2107 car with a jack from the replacement side (we hang the rear wheel), not forgetting to tighten the hand brake;
- spray WD-40 on the mounting threads and go drink tea. After 15 minutes, the Teflon lubricant penetrates inside, which makes unscrewing easier.
- We begin to unscrew the bottom bolt, holding it on one side and using a ratchet on the other, and then knock the bolt out with a hammer through the plastic plate so as not to damage the thread.
- The bottom edge now dangles freely
- Now we calmly unscrew the upper fastening bolt with a wrench, and, using a pry bar, pry the cylinder to the side and remove it.
Now we move the jack to the second half and repeat the same steps. You can use whatever you want - oil or gas, but be sure to use the same ones in a pair. This is how the rear shock absorbers are replaced.
Front shock absorbers are replaced if the same symptoms occur: knocking and “breakdowns” when the front wheel gets into a hole, or the front suspension gets oily.
The tool you need are keys 6, 13, 17.
Replacing rear shock absorbers on VAZ 2101-VAZ 2107
Welcome! A car shock absorber is a very important thing in every car, because if there were no shock absorbers, the car would simply jump up and down. To prevent this from happening, shock absorbers were invented that allow you to keep the car level on the ground, dampening all the vibrations that cause the car to sway.
Note! To replace the rear suspension shock absorbers, you only need two 19mm wrenches!
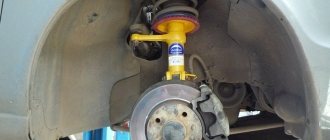
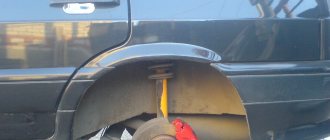
Where are the rear shock absorbers located? They are located next to the wheels and can be very easily seen by looking under the bottom of the car. The upper part of the shock absorber is attached to the bottom of the car, and the lower part is attached to the bracket. So that you can finally figure out where the rear shock absorber is located, look at the photo below, which shows the lower mount of the shock absorber to the bracket.
When do you need to change rear shock absorbers?
- They need to be changed when an oil leak appears on them, due to which they become oily.
- It is also necessary to replace them if they have ceased to perform their main job of “damping vibrations when the car is moving.”
Note!> For more information about when the rear shock absorbers will need to be replaced, read the article entitled: “Checking shock absorbers for performance”!
Modernization of shock absorbers
Not every owner likes the soft suspension of the 7. To make the car more assembled, reduce roll and sway, and increase rigidity, car enthusiasts resort to modifications, replacing original shock absorbers with products with other characteristics. For example, to stiffen the rear suspension without any modifications or alterations, you can install shock absorbers from Niva. Based on the reviews of many owners of the “Seven”, after such changes the car becomes a little stiffer and holds the road better.
Double
To install dual shock absorbers you will need:
- 4 rear shock absorbers;
- set of heads, screwdrivers, keys;
- hammer;
- welding machine.
The essence of the modification comes down to the fact that it is necessary to manufacture and attach to the body a bracket for the second damper.
To install the second shock absorber, you will need to make and secure a bracket
Installation of the latter to the rear axle is carried out together with a standard shock-absorbing element using a long bolt or stud. The procedure is carried out the same way on both sides.
The second shock absorber is secured from below with a long bolt or pin
With such modifications, it is recommended to install new shock absorbers.
Sports
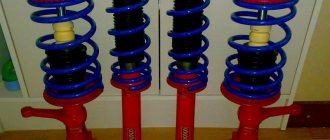
If the car is modified for a sporty driving style, then the changes apply not only to the rear, but also to the front suspension. For such purposes, it is convenient to use a suspension kit, which includes springs and shock absorbers. Depending on the goals pursued, the installation of such elements is possible both without changing the ground clearance and with lowering the suspension, ensuring maximum rigidity in all modes of damper operation. The kit allows you to get excellent car handling. However, you can install sports elements separately - in front or behind, which depends only on your wishes. One of the common options for sports shock absorbers installed by owners of “sevens” and other “classics” is PLAZA SPORT. Installation is carried out in place of standard parts without any modifications.
Among sports shock absorbers, VAZ 2107 owners often install PLAZA SPORT
The seventh model Zhiguli is technically a fairly simple car. However, poor quality road surfaces often lead to failure of suspension shock absorbers. It is not difficult to identify malfunctions of these elements even in a garage, as well as to replace them. To do this, it is enough to prepare the necessary set of tools, read the step-by-step instructions and follow them during the work process.
Muffler tuning
The exhaust system of VAZ cars of the “classic” series (2101–2107) consists of three parts: the exhaust pipe (“pants”), a resonator and a muffler.
Direct-flow muffler: device, advantages, installation
Many owners of “kopecks” do not leave the exhaust system of their cars without improvements, replacing the standard muffler with a direct-flow muffler, or simply adding it to an existing one, achieving the “double exhaust” effect and the characteristic low roar that accompanies it.
What is the difference between a straight-through muffler and a regular muffler? A standard muffler consists of numerous sharply curved baffles and tubes. Passing through them, exhaust gases are forced to change directions, which is why the pressure drops, the sound becomes quieter, and toxicity decreases.
In a direct-flow muffler, the pipes, as the name suggests, are straight, the bends are smoothed, there are no partitions, and there are fewer welds. This allows exhaust gases to move freely.
In a direct-flow muffler, exhaust gases encounter almost no resistance on their way out, which means they do not lose pressure, etc.A ready-made ramjet engine can be purchased at a spare parts store; This pleasure will cost one and a half to three thousand rubles. Most models can be installed without welding. However, some craftsmen make direct-flow mufflers on their own, using old undamaged mufflers and pipes, or limiting themselves to only the latter.
Video: do-it-yourself direct-flow muffler
When a penny needs new pants
The exhaust pipe of the VAZ 2101 was called “pants” for its characteristic design: two long pipes connected at the edges resemble trouser legs.
The exhaust pipe received the name “pants” for its characteristic shape.
It is necessary to replace the intake pipe when a through hole forms in it and it begins to leak air. The fact is that exhaust gases circulate through the pipe, the temperature of which can reach 300–500 degrees, which over time even damages metal.
In addition, the “penny” needs to change its “pants” if the intake pipe is deformed.
The pipe is located under the bottom of the car in the front part.
To replace the exhaust pipe on a VAZ 2101, you need the following tools:
- wrench “13” (preferably an extension with a socket head of the appropriate size);
- universal joint;
- calipers;
- metal ruler.
Important point: replacement should only be done when the engine is cool; otherwise, there is a risk of getting burns - after all, as mentioned above, the pipes in the exhaust system can heat up to several hundred degrees.
To replace the exhaust pipe, you need:
- Disconnect or completely remove the rear muffler.
- Disconnect the resonator from the exhaust pipe and remove it.
- Using a wrench, unscrew the bolt securing the clamp that secures the pipe to the bracket on the box.
- Under the hood, unscrew the four nuts that secure the pipe to the exhaust manifold.
- Carefully remove the exhaust pipe with both hands.
Installation is carried out in reverse order.
Thus, with a little time and money, you can not only improve the technical characteristics of your car, but also give it an individual, unique look. Read more about all the methods of tuning the VAZ 2101 on our website.
Related works
Changing shock absorbers on a VAZ 2107 is accompanied by preventive and diagnostic work related to the suspension. They usually include a visual inspection and replacement of certain parts.
Most often, new springs are installed. In addition, many car owners change spacers along with rear dampers - this allows them to increase the vehicle's ground clearance. This procedure necessarily accompanies the installation of stiffer shock absorbers.
The procedure for installing front and rear shock absorbers on a VAZ 2107 does not require special knowledge and skills. An unprepared car owner can spend a maximum of 2–3 hours on it. After replacement, preventive and repair work is carried out to extend the life of the suspension.
Leading manufacturers
When choosing new nodes, you should think about what exactly you want to get and what it will be like for you in the future. We recommend installing collapsible struts, since their design can be disassembled into parts, thereby simplifying and reducing the cost of suspension repairs. This is one of the key advantages of collapsible units.
KYB (Kayaba)
Look at the front element assembly in the photo to first understand what exactly this component of your car looks like. Choosing a manufacturer is a fairly pressing issue, since each of the options presented today has its own advantages and disadvantages. We invite you to familiarize yourself with them in the table.
| Manufacturer | Advantages | Flaws |
| Standard factory | Financially accessible | Not very reliable, can withstand about 30 thousand km, then require mandatory replacement |
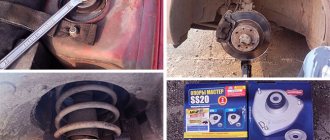
| Racks from Priora | Gives rigidity, provides comfort, holds well on the road | There is no sound insulator, the bump stop suffers greatly |
| SS20 | Improved version of Priora struts | There are essentially no disadvantages |
| Plaza | Available in three versions - comfort, sport and supersport, they are of high quality | Afraid of low temperatures |
| Kayaba | The most popular, high-quality, reliable, not afraid of frost | There are many fakes on the market, which makes it difficult to find the original. |
From this we can conclude that spare parts from Kayaba are the optimal solution that will last a long time, reliably, and will not be afraid of harsh Russian winters, during which many analogues among the A-pillars simply will not be able to function normally, causing problems for you.
Replacing silent blocks of VAZ 2107 levers step by step
To replace silent blocks you will need a set of keys and a special puller. If the silent blocks are located in the upper arm, you will have to completely dismantle it. If they are in the lower arm, there is no need to do this. To remove the upper arm, it is necessary to press the ball joint pin out of the steering knuckle. Then remove the bumper mounting bolt and unscrew the nuts that hold the upper arm axle, and then remove it. Now remove the upper control arm from the car.
Next, using a puller, we remove the worn silent blocks and install new ones. We install the lever in the reverse order. To install the ball joint pin, load the suspension with a jack placed under the lower arm.
To replace the silent blocks of the lower arm, it is not necessary to remove it. It is enough to unscrew the nuts of the lever axle, and then remove the hinges with a puller. Next, install new silent blocks and tighten the nuts. The lower arm is dismantled if it is damaged, but this rarely happens.
↑ Rear suspension diagram
1 - spacer sleeve; 2 — rubber bushing; 3 — lower longitudinal rod; 4 — lower insulating gasket of the spring; 5 — lower spring support cup; 6 — suspension compression stroke buffer; 7 — bolt for fastening the upper longitudinal rod; 8 — bracket for fastening the upper longitudinal rod; 9 — suspension spring; 10 — upper spring cup; 11 — upper insulating gasket of the spring; 12 — spring support cup; 13 — rod of the rear brake pressure regulator drive lever; 14 — rubber bushing of the shock absorber eye; 15 — shock absorber mounting bracket; 16 — additional buffer for suspension compression travel; 17 — upper longitudinal rod; 18 — bracket for fastening the lower longitudinal rod; 19 — bracket for fastening the transverse rod to the body; 20 — rear brake pressure regulator; 21 — shock absorber; 22 — transverse rod; 23 — pressure regulator drive lever; 24 — holder of the lever support sleeve; 25 — lever support sleeve; 26 — washers; 27 - spacer sleeve.
Front pillar repair
You can repair and bleed the front strut yourself, but you need to buy a new oil seal and seal ring, they are sold as a repair kit. You also need to purchase a spindle oil to pump the oil rack. Gas shock absorbers in the struts are not pumped, they are disposable and not dismountable, they are replaced entirely with new ones.
Photo. We knock down the limiter support.
Photo. It is shown how to unscrew the nut of the strut housing with a bit.
I won’t explain all the intricacies of disassembling the front strut, because just be careful and you yourself will understand where everything is, and you can easily change the oil seal and O-ring. But if the strut rod has severe scuffing, then it must be replaced with a new one.
Photo. The insides of the strut, the arrow shows the oil seal and the O-ring, which must be changed when bleeding the oil strut.
I pour oil into the shock absorber of the strut like this, insert the shock absorber into the strut and lower the rod down, fill the oil up to the threads, and without pulling the shock absorber out of the strut, lift the rod, and again add oil, assemble the strut, but do not tighten it, then lower the rod and the excess oil is squeezed out, But I don’t lower the rod all the way, I leave it about twenty millimeters, and I tighten it. After such bleeding, the strut shock absorber works great.
How does a faulty shock absorber manifest itself?
Firstly, the driver cannot help but feel the difficulty in driving the car, because the mission of the am-s is to control the wheel by extinguishing the lion's share of energy, converting it into heat and dissipating
But the importance of the good condition of the shock absorber is rarely given importance or thought about after an accident. Judge for yourself - any unit wears out during operation, so why should the Am-R be an exception? There is no doubt that you need to remember and know how to replace a shock absorber
This is a mandatory event for the car.
Secondly, wear can manifest itself as knocking or even vibration. Let's use logic: the amplifier has worn out, which means the contact of the wheel with the road is no longer so clear, and the braking distance increases. Well, these changes usually result in wear and tear on the tires and even the chassis.
The reason for replacing the shock absorber may be either a leak in the shock absorber or an increase in the free play of the rod. These malfunctions are absolutely unacceptable when operating a vehicle. This is due to the fact that vibrations increase and driving, especially when cornering, can become quite dangerous. Let's consider this process on two different cars - front-wheel drive Samara and rear-wheel drive Zhiguli.
VAZ 2109
It's quite simple. The car is placed on a level surface, first gear is engaged, and wheel chocks are installed under the front wheel. The rear wheel is lifted using a jack and removed.
In the trunk, the side trim is removed to provide access to the rod mount from above. After this, unscrew the three nuts on top and the bolt on the beam itself. Now push the shock absorber up and pull it out along with the spring.
Remove the old shock absorber from the spring and install the new one. Assembling the units is done in reverse order. That's all.
VAZ 2107
In the case of “classics” everything is much simpler. This is due to the fact that in Zhiguli the shock absorber and spring are separate, and therefore their separate installation and dismantling is faster and easier. The car does not need to be jacked up - just lie under the car and unscrew all the shock absorber fastenings (on the rear axle and body). The old shock absorber is removed, and the new one is mounted on the same mounts. That's all.
This completes the replacement of the rear shock absorber. As you can see, everything is simple and clear. Good luck on the roads!
Front steps:
We hang the wheel in front in the same way, then open the hood. There is access to the rod of the front shock absorbers of the VAZ 2107.
- Unscrew the nut using a 17 wrench and holding it with a 6 wrench.
- Then, from below, under the car, we turn out the bracket using a 13-mm open-end wrench and turn it out, and then remove it together with the shock absorber:
- Now we repeat all the steps on the other side, remove the second shock absorber, and then in the reverse order, just install new ones. For some car owners, on the contrary, it is easier to change one side first, so as not to jack the VAZ 2107 four times.
Replacement should ideally be carried out immediately at the front and rear to ensure maximum smoothness, but some “stingy” enthusiasts argue that such a replacement is more expensive.
Related works
Changing shock absorbers on a VAZ 2107 is accompanied by preventive and diagnostic work related to the suspension. They usually include a visual inspection and replacement of certain parts.
Most often, new springs are installed. In addition, many car owners change spacers along with rear dampers - this allows them to increase the vehicle's ground clearance. This procedure necessarily accompanies the installation of stiffer shock absorbers.
The procedure for installing front and rear shock absorbers on a VAZ 2107 does not require special knowledge and skills. An unprepared car owner can spend a maximum of 2–3 hours on it. After replacement, preventive and repair work is carried out to extend the life of the suspension.
Features of repair of shock absorber mounts
The designers of VAZ cars of the classic family did not provide for the possibility of serious loads when designing the design of the upper mounts for the rear dampers. Therefore, many car enthusiasts encounter problems when installing rear struts on the upper mounts.
The upper mounts are metal studs secured to the body cross member at the rear of the car. Over time, metal fatigue appears at the fastening points due to the constant loads from the operation of the dampers, so the metal studs often crack and break off, or the fastenings themselves fail.
To solve problems with the upper fastenings, owners of classic Lada cars often resort to replacing the studs with new ones. To do this, holes are cut out at the locations of the fasteners using a grinder and the old studs are removed.
After that, new steel pins and washers are installed in the mounting holes, and the fastening points are securely welded with a welding machine.
You can safely install new shock absorbers on new mounts and not worry about the reliability of the mounts.
Source
