Fuel pump VAZ 2109 injector does not turn on
Hello everyone, dear car enthusiasts and owners of nines.
Today we will look at the main reasons why the fuel pump on a VAZ 2109 car does not work. Throughout the history of the car’s production, two types of fuel pumps have been installed: electric and mechanical. Everything depended on the type of engine, the injectors were electric and, accordingly, the carburetor nines were equipped with mechanical ones.
Let's start right away with the mechanical fuel pump. The most likely cause of the malfunction may be wear of the diaphragm. When the fuel pump diaphragm wears out, a gasoline leak appears in the housing. And the second reason is pusher failure.
On VAZ 2109 injection engines, you can very easily determine that the fuel pump is not working, just turn the ignition key and if you don’t hear the characteristic sound of the pump that its electric motor makes, then something is wrong with it.
The first step in this case is to check the condition of the fuel pump fuse. This fuse is located just below the glove compartment. In the block of three fuses and relays, you need to check the rightmost fuse, which is responsible for the fuel pump. If the fuse is faulty, it must be replaced with a new one, observing the amperage. And try to find the reason why it burned. You also need to check the fuse contacts for oxidation and, if necessary, clean them.
If the fuse is intact and the contacts are in order, you need to check the VAZ 2109 fuel pump relay. It is located in the same block as the fuse; checking it is very simple, you just need to replace it with a working one. If after replacing the relay the fuel pump starts working, then the problem is in the relay, you need to buy a new one and install it.
If, after replacing the relay, the fuel pump on the nine continues to not work, then you will have to check the fuel pump itself. If the pump starts working during testing, you will have to check the wires that go from it to the relay for breaks.
If, even when connected directly, the fuel pump refuses to work and there is no open circuit in the wires, then the best solution would be to replace it with a new one.
Well, that’s all, we looked at the main reasons why the fuel pump on a VAZ 2109 car does not work.
Guys, save me. The VAZ 2109i just won’t start. It feels like there is no current flowing to the brain. The fuel pump does not turn on, the relays do not work, the fuses are intact, the wires that go to the pump are intact, + there are wires on the brain. Today I measured the voltage on this thing (see photo). When the ignition is off, 6 volts, when on, 3. I decided to check the ground and then I realized that I didn’t understand anything. Any contact squeaks to ground (even those that gave out 6-3 volts) Is this how it should be? If not, what happened and where to dig?
Comments 59
the problem was in the ECU. I changed it to January and everything is ok
Guys. And I have such garbage. I turn on the ignition, the pump pumps up and everything is as it should be. I start it up. The engine runs for a couple of minutes and the pump relay starts clicking. Well, and accordingly, the pump also works in time with the clicking of the relay. The engine seems to be throttling. What kind of garbage can anyone knows
Have you tried changing the relay? Measure the voltage on the relay during such garbage. Will the voltage fluctuate or is it constant 12 volts?
So yes. And if it jumps, then where to dig next?
Then I don’t know then) look at the contacts then. But he shouldn't jump. It's either there or it's not there
Damn, I removed the terminal while it was back to normal. Now I don’t know where to look
People! Tell me about these relays! I had a similar situation the other day, I couldn’t start the car, I checked it with a light bulb, there was voltage coming from the fuse, but the relay didn’t turn on, I replaced the relay, it didn’t help! I look at the cross wires on the relay (as I understand it from the brain) and there is no voltage on them when I turn on the ignition, it turned out that this is only a consequence! There are three relays and three circuit breakers, one for the fan, the other for the fuel pump, and the third for powering the brain? It was the third fuse that blew, I replaced it, installed the same one, it started and it immediately blew! I set it to 10A because 15 had run out, and I really wanted to get home, so it started up and drove another 15 km, and only when I arrived at the gate did it burn out again! What could be shorting there and how to solve it? Until this moment, I replaced the radiator with the stove, the heat is terribly hot, maybe it caused the wires to melt? Only then would it constantly burn out, as I assume, please help! Anyone who has had this problem, please respond!
How to remove the fuel pump
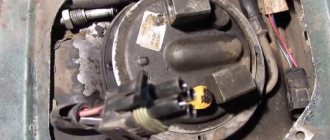
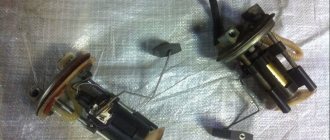
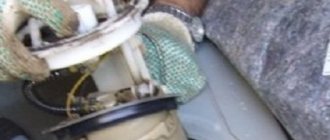
The VAZ 2109 fuel pump is located under the rear seat. The injector implies its installation directly in the tank. The thing is that the pump is a submersible type. In the same unit there is a float-type fuel level sensor. It works due to the fact that the float moves the slider using variable resistance. At the same time, the current in the power circuit changes. The amount of gasoline remaining in the tank is determined by the magnitude of the change. To remove the pump you will need to use pliers, screwdrivers and an 8mm wrench.
It is quite possible that the reason that fuel is not supplied is a non-working VAZ 2109 fuel pump relay. The injector contains it, as well as a fuse, which could easily burn out. Before starting work, thoroughly clean the entire cover so that after removal no dust gets inside the tank. Then, using a screwdriver, loosen the clamps that secure the hoses. Remove them; if you can’t do it with your hands, try gently squeezing them with pliers and twisting them. After this, use a size 8 wrench to unscrew all the nuts that secure the lid to the tank body. Please note that there are washers there. Don't lose them. That's all, now the pump can be easily removed for replacement or repair.
The fuel pump does not pump: causes and diagnostics
Let's start with the fact that if the gas tank is full, the battery is charged, the spark plugs are dry and there is a spark, the starter turns the engine normally, but the engine does not seize, then you should pay attention to the gas pump. A common problem is that there is no power to the fuel pump after the ignition is turned on. In a similar way, the malfunction manifests itself in motion, when the power to the fuel pump is lost and the engine suddenly stalls.
An equally important point is how much the fuel pump pumps. In other words, the pump may hum and buzz (power is being supplied), but not create the required pressure in the fuel line. The pressure in the fuel system with a working fuel pump must be more than 3 bar (which depends on the specific car model). The indicated pressure is accumulated in the fuel rail and has an indicator of 300 kPa and above.
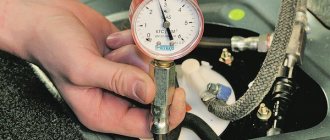
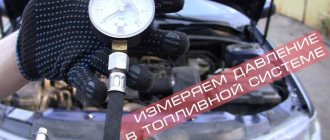
To check, you need to measure the pressure in the fuel rail with a pressure gauge, taking into account the indicators that are the norm for a specific car model. Using the example of injection VAZs, the pressure when the ignition is turned on is 3 atmospheres, at idle the figure is 2.5 atmospheres, when you press the gas 2.5-3 atmospheres. This method will help you accurately determine:
In the second case, when you press the gas, the pressure does not increase; in the latter case, the pressure gauge needle rises, but very slowly or jerkily.
A decrease in pressure below the norm will lead to the fact that the engine may not start or start with difficulty, stall, jerk, operate unstably and with failures. If this happens due to the fault of the pump and not the fuel filter, then there is a high probability that the coarse filter screen of the fuel pump is clogged. In this case, there is no need to change the fuel pump itself, since it will be enough to replace or even clean the mesh.
If you suspect that there is no voltage to the fuel pump, there is a quick way to check. It is enough to turn the ignition key and listen, as when you turn the key you should hear a slight hum from the fuel pump. If such a buzzing noise is not heard, it means there is no power to the fuel pump, there are problems with the wiring, etc.
Also in the general list of possible reasons why the fuel pump does not pump, the following are noted:
Wiring to the fuel pump
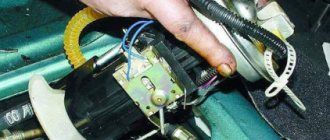
On most cars, the wiring to the fuel pump consists of three wires: “plus”, “minus”, and also a wire for indicating the amount of fuel in the gas tank. If the fuel pump does not pump, then the cause may be a lack of power.
To check the power to the fuel pump, just take a 12-volt light bulb and supply it with power from the external connector of the fuel pump. After turning the ignition, the control lamp should light up. If this does not happen, then the problem is in the external circuits. If the lamp comes on, it will indicate the need to check the internal contacts of the fuel pump.
To check the external wiring, you should alternately connect the positive and negative contacts, which are removed from the fuel pump power connector, to the ground of the pump. The contacts must also be connected to the fuel pump relay. If you place the negative contact on ground, after which the ignition is turned on and the light comes on, then this means that this contact is faulty. If the light bulb does not light up, then problems with the “plus” are obvious. If you place a contact on the relay and the light comes on, there is probably damage to the wire on the section that connects the relay and the fuel pump itself.
Fuel pump electric motor
If checking the pressure in the fuel rail and the external wiring to the fuel pump gives positive results, then you should check the fuel pump motor. This electric motor is responsible for circulating gasoline inside the fuel pump.
When checking, you need to take into account that the terminals on the fuel pump themselves tend to oxidize, as a result of which power is not supplied and the pump does not pump. In this case, the motor is working, but the terminals need to be cleaned or re-soldered.
Fuel pump ground contact
Problems with the fuel pump mass may be indicated by a fuel level sensor that is not working correctly. The mass may be poorly secured; in this case, the fuel pump does not pump fuel. The ground wire is usually located under the dashboard and runs through the cabin. It is necessary to find the specified wire, check and clean all contacts, then securely fasten the ground to the fuel pump.
Fuel pump relay
The fuel pump relay is often mounted next to the fuel pump ground, that is, under the dashboard. A normally operating relay after turning on the ignition for a couple of seconds allows the pump to create pressure in the system and immediately turns off.
Work in the salon
Repairing the fuel pump on carburetor VAZ 2108, VAZ 2109, VAZ 21099
This is the most difficult stage of DIY work, because:
- The instrument panel is difficult to install;
- Requires partial disassembly and removal of devices;
- Requires replacement of some terminals.
The VAZ 21099 wiring to the instrument panel injector is connected to the new one after re-soldering the connectors.
Precautions
When working with electrical equipment, the following precautions should be observed:
- Familiarize yourself with the requirements contained in the standard instructions;
- Disconnect the battery;
- Work with terminals and contacts using rubber gloves to avoid unnecessary contamination.
Replacing the pad
The complexity of the upcoming work lies in the fact that on older models the instrument panel wiring harness connectors are made with 9 contacts. And in order not to change it, you can use the old one.
And for this you will need:
- wiring diagram for VAZ 21099 injector for clarity;
- old block, cut from the removed wiring;
- availability of free time and desire.
9-pin header to be replaced
Diagram of devices connected to the block
Step-by-step instructions for replacing the pad are as follows:
- the wire transmitting readings from the speed sensor must be connected to pin 9 of the block (indicated as SP in the diagram);
- The Check Engine signal is sent to pin 8 of the block (BP);
- The fuel consumption sensor transmits information to the trip computer (MC);
- the diagnostic block is connected to the GB and interacts with the BC;
- the electronic tachometer receives information from the ECU and is output to pin 2 of the block (on the gearbox diagram);
- The RF connector provides 12V power and also powers the starter relay. The operation of the Check Engine is also tied to it;
- the starter is started through the ignition switch, and the inverter connector activates an additional relay when the key is turned to the “Starter” position;
- The 12 V ignition switch power is redistributed to the instrument panel via the GPU connector. Also supplies power to the ECU and the fuel pump to start the engine;
- Connector P is responsible for information about the level of gasoline in the car tank.
The process of connecting the block on the gas tank
Other causes of fuel pump malfunctions
Quite often, unprofessional installation of additional electrical equipment or security anti-theft systems leads to the fact that the power to the fuel pump is lost due to mixed up contacts or other connection errors.
Finally, let’s add that the gas pump in the gas tank is immersed in gasoline, in which it is actively cooled. The habit of driving with an empty tank can quickly damage the electric motor of the fuel pump, as it burns out.
What functions does the fuel pump relay perform, signs of breakdown. Where is the fuel pump relay installed, how to properly check the fuel pump relay.
Why does the starter turn normally, but the engine does not catch and does not start? Main causes of malfunction, checking fuel supply and ignition systems. Adviсe.
Diagnose faults that may indicate problems with the fuel pump. Self-check of the device, measuring the pressure in the fuel rail.
The causes of whistling and increased noise during operation of the fuel pump are overheating of the pump. How to diagnose and fix the problem yourself. Tips and tricks.
How to change a fuel pump. Location of the fuel pump, releasing pressure in the system, unscrewing the fuel lines, removing the pump, reassembling.
What to do if the car accelerates worse, does not pick up speed, or has failures during acceleration. Why the engine does not pull, how to find the reason for the decrease in power.
Source
Pump installation
Pay attention to the condition of the wires when replacing the VAZ 2109 fuel pump. The injector involves powering the engine from the on-board network, so there should be no breaks or destruction of the insulation. Installation of the fuel pump is carried out in the reverse order of removal. First, place the body in the tank, landing on the studs. Then you need to tighten all the nuts, then put the hoses in place and connect the plug with the wires.
Source of the article: https://fb.ru/article/192429/benzonasos-vaz-injektor-kak-rabotaet-zamena-i-proverka
What fuel pumps were installed on VAZ 2108/2109 cars
Most VAZ 2108/2109 cars were equipped with gasoline engines with carburetor injection of a combustible mixture into the combustion chambers. Only their latest modifications were equipped with fuel injection systems.
Table: serial engines of VAZ 2108/2109 cars
| Engine modification | Volume, cm 3 | Number of valves, pcs | Injection type | Years of manufacture |
| VAZ 2108 | ||||
| 2108 | 1289 | 8 | Carburetor | 1984–1997 |
| 21083 | 1499 | 8 | 1986–2005 | |
| 21081 | 1099 | 8 | 1987–1997 | |
| 2111–80 | 1499 | 8 | Injection | 1994–2005 |
| VAZ 2109 | ||||
| 2108 | 1289 | 8 | Carburetor | 1987–1997 |
| 21081 | 1099 | 8 | 1988–1997 | |
| 21083 | 1499 | 8 | 1988–2004 | |
| 2111–80 | 1499 | 8 | Injection | 1994–2004 |
| 11183–20 | 1596 | 8 | 1994–2004 | |
Absolutely all carburetor “eights” and “nines” were equipped with DAAZ mechanical fuel pumps produced by the Dimitrovgrad Automotive Accessory Plant. They were and are now produced under catalog number 2108–1106010.
Mechanical fuel pump DAAZ 2108–1106010
VAZ 2108/2109 injection engines were equipped with electric submersible gasoline pumps produced by Russian enterprises Pekar, Utes, SAAZ, as well as pumps of joint and foreign production. Fuel pumps were installed on the latest modifications. The catalog number of the submersible electric fuel pump VAZ 2108/2109 is 2112–1139009.
Electric pump "Bosch" 2112–1139009
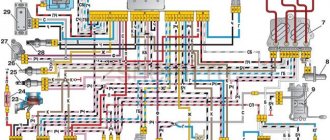
Connection diagram for electric fuel pump VAZ 21083, 21093, 21099 (injector)
On VAZ 21083, 21093, 21099 cars with a 2111 injection engine, an electric fuel pump is installed. It is located in the fuel module installed in the fuel tank.
For VAZ 21083, 21093, 21099 vehicles with ECM control unit (controller) January 5.1 (2111-1411020-61). Euro-2 toxicity standards (one oxygen sensor).
After turning on the ignition, the control unit supplies 12V to the fuel pump relay. The relay supplies voltage to the fuel pump. It turns on and builds up pressure in the engine fuel system. If there is no signal from the DPKV (the crankshaft does not rotate), the ECU turns off the relay and the pump. If the crankshaft rotates, the relay and the fuel pump work. All this work is accompanied by relay clicks and the buzzing of the electric fuel pump in the gas tank.
Notes and additions
— A similar connection diagram for the electric fuel pump (fuel pump) of VAZ 21083, 21093, 21099 cars with an injection engine 2111 and an ECM control unit M1.5.4N. The only difference is the color of the wires.
More articles on injection engines of VAZ 21083, 21093, 21099 cars
Connection diagram for electric fuel pump VAZ 21083, 21093, 21099 (injector): 1 comment
During the operation of any car, the need arises to replace parts and assemblies. If you intend to install a new injector on a VAZ 21099, then in recent years the automaker has been producing a unit with an M73 21114-1411020-12 Itelma controller, for which you will also have to replace the wiring.
Features of the design and location of fuel pumps VAZ 2108/2109
The DAAZ gasoline pump has a simple mechanical design. It includes:
Design of the DAAZ fuel pump
The VAZ 2108/2108 mechanical fuel pump is located in the engine compartment of the car and is installed on the auxiliary drive housing (in front of the ignition distributor). It is driven by the camshaft through a cam mechanism and a rod (pushrod). The camshaft rotates an eccentric, which transmits force through a pusher to a balancer at the bottom of the pump housing. The latter raises and lowers the rod with the diaphragms. Thus, a vacuum is formed at the pump inlet, and pressure is formed at the outlet. Valves located in the device body are responsible for its maintenance.
The VAZ 2108/2109 mechanical fuel pump is located on the auxiliary drive housing
On injection VAZ 2108/2109, the fuel pump is not a separate device, but an element of the fuel module. It also includes:
Fuel module assembly
The module is located in the car tank. Its lid (base) is located at the top of the container. You will find it by removing the back seat and peeling back the carpet.
The electric fuel pump in the injection VAZ 2108/2109 is located in the car tank
Structurally, the fuel injection pump VAZ 2108/2109 is an electric motor with an impeller on the shaft, which, rotating, pumps gasoline, creating a vacuum at the inlet fitting and pressure at the outlet. The pump is powered from the machine’s on-board network, protected by separate relays and a fuse.
Design of the electric fuel pump VAZ 2108/2109
An article dedicated to self-repair and replacement of the gas tank on a VAZ 2109 is located here: https://vazweb.ru/desyatka/pitanie/zamena-benzobaka-vaz-2114.html
Malfunctions of the pump with carburetor
Repairing the VAZ 2109 carburetor fuel pump should also begin with diagnostics. But in this regard, there is a significant difference from the injection version of the car. It lies in the fact that the fuel pump, in this case, is mechanical. The principle of operation, and therefore the repair, is different. Diagnosis involves the following basic steps when checked:
- general condition of the fuel pump;
- intake and exhaust valves;
- tightness;
- filter for clogging or damage;
- pump diaphragm;
- pusher
VAZ mechanical fuel pumps come in two types: DAAZ and Pekar. The principle of operation is similar, there are slight differences in design. The main parts of all mechanical pumps are: inlet and outlet valves, fittings, pusher, diaphragm and rod.
To check the inlet valve, you need to disconnect the hose from the suction fitting. Close the fitting with your finger and pump up the pump manually. If the finger is attracted to the valve, everything is in order - this part is serviceable; if not, the valve must be replaced. The outlet valve is checked by unscrewing the discharge fitting. By placing your finger in the same way and pumping up the lever, you should feel pressure.
It happens that the filter mesh is clogged. You need to take out the filter, clean it, wash it and blow it with compressed air. In case of obvious deformation or damage, the fuel pump mesh is replaced. If the fuel pump leaks or gets hot, the sealing diaphragms are most likely damaged. To replace them, remove the pump cover and unscrew the nut that holds the rod. Next we remove the diaphragms. In the case of the DAAZ pump there are 3 of them, while Pekar has one.
How to check a mechanical fuel pump VAZ 2108/2109
Checking a mechanical fuel pump involves determining its performance, i.e. measuring the amount of fuel pumped per unit of time. And according to the characteristics of the device, it should be at least one liter per minute. To determine it, you will need an assistant, as well as the following tools and tools:
We lower the hose from the outlet fitting into an empty bottle
If the amount of gasoline pumped in one minute is less than a liter, the pump is faulty
Further diagnostics should be aimed at identifying the faulty pump element. To carry it out you need:
You should feel a vacuum at the inlet fitting, and air pressure at the outlet
The mesh filter must be clean and free from mechanical damage.
If the diaphragms are damaged or deformed, they must be replaced
The length of the pusher should be 82.5 mm
Mechanical fuel pump repair
The functionality of a mechanical fuel pump can be restored by replacing its faulty elements. You can buy them at any automobile store. But it is better to buy not individual spare parts, but a repair kit. It includes all the elements that can fail:
Replacing valves
How to change apertures
To replace the diaphragms, you need to unscrew the nut by 10 in the upper part of the rod. Next, we remove the damaged elements, and in their place we install parts from the repair kit.
The kit includes three diaphragms: two working and one safety. The latter serves to prevent unauthorized fuel from entering the carburetor if the first two are damaged. It is installed at the very bottom of the rod immediately after the lower “plate”. We place spacers on top of it on the rod: first a small one, then a large one. We place the working membranes and the upper “plate” on them. We secure the resulting structure with a nut.
The mechanical fuel pump has 3 diaphragms
Replacing the pusher, thermal spacer and gaskets
The thermal spacer does not need to be replaced unless it is damaged. Inspect its mating surfaces, especially the outer one, to which the lower part of the pump housing is attached. It should be perfectly smooth. Otherwise, oil leakage may occur at the junction of parts during engine operation.
Replacing the pusher is carried out by removing the old one and installing a new rod in its place. There is no difference in which end where it will be installed.
Now about the gaskets. There are only three of them in the repair kit, and they have different thicknesses:
The first is intended for installation between the thermal spacer and the auxiliary drive housing, and the gaskets “B” and “C” are used to adjust the protrusion of the pusher above its mating surface.
The adjustment is made as follows:
Installation of gaskets and thermal spacer
The thinnest gasket is installed between the spacer and the accessory drive housing
The pusher should protrude 0.8–1.3 mm above the mating plane of the spacer
After the adjustment is completed, the fuel pump is installed in place and secured with nuts.
Replacing a mechanical fuel pump VAZ 2108/2109
Replacing a mechanical pump assembly will take no more than half an hour. To implement it you will need:
Removing a faulty pump
Securely secure the pump with nuts
Pump gasoline into the pump by pressing the manual pump lever
Checking the performance of the fuel pump on injection VAZ 2108/2109
If in Sputniks and Samaras with carburetor engines, fuel pump malfunctions are associated only with its design, then in injection vehicles they can also be caused by problems with the power supply of the device.
Diagnostics of the electric circuit of the fuel pump
To check whether voltage is supplied to the fuel pump, turn on the ignition without starting the engine and listen. When you turn the key, you should first hear the click of the relay, and then the characteristic “squeal” that the electric motor of the fuel pump emits. If these sounds are absent, the search for the problem should begin with the pump circuit protection devices.
The fuel pump relay and fuse are located in an additional mounting block, which is located under the glove compartment. The pump relay (R2) is installed in the middle, and its fuse (F2) is located to the left of it.
The fuel pump relay and fuse are located in an additional mounting block under the glove compartment.
We check them in this order:
Checking the fuel pressure in the system
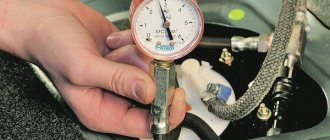
If the diagnostics show that the pump is working, but the above signs of its malfunction are observed, you need to check the fuel pressure in the system. For this you will need:
We check the pressure in the following order:
The fitting is located at the end of the ramp on the right side
Unscrew the spool with a nipple cap
We connect one end of the hose to the pressure gauge, the other to the fitting on the ramp
The pressure when the ignition is on should be 2.8–3.2 atmospheres
