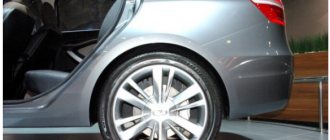
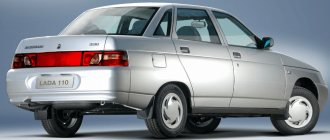
The products of the domestic automobile industry are reliable cars that can cope with our roads and at the same time maintain their suspension. But VAZ cars also have disadvantages, one of which is factory assembly, which does not imply the installation of alternative parts. This also applies to the 2114 model, which as standard is equipped with drum brakes on both wheel sets. This material describes in detail how to install disc brakes instead of drum brakes on your own.
IMPORTANT: changes and replacements in the brake system of VAZ cars are prohibited, the article is written for informational purposes only.
Interesting: AvtoVAZ also switched to disc brakes. The first model to receive this modernization was the Lada Kalina. Subsequent VAZ cars also received disc brakes on the rear wheels.
pros
Let's look at why disc brakes are better than drum brakes:
- Braking becomes more reliable, braking distance is reduced;
- Braking forces are distributed more evenly, given that the VAZ 2114 is a front-wheel drive car;
- There is an effect of faster response after pressing the pedal;
- Unsprung masses are reduced;
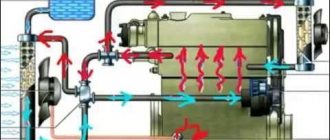
- Heat dissipation occurs better, which is especially important when driving on a mountain road or during active acceleration/braking. For this reason, the brake system is cooled better;
- Disk ones are much easier to dismantle and replace;
- There is no need to adjust the handbrake after each repair of the rear brakes, although this will have to be done the first time;
- They do not freeze in winter after washing, like drum ones;
- Rear disc brakes installed on the VAZ 2114 are much more convenient to control and promptly notice pad wear.
Basic information
Since the release of the first car at the car plant in Tolyatti, and this was the Zhiguli-2101 model, popularly nicknamed the “penny”, almost to this day the brake system diagram of all cars has remained unchanged. Discs were placed in front, and drums in the back. This is logical, since the main load during braking falls on the front ones.
Of course, this scheme is much more effective than the GAZ-24, which has drums in a circle. Because it’s no secret that disc brake pads grip much better, and the distance to stop is correspondingly much shorter.
Minuses
Replacing brakes with disc brakes was not without the famous “fly in the ointment,” although it rather concerns precisely those problems that their installation can cause.
Firstly, our law enforcement agencies consider their installation on a VAZ 2114 as a design change.
What might this entail?
- Fine when passing a technical inspection;
- You can be simply wrong in a controversial accident if traffic police officers emphasize that you have “wrong” brakes;
- And the insurance company may also consider this a reason for non-payment of insurance.
Secondly, the handbrake will additionally need to be modified - or replaced with a hydraulic handbrake, although the latter weakens over time.
Thirdly, it is necessary to refine or carefully adjust the sorcerer so that on the VAZ 2114 the rear wheels do not brake more than the front ones, as this will certainly cause a skid, especially on ice or wet asphalt. To do this, sometimes you even have to grind down the pads by a quarter, or even more.
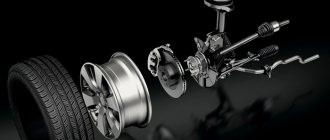
Design Features
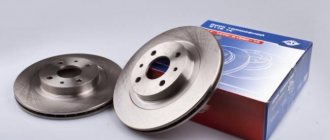
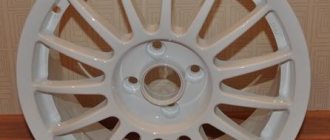
It is better to purchase rear disc brakes as a complete set. The VAZ 2114 fits 13 or 14 inch brake discs (ventilated or non-ventilated). Try to purchase certified discs so that they do not have to be modified.
Rear disc brake kit with necessary components
You also need a caliper, which comes in three types, so you need to select it to match the disc. The caliper comes with a hose and brake pads. The kit includes a universal clamp suitable for all calipers - a faceplate.
Necessary tool
Replacing a brake disc with your own hands does not require specialized technical knowledge; it is enough to prepare the necessary tools to carry out the work according to the list:
- Jack;
- Balloon wrench;
- Key for 12 and 17;
- Hammer and wooden block;
- Liquid WD-40 or its equivalent.
Useful : Step-by-step instructions for replacing rear pads on a VAZ 2114
The replacement procedure takes from 3 to 5 hours, depending on your repair experience.
Dismantling
Before installing disc brakes, you need to dismantle the old rear brake mechanisms of the VAZ 2114.
This is done like this:
- Remove the wheel;
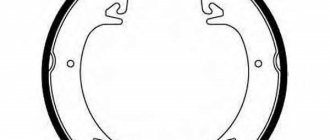
- Remove the brake drum;
- Remove the pads;
- Remove the hub from the wheel, having first unscrewed the brake pipe.
You should prepare for the fact that dismantling will not be easy. Not only do the brakes have the unpleasant tendency to stick during operation, but the bolts are also “welded” by corrosion. Therefore, it is advisable to treat the nuts and bolts themselves with a special agent (for example WD 40) so as not to tear off their edges.
It is important to plug the removed pipe with something so that brake fluid does not leak out and air is not sucked into the system. After that, knock down the hub. This works best if you attach a board or lath to the back of the support disk and hit it with a hammer, moving the blows: one from below, the other from above. This will prevent you from causing serious damage to the disk.
Rear disc brakes on a VAZ 2114 - how to install disc brakes on a VAZ 2114
Plastic grapes, deflated footballs on the back shelf of classic Lada cars, reflectors, Rubik's cubes from small to original sizes, dangling in front of the car owner's eyes, obscuring the already meager view through the windshield - little has changed since those times; they have been replaced by blue light bulbs, stylish stickers, not always straight-through, but roaring cans of mufflers and, in some cases, several aluminum boards in the form of a spoiler.
This is scientific and technological progress of what is visible, but what about what is not visible? The owner of this eight “went headlong” into tuning the “invisible parts”. In fairness, it must be noted that he is not the first and far from the last in his experiments. Some go even further. There is such a layer of car enthusiasts and adherents of tuning who, getting into the very “wilds” of it, simply cross the line that somehow separates their cars from the cars used in motorsport. Tuning projects are usually divided into several stages, namely: fine-tuning the engine, gearbox, suspension, body and, most importantly, fine-tuning the brake system. According to motorsport experts, tuning should always begin with modifying the brakes - the car must be taught to stop!
I will try to write about them and in more detail about installing RBD (rear disc brakes) in this article. It is clear that powerful foreign cars are equipped with disc brakes on all axles as standard, which allows them to confidently brake from high speeds. The braking system of domestic cars is equipped with rear drum brakes and is not very effective, especially during dynamic driving. Many drivers are familiar with a brake pedal that has lost its information content due to overheating of the entire braking system, for example, on a long descent. Agree, this is a rather unpleasant situation. In this case, I decided to radically correct this shortcoming and teach my car to stop no worse than foreign cars.
The front non-ventilated brake mechanisms with discs with a diameter of 240 mm were replaced with large-diameter ventilated “pancakes” from the new VAZ 2110 16V family with a diameter of 264 mm, which in itself gave a significant increase in the braking efficiency laid down by the manufacturer. The relatives were left out of work and were dumped in the corner of the garage. This happened about a year ago and all this time I was “tormented” by the thought of TRT. And so, on one sunny, warm Saturday in September, it was decided to make a “beginning” of this. They decided to start a more serious modernization of the braking system with the installation of rear disc brakes. The “body” of the eight was loaded with old brake mechanisms from the front axle and additional special parts. At a small service station, having installed the figure eight on the jacks, the first nut was unscrewed. If you have the necessary tools and skill, the entire job takes no more than 4 hours. The installation procedures are quite simple.
Installation kit
*Features of using such a kit
- brake calipers - use standard front calipers from VAZ 2108;
- brake hoses – use front brake hoses, because standard metal tubes do not reach;
- brake pads - I used Lucas pads, 1 set;
- bolts and grommets - I recommend using M10x1.25 bolts, 30mm long - 12 pcs. with growers;
- spacer washers – timing belt tensioner roller washers of the new VAZ 2108 model, 8 pcs.;
- caliper mounting plates (faceplates) – 2 pcs., a completely non-standard part that requires precise manufacturing using a coordinate machine;
- Brake discs – I used standard front brake discs with a diameter of 240mm. They must first be machined to fit the hub diameter of 60mm (standard 58mm). For some reason, you can grind the hub rather than the brake disc.
*To disassemble the standard drum brake system, you can use the “basin” repair instructions
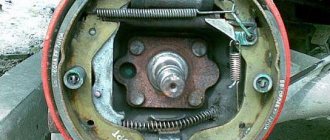
Step 1 (photo with a broken brake drum)
Remove the wheel rim. Loosen the tension of the handbrake cables and bring the rear pads together, use a 12mm wrench to unscrew the two guide pins. Using a hammer, very carefully knock down the brake drum, after first cleaning the seat on the hub with a metal brush and spraying with WD-40. This should be done gradually and around the entire circumference. It may not always come out of place easily, so we advise you to hit it either with a rubber hammer or through a wooden spacer, constantly turning the brake drum.
Step 2 (photo of bare brake drum backing plate)
Using a screwdriver, pry up the lower spring that tightens the brake pads and remove it, then with the same spring we remove the small guide springs that press the pads to the boot (brake cylinder shield), having removed the springs, we take the brake pad by the lower part and lift it to the top, resting with the upper part into the brake cylinder, and pull out the spacer bar, remove the brake pad from the brake cylinder and remove the upper tension spring of the brake pads, remove the handbrake lever from the handbrake cable and remove the second brake pad.
Step 3 (photo of unscrewing the hub using an open-end wrench)
Now you need to unscrew the bolts securing the hub to the beam. You need to prepare: a special split wrench; if you don’t have one, use a 17mm open-end wrench with a crank to increase the “shoulder”. After spraying the bolts with “Vedeshka”, we carefully tear them off. There is no need to rush here, because... The effort is quite large, and the danger of licking off the edges is even greater. In our case, everything turned out quite easily.
Step 4 (photo of unscrewing the brake tube and photo of the cap on the tube)
Before you start knocking down the hub, you need to unscrew the brake pipe. To do this, we use a special split wrench (see photo). I found one for brake pipes. Having torn it off, unscrew it completely, bend it slightly to the side and seal it with a cap previously removed from the brake cylinder bleeder fitting. Everything is ready for the next step.
Step 5 (photo of the beam with the hub removed)
Point of no return. The hub is held only in the seat of the beam and no one removed it from the factory, so you need to hit it hard and accurately. Impacts must be directed at the support disk from the inside, bottom and top alternately. Don't be afraid to damage the support disk, because... it will no longer be needed - the part is to be thrown away. The force of the impacts can be reduced when you see that the hub has separated from the beam. By lightly tapping we knock down the hub completely. This is what a beam without a hub looks like.
Step 6 (photo of the faceplate, photo of the drawing of the faceplate, photo of the hub connected to the faceplate)
Let's start installing the HCD. You need to decide initially how you want the caliper to be installed, in front or behind the axle. This will not affect the performance of the brakes in any way. I installed the faceplates so that the caliper "found its place" behind the axle. It’s more symmetrical, and “relatively” - the weight of the brake mechanisms helps with braking. We join the faceplate and hub into one piece. All technological holes must match perfectly. Small displacements can be corrected by light tapping. You need to center it very carefully.
Step 7 (photo of the flattened corner of the beam)
Before installing the hub combined with the faceplate on the beam, it is imperative to “straighten” the corners of the beam, into which the calipers would otherwise rest. I flattened them using a hammer. Which of the corners needs to be corrected depends on which side of the HTA installation on the axle the car owner initially chose. This step can be replaced by working with an angle grinder.
Step 8 (photo of the installed hub on the beam)
Among the “pitfalls” of this assembly step, it should be noted that there is no need to place a grommet under the upper left hub mounting bolt, otherwise the head of the same bolt will have to be sawed through with a grinder, due to the fact that the brake caliper bracket will rest against it. The decision is yours - grinder or no grower. I chose the second one.
Step 9 (photo of installed HTDs)
We put the brake disc on the hub. We mount the bracket on the faceplate. We place spacers between them at the connection points. They will remove and fix the required gaps for the caliper, bracket and brake disc. It happens that the size of the spacer washers may differ. Then they need to be selected specifically for the car. The connection between the bracket and the faceplate must be tightened with a force of 3-4 N.M. We lay the pads, screw the hose to the caliper, and then close the line by sealing the tube with the hose. Don't do the opposite! We seal the brake line. By pumping up the pressure pedal in the system, we check the brake line for leaks; if no leaks are found, you can proceed with installing the brake valve kit on the other side
Step 10 Bleeding the brake system. In a standard “eight”, the brake system circuits run diagonally, so I did the bleeding diagonally.
So - done! Having finally checked the tightness of the connections and bled the brake system, I try to “slow down”. The impressions are quite pleasant - the pedal has turned out to be much more informative; when you press it, you feel how the rear brakes instantly react under fluid pressure, which was not the case before - the pads diligently “bite” into the brake disc. The back of the “eight” directly squats under their effort. The quality of braking has become an order of magnitude higher! But, to a little disappointment, it became clear that, most likely, the warnings of experienced specialists would be confirmed, that such a braking system does not work quite correctly and, moreover, could play a cruel joke on an inexperienced driver, suddenly causing the rear axle to skid. The reason for this is incorrect distribution of braking forces. I drive in a more rigid “pedal to the floor” mode. I jerk up to a hundred, I brake hard, “the eight shifts to the right due to the fact that the rear wheels locked before the front ones, moreover, they did not lock at the same time! It’s good that I prudently carried out my “tests” in a deserted place on a closed section of the unfinished Ring Road without car traffic. I pump the brake system again, moving the fluid through the circuits. I try to “grab” it again, the result is the same - instant blocking of the rear wheels, but the good thing is that the trajectory of movement is not disturbed. She remains consistently straightforward. Driving like this is of course “very fun”, but I repeat, it is not safe, especially on a slippery surface with the drive wheels not in a straight line.
Conclusion
This result did not bother me; moreover, I was ready for it, simply naively continuing to believe in a “miracle” until the very last moment. The secret becomes clear, and the inaccessible becomes accessible. The potential of a braking system equipped with disc brakes on all axles of the vehicle is enormous and obvious. Therefore, we decided not to stop at half measures, but to carry out the second stage of modernization, especially since YOU may have a reasonable question: “what about the handbrake?” What to do without a handbrake?” Indeed, in this version there is no handbrake. Looking ahead, I will say that the problem of improper distribution of braking forces is solved by installing a brake regulator, and we have already solved it, and also installed a hydraulic handbrake.
Sources
- tuningtaza.ru/Installation-of-rear-disc-brake-on-VAZ-2114.html
- remontvazov.com/ustanovka-zadnix-diskovyx-tormozov-svoimi-rukami
- luxvaz.ru/vaz-2114/274-zadnie-diskovye-tormoza.html
- drive2.ru/c/1049738/
- drive2.ru/l/536771132393523153/
Installation
It's time to install disc brakes instead of the removed rear drum brakes.
Having knocked off the hub, we will put it back, but in a different way:
- It should be installed through the plate into which the caliper is already mounted.
- Carefully ensure that all holes line up. Particular attention to alignment;
- Next, use a hammer to straighten the corner of the beam so that the caliper does not rest against it;
- Now you can put the brake disc on the hub, placing spacers between these parts, and secure the disc with a bracket;
- We install brake pads from VAZ 2114;
- First, carefully and securely attach the brake hose to the caliper, and then to the tube;
- To reduce the braking force of the rear brakes compared to the front, you need to partially grind off the friction material of the pads.
Replacement process
- First, we install the car on the site where we will carry out repairs. We set the parking brake and put supports under the rear wheels for safety.
- Use a wheel wrench to remove the nuts on the wheel, then jack up the car and remove the part.
- Now we need to unscrew the steering wheel in the opposite direction from the repair one so that we can more easily get to the caliper mounting bolts.
- Use a screwdriver to separate the pads, pressing the brake cylinder inward.
- On the back of the hub there are two 17mm bolts that hold the mechanism together with the bracket; unscrew it completely.
- Disconnect the brake hose fastener from the rack and remove the element. Do not leave the caliper hanging from the brake hose; carefully place it on something or hang it on a wire.
- Next we need to unscrew the two pins that hold the brake disc itself. This is done with a key of 12.
- Now you can remove it. If it cannot be removed by hand, you can use a hammer to knock it evenly from the back.
- After removal, you need to clean the area where the brake disc meets the hub.
- When the element is prepared, you can install a new part and assemble everything in the reverse order.
Before driving onto the road, it is worth checking the effectiveness of the braking system. To do this, you need to ride at low speed around the site and brake several times.
Examination
Having carried out all the above operations - first on one wheel, and then on the second, you also need to check the system for leaks. The first phase is to simply press the pedal.
The fact that everything is done normally is indicated by the fact that the pedal is pressed with force, quite tightly.
But this is not enough. Have someone else press the brake pedal while you try to rotate the parts that make up your new rear disc brakes.
If nothing moves, it means that your VAZ 2114 now has new rear disc brake systems - better and more reliable than the previous ones.
How to determine rear wheel brake pad wear
To be able to visually determine the wear of the pads on the rear wheel, the wheels must be removed. In this case, you must act as follows:
- Having placed the car on a flat, solid area, install a jack under the bottom in the area of the rear wheel at a distance of approximately 300 mm from the front edge of the wheel arch;
- loosen the wheel rim mounting bolts;
- jack up the car to the required height and completely unscrew the mounting bolts;
- remove the rear wheel;
- To remove the drum, you need to unscrew the two guide pins using an open-end wrench or a 12-point socket;
- as a rule, the drum is removed with great difficulty; to facilitate the process, it has special holes with M8 threads, the removed pins are inserted into this thread and as it is tightened, it is pressed out
drum;
- measure the thickness of the friction layer, it should be at least 1.5 mm, while the pads should not have traces of oil, mechanical chips and they should be properly secured.
If it is necessary to replace the rear brake pads, they must be replaced on both wheels on both sides, as well as on the front disc brakes.
Brake pads
Every driver must remember that attention to the car’s braking system and timely diagnosis of brakes is a concern not only for his own safety, but also for the safety of his family, as well as other people on or near the road.
Bleeding and adjustment
After any manipulations with the brake system (it doesn’t matter whether you repaired the rear, front or parking), on the VAZ 2114 it is vitally important to bleed the brakes so that an air plug does not form anywhere in them, which can negate the ability to brake at the right moment.
It is convenient to do this together, but you can do it yourself, although this requires some additional equipment. Many people know how to bleed the brakes on a VAZ 2114. The main thing is not to forget to do this diagonally, always starting with the front wheels, and pump the right one first.
After bleeding, you still need to check the braking forces. This requires an outside observer. You accelerate and brake sharply, and he watches as the brakes apply. The front ones should work first, then (with a small gap) the rear ones, and the braking force should be greater for the front ones.
Which brake disc to choose?
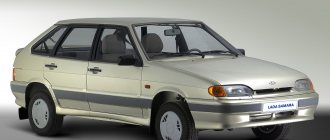
The first cars of the Samara family were equipped with an 8-valve engine. At that time, effective braking was not required and the brake disc options were size R13, ventilated and non-ventilated. Since 2000, they began to install a 16 valve engine and the size of the mechanism was also increased to R14, and they were installed only of the ventilated type.
When purchasing, you definitely need to pay attention to the brand of brake disc, the quality of its performance and reviews from car owners. The price for non-ventilated products will be about 700 rubles per piece, for ventilated ones about 1000 rubles. If we consider the size R14, then the prices for the models are on average 1,500 rubles.
After reading reviews from car owners, we can identify several brands that are most often recommended for purchase:
- Lada –750 rubles;
- Lada SPORT – 1150 rubles;
- Valeo – 1250 rubles.
It is recommended to immediately replace the front pads along with the brake discs, since the old ones most likely have wear left from the previous discs.