- Difficulty of choice
- Manufacturers and equipment
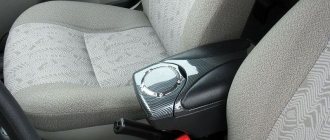
- Installation
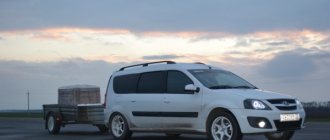
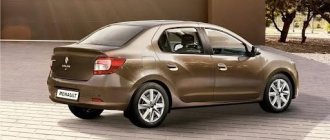
Hi all! Agree that towing coupling devices are often found on domestic cars. I can’t say for sure what causes this. But I can tell you a little about the tow bar for Kalina Universal or just VAZ 1117.
This car, even despite this type of body, cannot boast of large luggage space. What can we say about a sedan or hatchback, where the size of the luggage compartment is even smaller.
To compensate for this lack of space, you can install a tow bar. Its installation and connection are not difficult. If you choose wisely and study all the instructions in detail, you can easily do the installation yourself.
First, you have to buy a suitable trailer hitch. I will give you some recommendations on this matter. And I’ll tell you about the installation separately, which will allow you to at least have an idea of how all this work is done and what may be required of you.
Difficulty of choice
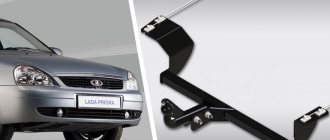
If you look at the assortment, it may seem that buying a trailer hitch for Kalina will not be difficult. But we have already considered this issue using the example of choosing and installing towbars on Lada Largus, as well as on Lada Vesta cars and on the no less popular, but requiring expansion of the luggage space Lada Priora.
The main problem is not that the price is high. No, most of the good towbars suitable for Kalina are quite inexpensive. Therefore, for regular Kalina and Kalina Cross you won’t have to spend a lot of money. The problem is the assortment, which is simply huge. And you have to choose among them. I advise you to start with the type of construction, of which there are 3.
- Welded. The drawings are quite simple, but very reliable due to the welding connection. At the same time, it will not be possible to dismantle such a trailer hitch without special tools and equipment. It is not removable, which may cause problems when operating a car without a trailer;
- Removable. The advantage is the possibility of dismantling. The connection is quite reliable if the permissible loads are not exceeded. Easy to use and affordable;
- Flanged. Installation is extremely simple; you can eliminate the installation step of trimming the bumper. Although the designs are the most expensive, taking them in the current realities is the most profitable.
Pay attention to what generation your station wagon is. The thing is that the first generation trailer hitch is not suitable for the 2nd generation Kalina. And vice versa. But a tow bar designed for the Lada Granta is perfect for a station wagon.
I do not recommend buying used options, since it is unknown in what conditions the towbars were used and how intact their design has been preserved. Such savings are completely unjustified.
Manufacturers and equipment
As for manufacturers, several brands can be distinguished.
- Baltex. A domestic company whose main plant is located in St. Petersburg. But you can purchase products in Voronezh, Samara, Moscow and throughout Russia. Reasonable prices and decent quality. That says it all;
- AutoS. The plant is from Kolomna, which has been operating since 1991 and creates excellent towing devices. They don’t ask for a lot of money, but they are willing to provide good quality and complete installation kit;
- Trailer . One of the most famous companies in Russia, which manufactures and sells trailer hitches. Prices are level, quality is not satisfactory. Hence the increased demand;
- Leader Plus. Another popular brand with a wide range of trailer hitches for domestic cars and not only. It’s easy to find an adapted version for Kalina station wagon. The price will pleasantly surprise you.
There are a number of foreign brands that are more expensive, but in fact do not justify themselves in relation to domestic cars. Whether you want to overpay or not, decide for yourself.
In order for the installation to proceed without any problems, you need to carefully check the complete set of the trailer hitch before starting work.
Moreover, from personal experience, I advise you to do this before transferring money to the seller. Otherwise, it will be problematic to buy or look for something later.
A standard and correct set should consist of:
- the towbar frame itself;
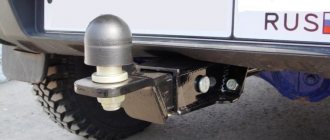
- removable ball, if you buy a removable trailer hitch;
- fastenings;
- wires;
- protective decorative cap;
- sockets;
- technical passport;
- installation diagrams;
- installation instructions;
- plugs (not everywhere).
Having such a set, you can safely get to work. If you are not confident in your own abilities, it is better to use the services of specialists. Here everyone decides for himself.
There will be nothing complicated in installation if you select a trailer hitch specifically for your Kalina station wagon model. Some towbars require trimming the bumper and drilling holes. If you encounter this, then definitely choose a device that is not intended for your car. Viburnum comes in different varieties.
Types of products
Today, some drivers manage to transport heavy luggage in domestic compact VAZ models, but note that the trunks of such cars are not entirely suitable for transporting cargo of this nature. Also, the folded backrest of the rear seat row does not “save” the situation much. For transporting very large items, using a trailer is an excellent solution. The tow bar serves this purpose. Considering that the luggage compartment volume in the Lada Kalina is a modest 235 liters, then choosing a coupling device will be a very effective solution.
Today the market is able to offer its buyer three tow bar options:
- a removable product, the main advantage of which is mobility, because it can be either installed or dismantled at the slightest need;
- a welded device that is not at all easy to dismantle, because this will require the use of special equipment;
- flange design, which involves the simplest installation procedure, allowing you to avoid cutting the bumper.
Installation
The complexity of this stage directly depends on how everything went with the issues of choosing a suitable towing device. Therefore, get ready for hard work, but it is possible that installation will take you a minimum of time and effort.
Installation is performed sequentially. There is no need to rush here, otherwise the consequences of your mistakes will force you to redo everything all over again. An incorrectly installed tow bar poses an increased risk during its operation. Especially in combination with a loaded trailer.
Therefore, installation is carried out approximately like this:
- You have made your choice. If you have a Kalina station wagon, then it has holes for fastenings already from the factory. You don't have to drill anything;
- Depending on the trailer hitch, it may be necessary to remove the bumper. This is not that difficult since you need to unscrew a few fasteners;
- Trimming is carried out only when using homemade towbars, or when purchasing low-quality factory products. I hope you were able to avoid this problem by choosing the design wisely;
- It is better to treat all fasteners with anti-corrosion compounds so as not to provoke the spread of rust;
- The metal structure is mounted according to the factory holes on the fastenings that came with the package. Refer to the installation diagram provided by the manufacturer;
- When the structure is secured, the electrical component can be installed. For the Kalina station wagon there is a 7-pin socket and a wiring harness. The socket is mounted using the bracket and fasteners included in the package;
- Take a diagram from the manufacturer, which clearly outlines the steps for connecting the electrical wires. I can’t give specific advice here, since the TSUs are different;
- The connection is made through standard connectors provided by the manufacturer. But extra insulation never hurts.
Installation of the device and connection of electrical equipment
Before we look in detail at all the nuances of installing a towbar on Kalina, it must be said that, unlike other domestic cars, for example, Niva, the Lada hatchback and station wagon are not provided with a “native” towbar. This means that you will have to deal with external devices. If you are not confident in your abilities or do not have the necessary experience and skills, then it is better to entrust the installation of the towbar to specialists in a car service center. If you are determined to carry out the procedure yourself, then the main rule is to strictly follow the instructions that are given in the technical data sheet of each product:
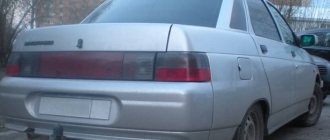
Towbar Lada Kalina 1118 sedan 2005- / Lada Kalina 1117 station wagon 2007-2013
- Before you start installing the towbar (Kalina hatchback and station wagon, by the way, have standard places for its installation), you need to decide for what purpose you will use it and how often, i.e. decide on the type of trailer hitch.
- The next step is to drill (if necessary) holes for installing fasteners. In some cases, you will have to remove the bumper from Kalina station wagon and hatchback. Another problem is that installation of the product may require cutting the bumper (this is in the case of homemade or low-quality factory production). To carry out this operation you will need a diagram and template.
- When the holes are ready, it is necessary to treat the fasteners with an anti-corrosion compound and install them according to the instructions in the technical data sheet.
- Now you can start installing electrical equipment, which in the case of the Lada Kalina hatchback and station wagon is represented by a socket with seven contacts and wires. Installation of the socket involves the use of a bracket on which the product will be fixed. Bolts and screws are required for installation.
- The next step is connecting the outlet. The operation is carried out through wires in the rear wiring harness of the car. The wires are multi-colored, each of them is designed to connect to a specific lamp. Detailed information can be found in the technical data sheet of the machine.
- The wires are connected through standard connectors that were provided by the manufacturer. Sometimes it is necessary to insulate each element of the wiring (if the insulation is broken). During installation, additional elements may be required to avoid soldering and twisting.
Tow bar kit for VAZ 1119 Lada Kalina hatchback 2004-…
It is important to know! You should not believe auto parts manufacturers who claim that there is a standard part suitable for any Kalina hatchback, sedan or station wagon. You can try your luck, but most likely the car connectors will be incompatible with the product
It all depends on the body type. Therefore, it is better to order a manufactured trailer hitch for the specific brand of your car.
Towbar for Lada Kalina hatchback
The towing device that is used to attach a trailer to a vehicle is called a towbar. Each car model, due to its individual design and structure, requires a specific towbar model in order for the towbar to hold tightly and reliably. Therefore, towbars are manufactured separately for each model of the model range.
A prototype of the Lada Kalina hatchback was demonstrated to the public in 1999. However, the assembly of such cars began only in 2006. Since 2008, the Sport modification also began to exist. The second generation of five-door hatchbacks was launched in 2013. In the new version, the car has become more powerful.
Preparatory stage (selection of PTF for Lada Granta)
In order to install the PTF in the Lada Granta, special installation locations will be required. Fortunately, the standard bumper already has such standard places from the factory. Their dimensions are completely similar and identical to the PTF from Kalina and have two different types.
The first is sold under the Bosch brand in Ryazan and has a flat glass headlight block, and headlights with convex glass are produced under production in Kirzhach. These two types of headlights have the same mounts, so choose for yourself which headlights to buy for yourself.
On the left side there is a PTF from “Bosch” (LUCH), on the right side there is “Kirzhach”.
Choosing a tow hitch for Lada Kalina
The main part of the towbar, in addition to the fastenings, to which the trailer clings is the towbar ball. Towbar balls can be of different classifications, depending on the dimensions of the car and the expected load on it. Lada Kalina uses class A towballs, which means that the maximum load on it can be up to 1,500 kg and 100 kg in horizontal and vertical dimensions.
We recommend choosing towbar devices from Bosal-Autoflex, since they meet all safety requirements, are made of high-quality materials, and also represent a very favorable combination of price and quality. Use only new towbars, as it is virtually impossible to determine the loads applied to used structures.
How to choose a tow bar?
This process implies an individual approach, since there are many product designs and they vary depending on the body version and generation of the Lada Kalina. So, for example, a towbar for the first generation of a sedan may not fit a station wagon in the second generation. Note that for the Lada Kalina station wagon in the same generation, the coupling device designed for the related Grant model is quite suitable.
If we take into account this aspect, then otherwise the choice cannot cause difficulties for the future owner of the product.
Prices for towbars for Lada Kalina 1, 2 hatchback
| Manufacturer/country (for body type) | vendor code | Maximum horizontal load (kg) | Maximum vertical load (kg) | Do you need to remove the bumper? | Need to cut the bumper? | Electrics | Matching block | Price |
| Bosal-Autoflex/Russia (hatchback 2012-2015) | 1219 A | 1 100 | 50 | Yes | No | Wires and socket included | Not needed | 3,650 rubles |
| Bosal-Autoflex/Russia (hatchback 2006-2015) | 1219 A | 900 | 75 | Yes | No | Wires and socket included | Not needed | 3,650 rubles |
What else will you need?
Prepare a soldering kit and heat-shrinkable tubes - this is for connecting the electrics. You can also use special clips.
If the car's lighting equipment is controlled by a microprocessor (mainly for cars older than 2010), the trailer will have to be connected through a matching unit. Without it, the computer mistakenly considers an increase in the resistance of the on-board network to be a sign of a lamp burnout and blocks the power supply.
Before starting installation work, prepare a multimeter.
Do-it-yourself towbar installation on Lada Kalina
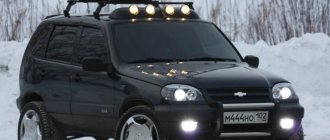
Installed towbar on Lada Kalina 2 Cross
- Before installation, remove the top cover of the luggage compartment,
- remove the rubber plugs,
- place the trailer hitch so that the holes coincide,
- secure,
- drill holes to the desired width,
- tightly secure the trailer hitch on the reverse side,
- tighten all nuts.
More detailed instructions describing the exact values and tools are included with the towbar.
The picture shows a towbar for Lada Kalina from Bosal-Autoflex.
Product contents for the universal version
Today, the device we are considering belongs to the category of collapsible structures. You can purchase it in a specialized retail chain. This option has undeniable advantages over its competitors. Among the positive aspects we note:
- - simplicity of the installation procedure;
- — ease during transportation;
- — compactness in storage.
The delivery set includes the following list of components:
- technical manual;
- protective cap;
- fasteners;
- 7-pin socket for switching lighting devices.
Important! The design of towbars varies slightly, which affects the pricing policy. Also, the complete set may have a varied composition. When choosing the best option, pay attention to these points.
Tow bar for viburnum hatchback
I recently bought a towbar from the Leader Plus brand, price 1960 rubles with a removable ball (as written in the description), or rather with a removable rod with a ball)))
Previously, I have already installed towbars from this company on a Kalina sedan and a VAZ 2110, the installation was always quite simple and quick, but not this time.
This short Lada Kalina hatchback (by the way, both the first and second ones have the same towbar mounting device) has very little space for manipulating with your fingers, or rather, for screwing on the first 2 bolts with which the towbar is initially attached.
The bolts included in the kit are very long, I had to cut them randomly because they didn’t fit (they rest against the spare tire tray). The rest of the holes have to be drilled myself. When I read this in the instructions, my heart pounded.
I thought that, like the Kalina sedan and station wagon, there were all the necessary welded nuts for installation, but here I was miraculously mistaken
Well, I had to take a drill and drill, well, a drill of a suitable diameter and length, yes, about 15 cm long - two holes are drilled through the entire rear pie of the body and come out right under the plastic trim of the rear frame of the body, it was in the garage
Electrical connection
The towbar socket is secured using a special bracket. The bracket itself is secured using self-tapping screws and bolts. Lada Kalina wiring includes a standard kit. This kit includes harnesses to connect the outlet. The wires have different colors. Thanks to this, the lights are connected without errors. The equipment is sold together with an electrical diagram indicating how to connect the wires.
For both versions of the Lada Kalina there are the same number of contacts and wires. There is a standard place and connectors for the wires. If the insulation of the wires has been damaged, you must insulate them yourself.
The holes for the wires have plugs. Modern cars are equipped with sensors that monitor the operating condition of the tow bar. You can buy sensors separately if the standard machine design does not have them.
What exactly do you need to buy for a station wagon?
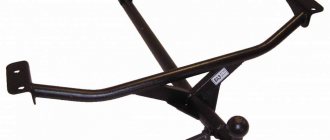
Let's turn to the official documentation, more precisely, to the catalog of assembly units. In this document, one of the drawings shows the body frame:
Rear floor frame, station wagon
All parts, in addition to the 12th, make up the floor frame. A towbar must be attached to parts “14” and “3”, as well as to channel “13”. These parts are provided with holes (their total number is 6).
The distance from part “13” to the first side hole in our case is 145 mm, to the second – 245 mm. For the “first Lada Kalina” these distances were different. Towbars suitable for the VAZ-1118 are not necessarily suitable for the Kalina-2. However, there are also universal solutions. A drawing of one of them is presented below.
A universal tow bar will have 4 or 5 holes on the sides:
Scheme of a universal towbar (for Granta, Kalina-1 and 2)
If the kit comes with threaded strips, then know that they will not be needed. The standard holes in the body are threaded from the factory. In conclusion, here is a photo illustrating all of the above:
Hole layout, new family station wagon
When making your choice, do not make mistakes! You can take a ruler with you and measure the distance from the plane of the “ears” (see diagram above) to the first side hole. It should be exactly 145 mm.
Selecting a device for Kalina station wagon
Not all devices that are intended for the first generation station wagon are suitable for a station wagon with a towing mechanism. The selection is not difficult, but you need to take into account that there are three modifications of Kalina. Installing a tow bar on the Kalina hatchback is necessary. For the VAZ 1119 hatchback, you can use a device that is suitable for a second-generation station wagon.
Devices that are suitable for the Lada Granta are also suitable for the second model. It is clear that without installing a tow bar on the Kalina station wagon, it will not be possible to use a trailer. The trunk volume of the car is 235 liters. Even if you fold down the seats, you won’t be able to transport, for example, a refrigerator. Therefore, the use of a trailer becomes necessary, especially if a large family uses a car to travel to the country.
What is included in the towbar kit for Kalina station wagon? Today, the devices that are offered in car dealerships are of the collapsible type. This option has the advantage that it is convenient to transport, store, and install. The kit includes:
- a socket that has seven contacts;
- wires for installation;
- fastening materials;
- cap for protection;
- technical certificate.
It is not difficult to purchase the presented product today. The fact is that this car model is very popular. The designs of the towbar for the Kalina hatchback differ in type and method of attachment. Prices may vary from store to store. On average, this ranges from 1,700 to 2,000 rubles.
Towbar for station wagons and its installation
Let's look at the installation procedure, following the standard instructions. Please note that all towbar mounting screws are metric and have a standard size of M10. You'll need a spanner, but that's not all. Considering the weight of the product, it is better to carry out installation by two people: one mechanic holds the towbar, the second tightens the screws.
We remove the mastic from the holes in the side members.
First of all, before installation you need to find the standard threaded holes. Using a Phillips screwdriver, they are cleaned of anticorrosion.
The towbar assembly itself is placed under the body so as not to damage the muffler mount. Then, hand screw in the six bolts that should be included in the kit. Don't forget to install the washers supplied by the manufacturer.
Getting to the bolt heads will be difficult. Use a socket wrench to tighten all the screws last.
It is important to know that you cannot use power tools when performing installation. The hand rotating the handle of the spanner develops quite sufficient force.
Depending on the qualifications of the installer, the entire installation operation takes 10-20 minutes. Additionally, you may need to connect an outlet that will power the trailer's electronics. Here it is better to contact an official dealer. You cannot connect the wiring yourself - this may void the warranty. We wish you success.
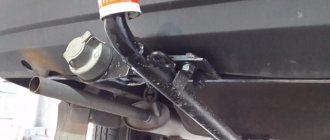
The result of all efforts may look like this:
Installed tow bar, Lada Kalina Cross car
What is shown here is not a station wagon, but a crossover, but the body of these cars differs little from the station wagon.
Registration required
The possibility of installing a tow bar on the Lada Kalina is provided by the manufacturer. Therefore, there is no need to register it if it is a certified product. But the car enthusiast must have the following documents with him:
- technical certificate of the trailer hitch with an installation mark;
- copies of certificates of product compliance with Russian standards;
- invoice or receipt for installation of the device.
Installing a towbar without a certificate or that is not suitable for a given car model (it was necessary to drill holes in the side member) is interpreted as making changes to the design of the vehicle. In accordance with the requirements of the Technical Regulations of the Customs Union, the vehicle will have to be registered with the State Traffic Safety Inspectorate. The procedure involves testing the product for strength in an accredited laboratory, which will require financial costs from the owner.
Purchase and installation of towbars on a hatchback
Here is a drawing of a coupling device designed for hatchbacks:
These towbars fit all berry hatchbacks
Here the fastening differs from that discussed above. For example, nothing is screwed to the side members. The towbar is attached to the rear channel, and three screws go through the holes in the niche. It, that is, the niche, is intended for a spare wheel, and the holes in it are closed with plugs.
The holes on triangle 2 will be closed with rubber plugs
There are a large number of towbars on the market, the installation of which requires that the “spare wheel” niche has to be drilled out. As a rule, three holes will have to be made in the niche, and two more on the underside of the channel. It may be better to buy a device that fits the standard body holes. We will let the owner make the choice.
So, we will be guided by the manufacturer's instructions. Installation is easier to perform by driving the car into a pit:
- The rubber plugs from the holes in the niche must be removed;
- The towbar is positioned along the central axis, aligning the holes in the “ears” with the holes on the rear channel;
- Then, the device is fixed with M10 bolts, not forgetting to install the washers. The bolts are screwed into the threads of the rear channel;
- Having installed the missing fasteners (M12 screws are screwed into the nuts), you need to tighten all the fasteners with a wrench. The force should be 30-50 N*m.
The procedure for carrying out electrical installation work when connecting the towbar socket
p, blockquote 45,0,0,0,0 —>
1. First stage of work: determining the connection diagram, the need to use a matching unit, choosing the type of connector
.
p, blockquote 46,0,0,0,0 —>
If at the time of installing the trailer connector, the latter is not yet available, or you do not plan to buy it at all, and you intend to use only rental equipment, it is recommended to immediately install a 13-pin universal connector.
p, blockquote 47,0,0,0,0 —>
Video - why a 13-pin socket for a towbar is preferable in some cases:
p, blockquote 48,0,0,0,0 —>
p, blockquote 49,0,0,0,0 —>
In this case, using a 13/7 pin adapter, you can connect a regular cargo trailer without any problems.
p, blockquote 50,0,0,0,0 —>
p, blockquote 51,0,0,0,0 —>
There is, of course, the opposite option - a 7/13 adapter, but some of the user connections, including for charging the battery, will have to be made outside the connector, which is very inconvenient.
p, blockquote 52,0,0,0,0 —>
p, blockquote 53,0,0,0,0 —>
If you have a car built before 2000, you may not need to install a matching unit. In this case, the rating of the fuses serving the turn signals and rear lights should be increased by 25%.
p, blockquote 54,0,0,0,0 —>
2. Next, it is imperative to check all electrical circuits in the trailer connector
(if available).
p, blockquote 55,0,0,0,0 —>
This can only be avoided if you are using a rental trailer; the lessor checks them and is responsible for their functionality and safety.
p, blockquote 56,0,0,1,0 —>
The most typical malfunctions of trailer electrical equipment:
p, blockquote 58,0,0,0,0 —>
- “rotting” of electrical wiring, especially in the area of connections, contacts, soldering;
- short circuits in the area of rubbing parts;
- failure of light lamps;
- large leakage currents associated with salt coating of roads and driving into bodies of water (boat trailers, especially on the sea coast).
3. At the third stage, a routing scheme is developed
(what wire, what color, what section, where it goes, how it goes, where it connects, what it connects to, and, finally, how it connects).
p, blockquote 59,0,0,0,0 —>
In order. If the purchased trailer connector is equipped with conductors, there is no point in replacing them. Otherwise, you should select conductors in exact accordance with the colors and sections shown in the figures above.
p, blockquote 60,0,0,0,0 —> adsp-pro-3 —>
The most difficult thing is to determine the path of the wires from the connector into the luggage compartment so that it is invisible, the conductors cannot be damaged during operation and cause a short circuit, and the seal of the cabin is not compromised. In most cases, manufacturers provide a standard hole.
p, blockquote 61,0,0,0,0 —>
Connections can be (and are better) made using the standard method: stripping + twisting + soldering + heat shrink. All connections must be made at least with the ignition off. There is a connection option using special clips.
p, blockquote 62,0,0,0,0 —>
p, blockquote 63,0,0,0,0 —>
Such connections do not provide high currents and are not as durable, but in some cases they can be used when using cargo trailers.
p, blockquote 64,0,0,0,0 —>
For further actions you need a minimum set of tools and components:
p, blockquote 65,0,0,0,0 —>
- a set of plumbing tools for dismantling and installing interior elements during cable laying;
- a set of electrical installation tools, if necessary, a soldering iron, solder, flux;
- wires, electrical clips, self-tapping screws, casings, heat shrink, electrical tape, clamps;
- multimeter;
- control lamp;
- mirror (when installed alone).
4. Connection
. At this stage, you need to be as careful as possible; it is better to sign each connection first, and only then carry out the electrical installation.
p, blockquote 66,0,0,0,0 —>
Electrical connections outside the car must be “dressed” with heat shrink (a cambric that shrinks in size when heated with an industrial hair dryer can be used with a lighter).
p, blockquote 67,0,0,0,0 —>
5. Check. At this stage, using a multimeter, the absence of short circuits is determined and electrical connections are made. Only after this can you turn on the ignition and test all functions.
p, blockquote 69,0,0,0,0 —>
If the on-board computer provides information about errors in the operation of electrical equipment, most likely, the use of a coordination unit when connecting a trailer for your car is mandatory.
p, blockquote 70,0,0,0,0 —> adsp-pro-4 —>
Tips for choosing a towbar
As for the data related to trailers, the Kalina-2 hatchback is no different from the station wagon:
- The total weight of towed devices not equipped with brakes must not exceed 450 kg;
- The maximum trailer weight, if equipped with a brake system, can be 900 kg.
Based on these numbers, you need to choose a new towbar. For most devices on the market and suitable for Kalina-2, the rated value is 900 kg. Here we are talking about the traction load, that is, the force applied in the horizontal plane. There is another important parameter - the load on the ball. Typically, for devices that can withstand 1000 kg of traction load, the ball load value is 75 kg. The force with which a trailer can push against a towbar is limited, and 75 kg is approximately 750 Newton.
Let’s say that one person can connect the trailer to the car. In this case, the vertical load can hardly exceed 50 kg. Conclusion: there is no need to buy coupling equipment if it is not even designed for the specified load (50 kg).
The question is often asked what category of license is needed to drive a car with a trailer. The mass of the station wagon is 950 kg, and the trailer, as mentioned above, can weigh no more. Plus, the mass of the “hitch” will not exceed 3.6 tons. All together this will entail the following: the driver driving such a “hitch” only needs to have a category B license. This is true even if the trailer weighs 900 kg.
Features of the socket connection
To connect the towbar to the vehicle's electrical wiring, we recommend using stranded copper wire. The ideal option is a wire in which each core has a cross-section of at least 1.5 square meters. mm. The wire must have a double layer of insulation.
Features of connecting the trailer hitch, connection diagrams for the 7-pin device, color designations, plug connection diagram, towbar socket connection diagram.
To understand whether you have sufficient information about the trailer hitch.
- How many types of sockets are there?
a) Three types of sockets are available for passenger cars. Thirteen-pin, used in Russia. American or European 7 pin. And there is a special connector.
b) There are two types of sockets on sale. Russian for 13 pins and American for 7 pins.
- What does contact mean, oh?
a) wire going to the left turn signal.
b) Right turn signal wire.
c) A wire that turns on the right and left turn signals.
- Why do they put caps on sockets?
a) The cover is needed to prevent unnecessary wires from being connected to the device.
b) It serves as a protection that protects the outlet from external influences. The cover is needed when the tow bar is not connected to the trailer.
- What contacts can be spliced to simplify the assembly process?
a) You can splice the contacts of two headlights, reverse lights, brake lights, fog lights and side lights. They all turn on synchronously.
b) Any contacts are allowed to be connected. This will make the work easier.
- What does contact mean, oh?
a) Connection to the rear fog lamp.
b) Connection to the vehicle's brake lights.
Answers:
- a) There are three types of sockets - Russian with 13 pins, American or European with 7 pins, as well as a special connector.
- A) The letter “L” indicates the wire connected to the left turn signal.
- B) The cover on the socket serves as protection against various influences. It is closed when the tow bar is not connected to the trailer.
- A) To simplify the work, the following contacts are spliced: two headlights, reverse, brake lights, fog lights and side lights. The connectivity is due to the fact that they all turn on synchronously.
- A) The designation “54G” is a connection to the car’s fog lights.
To transport bulky cargo, a reliable trailer is attached to the vehicle. The connection occurs through the trailer hitch and tight contact with its socket. It is necessary to connect the contacts correctly so that the rear lights on the trailer turn on when driving, signaling to road users that the driver is performing various actions, for example, turning. To connect the signals correctly, you will need to study the trailer connection diagram, as well as the pinout of the towbar socket.
Definition: A trailer socket pinout is a diagram of the connectors needed to connect a vehicle to a trailer with your own hands. An electrical connection is required so that all lighting equipment on the trailer works, in accordance with traffic regulations.
A few words about lighting technology
Trailed towable devices, i.e. car trailers, require brake lights. The same applies to side lights and turn signals. In addition, if the trailer weighs more than 750 kg, it is equipped with a reversing light.
There is no separate terminal block that allows you to connect all the “electrics” of the trailer in Grant/Kalina-2. Of course, the towbar will be equipped with a socket, such as shown below. But connecting this outlet by running the cables inside the body will not be so easy.
Standard towbar socket, 7 pins
An experienced installer, when making connections, will be able to implement the diagram shown here:
It is advisable to connect trailer lamps via a relay
The wires can be passed through one of the holes provided in the floor of the body. These holes themselves are protected by plugs.
Trunk floor diagram, station wagon/hatchback
There is nothing more to add here. We wish you success.
Anyone who connects the tow bar without the participation of a car dealer may lose the warranty on the electrical system. Any intervention in the electrical circuit will void the warranty if it is carried out without the consent of the dealer. Make a choice.
Answers to 3 frequently asked questions about connecting a towbar socket
These changes consist of connecting the same wires leading to the rear light and signal electrics of the car's trailer with the wires from the coupling device.
The most difficult point is the need to determine where the conductors are connected. The outlet itself is connected in two ways: Standard. Before starting the procedure, check whether there are the required number of wires of sufficient, but not excessive cross-section.
If the light and signal lamps of your car operate without the participation of a special microprocessor, a suitable option is to connect a seven-channel towbar connector with 7 contacts. The second contact group, which provides constant 12-volt power, is often not used.
American manufacturers also use a four-pin pinout for a passenger car trailer socket; European and American-made cars that are operated by domestic cars have a contact connection system. On domestically produced trailers, as a rule, a 7-pin connector is used, so along with the towbar it is reasonable to purchase a corresponding socket with seven contacts. Switching on using a matching unit When connecting a trailer hitch, a modern electronic control unit requires the presence of an adapter, that is, a matching unit between the electronic elements of the car, the towbar and the towed part of the vehicle.
Read more: Loop measurement phase zero
Thanks Dmitry Buy Trailer From this article you will learn about connecting Webasto, instructions for such a connection, as well as what subtleties and nuances you should pay attention to during installation. Prices are very low
If you were unable to print, then download the diagrams to your smartphone to constantly check the correct connection. Blue - fog lights if such are provided by the car design. However, if you happen to have a foreign car with an original towbar with a pin socket, and the trailer purchased from our company has a 7-pin connector, then this is not a problem - there are adapters for connecting a 7-pin trailer plug to a pin socket, and vice versa. In addition, copper wires are excellent for wiring. You will also need a high-quality wire with one core with a wire cross-section of at least 1.
To do this, pour water over this part and see if there are any leaks. These changes consist of connecting the same wires leading to the rear light and signal electrics of the car's trailer with the wires from the coupling device. Cover First familiarize yourself with the location of all seven connectors. List of the best manufacturers: Bosal. Correct selection of conductors according to the cross-section allows you to prevent overloading of automotive wiring and failure of fuses.
At the same time, you should prepare connecting blocks; the best options will be those with sockets for fuses. If the kit does not include wires, then you need to find copper ones with a suitable thickness. If the manufacturer is conscientious, then the box will definitely include instructions for proper placement. How to connect contacts? Heat shrink and electrical tape. Connecting a trailer socket
Pinout of 15 pin connector
This type of connector for connecting trailers and semitrailers is an accepted standard for tractors from almost all manufacturers, including American ones. Considering the requirements for trailers of this class, a standard 13-pin connector is not suitable for powering and controlling their electrical equipment.
Appearance of a 15 pin socket
Matching table for 15-pin connector.
| Pin number | Coloring | Function |
| 1 | Yellow | Left side turn signal |
| 2 | Green | Starboard turn signal |
| 3 | Blue | PTF |
| 4 | White | Earth |
| 5 | Black | Parking lights on the left side |
| 6 | Brown | Side lights on the right side |
| 7 | Red | Brake light control |
| 8 | Pink | Reverse signal |
| 9 | Orange | +24 V |
| 10 | Gray | Transmission of an alarm signal from sensors installed on the brake pads |
| 11 | White-black | Signal from spring brake pressure sensors |
| 12 | White-blue | Bridge lift control |
| 13 | White-red | exchange of information signals |
| 14 | White-green | CAN-H |
| 15 | White-brown | CAN-L |
Lada granta (2190, 2191)
Figure 2-10 shows the main version of the trailer hitch installed on the LADA GRANTA.
Figure 2-10 – Design and delivery set of LADA GRANTA trailer hitch (2190, 2191): 1 – rod assembly with brackets; 2 – socket box; 3 – hook
Remove the rear bumper.
On the inside of the cross member 2, Figure 2-11, the floor of the rear, right 1 and left 3 rear side members, clean the embedded threaded holes 4 (flat-head screwdriver) from the PShM layer.
Note: The design of the rear suspension of the main muffler for vehicles produced before 2022 allows the trailer hitch bar bracket to be attached to the left side member of the body in two places if there is an additional mounting hole on the bar bracket.
Figure 2-11 – Location of standard threaded holes for attaching the trailer hitch: 1 – rear right floor spar; 2 – rear floor cross member; 3 – rear left floor spar
Install the rod onto the body and secure, without tightening, with the bolts supplied.
Tighten bolts 2, Figure 2-12, fastening the rod 3 to the floor cross member, then bolts 1 of the brackets to the body side members (wrench 17, replaceable head 17, wrench).
Figure 2-12 – Installation of the trailer hitch rod: 1 – bolt securing the rod bracket to the spar; 2 – bolt securing the rod to the floor cross member; 3 – trailer hitch bar
Install hook 3 on the rod, see Figure 2-10, and socket 2 (wrench 19, replaceable head 19, knob).
Install and connect the electrical equipment of the trailer hitch.
Install the rear bumper.
Pinout of 7 pin socket
Below is a drawing showing the wiring of a 7-pin connector (socket and plug). The typical colors of wires for Russian-assembled cars are indicated (color deviations are possible). In European machines, not all contacts on the connector may be used.
Pinout of the 7-pin towbar socket (A) and the corresponding trailer plug (B)
Explanation of the picture:
- Left side turn signal control signal.
- PTF connection (in foreign cars the contact may not be used).
- Weight.
- Starboard turn signal control signal.
- Side lights on the left side.
- Brake light control.
- Side lights on the starboard side
Currently, the 7-pin connector is practically not used in modern foreign cars; 13-pin sockets are installed there. If the trailer has an old type plug, you can connect it to the new Euro connector using a special adapter, which is much easier than changing the connector.
Adapter from 7 to 13 pins
Pinout of 13 pin socket
Almost all modern imported cars are equipped with this connector (if the design allows for its installation). The colors and pin numbers, as well as the correspondence table, are shown below.
Contact numbers and wire colors for 13 pin socket
Correspondence table for 13-pin connector.
| Contact number | Wire coloring | Functional purpose |
| 1 | Yellow | Left side turn signal |
| 2 | Blue | Rear PTF |
| 3 | White | Weight for chains 1 to 8 |
| 4 | Green | Starboard turn signal |
| 5 | Brown | License plate illumination and parking lights on the right side |
| 6 | Red | Brake light control |
| 7 | Black | License plate light and left side parking lights |
| 8 | Orange | Reverse signal |
| 9 | Red with brown | +12 V from battery |
| 10 | Blue with brown | +12 V (when ignition is turned on) |
| 11 | Blue and white | Chain weight 10 |
| 12 | – | Not involved |
| 13 | Green with white | Chain weight 9 |