Why did it happen so?
Perhaps the automatic requests do not belong to you, but to another user accessing the network from the same IP address as you. You need to enter the characters into the form once, after which we will remember you and be able to distinguish you from other users exiting from this IP. In this case, the page with the captcha will not bother you for quite a long time.
You may have add-ons installed in your browser that can make automatic search requests. In this case, we recommend that you disable them.
It is also possible that your computer is infected with a virus program that is using it to collect information. Maybe you should check your system for viruses.
If you have any problems or would like our support team, please use the feedback form.
We were the first to get acquainted with the new Lada Granta and answer questions from visitors to the ZR.RU website. Details in the June issue of Za Rulem magazine.
LADA > Granta
How to install and connect
To install a radio on Grant, you need:
- Remove the decorative plug in the front panel by lifting it with a mounting spatula. Wires with ISO standard connectors are located in special routings on the back.
- Place a 1 Din mounting shaft in the rectangular hole and press firmly.
- Use a screwdriver or other object to bend the metal corners that will keep the part from falling out.
- Open the glove box lid to find the antenna cable, which is located under the floor sound insulation near the front passenger's feet.
- Connect the power adapter (depending on the type of head unit). Route the cables through the installation shaft.
- Install the speakers in their original places. The doors of the basic configuration do not have cables for connection; there is only a connection plug located near the clutch pedal. In this case, the cables should be installed independently, passing them through the corrugated protective channels located between the stand and the door.
- The laid wires are wrapped in foam rubber, which is secured with tape or insulating tape. This manipulation allows you to avoid extraneous sounds caused by the contact of cable insulation on the metal door panels.
- When using speakers with a diameter of more than 13″, it is necessary to make wooden or plywood podiums that will allow the equipment to be installed in a standard hole.
- Connect the plugs to the head unit, which is then inserted all the way into the mounting shaft.
- Check the operation of the radio receiver and player in different modes.
- Install the decorative frame in its original place.
To install a double-din head unit you need:
- Using a mounting spatula, remove the air conditioner control knob.
- Pry up and remove the plastic cover of the central part of the instrument panel. When dismantling, it is necessary to disconnect the wiring plugs to the control buttons for additional equipment.
- Using a hacksaw and a construction knife, cut out the central jumper in the instrument panel. At the same time, the transition channel for the central interior ventilation deflectors is shortened by 4-5 mm.
- Install the radio in the shaft using modified mounting brackets. The device is attached to standard points located in the instrument panel.
- Mount the modified decorative frame onto which the deflectors have previously been rearranged.
If the head unit supports a low-frequency speaker, then a separate wiring is laid to it, which runs under the trim on the thresholds. When using an active subwoofer with a bass reflex, it is necessary to route the power cables, equipped with a separate fuse, into the luggage compartment.
Interior of Lada Granta in the “Lux” version
Lada Granta will be produced in three body types: sedan, station wagon and hatchback. Moreover, Grant’s sedan will “kill” a similar body from Kalina, since the client gets more cars for less money. A test assembly is currently underway, but the estimated capacity is 150 thousand copies per year.
In addition to the price, the two budget phones have quite significant differences in their details. Despite the fact that Granta is built on the basis of Kalina, approximately 400 components were developed specifically for the new product. Granta has its own trunk, hood, front and rear fenders, bumpers and optics, and the doors and roof are Kalinov’s. Despite the increased overhangs, geometric cross-country ability was not affected.
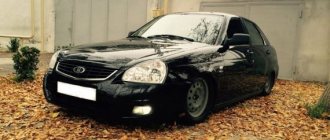
Lada Granta
The torpedo on the Lada Granta is original, but uses some parts from Kalina - for example, such as the “knobs” for adjusting the heating system. To reduce the “crickets” and reduce the cost, the developers took the path of reducing the parts (from 59 to 39 pieces) of the “torpedo”, making it more monolithic. The seats, steering wheel, gear lever and door panels are also original. In the car's chassis, the main change concerns the rear suspension, which will later appear on Kalina. For the first time, VAZ conveyor cars received not parallel, but “negative camber” of the rear wheels.
Choosing the right radio size
We carry out installation either independently or by contacting specialists at the service center. In the second case, the service is paid.
By default, all VAZ and Lada models are equipped with a 1-DIN radio. The opening dimensions correspond to: 180 x 50 mm. This is an old standardization that has been in force since the times of the USSR. Modern audio modules can be purchased complete with a pre-installed LCD display. The size of the opening must comply with the standard: 180 x 100 mm, that is, doubled in height. Size marking: 2-DIN.
To install the radio in the Granta liftback, cut out the top pocket, remove the plastic, and install the assembled module. For a beginner, the process will seem somewhat complicated, so strictly follow the instructions.
Vladimir Putin at AvtoVAZ
A lightweight connecting rod and piston group was installed in the 90-horsepower engine, due to which it was possible to reduce noise and vibration load and increase the service life of the engine. Efficiency indicators remained approximately within the same limits: approximately 7.0–7.5 liters per “hundred”, depending on the body type.
Tolyatti residents have finally decided on the supplier of the automatic transmission - it will be the Japanese company Jatco, a distant partner in the Renault-Nissan-AvtoVAZ alliance. But the two-pedal Granta will not see the light until mid-2012, because the process of fine-tuning the 4-speed Japanese “automatic” for our model has not yet been completed. Mechanical boxes with cable drive are currently considered only as promising components.
Trunk of Lada Granta with a volume of 500 l
LADA Granta has modernized front and rear suspension and power unit.
A modernized 1.6-liter 8-valve engine has been developed for LADA Granta, its main features
lightweight connecting rod and piston group
power 90 hp
low fuel consumption
low noise and vibration levels
In addition to this engine, LADA Granta will be produced with 8-valve (80 hp) and 16-valve (98 hp) 1.6-liter engines, which are currently used on LADA Kalina.
LADA Granta: PRODUCTION. WHERE and HOW MUCH - the project provides for the annual production of 150 thousand LADA Granta:
AVTOVAZ is modernizing technology when developing the LADA Granta: about 50 new pieces of equipment are being introduced and about 40 more are undergoing fundamental changes.
Welding of LADA Granta will be carried out on automatic lines, where the bodies of the LADA Kalina sedan were welded before
Painting and assembly of LADA Granta will be carried out at the existing LADA Kalina production facility.
Reinforced "Hedgehog" pistons for interior door trims of VAZ 2108-21099, 2110-2112, 2113-2115
Flip ignition key Audi style for Lada Priora, Kalina, Granta, Chevrolet Niva, Datsun
Dirt plugs for the steering rod opening for Lada Granta, Kalina, Kalina 2
USB charger 2 slots for Lada Priora, Granta, Kalina 2
Luxury air duct nozzle with silver ring for Lada Granta, Kalina 2, Granta 2
Reinforced upholstery clamps Raymond for Lada Priora, Kalina 2, Granta, datsun
Glasses holder
Working blank key with chip for Lada Priora, Kalina, Kalina 2, Granta, Chevrolet Niva
Floor tunnel from Granta assembled for Lada Kalina
Door sill trim for Lada Granta, Kalina 2
Immobilizer chip key (transponder) working for Lada Kalina, Priora, Grant
Threshold seal RGI 135 for Lada Granta, Kalina, Kalina 2, datsun
Vertical seal RKI 19 for Lada Granta, Kalina, Kalina 2, Largus
Rubber mat for driver's door handle for Lada Granta, Kalina, Kalina 2, Datsun
Training key blank with chip for Lada Priora, Kalina, Kalina 2, Granta, Chevrolet Niva
Chrome door lock buttons for Lada Kalina 2, Granta
Colored handbrake handle for VAZ cars
Original audio preparation kit (plastic speaker grilles in the doors) for Lada Granta, Kalina 2
One of the popular types of tuning is interior tuning. And it is here that we offer you a large selection of all kinds of small and large spare parts and parts for a variety of purposes, ranging from replacing a broken spare part to a real cool change in the entire appearance of the interior. So let’s talk about all sorts of “pumping up the interior” of the Lada Grant and its modifications.
This type of car modernization is one of the most enjoyable, since you can replace the old and add a new one, in which you are surrounded by space while driving. In other words, while driving you will feel the innovations you are purchasing, which ultimately will allow you to truly choose “your plate” due to a wide range of replaceable elements, their style, color, shape and design.
Alternative torpedo
The alternative dashboard is softer than the standard “tens” dashboard, but the main advantage is the absence of unpleasant grinding and squeaking. Motorists decide to get rid of the standard one precisely because of the squeaking. For the VAZ 2110 car there are several types of panels that differ in design.
The panel is sold as a set:
- The panel itself, which is an alternative to standard plastic.
- Buttons, brackets and inserts for blowers and instrument panels.
- A set of wires and a block for a double switch.
- Buttons for low beam, heating, dimensions and fog lights.
- Plugs for buttons are installed in places where keys are not needed.
Where to start tuning Lada Granta
As a rule, tuning the interior of a Lada Granta begins with major changes regarding the door trim or the instrument panel (dashboard) as a whole, as well as the seats. But why do we need rules when we are doing exactly what we need at the moment, especially if there is no time for global alterations. Therefore, we recommend that you pay attention, first of all, to small details, which at the same time are very noticeable. We are talking about replacing the gearshift knob and handbrake, steering wheel, center console, floor tunnel and other inserts, such as air duct nozzles, gearbox frames for Lada Grant, etc. Replacing all of the above parts takes a minimum of time and effort, but you will feel the effect immediately, for example, changing gears with brand new, upholstered genuine leather with red stitching. And this is not only due to the fact that the handle looks chic, but even because the leather does not slip in a sweaty hand (and avid racing enthusiasts know exactly how you sweat in a race). Another example is when the replaced air duct nozzles with a silver ring suddenly began to match the tone of the console frame, which already gives the appearance of a finished interior, with correctly selected colors. And there are many such examples.
You can, of course, endlessly praise and attach standard spare parts to the 10th hedgehogs and bolts. But a huge part of car enthusiasts love to pump up the inner world of their “swallow”. And in my life, more than once I have experienced the feeling when you get into a domestic car, and in the cabin you get the feeling that you missed the car. And it’s nice when a car greets you with more comfort than you expect. Thus, exceeding your expectations.
- I want to install a sports steering wheel with an anatomical grip, sports seats and pedal pads. When I'm driving, I feel like a pilot. I want the inside of my car to feel like a pilot's cockpit. Torpedo, console, indicators, pedal pads, and even a switch key. Standard equipment is not my thing at all.
- I have already driven through many cities in my swallow. I made a new interior for myself, installed new upholstery, new covers, visors, an armrest and all the little things. She used to greet me in the winter with a cold chair, so she installed heating for herself. I like it, I won't sell it. I made it for myself.
You can start changes with large details, as mentioned above, then tuning will take a lot of time and effort, but global alterations entail great joy, because whole large pieces of the interior are changing, which are impossible not to notice. You can do all this yourself or contact a special center, but the essence remains the same - this must be done on domestic cars, because this is precisely why they are valuable, that there is always a choice: to remain stock or to make a masterpiece for yourself, which it would be a pity to sell.
It turns out that interior tuning is an individual thing, and to meet needs, the consumer needs a choice. From adjustment knobs to anatomical seats. Our online store has everything you need for a person who has decided to upgrade and upgrade their car.
Removing the instrument panel
We carry out work to replace the instrument panel, panel wiring harness and elements of the heating and ventilation system.
Disconnect the wire terminal from the negative terminal of the battery. Drain the liquid from the engine cooling system (see “Replacing the coolant”). In the engine compartment, remove the heating and ventilation system filter (see “Replacing the heating and ventilation system filter and cleaning the drainage hole in the plenum box”). Using a Phillips screwdriver, unscrew the four self-tapping screws that secure the filter housing of the heating and ventilation system to the instrument panel...
...and remove the casing. Loosen the clamps securing the heater inlet and outlet hoses...
...and remove the hoses from pipes 2 of the heater radiator. Using a high 10mm socket with an extension, unscrew nut 1 of the stud securing the flange of the heater radiator pipes to the front panel. Inside the car...
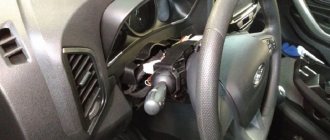
We disconnect the steering column from the instrument panel frame and lower it to the floor or remove the button completely (see “Removing the electric power steering column”).
We remove the seals of the openings of the right and left doors in the places where the instrument panel and the upholstery of the front pillars are installed.
Having overcome the resistance of the clamps, remove the left side trim of the instrument panel. Similarly, remove the right side trim of the instrument panel. Use a screwdriver to pry up the upholstery of the left front pillar and, overcoming the resistance of the pistons...
...remove the upholstery. Similarly, remove the upholstery of the right front pillar.
Remove the headlight beam direction control knob.
Using a 21mm socket, unscrew the nut securing the regulator to the instrument panel...
...and remove the nut.
We take out the headlight beam direction control from the hole in the instrument panel.
Using a screwdriver, press out the two latches on the glove box and remove the upper edge of the box from the instrument panel.
We open the glove box at a large angle and, applying the necessary force, pull the four split hinges of the box from their axes.
Near the opening of the left door, use a 10mm socket to unscrew the nut securing the tip of the “mass” wire... ...and remove it from the stud.
Using a 10mm socket, unscrew the two nuts securing the ends of the ground wires to the right bracket of the instrument panel console...
...and remove the wire ends from the studs.
Using a 13mm socket, unscrew the bolt securing the right bracket of the instrument panel console to the body bracket. Similarly, unscrew the bolt securing the left bracket of the instrument panel console to the body bracket.
Squeeze the two clips and disconnect the wiring harness block from the brake light switch.
By pressing the latch, disconnect the wiring harness block from the gas pedal module.
Disconnect the instrument panel wiring harness connector from the clutch pedal position sensor wiring harness connector.
On the right side of the instrument panel, by pressing the latch, disconnect one block of the wiring harness from the controller.
Using a screwdriver, move the pad clamps...
. disconnect the two wiring harness blocks from the fuse and relay mounting block.
Disconnect the two connectors of the front wiring harness of the engine compartment.
Using a 13mm socket, unscrew the two bolts securing the instrument panel frame to the front panel bracket (for clarity, the instrument panel trim has been removed).
The arrows show the bolts securing the instrument panel frame to the front panel bracket (for clarity, the instrument panel trim has been removed).
Using a 13mm socket, unscrew the two bolts on the left securing the instrument panel frame to the side panel bracket. Similarly, unscrew the two bolts of the right fastening of the instrument panel frame to the side panel bracket.
We take out the instrument panel complete with frame, heater and air ducts through the doorway. To remove the plastic trim of the instrument panel...
... use a Phillips screwdriver to unscrew the two screws under the instrument cluster. Under the cover of the mounting block...
Instrument panel assembled with frame and heater (view from the inside)
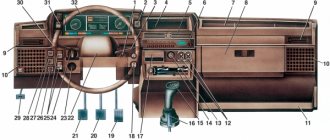
Front panel (instrument panel removed)
The numbers in the two photos show the connecting blocks of the wiring harnesses on the instrument panel and the front panel.
...use a Phillips screwdriver to unscrew the three screws on the left side...
...and one screw on the right side.
Using the same tool, unscrew the five screws on the right side of the instrument panel.
Under the central trim of the instrument panel, unscrew the two screws in the center...
...and one screw on top.
Using a Phillips screwdriver, unscrew the four self-tapping screws securing the heating and ventilation control unit to the instrument panel trim. Disconnect the wiring harness block from the cigarette lighter (see “Removing the cigarette lighter, replacing the backlight”).
We unscrew the two screws of the lower fastening of the instrument panel trim to the frame.
Using a Phillips screwdriver, unscrew the screw at the top left that secures the instrument panel trim to the frame. Similarly, unscrew the screw of the upper right fastening of the cladding.
Using a Phillips screwdriver, unscrew the two self-tapping screws securing the windshield defogger duct...
Using the same tool, unscrew the self-tapping screw securing the air duct of the right side deflector...
Unscrew the self-tapping screw securing the air duct of the left side deflector...
Remove the instrument panel trim from the frame. We install the instrument panel trim and the instrument panel assembled with the frame and heater in the reverse order. Fill in the coolant (see “Replacing the coolant”).